ProxmoxVE 6.x 超融合配置手册
snow chuai汇总、整理、撰写---2020/08/04
最后更新日期---2020/12/24
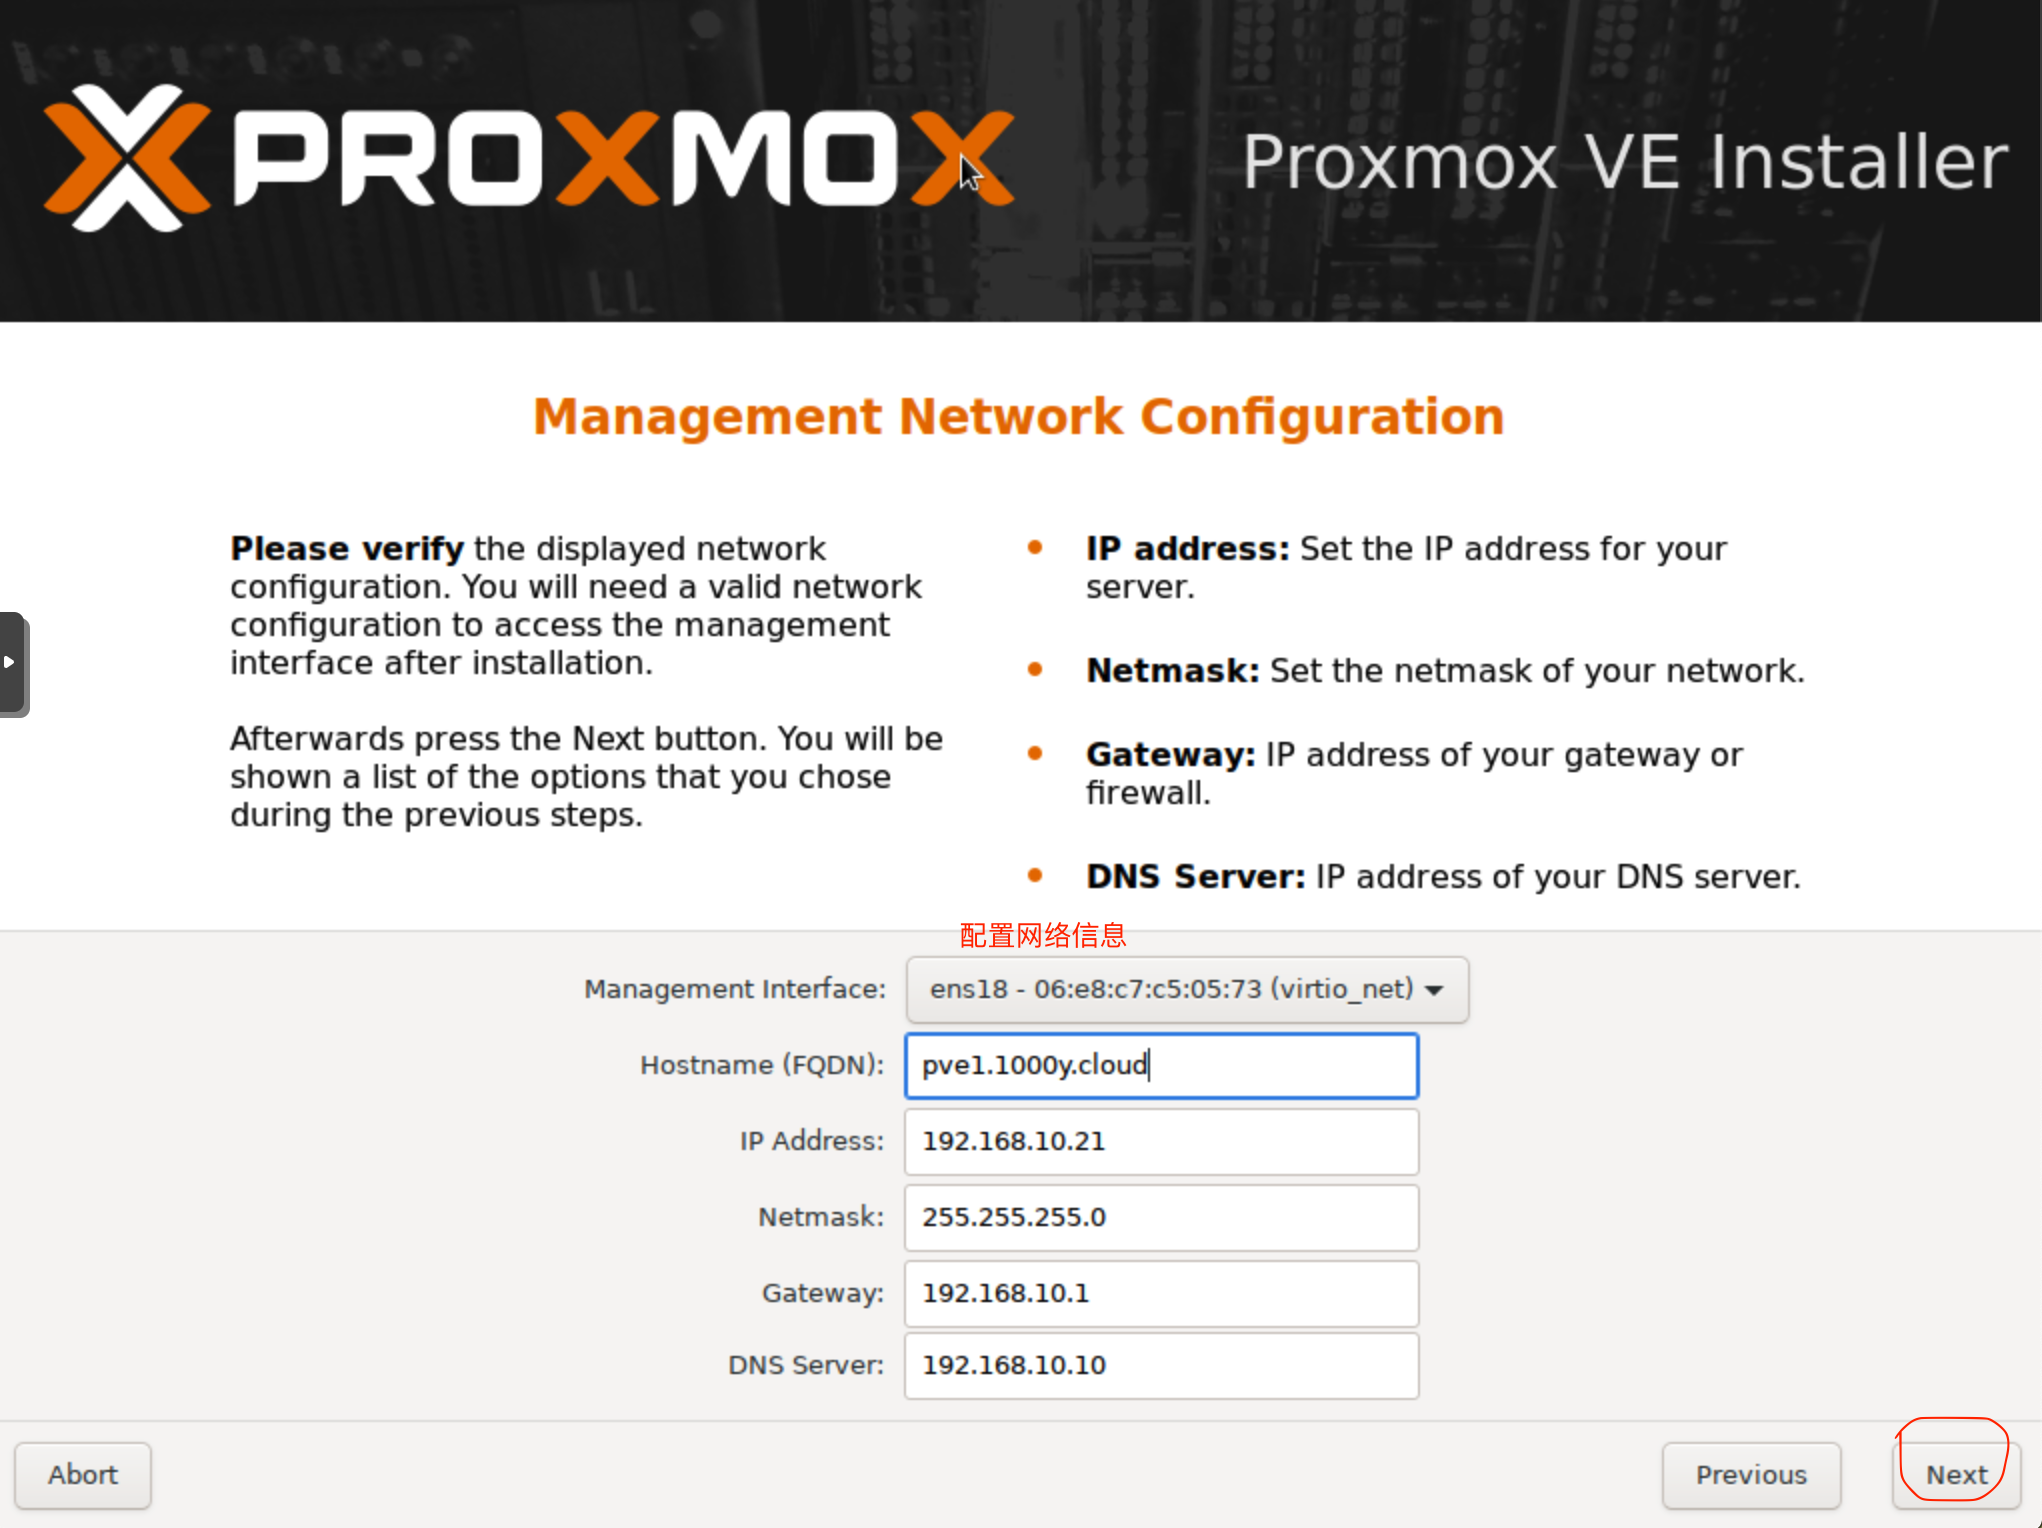
1. 安装PVE
1) 下载PVE ISO [root@srv1 ~]# curl -O https://mirrors.tuna.tsinghua.edu.cn/proxmox/iso/proxmox-ve_6.2-1.iso |


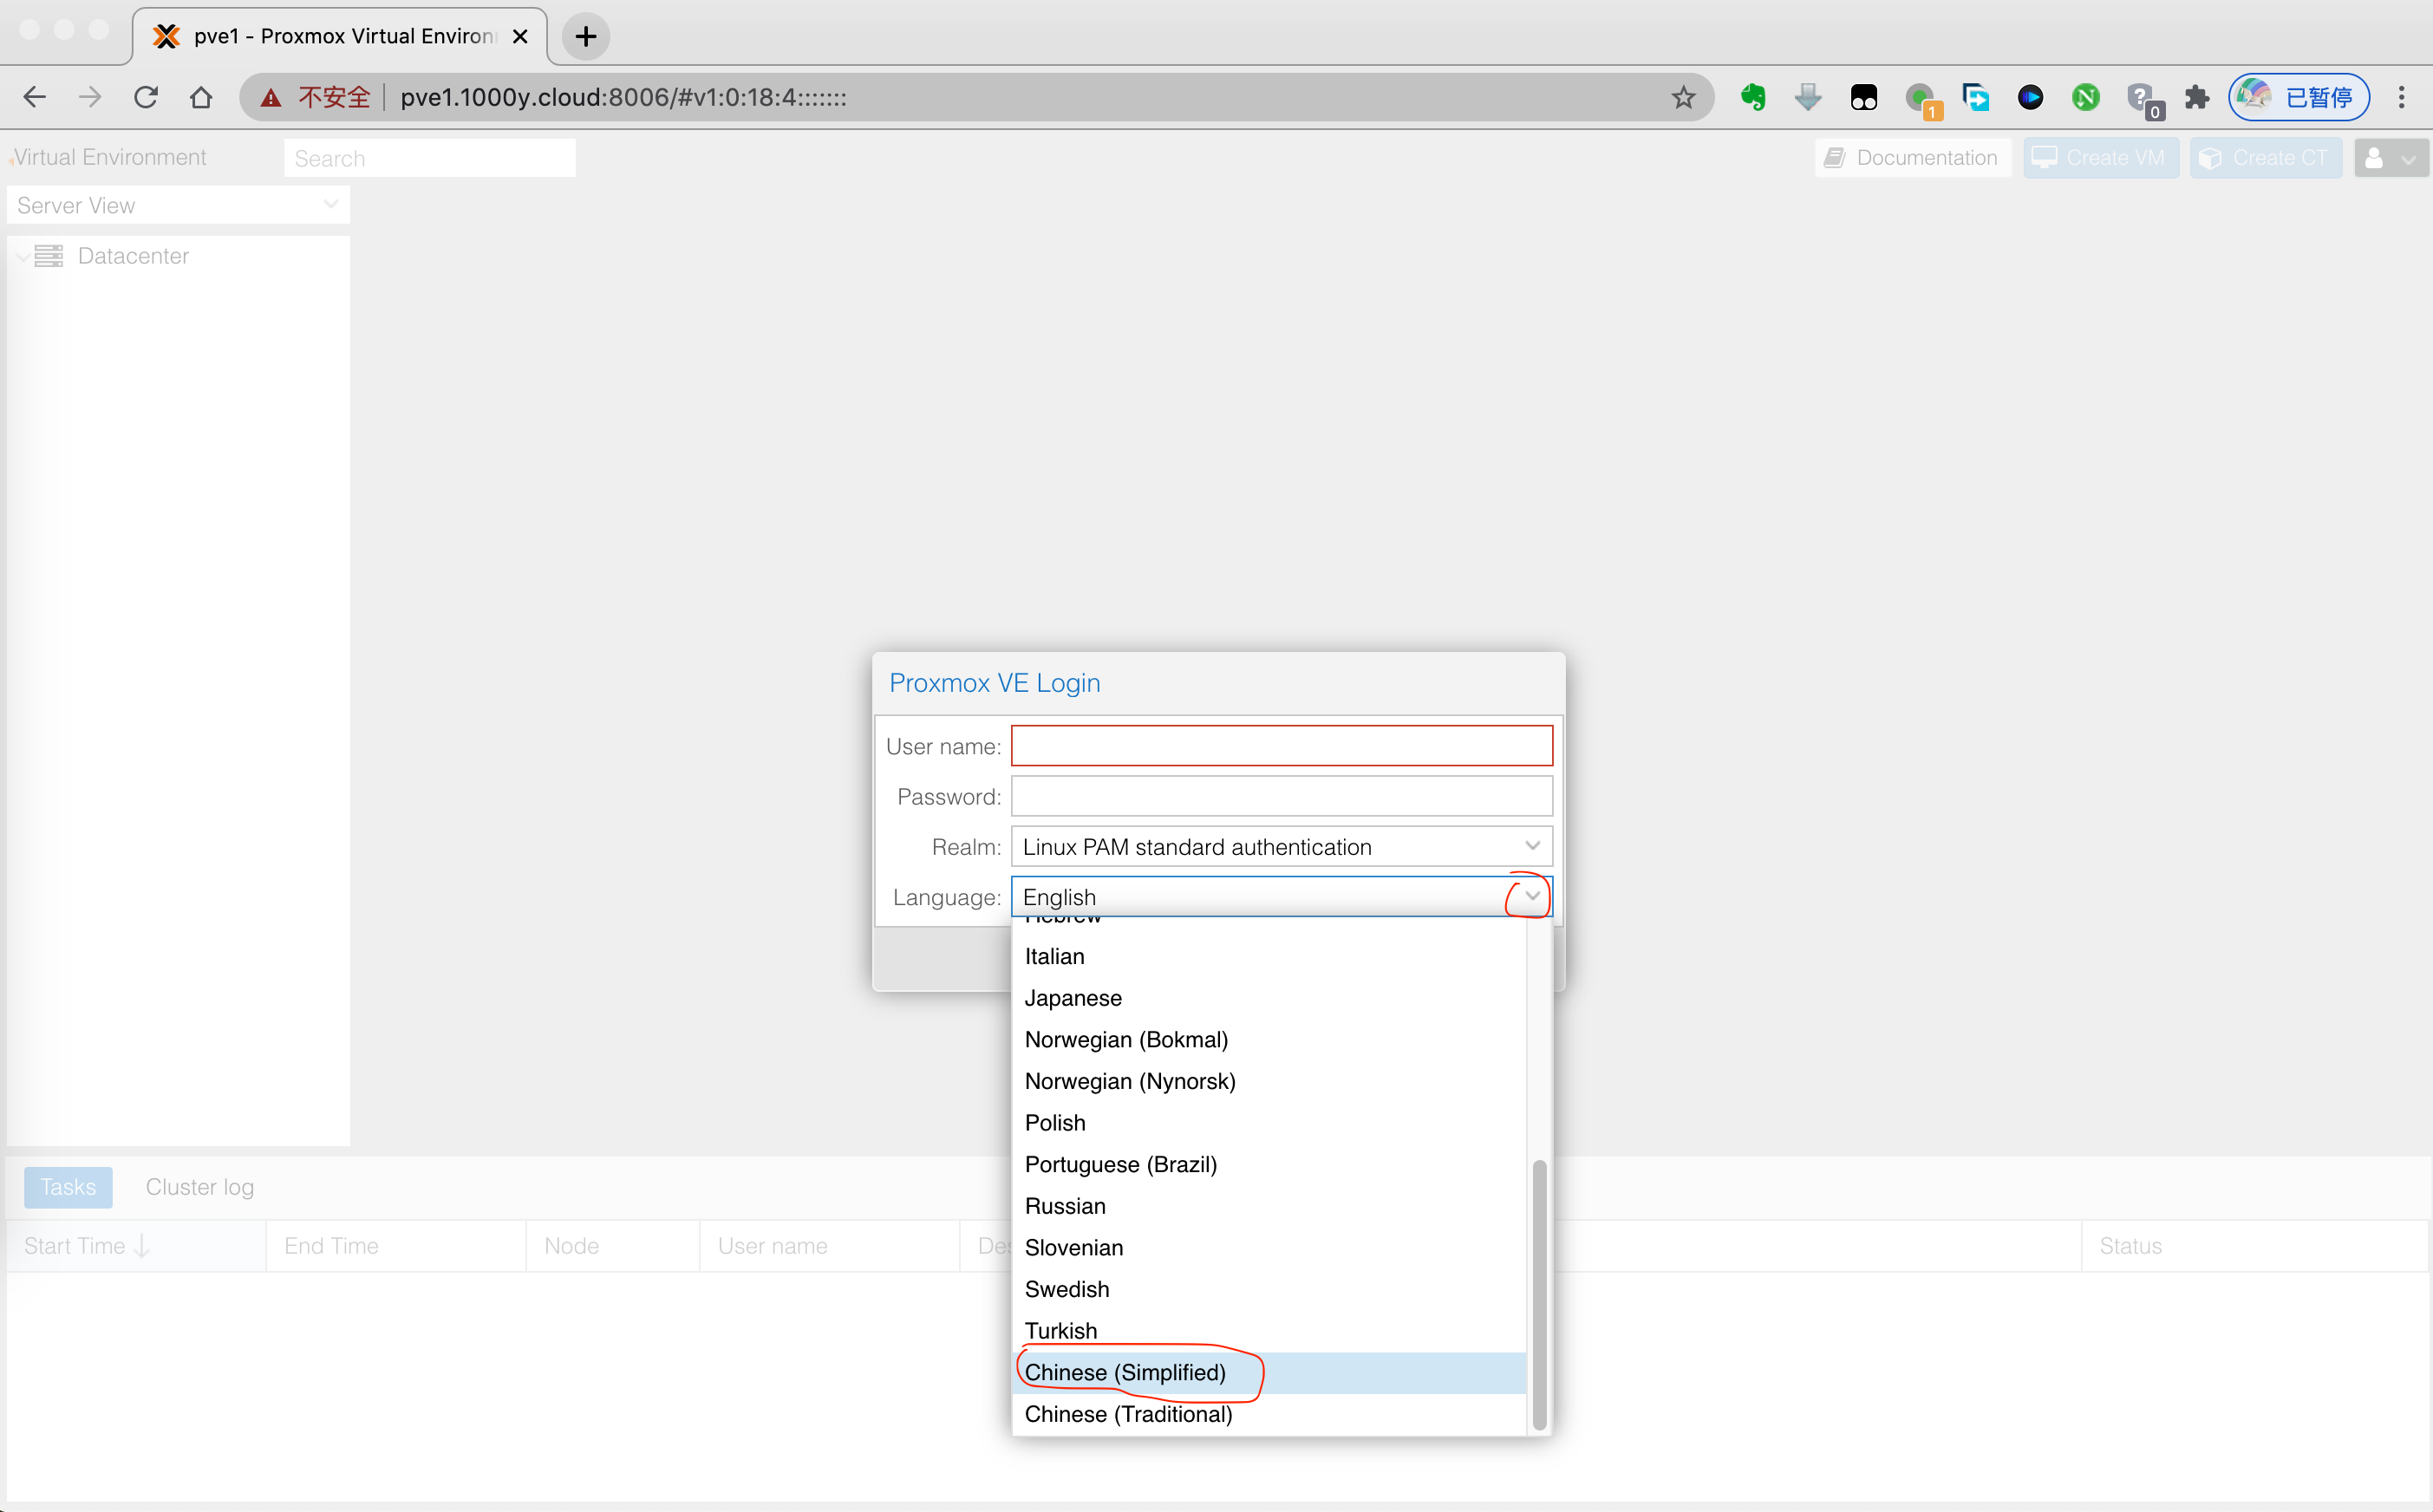


2. 修订PVE
1) 取消订阅提示 root@pve1:~# sed -i "s/data.status !== 'Active'/false/g" /usr/share/javascript/proxmox-widget-toolkit/proxmoxlib.js |

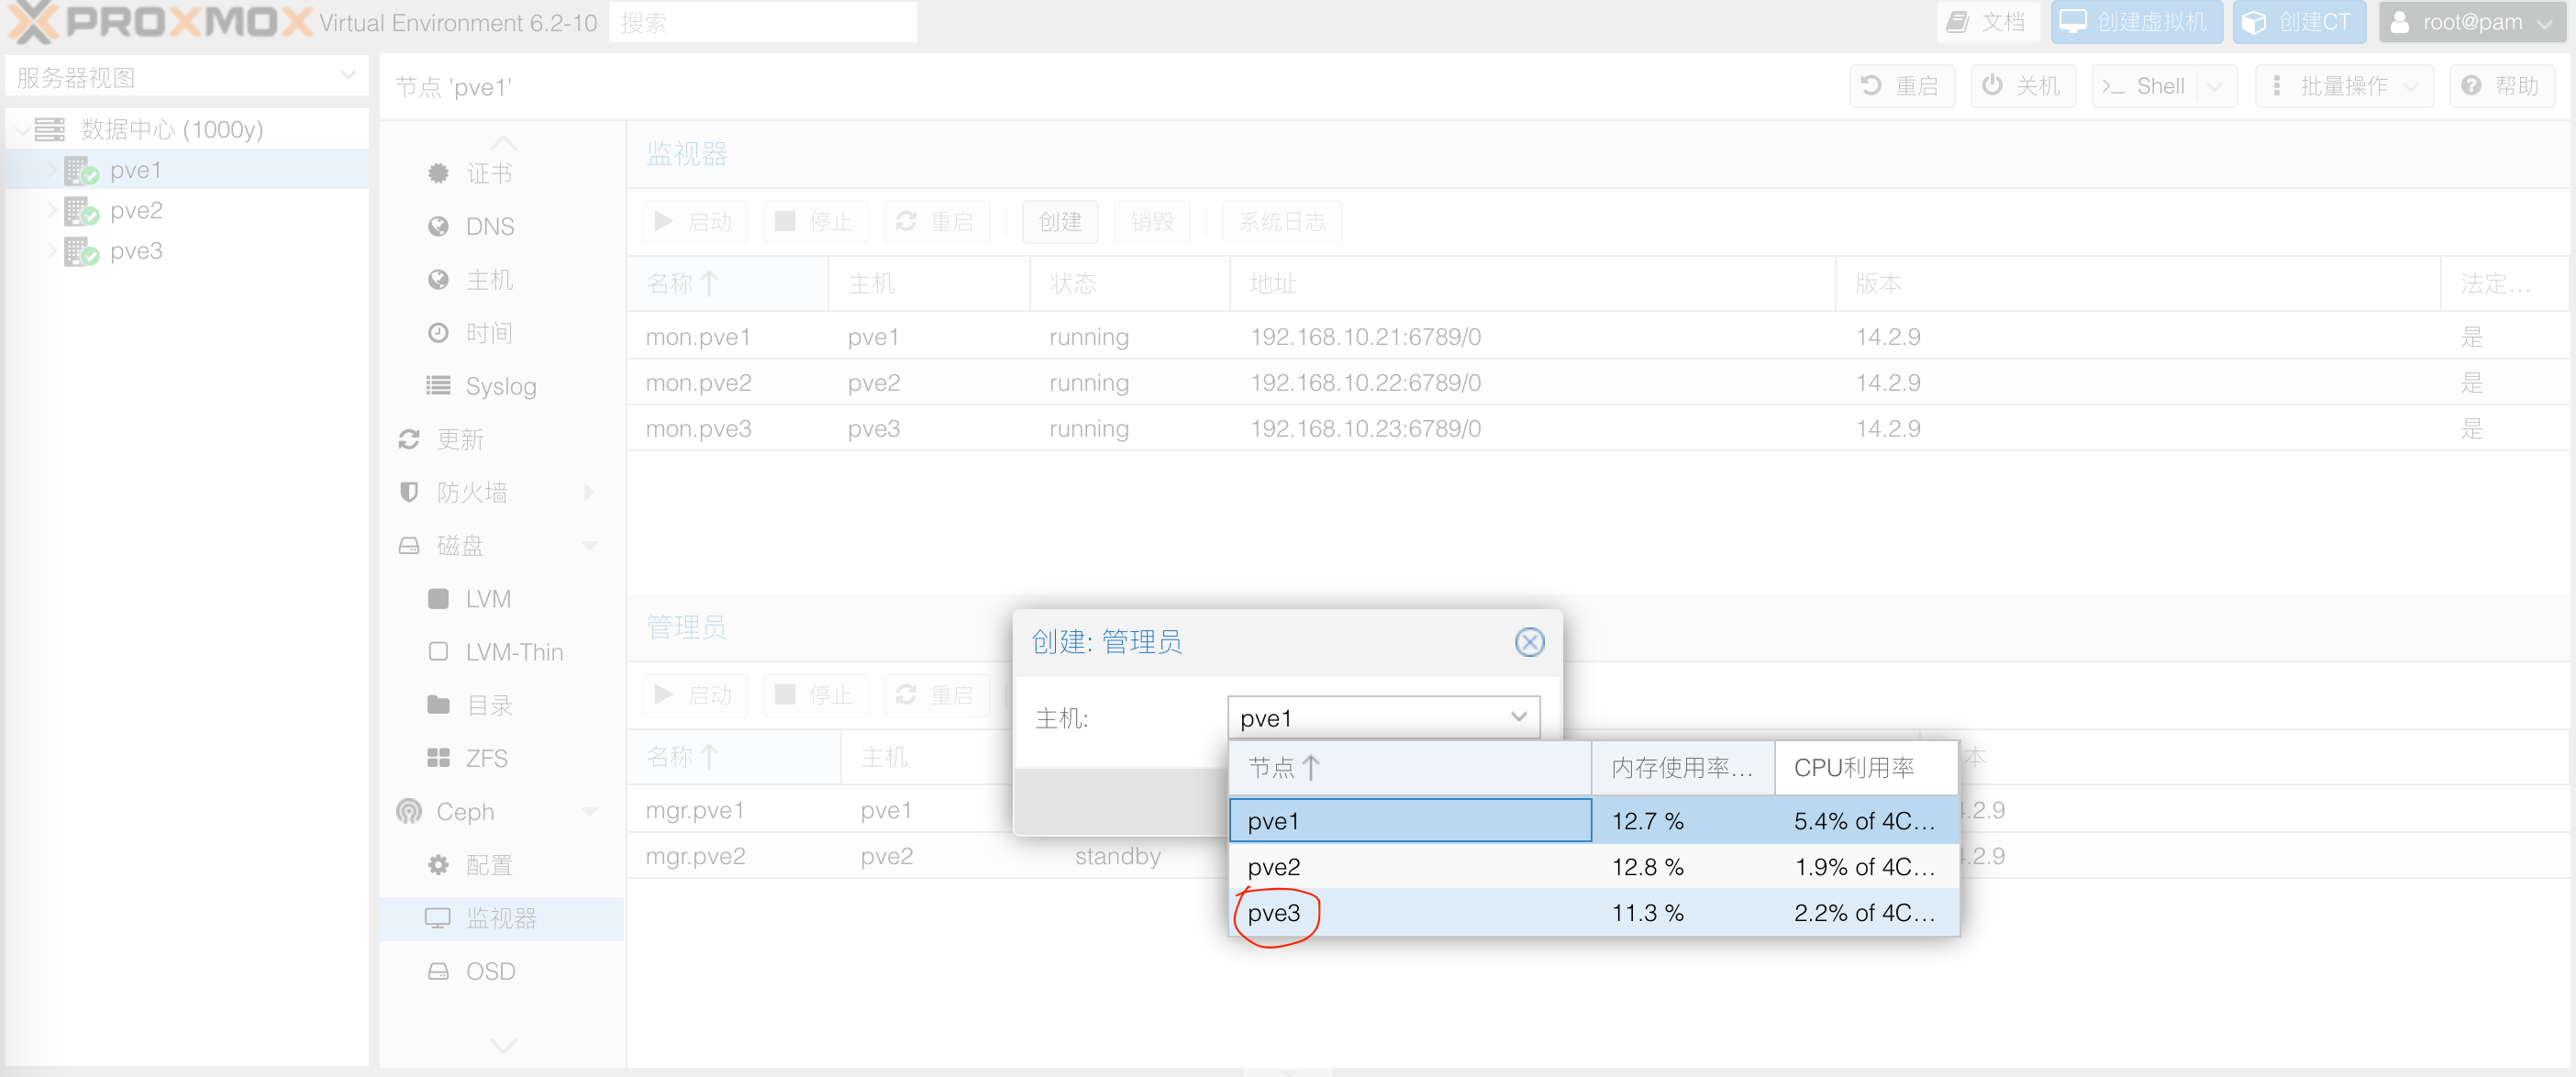
3. 实现PVE Cluster
1) 所有主机均安装chrony服务(NTP Service) root@pve1:~# timedatectl set-timezone Asia/Shanghai root@pve1:~# apt install chrony -y root@pve1:~# systemctl enable --now chrony |

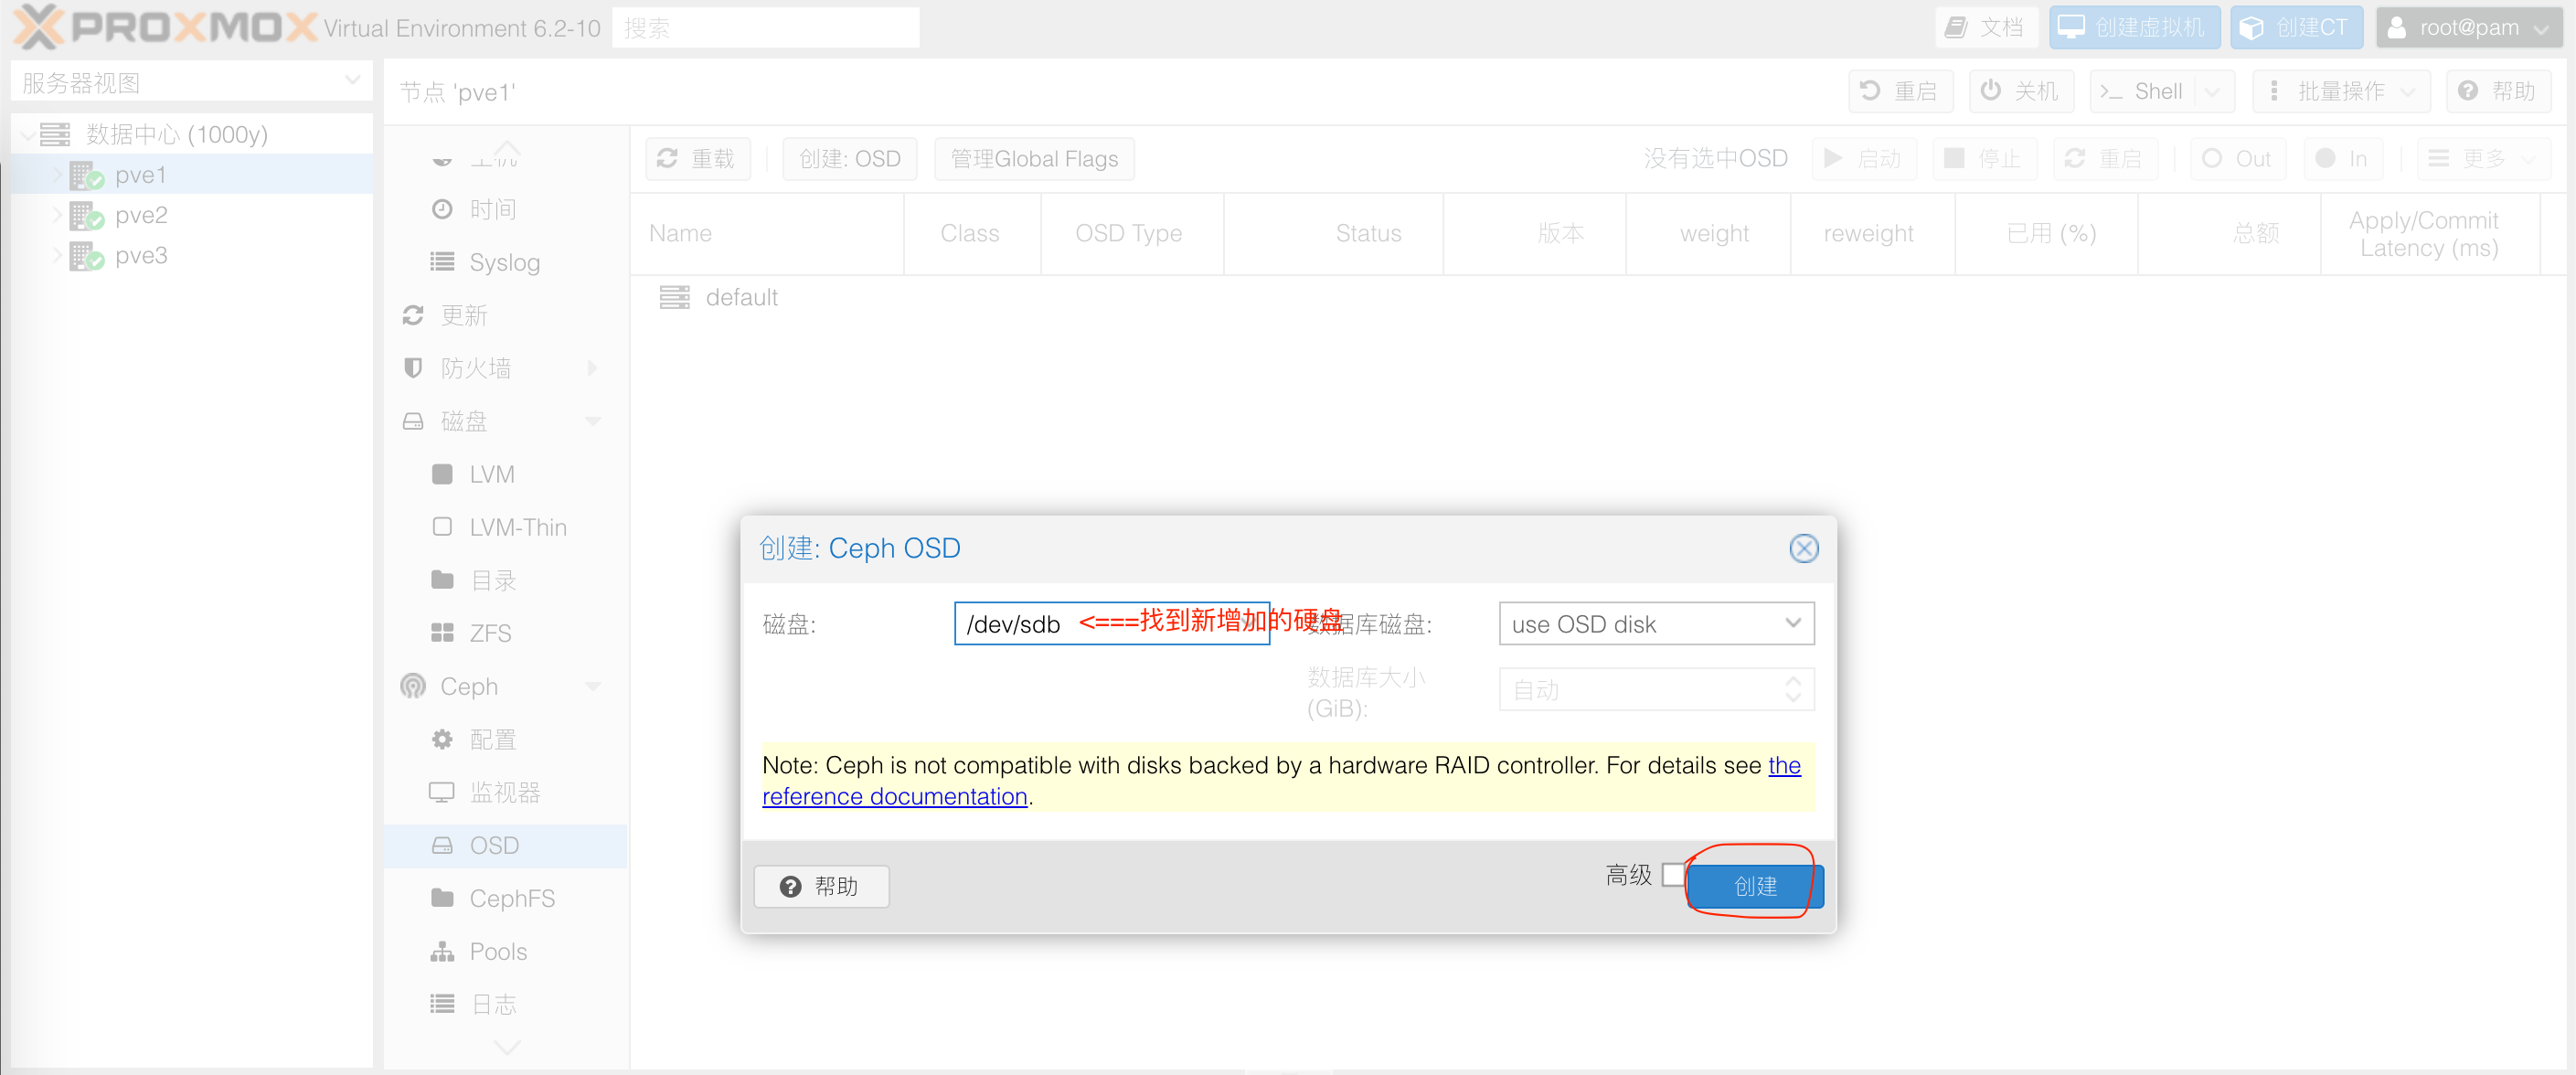
4. 安装PVE-Ceph集群
1) 所有节点均增加一块100G硬盘 |


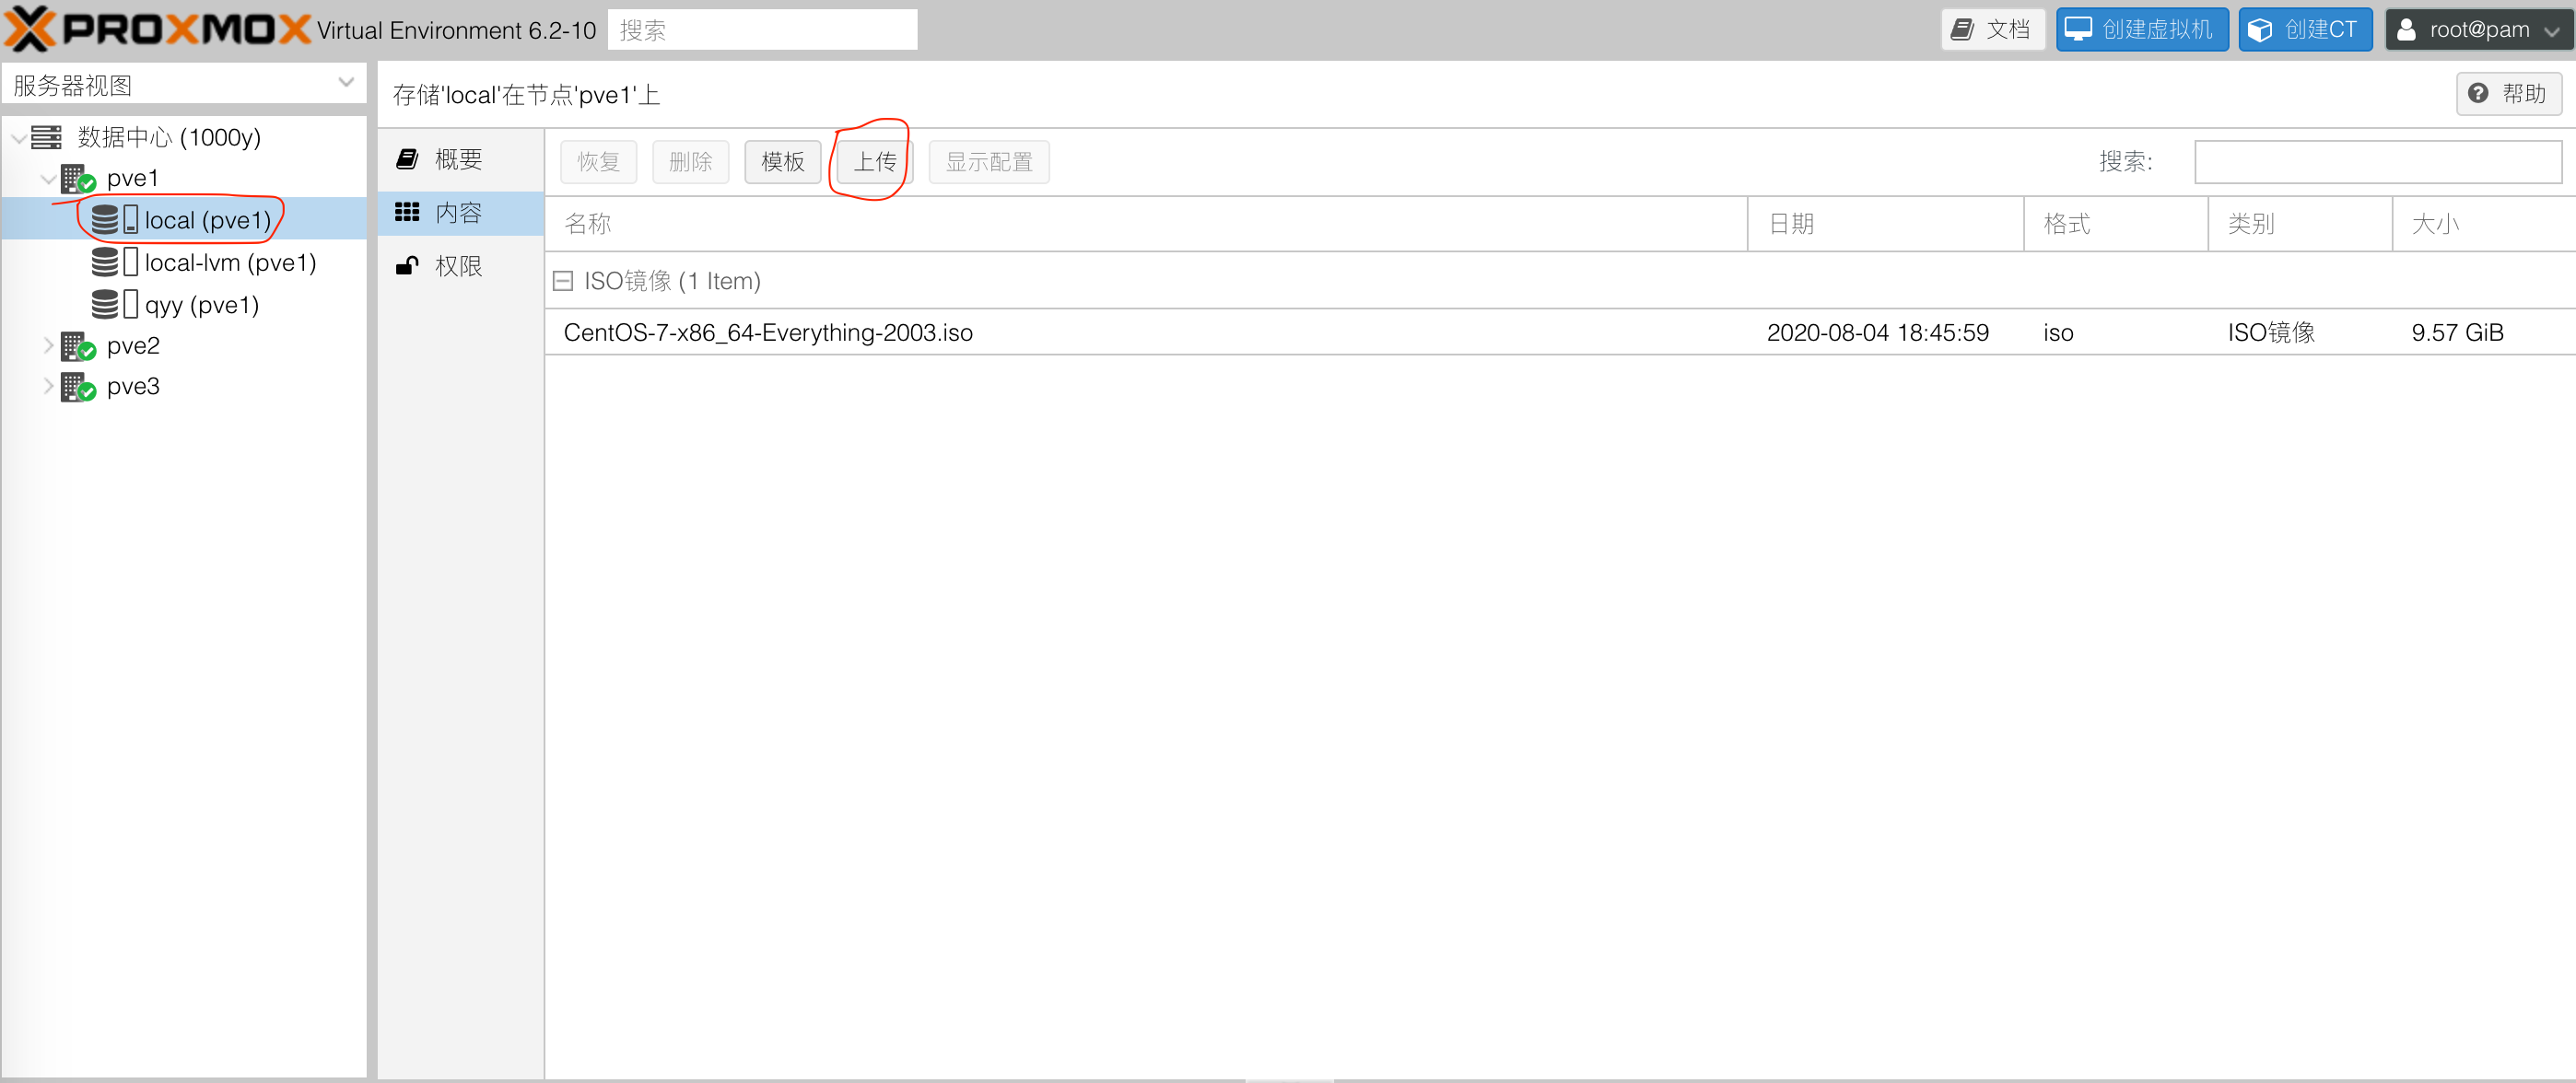
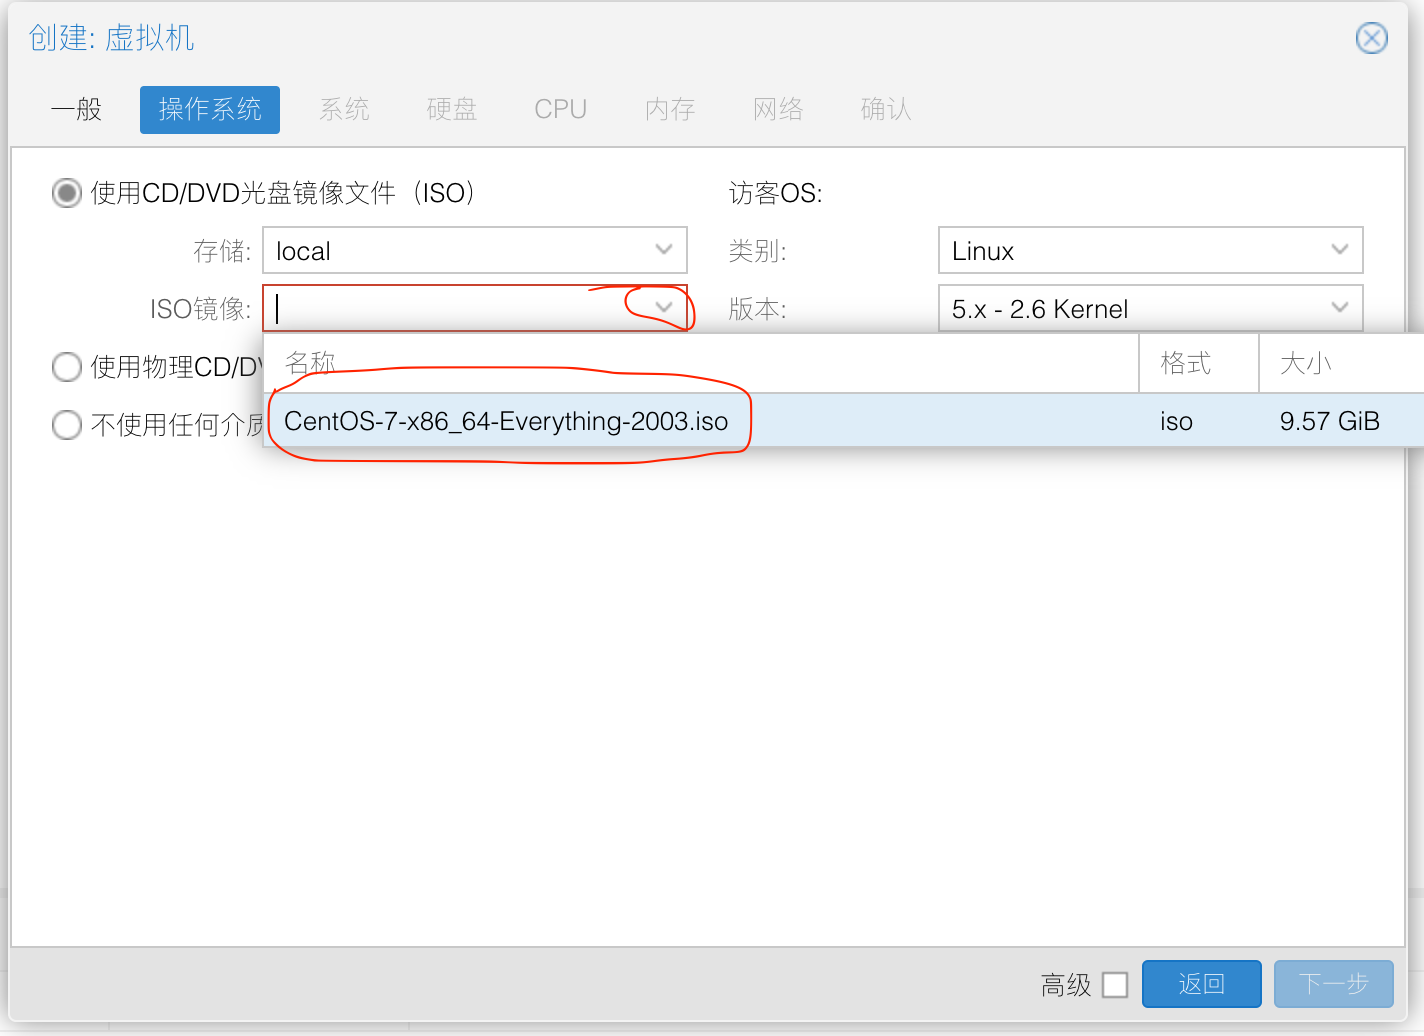
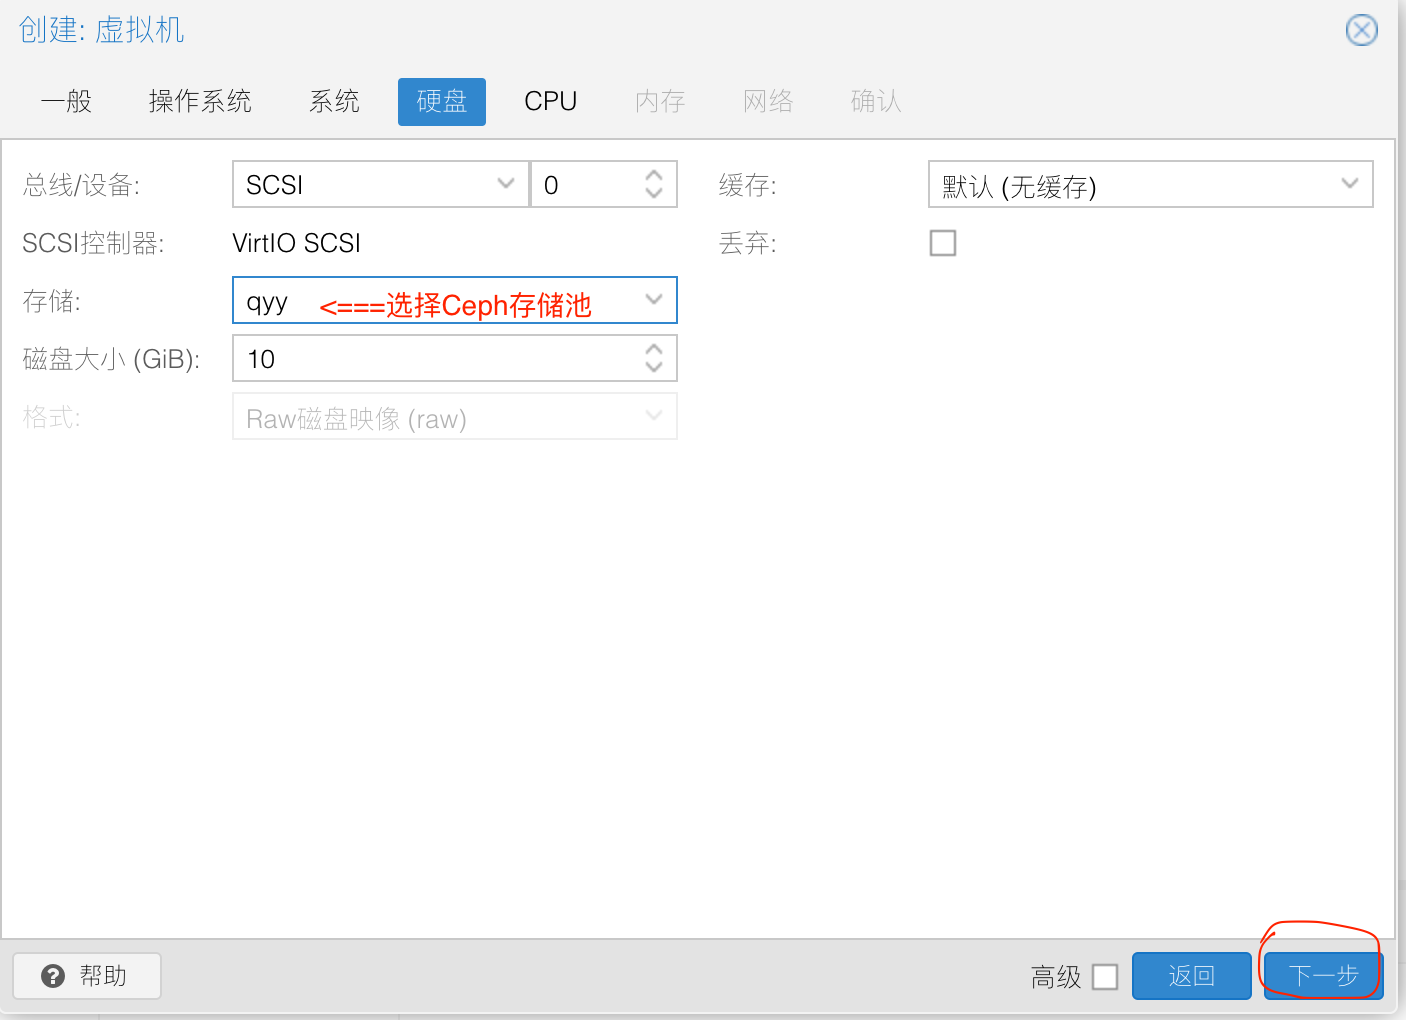
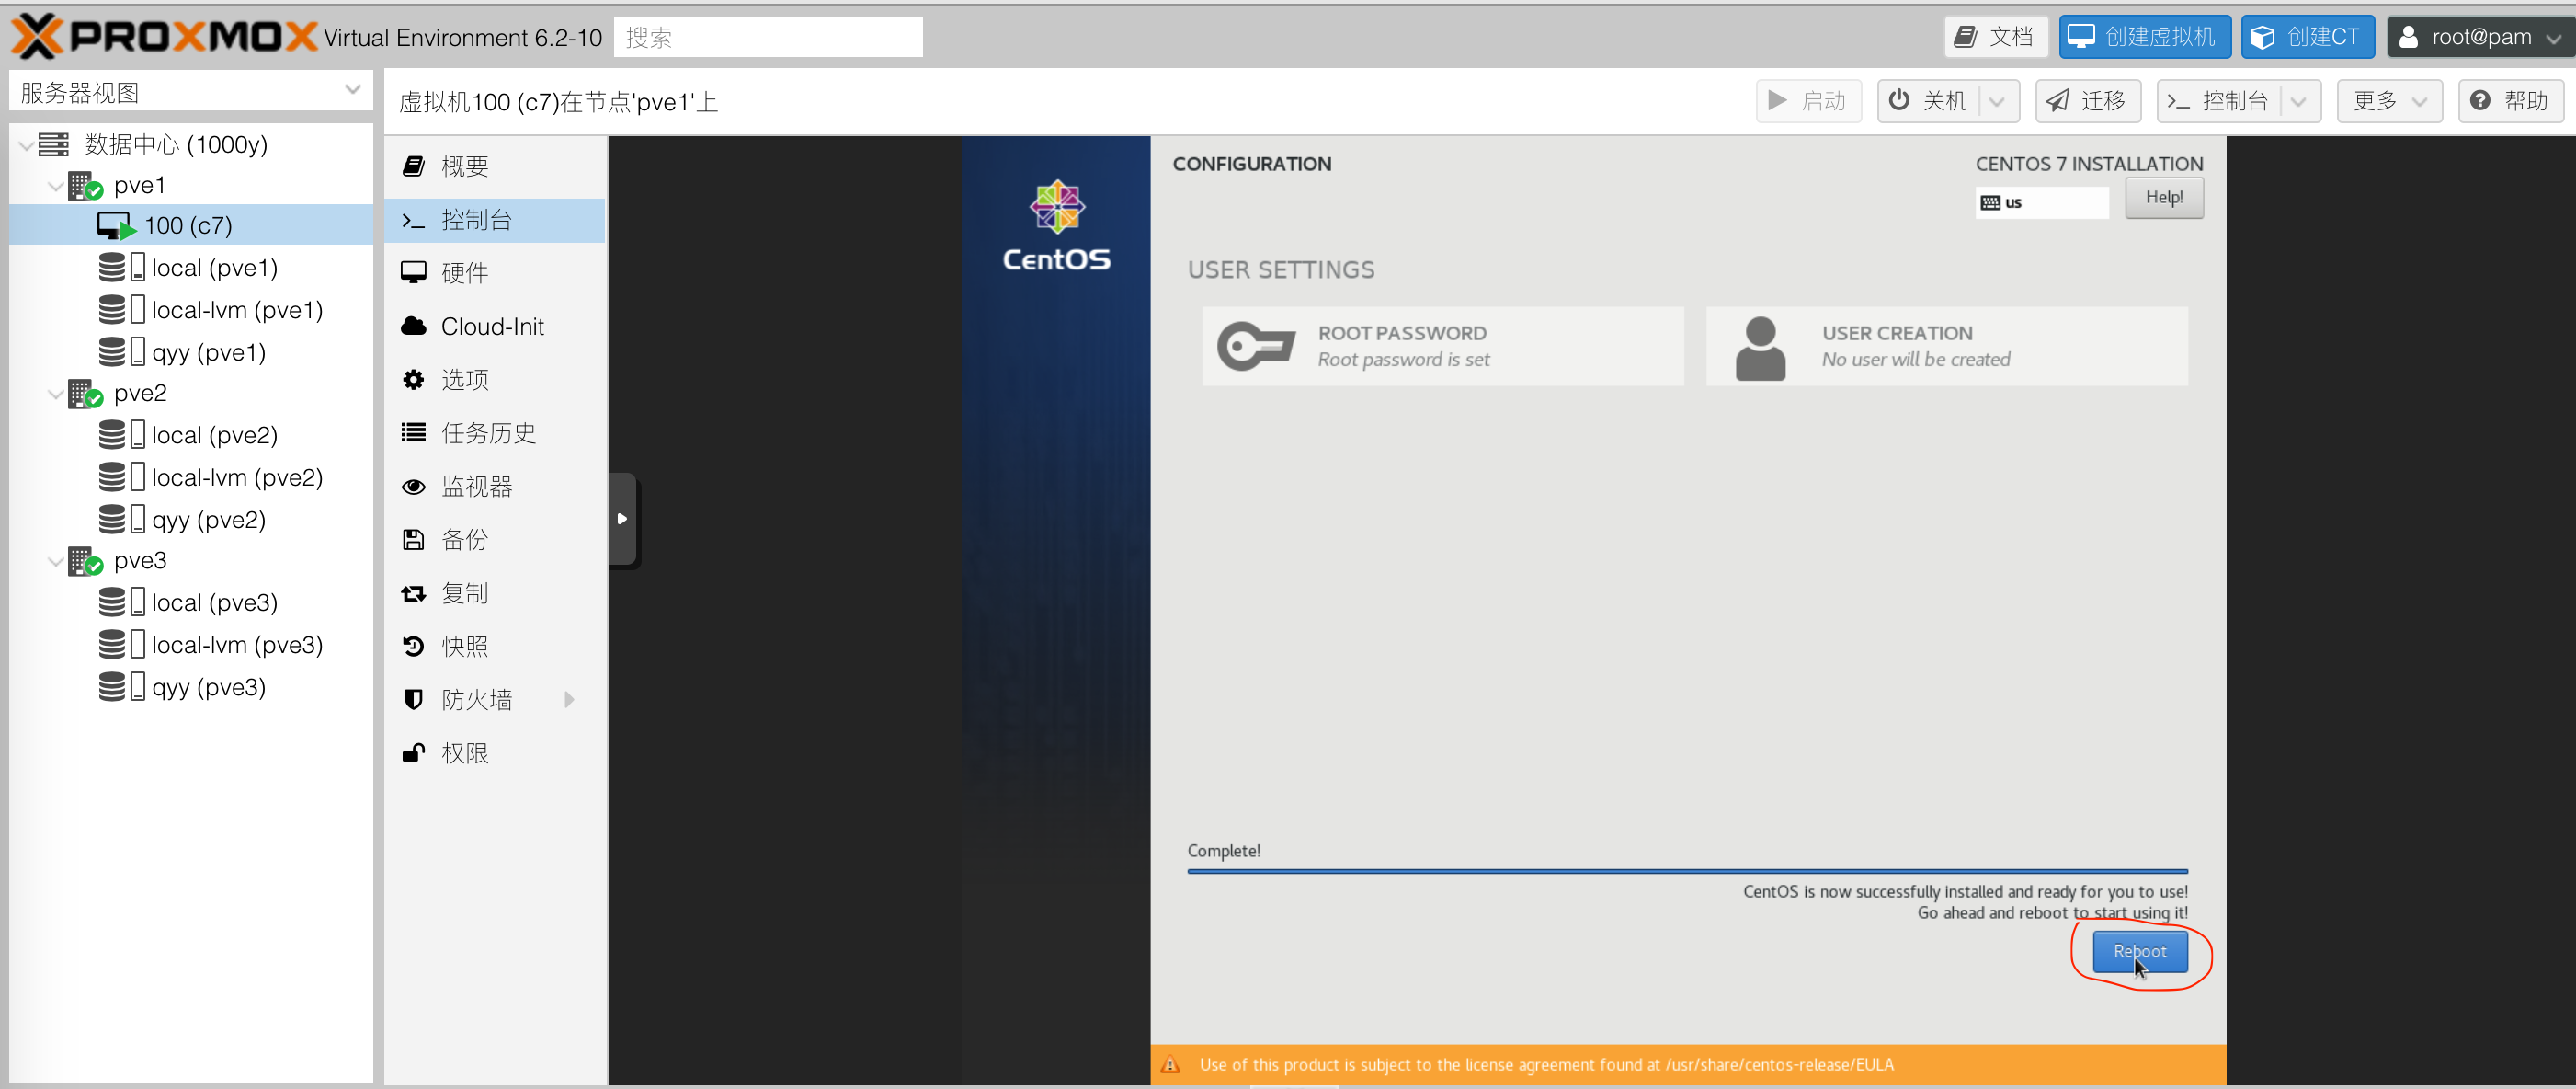
5. 创建虚拟机
1) 上传ISO镜像 (1) 使用WEB UI上传ISO |


6. 连接外部存储
1) 准备好NFS/GFS/Ceph/iSCSI等任意一个或多个外部存储 |


7. 迁移
1) 准备PVE Cluster |


8. 虚拟机其他操作
1) 虚拟机快照 (1) 生成快照 |


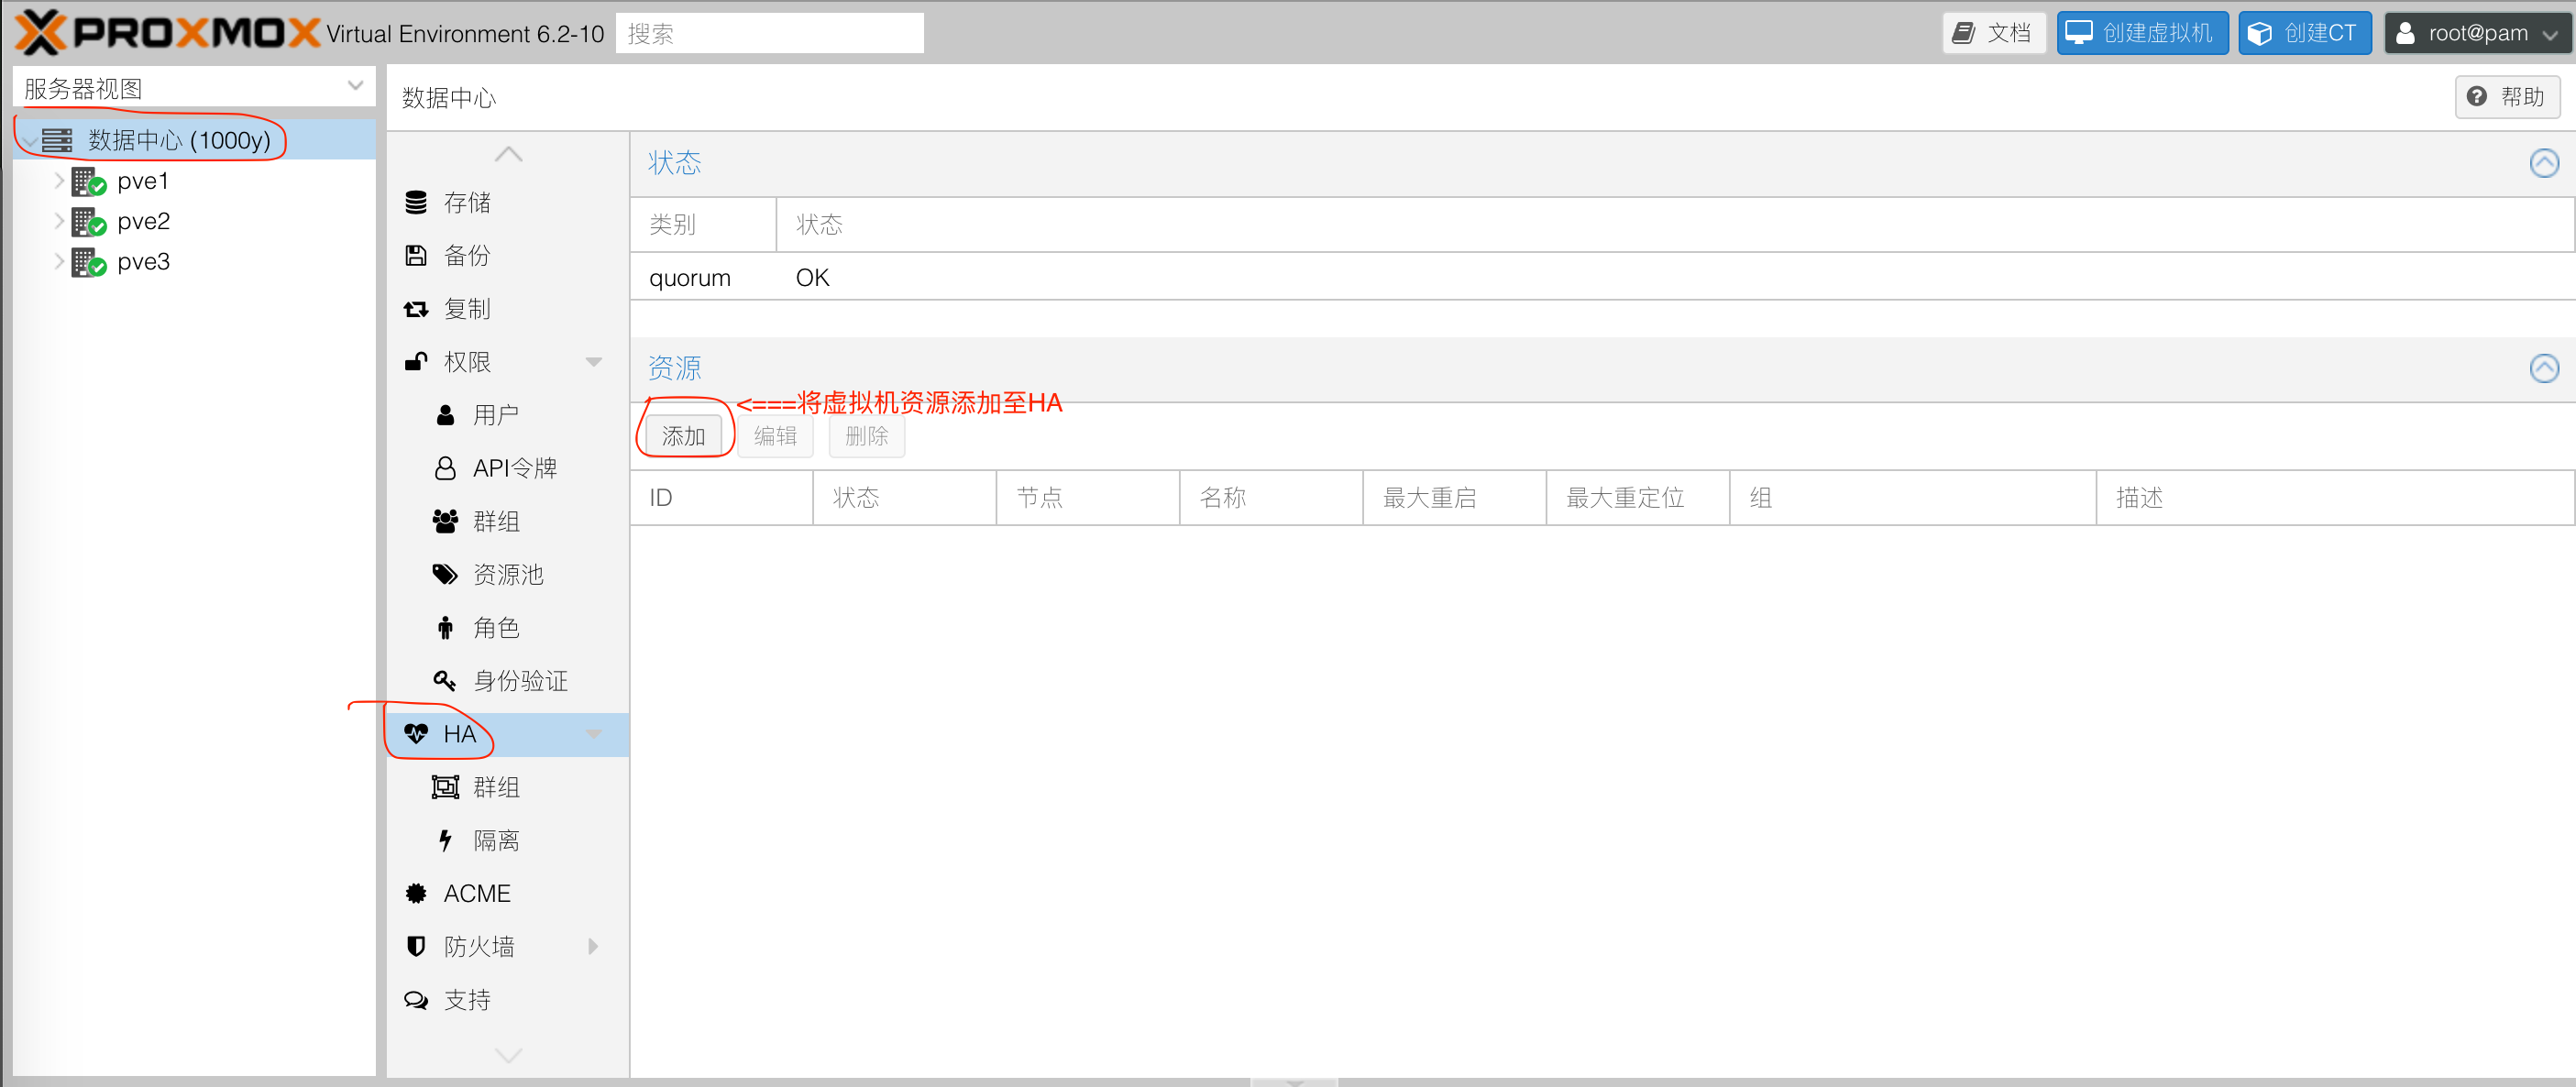
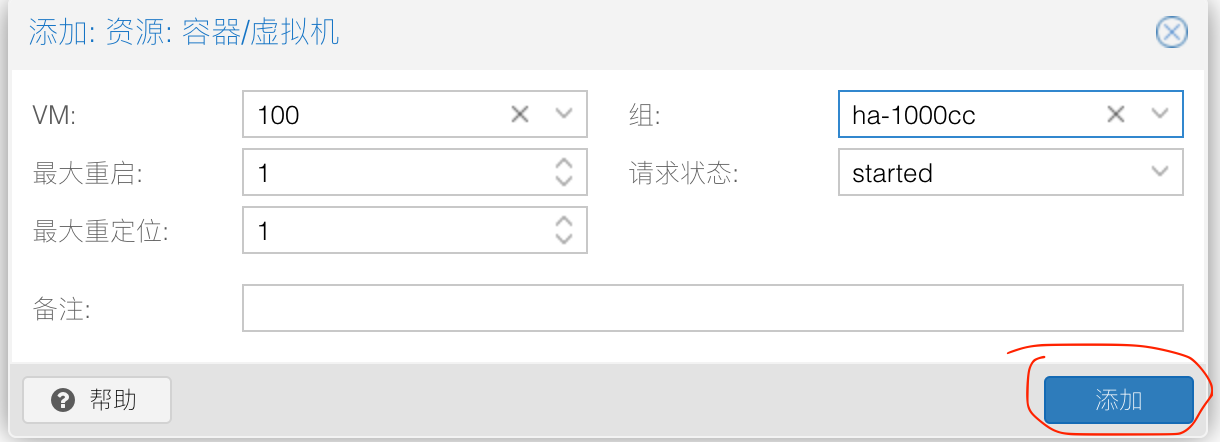
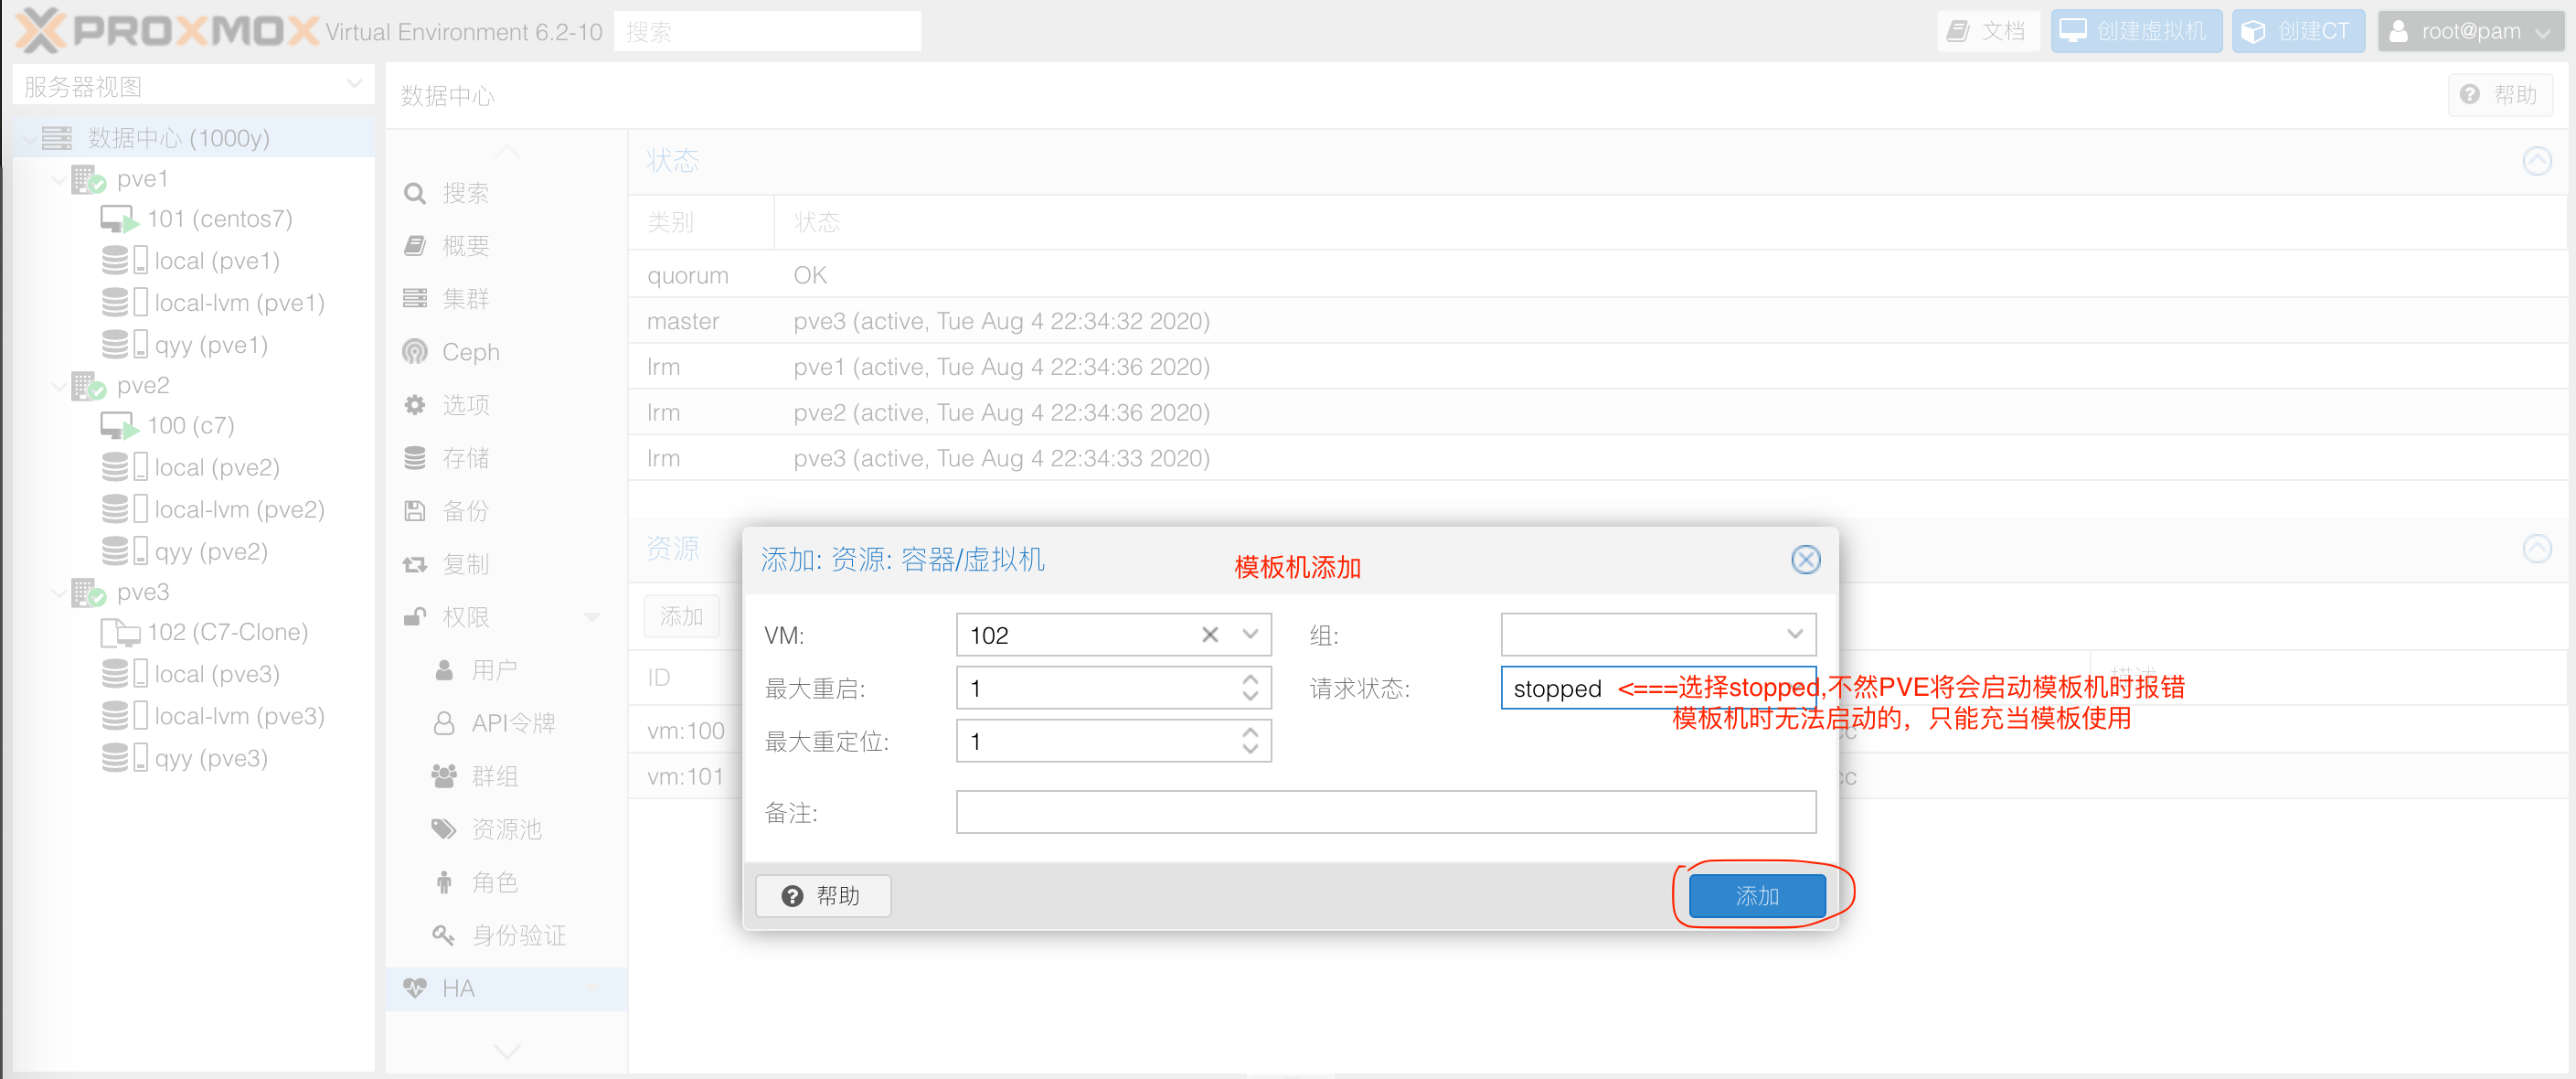
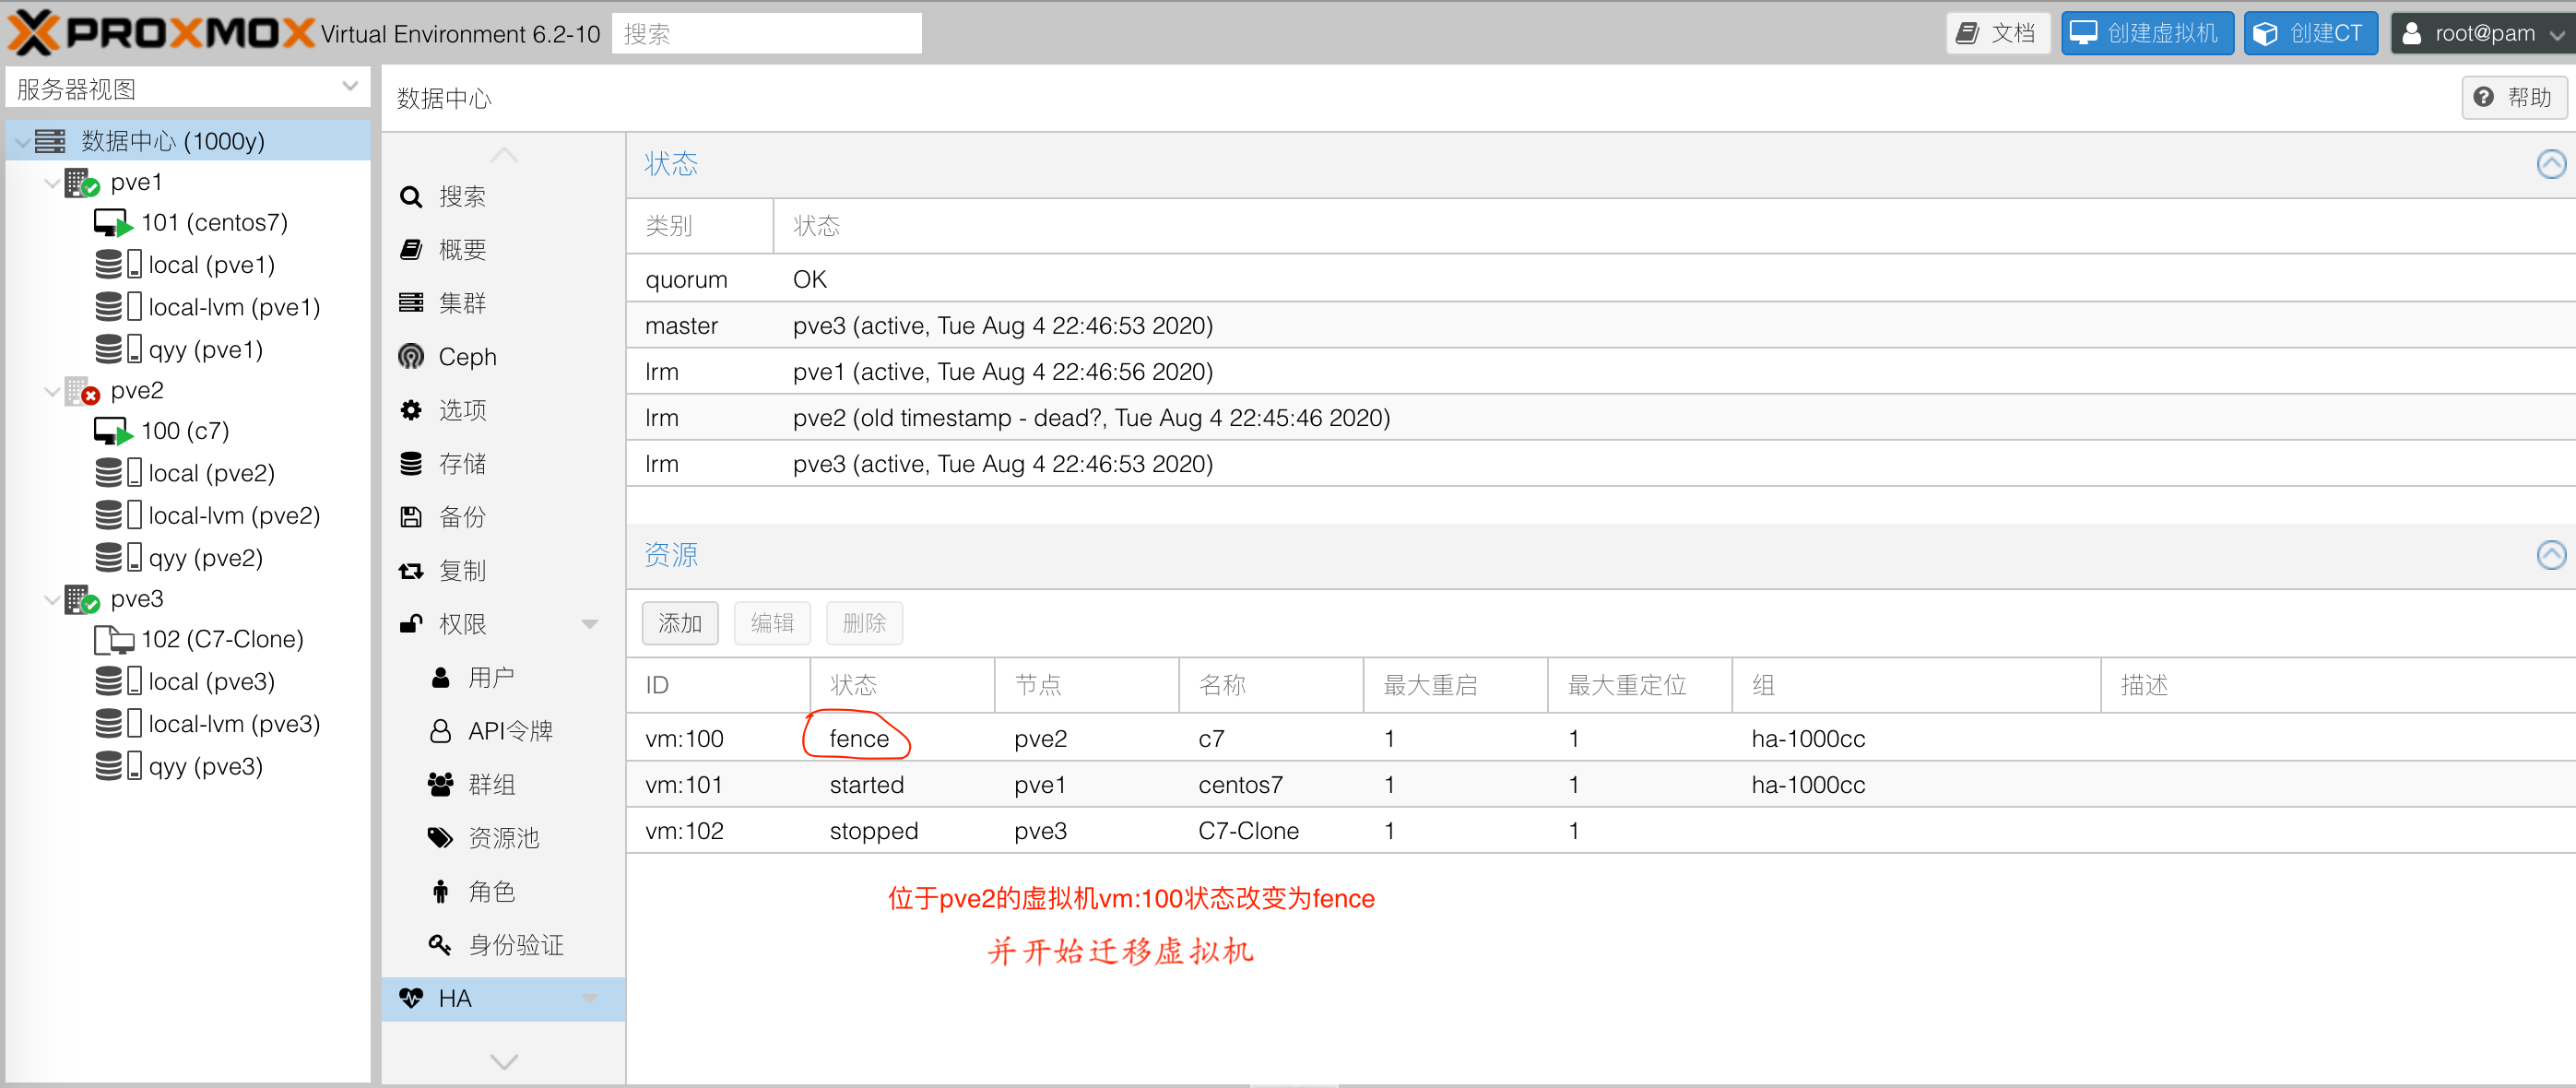
9. PVE-HA实现
1) 准备工作 1. 至少三个群集节点(以获得可靠的仲裁) 2. VM和容器的共享存储 3. 硬件冗余(无处不在) 4. 使用可靠的“服务器”组件 5. 硬件看门狗-如果不可用,将退回到linux内核软件看门狗(softdog 6. 可选的硬件围栏设备 |


10. 监控Proxmox VE
10.1 使用proxmox-pve-exporter采集监控数据
2) 部署好Grafana,,详情请查阅Prometheus配置手册第5步---使用Grafana支持可视化---实现第1及第2小节(安装最新版本的Grafana)
3) 在素有的PVE主机节点行安装promox-pve-exportter (1) 创建Prometheus账户 root@pve1:~# groupadd --system prometheus root@pve1:~# useradd -s /sbin/nologin --system -g prometheus prometheus root@pve1:~# mkdir /etc/prometheus/
root@pve2:~# groupadd --system prometheus root@pve2:~# useradd -s /sbin/nologin --system -g prometheus prometheus root@pve2:~# mkdir /etc/prometheus/
root@pve3:~# groupadd --system prometheus root@pve3:~# useradd -s /sbin/nologin --system -g prometheus prometheus root@pve3:~# mkdir /etc/prometheus/
(2) 安装proxmox-pve-exporter root@pve1:~# apt install python python-pip -y root@pve1:~# pip install -i https://pypi.tuna.tsinghua.edu.cn/simple prometheus-pve-exporter
root@pve2:~# apt install python python-pip -y root@pve2:~# pip install -i https://pypi.tuna.tsinghua.edu.cn/simple prometheus-pve-exporter
root@pve3:~# apt install python python-pip -y root@pve3:~# pip install -i https://pypi.tuna.tsinghua.edu.cn/simple prometheus-pve-exporter
(3) 创建配置文件 root@pve1:~# vi /etc/prometheus/pve.yml default: user: root@pam password: 123456 # 你的pve的管理密码 verify_ssl: false
root@pve1:~# chown -R prometheus:prometheus /etc/prometheus/ root@pve1:~# chmod -R 775 /etc/prometheus/
root@pve2:~# vi /etc/prometheus/pve.yml default: user: root@pam password: 123456 # 你的pve的管理密码 verify_ssl: false
root@pve2:~# chown -R prometheus:prometheus /etc/prometheus/ root@pve2:~# chmod -R 775 /etc/prometheus/
root@pve3:~# vi /etc/prometheus/pve.yml default: user: root@pam password: 123456 # 你的pve的管理密码 verify_ssl: false
root@pve3:~# chown -R prometheus:prometheus /etc/prometheus/ root@pve3:~# chmod -R 775 /etc/prometheus/
(4) 创建服务文件 root@pve1:~# vi /etc/systemd/system/prometheus-pve-exporter.service [Unit] Description=Prometheus exporter for Proxmox VE Documentation=https://github.com/znerol/prometheus-pve-exporter
[Service] Restart=always User=prometheus ExecStart=/usr/local/bin/pve_exporter /etc/prometheus/pve.yml
[Install] WantedBy=multi-user.target
root@pve1:~# systemctl daemon-reload root@pve1:~# systemctl enable --now prometheus-pve-exporter
root@pve2:~# vi /etc/systemd/system/prometheus-pve-exporter.service [Unit] Description=Prometheus exporter for Proxmox VE Documentation=https://github.com/znerol/prometheus-pve-exporter
[Service] Restart=always User=prometheus ExecStart=/usr/local/bin/pve_exporter /etc/prometheus/pve.yml
[Install] WantedBy=multi-user.target
root@pve2:~# systemctl daemon-reload root@pve2:~# systemctl enable --now prometheus-pve-exporter
root@pve3:~# vi /etc/systemd/system/prometheus-pve-exporter.service [Unit] Description=Prometheus exporter for Proxmox VE Documentation=https://github.com/znerol/prometheus-pve-exporter
[Service] Restart=always User=prometheus ExecStart=/usr/local/bin/pve_exporter /etc/prometheus/pve.yml
[Install] WantedBy=multi-user.target
root@pve3:~# systemctl daemon-reload root@pve3:~# systemctl enable --now prometheus-pve-exporter
(5) 访问测试 [浏览器]===>http://$pve_ip:9221/pve
4) 将proxmox-pve-exporter加入至Prometheus [root@srv1 ~]# vi /etc/prometheus/prometheus.yml # 于文档最后追加如下内容 ...... ...... - targets: ['srv1.1000y.cloud:9090']
- job_name: 'proxmox' metrics_path: /pve static_configs: - targets: ['pve1.1000y.cloud:9221', 'pve2.1000y.cloud:9221', 'pve3.1000y.cloud:9221']
[root@srv1 ~]# systemctl restart prometheus
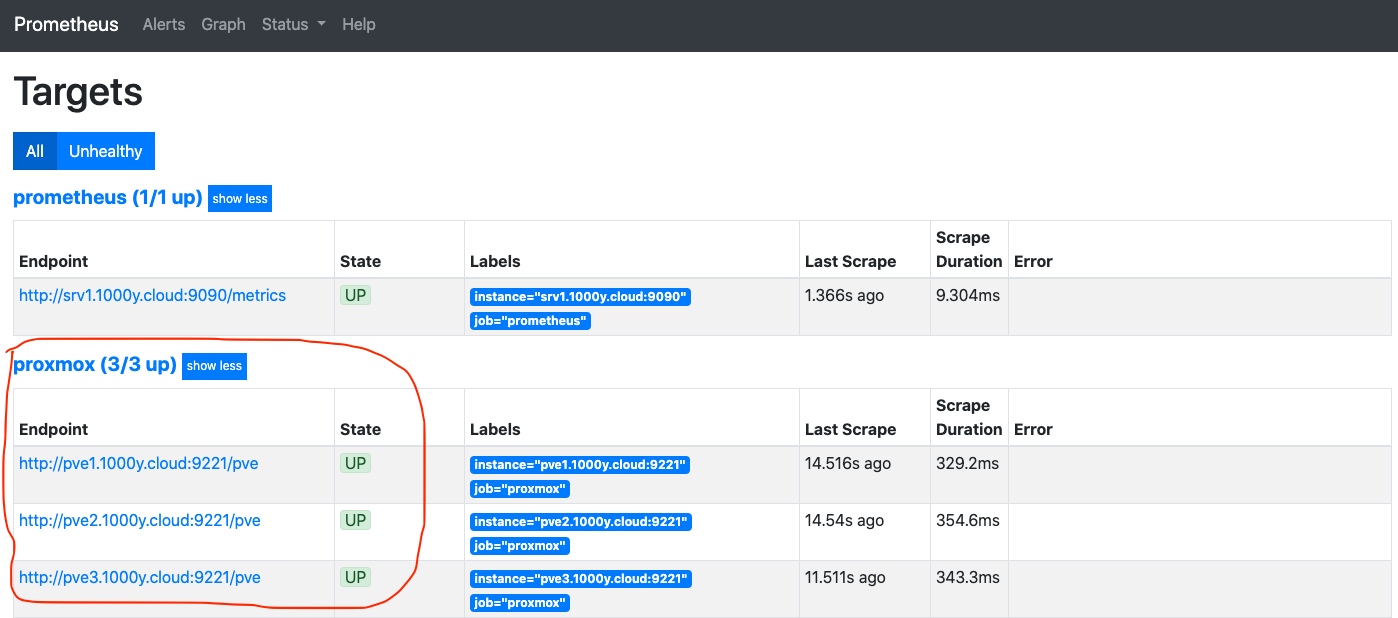
5) 确认Prometheus开始收集监控信息 [浏览器]===>http://$prometheus_srv_ip:9090===>Status===>Targets
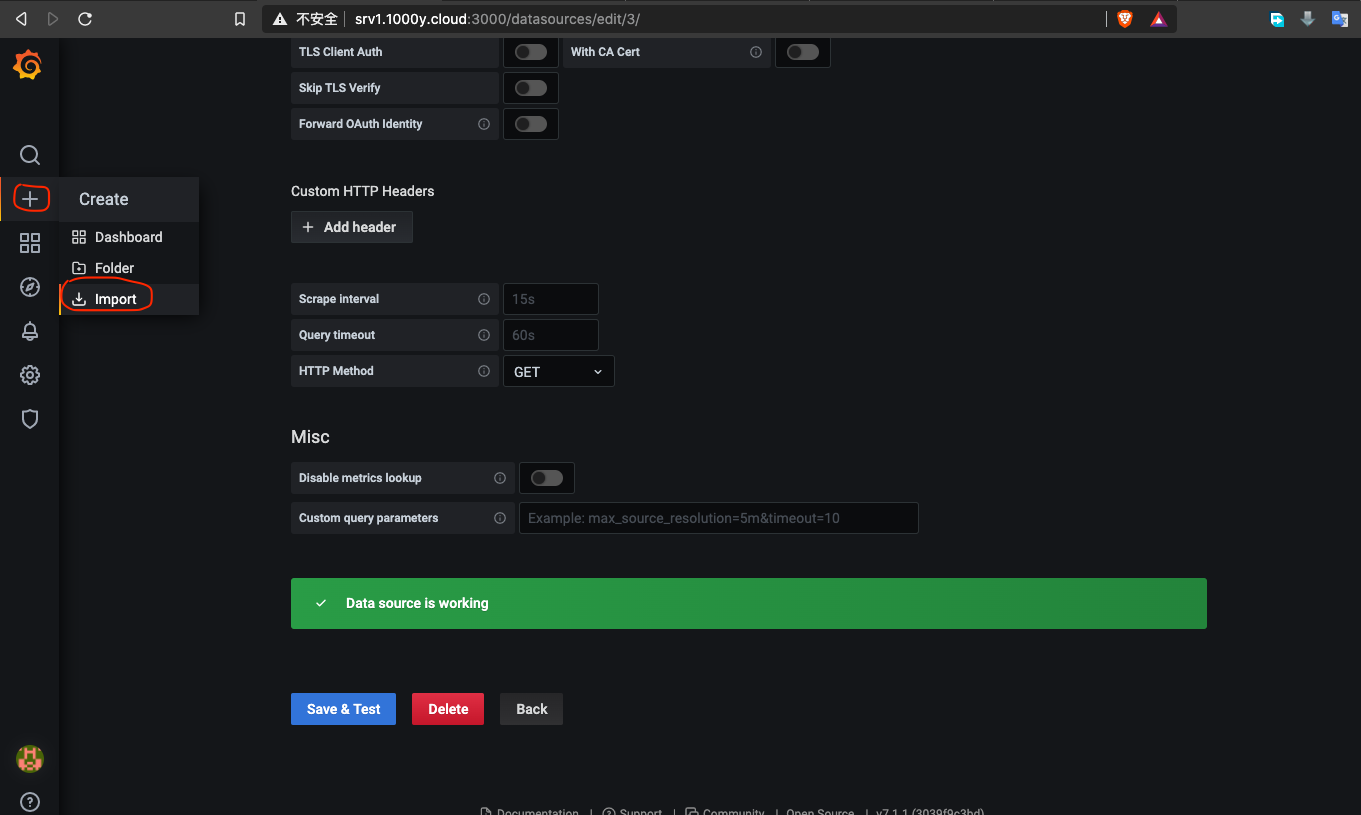
6) 在Grafana上添加Prometheus数据源
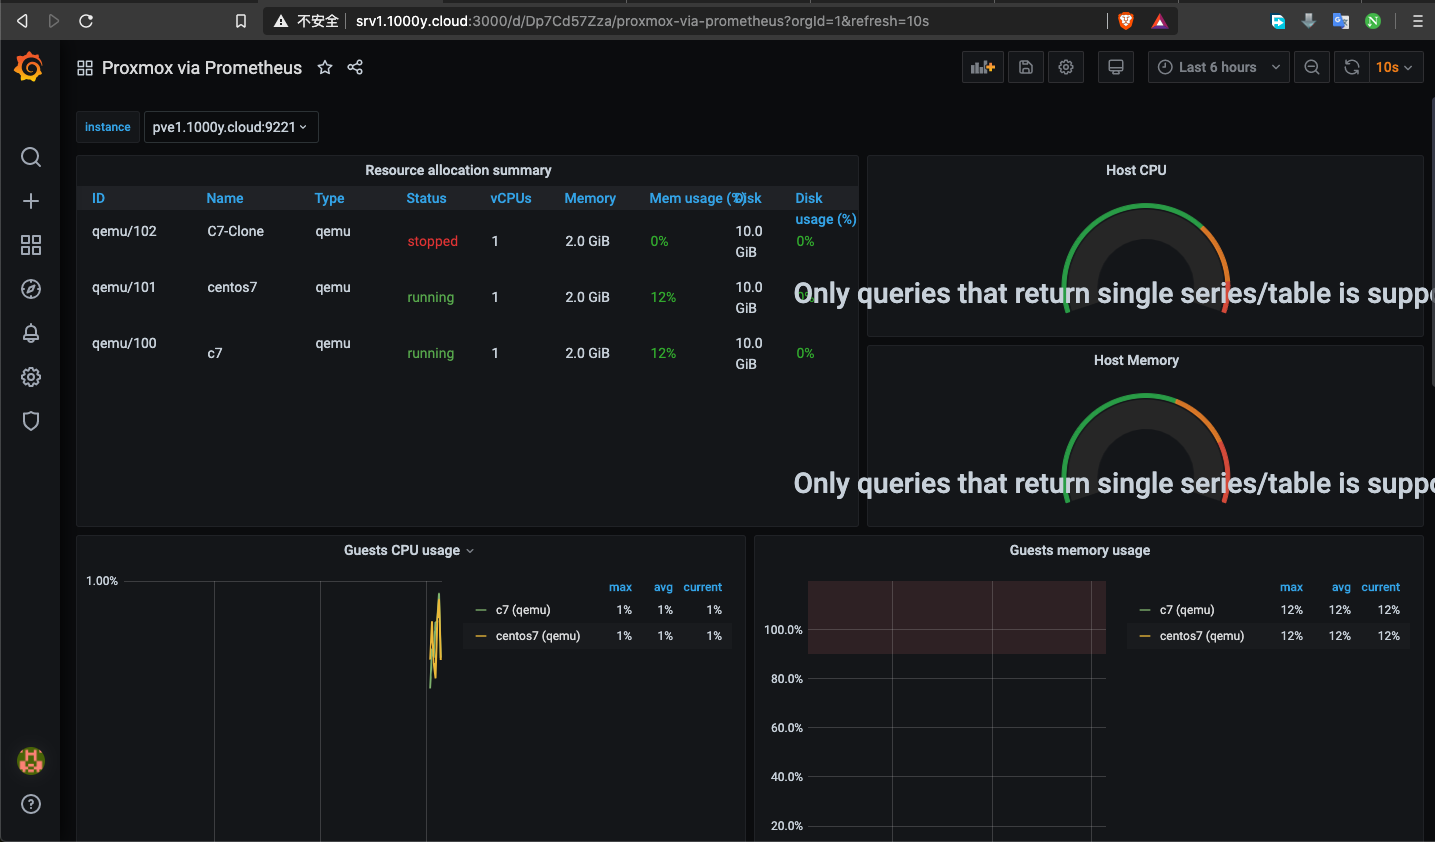
7) 在Grafana上添加一个监控模板
10.2 使用node-exporter采集监控数据
2) 部署好Grafana,,详情请查阅Prometheus配置手册第5步---使用Grafana支持可视化---实现第1及第2小节(安装最新版本的Grafana)
3) 在所有节点上安装node-exporter root@pve1:~# wget -P /tmp https://github.com/prometheus/node_exporter/releases/download/v1.0.1/node_exporter-1.0.1.linux-amd64.tar.gz root@pve1:~# tar -xzvf /tmp/node_exporter-1.0.1.linux-amd64.tar.gz -C /tmp root@pve1:~# mv /tmp/node_exporter-1.0.1.linux-amd64/node_exporter /usr/local/bin/
root@pve2:~# wget -P /tmp https://github.com/prometheus/node_exporter/releases/download/v1.0.1/node_exporter-1.0.1.linux-amd64.tar.gz root@pve2:~# tar -xzvf /tmp/node_exporter-1.0.1.linux-amd64.tar.gz -C /tmp root@pve2:~# mv /tmp/node_exporter-1.0.1.linux-amd64/node_exporter /usr/local/bin/
root@pve3:~# wget -P /tmp https://github.com/prometheus/node_exporter/releases/download/v1.0.1/node_exporter-1.0.1.linux-amd64.tar.gz root@pve3:~# tar -xzvf /tmp/node_exporter-1.0.1.linux-amd64.tar.gz -C /tmp root@pve3:~# mv /tmp/node_exporter-1.0.1.linux-amd64/node_exporter /usr/local/bin/
4) 在所有节点上创建账户及服务文件 root@pve1:~# useradd -rs /bin/false node_exporter root@pve1:~# vi /etc/systemd/system/node_exporter.service [Unit] Description=Node Exporter After=network.target
[Service] User=node_exporter Group=node_exporter Type=simple ExecStart=/usr/local/bin/node_exporter
[Install] WantedBy=multi-user.target
root@pve1:~# systemctl daemon-reload && systemctl enable --now node_exporter
root@pve2:~# useradd -rs /bin/false node_exporter root@pve2:~# vi /etc/systemd/system/node_exporter.service [Unit] Description=Node Exporter After=network.target
[Service] User=node_exporter Group=node_exporter Type=simple ExecStart=/usr/local/bin/node_exporter
[Install] WantedBy=multi-user.target
root@pve2:~# systemctl daemon-reload && systemctl enable --now node_exporter
root@pve3:~# useradd -rs /bin/false node_exporter root@pve3:~# vi /etc/systemd/system/node_exporter.service [Unit] Description=Node Exporter After=network.target
[Service] User=node_exporter Group=node_exporter Type=simple ExecStart=/usr/local/bin/node_exporter
[Install] WantedBy=multi-user.target
root@pve3:~# systemctl daemon-reload && systemctl enable --now node_exporter
5) 访问测试 [浏览器]===>https://$pvesrv_ip:9100
6) 修改Prometheus的配置文件 [root@srv1 ~]# vi /etc/prometheus/prometheus.yml # 于文件底部追加绿色部分内容 ...... ......
- job_name: 'proxmox' metrics_path: /pve static_configs: - targets: ['pve1.1000y.cloud:9221', 'pve2.1000y.cloud:9221', 'pve3.1000y.cloud:9221']
- job_name: 'node_exporter_metrics' scrape_interval: 5s static_configs: - targets: ['pve1.1000y.cloud:9100', 'pve2.1000y.cloud:9100', 'pve3.1000y.cloud:9100']
[root@srv1 ~]# systemctl restart prometheus
7) Prometheus测试 [浏览器]===>http://$Prometheus_ip:9090===>Status===>Targets
8) 在Grafana上添加基于node_exporter的模板
10.3 使用Graphite采集监控数据
2) 使Graphite接收UDP请求---Proxmox默认使用udp发送计量数据 [root@srv2 ~]# vim /etc/carbon/carbon.conf ...... ...... # 修改93行的值 ENABLE_UDP_LISTENER = True UDP_RECEIVER_INTERFACE = 0.0.0.0 UDP_RECEIVER_PORT = 2003 ...... ......
[root@srv2 ~]# systemctl restart carbon-cache
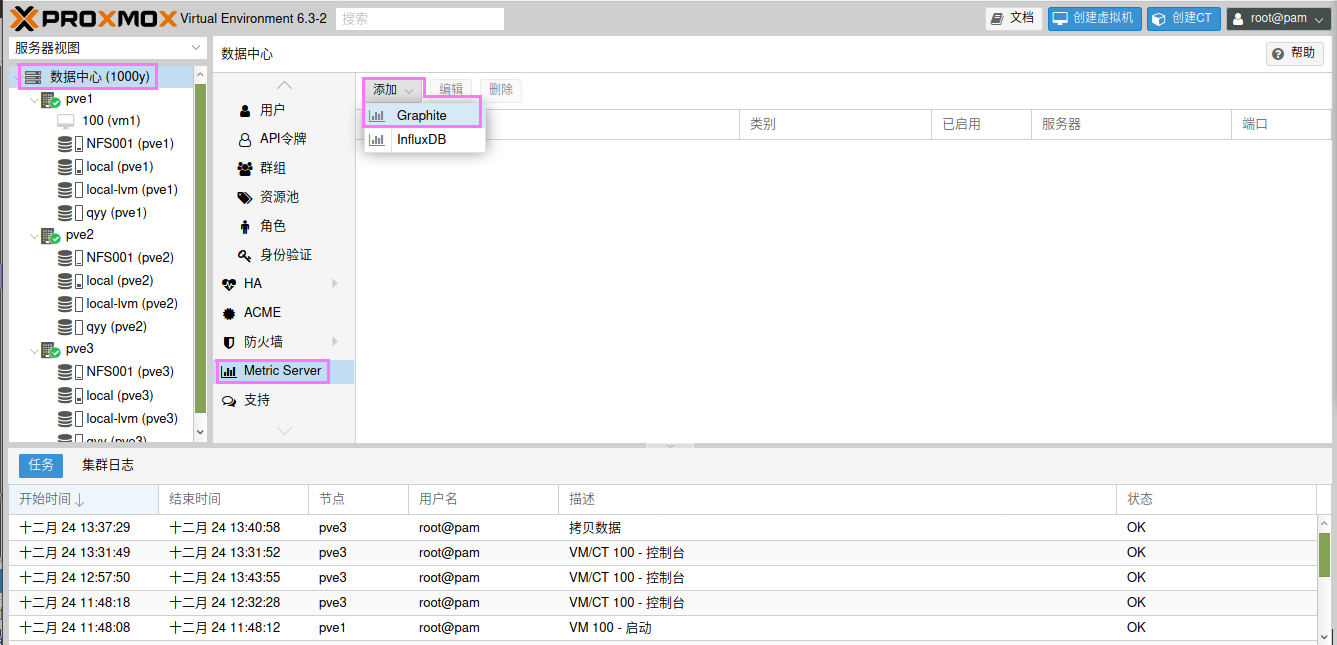
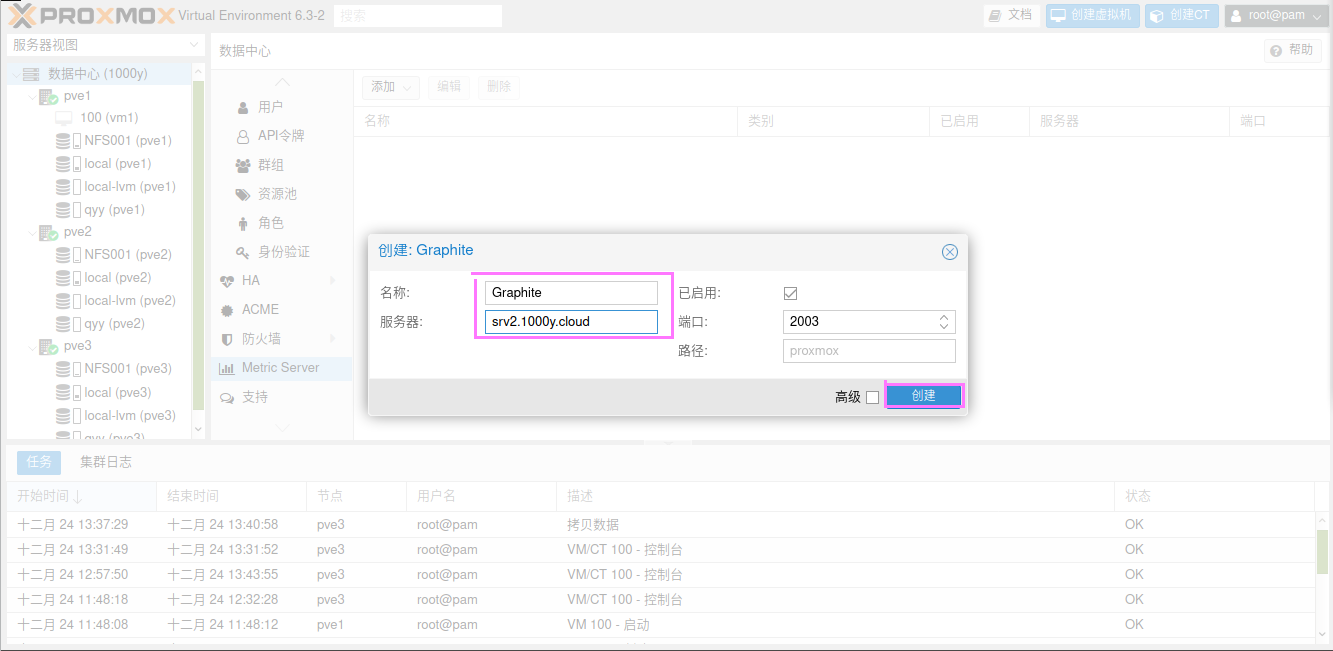
3) 配置Proxmox
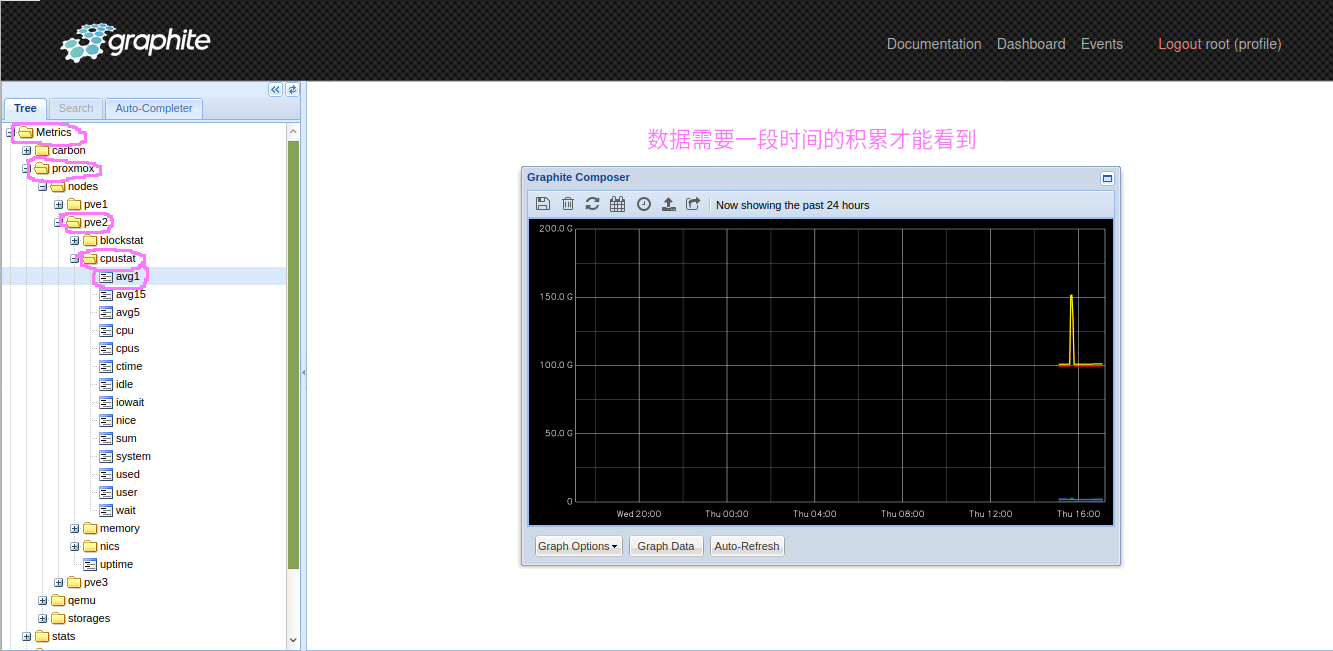
4) Graphite端查看


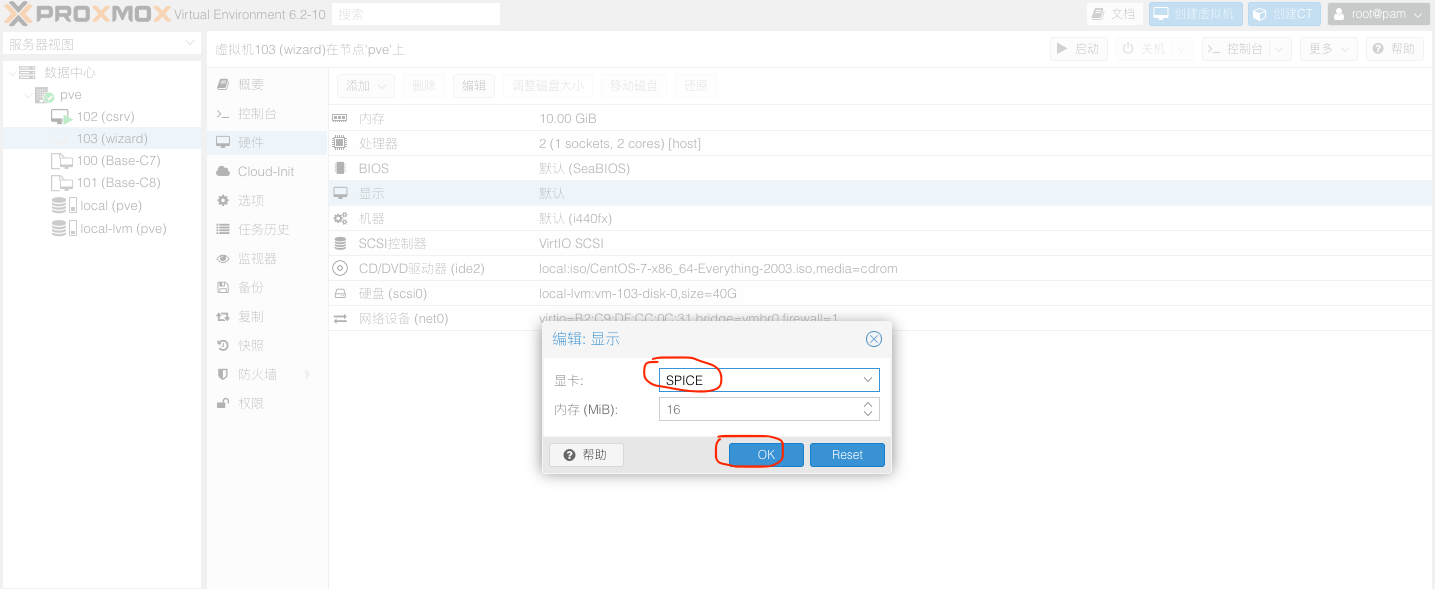
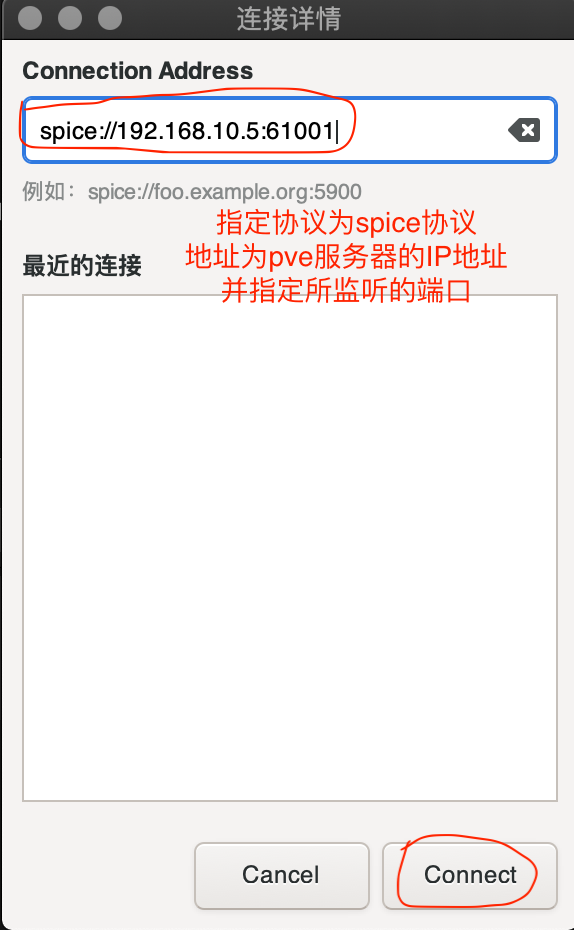
11. 开启云桌面
1) 开启SPICE 1. 关闭虚拟主机 2. 将虚拟主机设置为SPICE协议 |


12. 使用Proxmox Backup Server备份PVE
12.1 安装及配置Proxmox Backup Server
2) 下载PBS https://mirrors.tuna.tsinghua.edu.cn/proxmox/iso/proxmox-backup-server_1.0-1.iso
3) 本操作PBS主机硬件 1. 4Core-vcpus 2. 8G MEM 3. sda为系统盘32G/sdb为数据盘100G
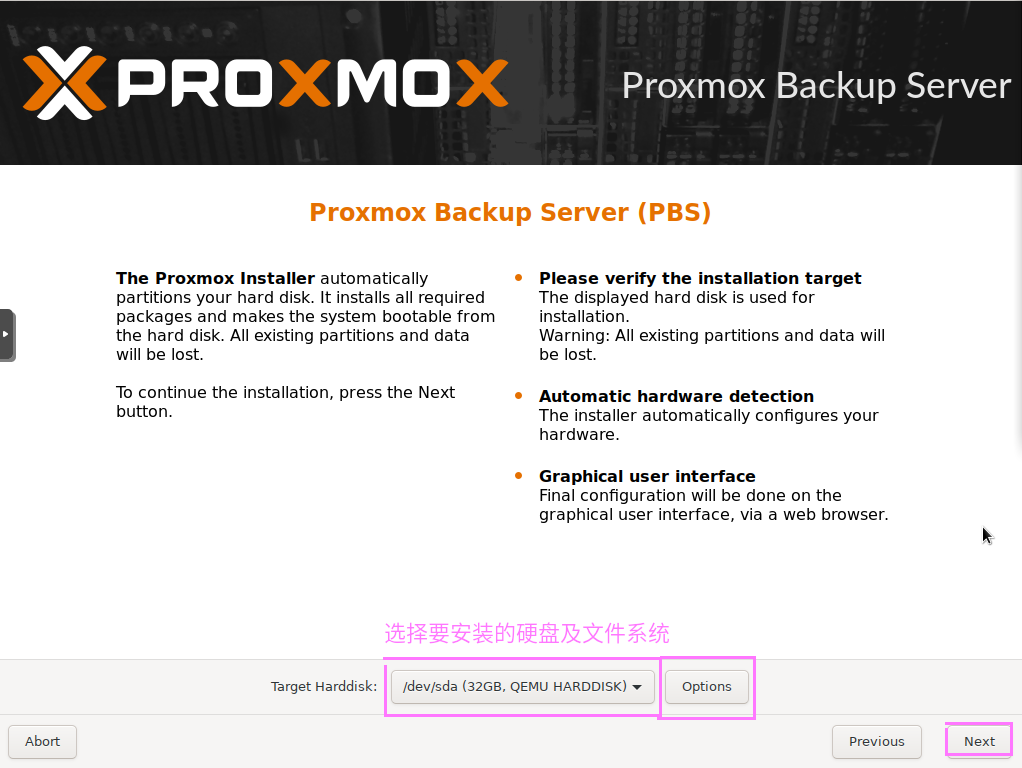
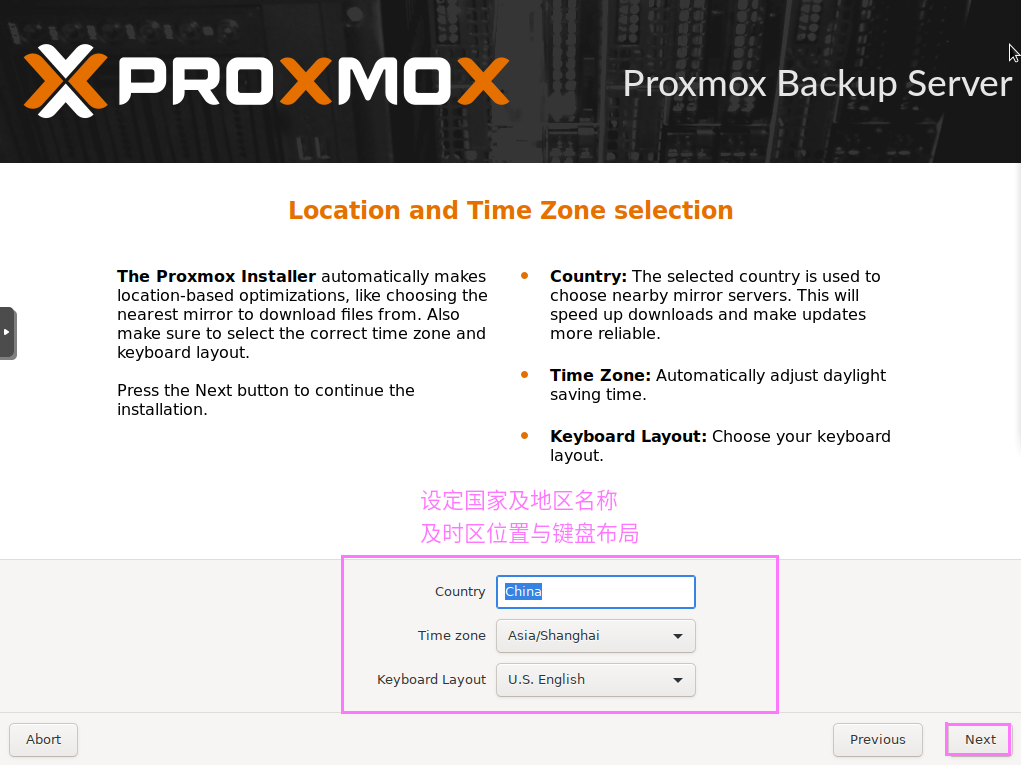
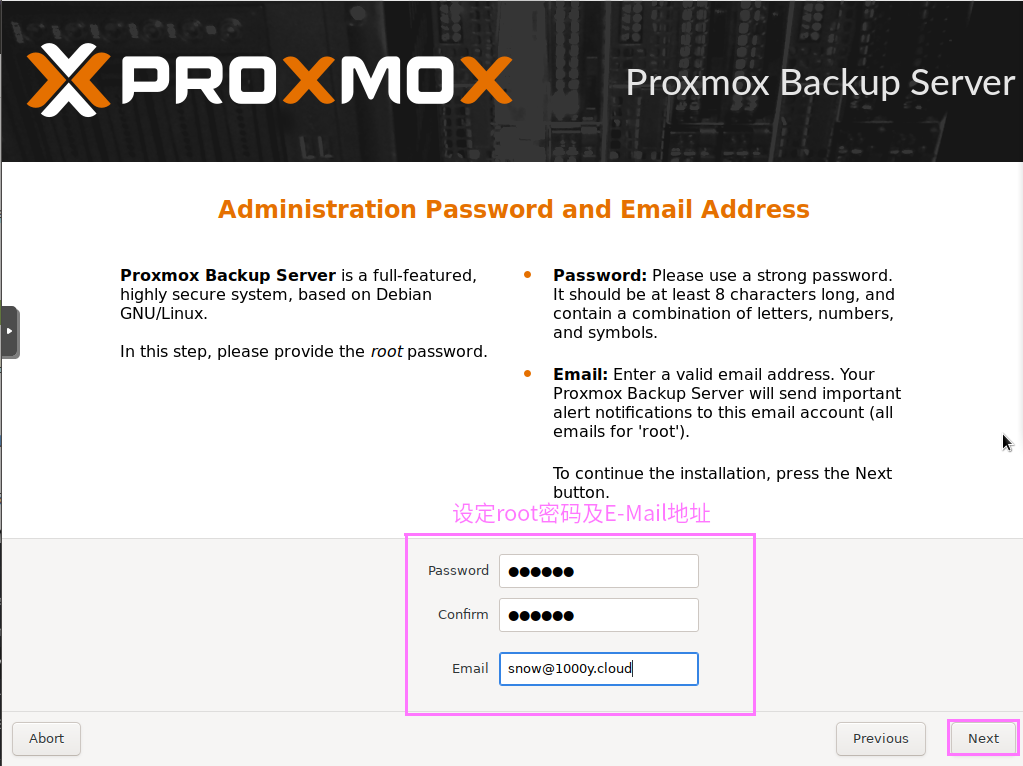
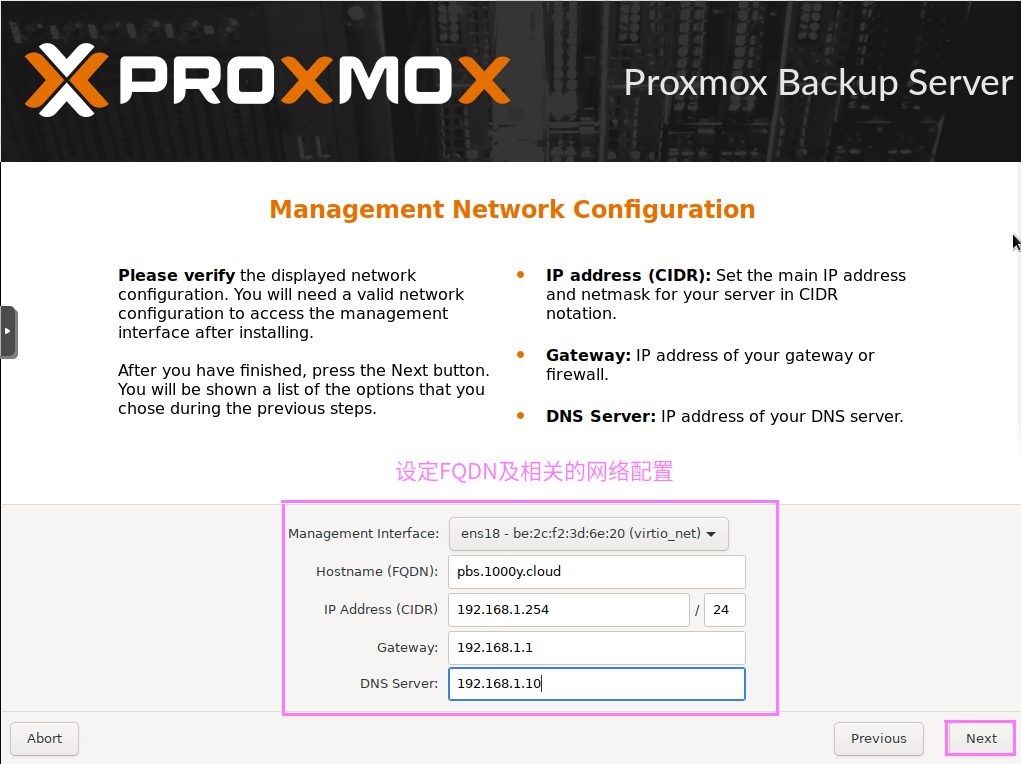
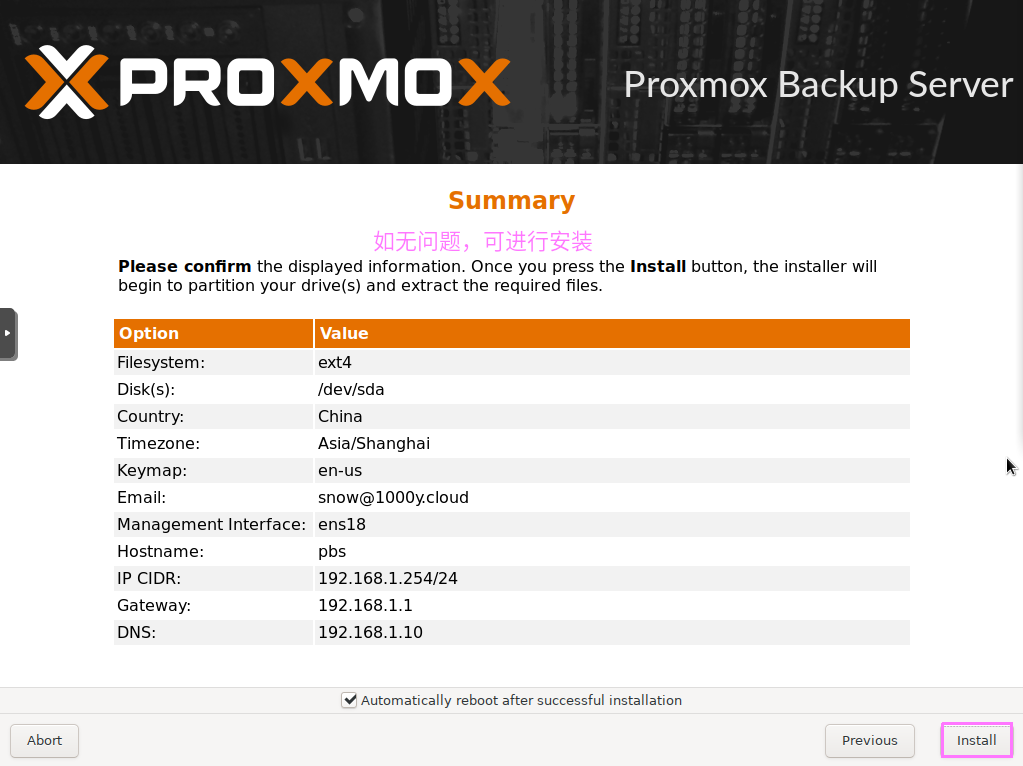
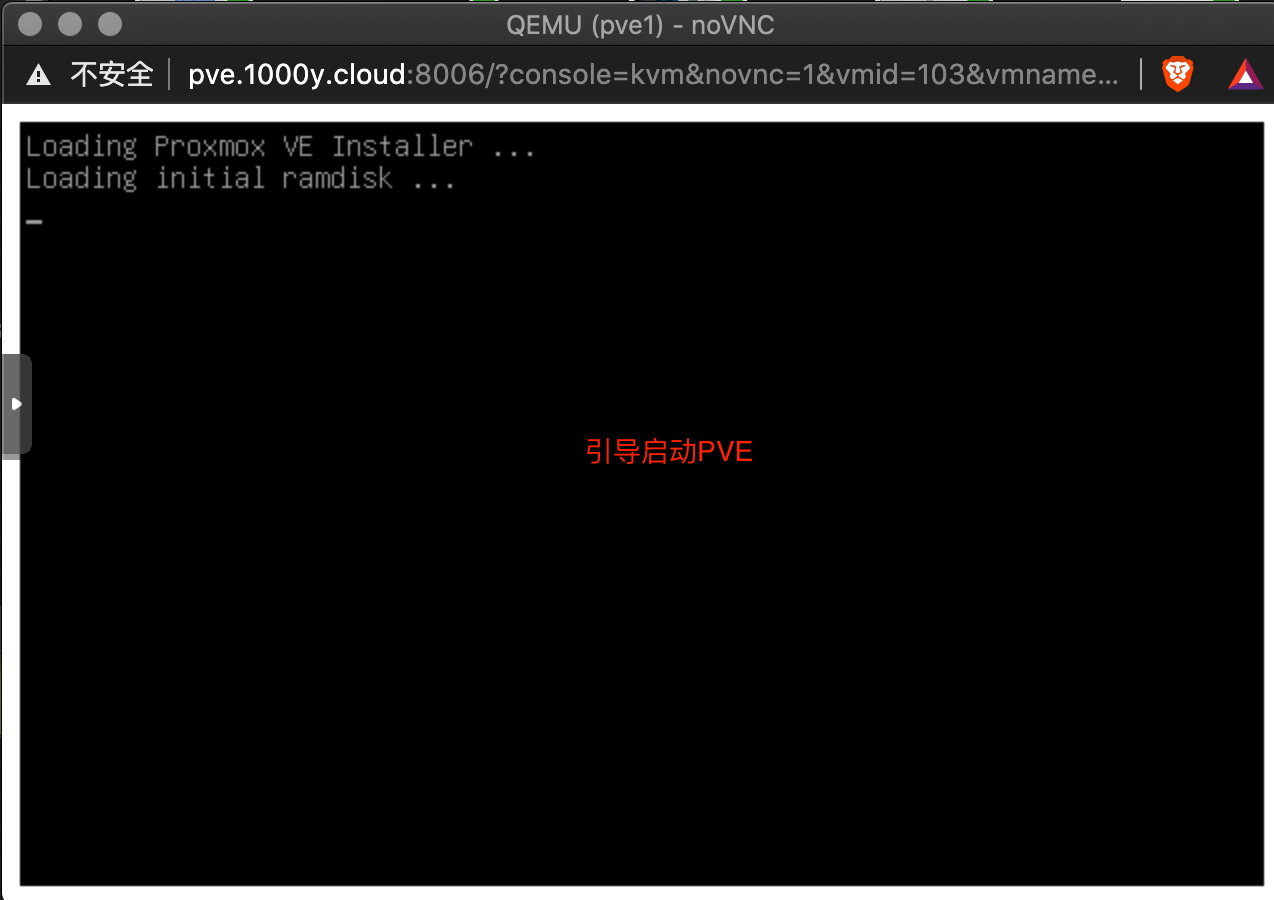
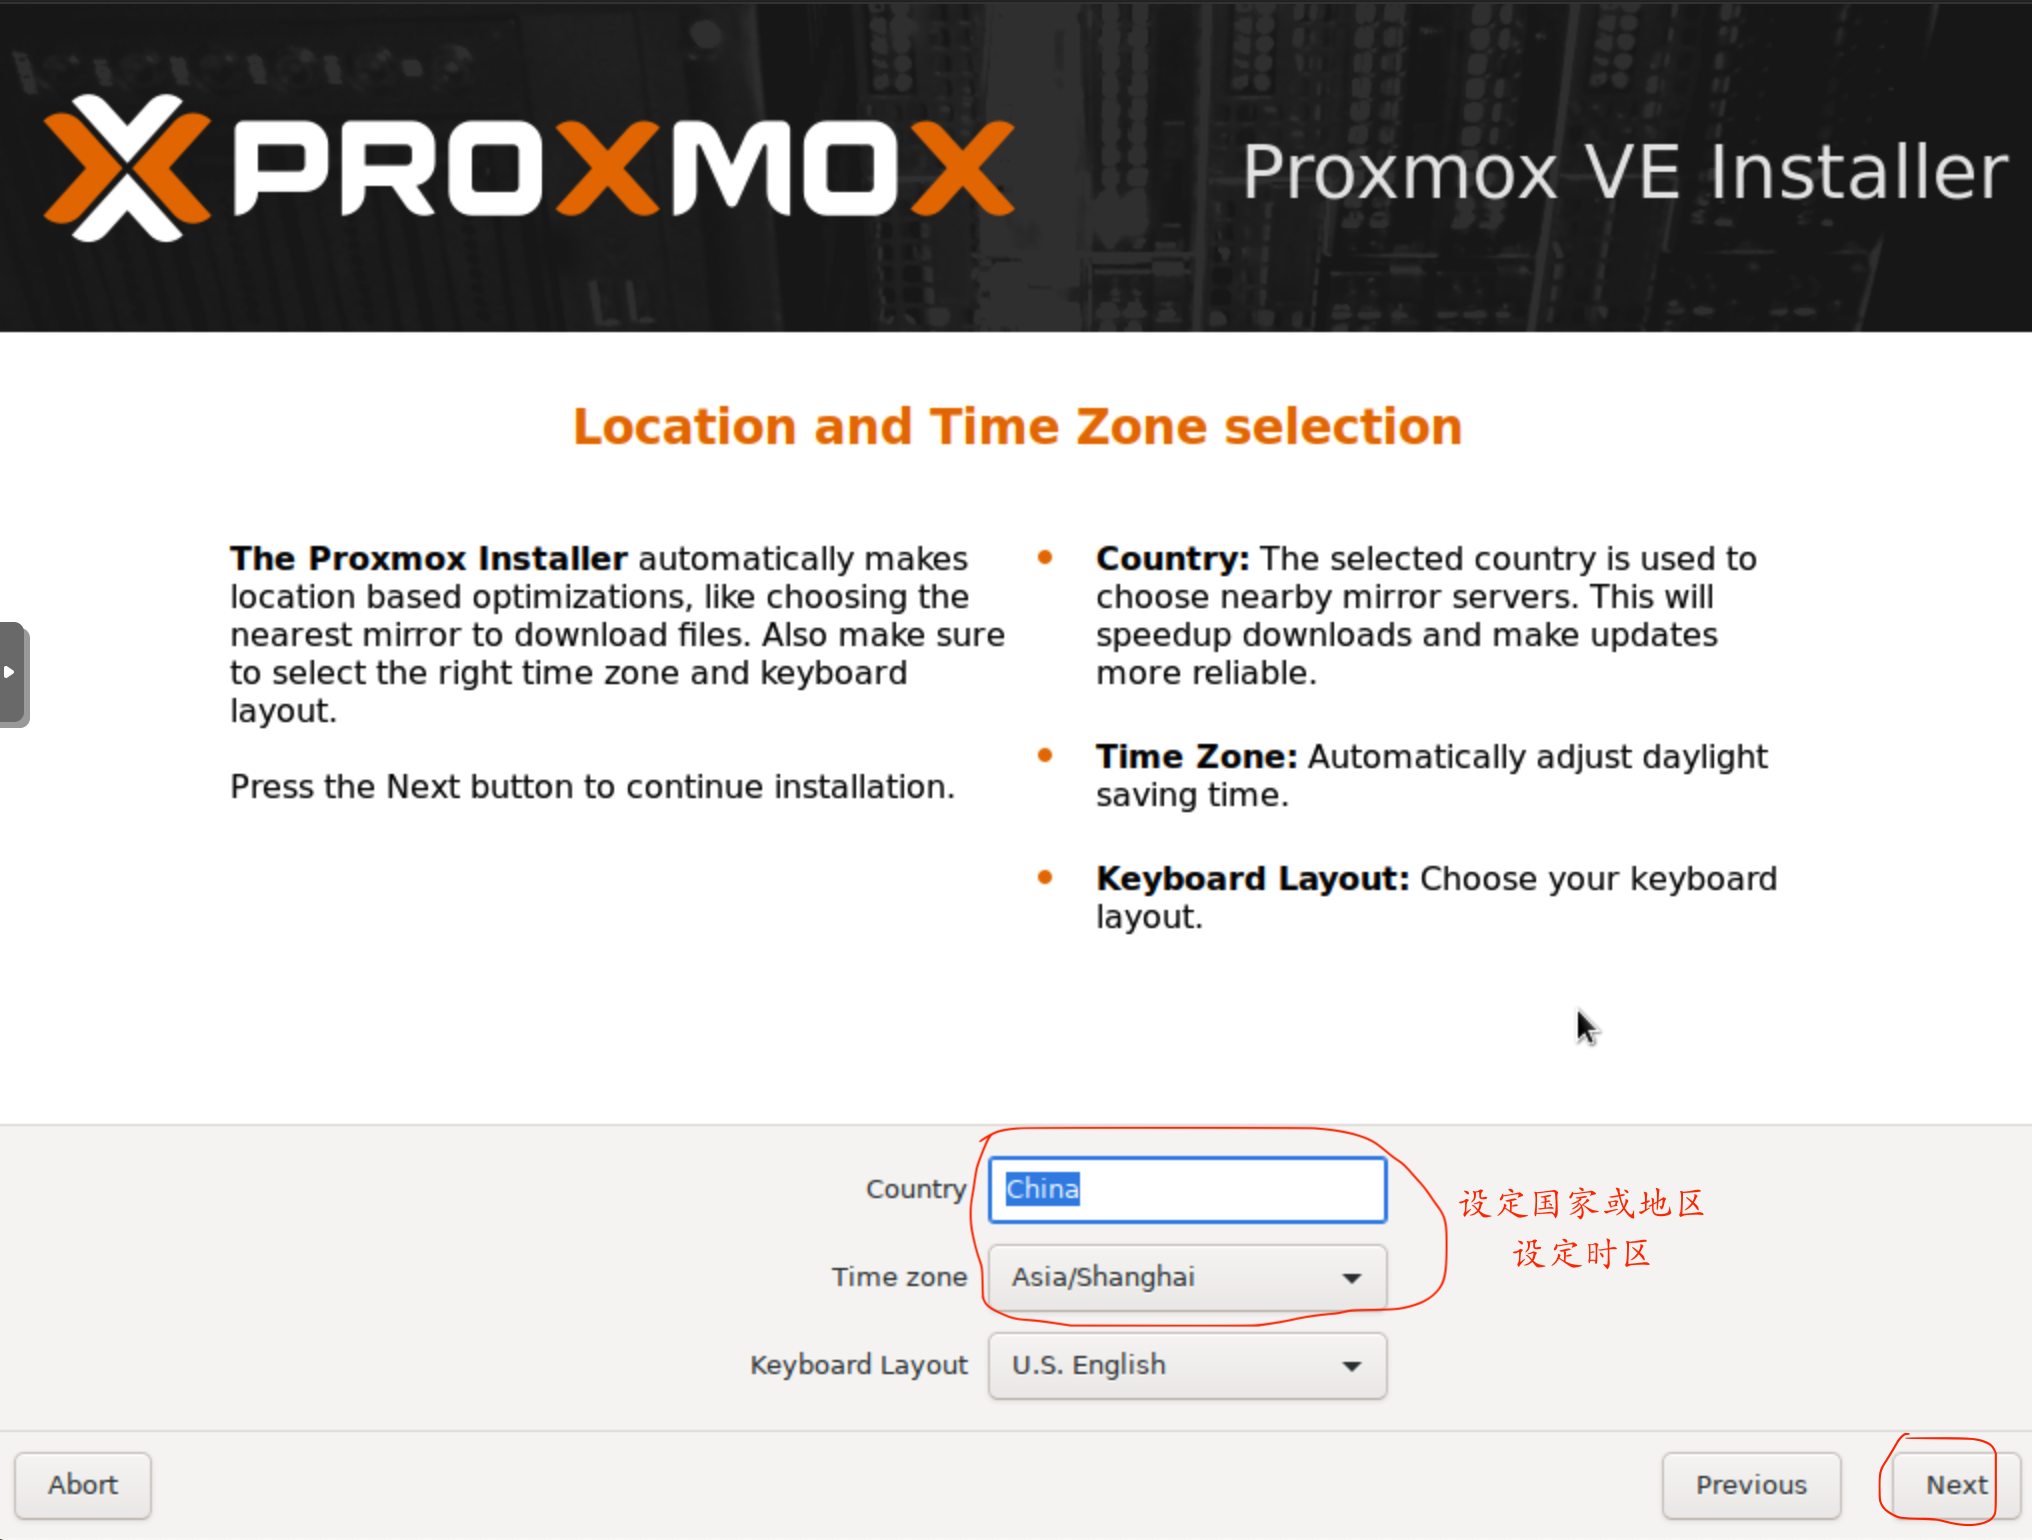
4) 安装PBS
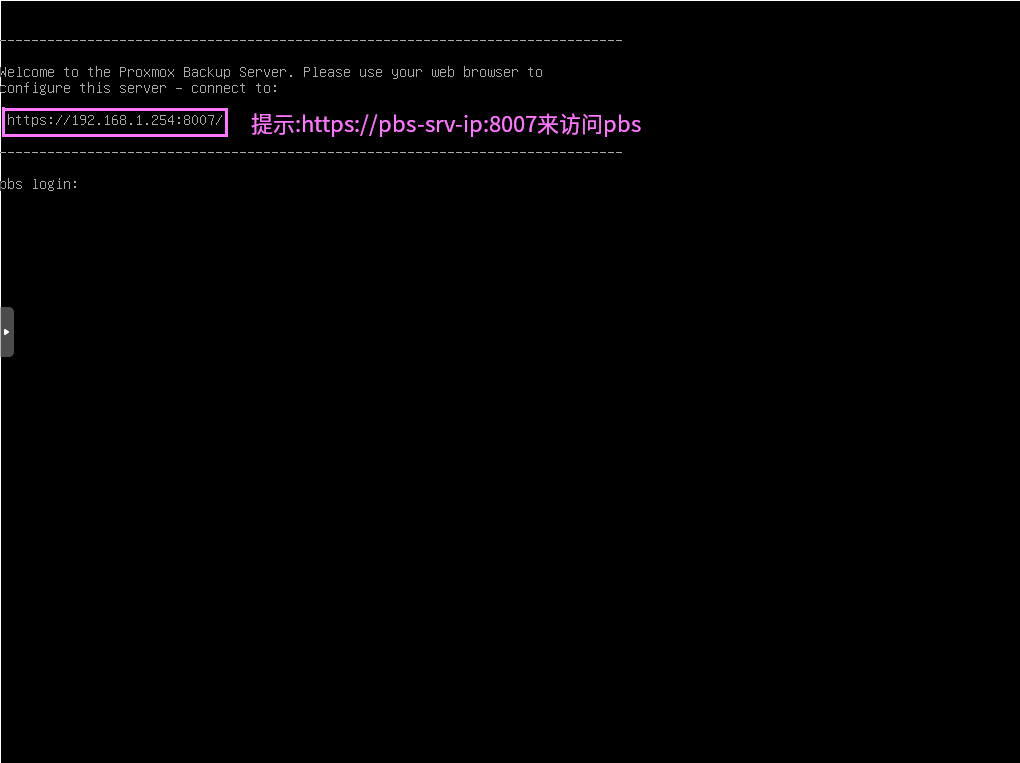
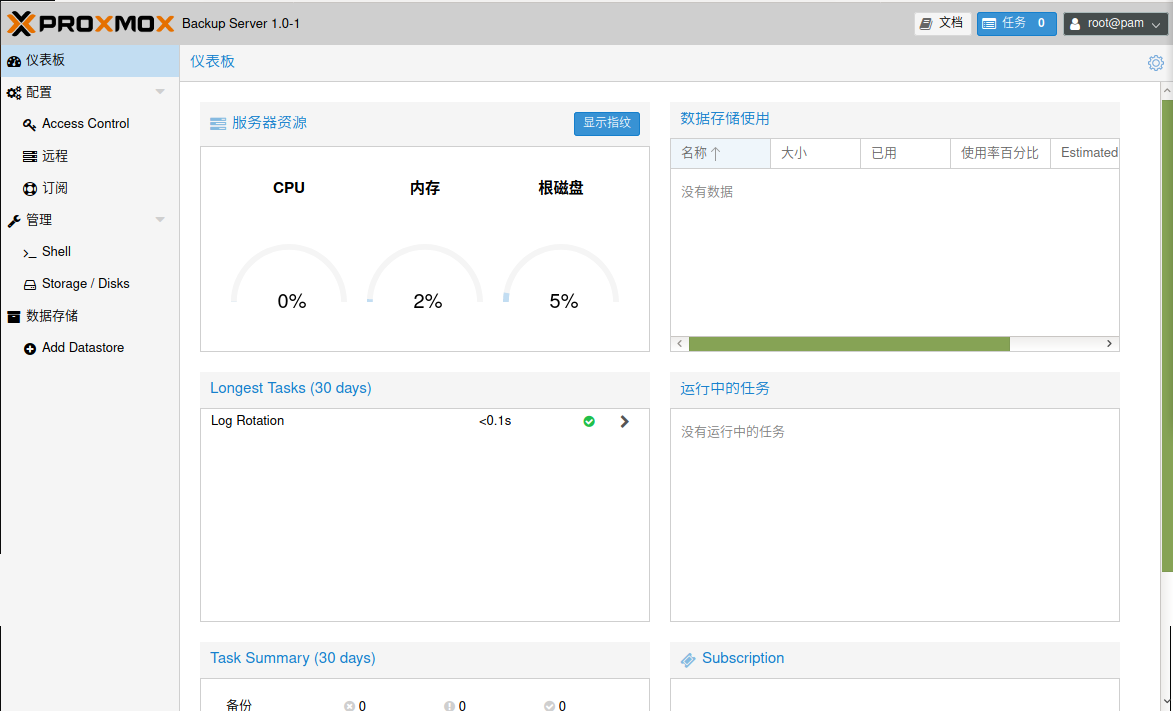
5) 登录PBS [浏览器]===>https://pbs-srv-ip:8007
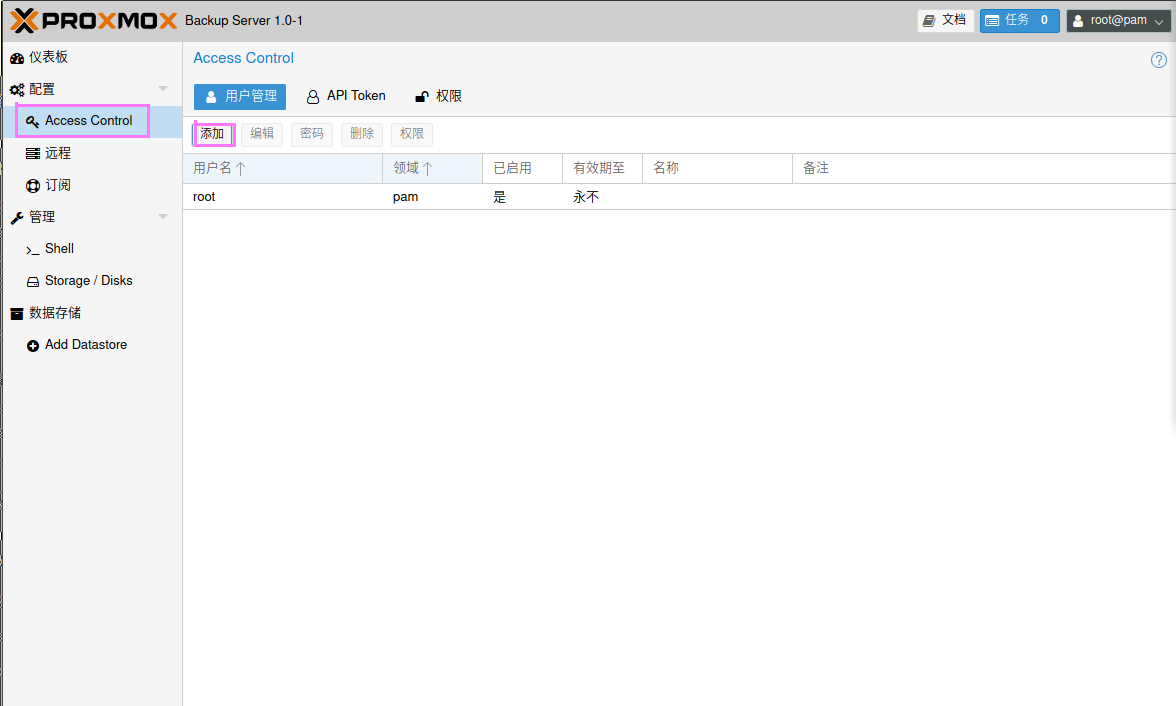
6) 创建PBS帐号
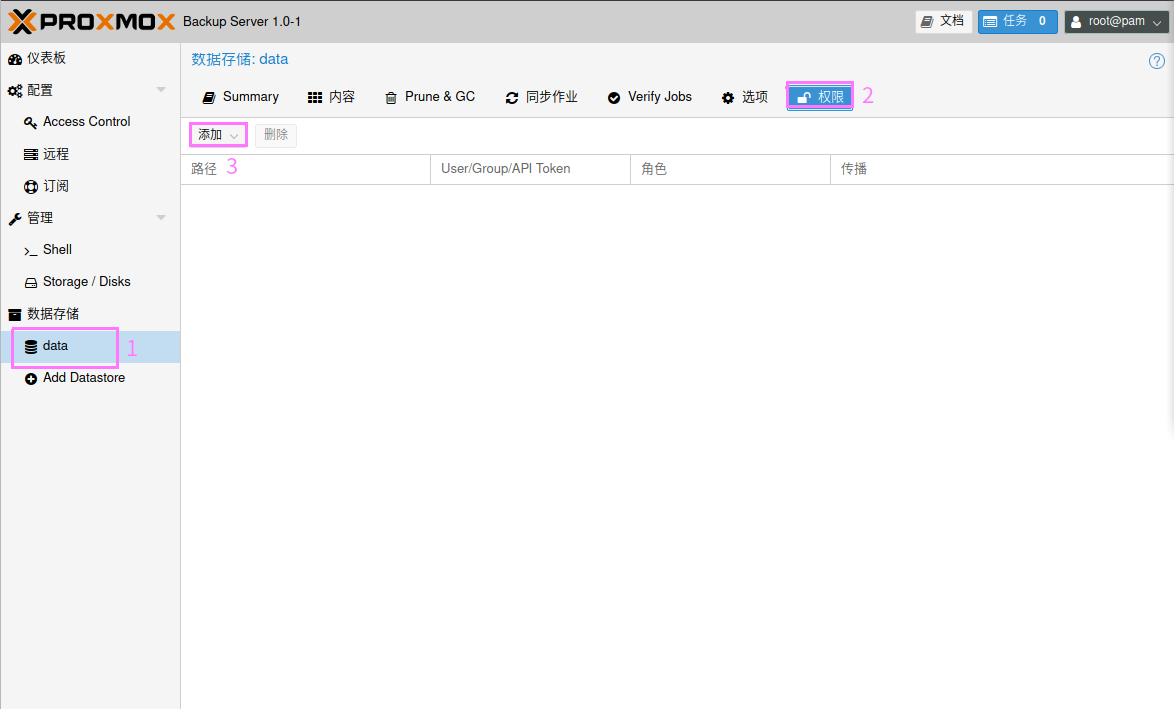
7) 创建备份所需要的存储空间
可在pbs命令行中确认data存储的挂载点 root@pbs:~# more /etc/proxmox-backup/datastore.cfg datastore: data path /mnt/datastore/data
root@pbs:~# df -Th | grep /mnt/datastore/data /dev/sdb1 xfs 100G 169M 100G 1% /mnt/datastore/data
8) 为备份的存储空间授权账户
每当进行PVE虚拟机或者容器备份时,可以通过查看.chunks目录空间大小变化来验证是否有数据写入。 root@pbs:~# ls -la /mnt/datastore/data/ total 2112 drwxr-xr-x 3 backup backup 34 Dec 22 19:20 . drwxr-xr-x 3 root root 4096 Dec 22 19:20 .. drwxr-x--- 65538 backup backup 1069056 Dec 22 19:20 .chunks -rw-r--r-- 1 backup backup 0 Dec 22 19:20 .lock
12.2 配置Proxmox Backup Server客户端
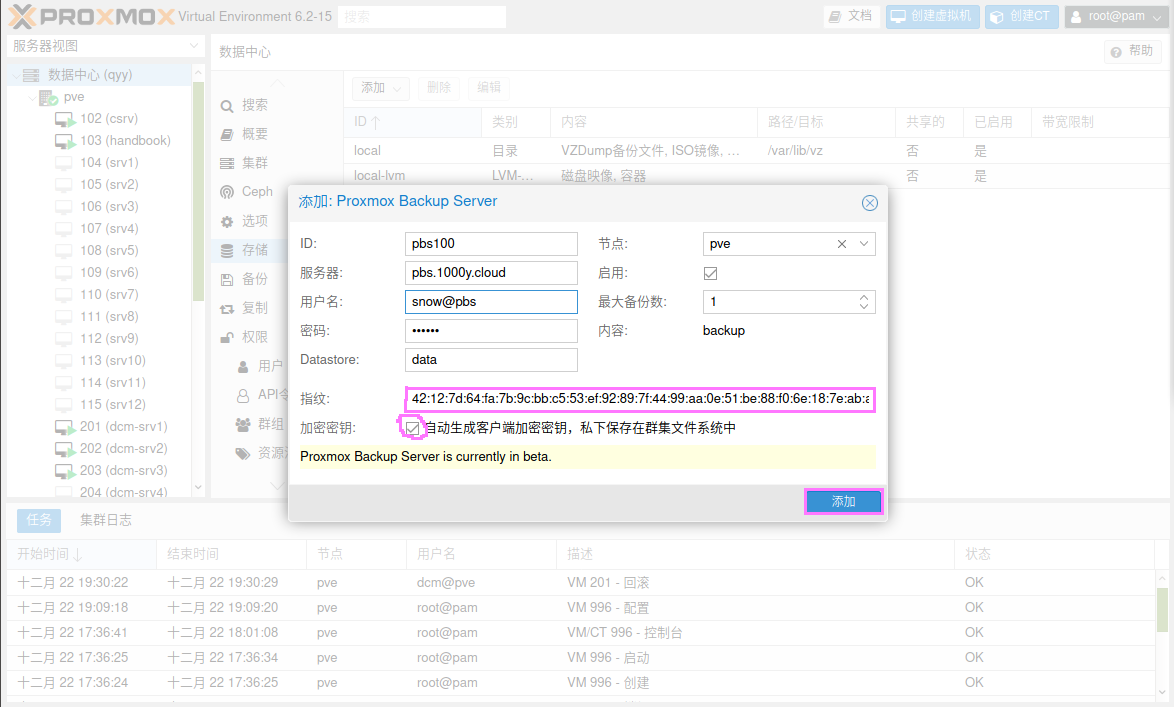
2) 使PVE的PBC客户端连接PBS
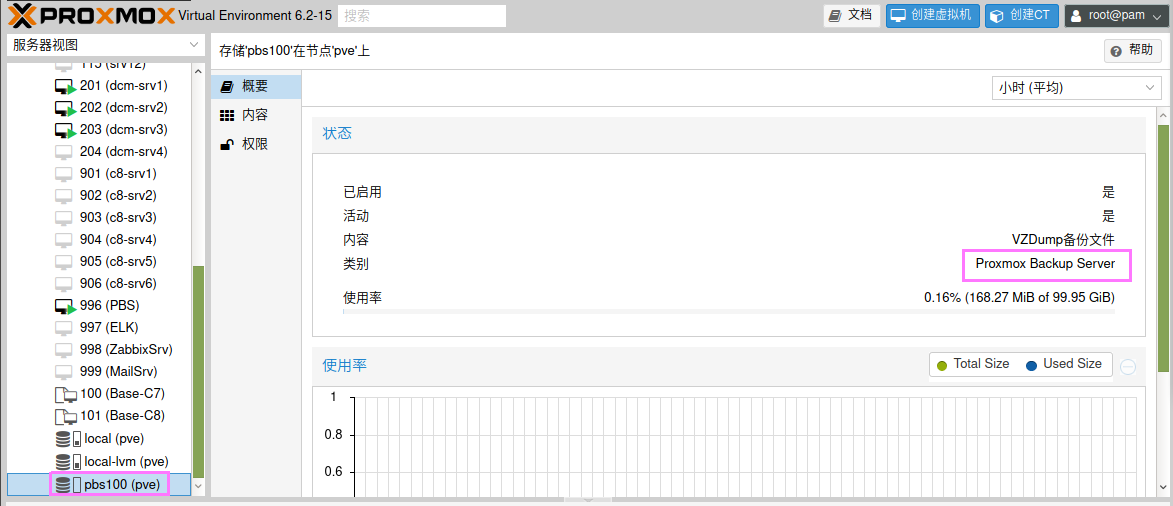
3) 验证PBS客户端与服务器端连接的正确性验证 root@pve:~# cat /etc/pve/storage.cfg dir: local path /var/lib/vz content backup,vztmpl,iso
lvmthin: local-lvm thinpool data vgname pve content rootdir,images
pbs: pbs100 datastore data server 192.168.1.254 content backup encryption-key 1 fingerprint 42:12:7d:64:fa:7b:9c:bb:c5:53:ef:92:89:7f:44:99:aa:0e:51:be:88:f0:6e:18:7e:ab:ab:f 7:81:63:73:97 maxfiles 1 nodes pve username snow@pbs
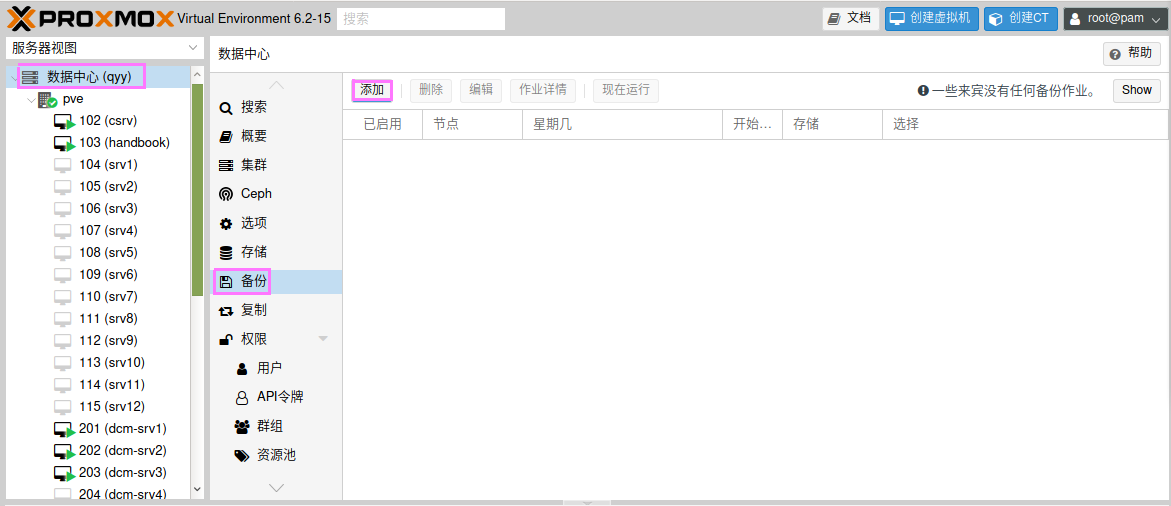
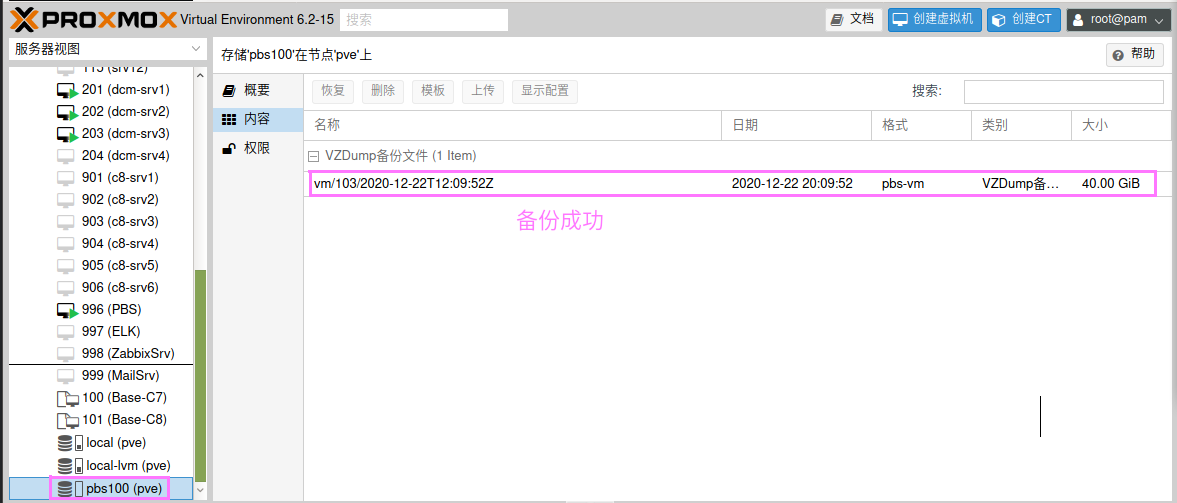
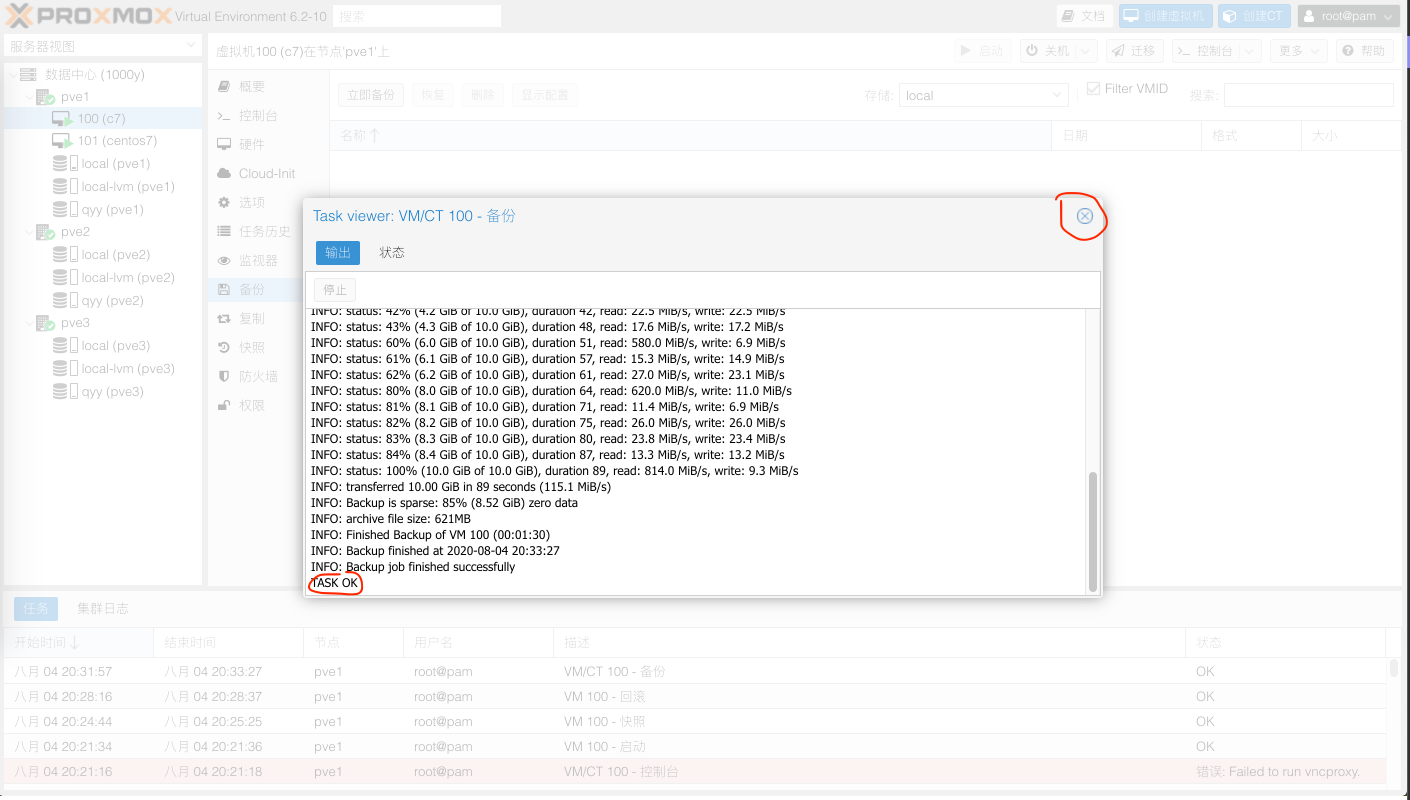
12.3 备份PVE的虚拟机