Redmine配置手册

snow chuai汇总、整理、撰写—2020/2/28


1. 前期准备
1.1 安装Apache
1) 安装并启动httpd
[root@srv1 ~]# yum install httpd -y
[root@srv1 ~]# systemctl enable --now httpd
1.2 设置SMTP
1) 安装Postfix
[root@srv1 ~]# yum install postfix -y
2) 配置postfix并启用SMTP验证 [root@srv1 ~]# vim /etc/postfix/main.cf # 取消75行注释,并指定邮件服务器的FQDN myhostname = srv1.1000cc.net
# 取消83行注释,并指定邮件服务器的域名 mydomain = 1000cc.net
# 取消99行注释 myorigin = $mydomain
# 修改116行,让MAIL Server监听所有地址 inet_interfaces = all
# 修改164行,于最后追加$mydomain(值在83行已定义) mydestination = $myhostname, localhost.$mydomain, localhost, $mydomain
# 修改264行,定义本地网络地址 mynetworks = 127.0.0.0/8, 192.168.10.0/24
# 取消419行注释,定义用户的Mailbox的目录[位置在用户主目录下] home_mailbox = Maildir/
# 于574行,添加如下内容,定义smtp banner smtpd_banner = $myhostname ESMTP
# 于文档最后追加如下内容 # 限制email尺寸不超过10M message_size_limit = 10485760 # 限制邮箱容量不超过1GB mailbox_size_limit = 1073741824
# 开启STMP验证 smtpd_sasl_type = dovecot smtpd_sasl_path = private/auth smtpd_sasl_auth_enable = yes smtpd_sasl_security_options = noanonymous smtpd_sasl_local_domain = $myhostname smtpd_recipient_restrictions = permit_mynetworks, permit_auth_destination, permit_sasl_authenticated, reject
3) 重启Postfix [root@srv1 ~]# systemctl restart postfix [root@srv1 ~]# systemctl enable postfix
4) 防火墙设定 [root@srv1 ~]# firewall-cmd --add-service=smtp --permanent success [root@srv1 ~]# firewall-cmd --reload success
1.3 安装及配置PostgreSQL数据库(数据库选择其一)
1) 安装Postgresql
[root@srv1 ~]# yum install centos-release-scl-rh centos-release-scl -y
[root@srv1 ~]# sed -i -e "s/\]$/\]\npriority=10/g" /etc/yum.repos.d/CentOS-SCLo-scl.repo
[root@srv1 ~]# sed -i -e "s/\]$/\]\npriority=10/g" /etc/yum.repos.d/CentOS-SCLo-scl-rh.repo
[root@srv1 ~]# sed -i -e "s/enabled=1/enabled=0/g" /etc/yum.repos.d/CentOS-SCLo-scl.repo
[root@srv1 ~]# sed -i -e "s/enabled=1/enabled=0/g" /etc/yum.repos.d/CentOS-SCLo-scl-rh.repo
[root@srv1 ~]# yum --enablerepo=centos-sclo-rh install rh-postgresql96-postgresql-server -y
2) 启用shell环境 [root@srv1 ~]# vim /etc/profile.d/rh-postgresql96.sh #!/bin/bash
source /opt/rh/rh-postgresql96/enable export X_SCLS="`scl enable rh-postgresql96 'echo $X_SCLS'`"

[root@srv1 ~]# source /etc/profile.d/rh-postgresql96.sh
[root@srv1 ~]# postgres -V postgres (PostgreSQL) 9.6.10
3) 启动Postgresql数据库 [root@srv1 ~]# postgresql-setup --initdb --unit rh-postgresql96-postgresql * Initializing database in '/var/opt/rh/rh-postgresql96/lib/pgsql/data' * Initialized, logs are in /var/lib/pgsql/initdb_rh-postgresql96-postgresql.log
[root@srv1 ~]# vim /var/opt/rh/rh-postgresql96/lib/pgsql/data/postgresql.conf # 取消59行注释,并允许所有主机进行远程访问 listen_addresses = '*' # 取消433行注释,并指定日志格式(%t:时间戳,%u:用户名,%d:数据库名) log_line_prefix = '%t %u %d'
[root@srv1 ~]# systemctl enable --now rh-postgresql96-postgresql
4) 创建Redmine数据库 [root@srv1 ~]# vim /var/opt/rh/rh-postgresql96/lib/pgsql/data/pg_hba.conf # 修改82,84行 host all all 127.0.0.1/32 ident host all all 127.0.0.1/32 md5 host all all ::1/128 md5
[root@srv1 ~]# systemctl restart rh-postgresql96-postgresql
# 设定密码,密码为123456 [root@srv1 ~]# su - postgres -bash-4.2$ createuser redmine -bash-4.2$ createdb redmine -O redmine -bash-4.2$ psql -c "alter user redmine with password '123456'" ALTER ROLE -bash-4.2$ exit [root@srv1 ~]#
1.4 安装及配置MariaDB数据库(数据库选择其一)
1) 安装MariaDB
[root@srv1 ~]# yum install mariadb-server -y
[root@srv1 ~]# vim /etc/my.cnf # 于[mysqld]最尾部追加如下内容: character-set-server=utf8
[root@srv1 ~]# systemctl enable --now mariadb
2) 初始化MariaDB [root@srv1 ~]# mysql_secure_installation
NOTE: RUNNING ALL PARTS OF THIS SCRIPT IS RECOMMENDED FOR ALL MariaDB SERVERS IN PRODUCTION USE! PLEASE READ EACH STEP CAREFULLY! In order to log into MariaDB to secure it, we'll need the current password for the root user. If you've just installed MariaDB, and you haven't set the root password yet, the password will be blank, so you should just press enter here.
Enter current password for root (enter for none): # enter OK, successfully used password, moving on...
Setting the root password ensures that nobody can log into the MariaDB root user without the proper authorisation.
Set root password? [Y/n] y # 设置root密码 New password: Re-enter new password: Password updated successfully! Reloading privilege tables.. ... Success!

By default, a MariaDB installation has an anonymous user, allowing anyone to log into MariaDB without having to have a user account created for them. This is intended only for testing, and to make the installation go a bit smoother. You should remove them before moving into a production environment.
Remove anonymous users? [Y/n] y # 移除anonymous账户 ... Success!
Normally, root should only be allowed to connect from 'localhost'. This ensures that someone cannot guess at the root password from the network.
Disallow root login remotely? [Y/n] y # 禁用root远程登录 ... Success!
By default, MariaDB comes with a database named 'test' that anyone can access. This is also intended only for testing, and should be removed before moving into a production environment.
Remove test database and access to it? [Y/n] y # 移除test数据库 - Dropping test database... ... Success! - Removing privileges on test database... ... Success!
Reloading the privilege tables will ensure that all changes made so far will take effect immediately.
Reload privilege tables now? [Y/n] y # 重新加载privilege ... Success!
Cleaning up...
All done! If you've completed all of the above steps, your MariaDB installation should now be secure.
Thanks for using MariaDB!
3) 测试MariaDB连接 [root@srv1 ~]# mysql -u root -p Enter password: # 输入密码 Welcome to the MariaDB monitor. Commands end with ; or \g. Your MariaDB connection id is 16 Server version: 10.1.20-MariaDB MariaDB Server
Copyright (c) 2000, 2018, Oracle, MariaDB Corporation Ab and others.
Type 'help;' or '\h' for help. Type '\c' to clear the current input statement.
MariaDB [(none)]> select user,host,password from mysql.user; +------+-----------+-------------------------------------------+ | user | host | password | +------+-----------+-------------------------------------------+ | root | localhost | *6BB4837EB74329105EE4568DDA7DC67ED2CA2AD9 | | root | 127.0.0.1 | *6BB4837EB74329105EE4568DDA7DC67ED2CA2AD9 | | root | ::1 | *6BB4837EB74329105EE4568DDA7DC67ED2CA2AD9 | +------+-----------+-------------------------------------------+ 3 rows in set (0.00 sec)
MariaDB [(none)]> show databases; +--------------------+ | Database | +--------------------+ | information_schema | | mysql | | performance_schema | +--------------------+ 3 rows in set (0.00 sec)
MariaDB [(none)]> exit Bye [root@srv1 ~]#
4) 防火墙规则设定 [root@srv1 ~]# firewall-cmd --add-service=mysql --permanent success [root@srv1 ~]# firewall-cmd --reload success
5) 创建redmine数据库并设定访问权限 [root@srv1 ~]# mysql -u root -p Enter password: Welcome to the MariaDB monitor. Commands end with ; or \g. Your MariaDB connection id is 12 Server version: 10.1.20-MariaDB MariaDB Server
Copyright (c) 2000, 2016, Oracle, MariaDB Corporation Ab and others.
Type 'help;' or '\h' for help. Type '\c' to clear the current input statement.
MariaDB [(none)]> create database redmine; Query OK, 1 row affected (0.00 sec)
MariaDB [(none)]> grant all privileges on redmine.* to redmine@'localhost' identified by '123456'; Query OK, 0 rows affected (0.00 sec)
MariaDB [(none)]> grant all privileges on redmine.* to redmine@'%' identified by '123456'; Query OK, 0 rows affected (0.00 sec)
MariaDB [(none)]> flush privileges; Query OK, 0 rows affected (0.00 sec)
MariaDB [(none)]> exit Bye
1.5 安装Ruby2.4
1) 安装Ruby2.4
[root@srv1 ~]# yum --enablerepo=centos-sclo-rh install rh-ruby24 -y
2) 配置Ruby2.4的Shell环境 [root@srv1 ~]# scl enable rh-ruby24 bash
[root@srv1 ~]# ruby -v ruby 2.4.6p354 (2019-04-01 revision 67394) [x86_64-linux]
[root@srv1 ~]# which ruby /opt/rh/rh-ruby24/root/usr/bin/ruby
[root@srv1 ~]# vim /etc/profile.d/rh-ruby24.sh #!/bin/bash
source /opt/rh/rh-ruby24/enable export X_SCLS="`scl enable rh-ruby24 'echo $X_SCLS'`"
1.6 安装一些所需的工具软件
[root@srv1 ~]# yum --enablerepo=centos-sclo-rh install rh-postgresql96-postgresql-devel \
rh-ruby24-ruby-devel openssl-devel libxslt-devel libxml2-devel gcc gcc-c++ make patch ImageMagick ImageMagick-devel \
libcurl-devel httpd-devel ipa-pgothic-fonts -y
2. 安装Redmine
1) 安装Redmine
[root@srv1 ~]# curl -O https://www.redmine.org/releases/redmine-4.1.0.tar.gz
[root@srv1 ~]# tar xfz redmine-4.1.0.tar.gz -C /var/www/ [root@srv1 ~]# mv /var/www/redmine-4.1.0 /var/www/redmine
2) 配置Redmine [root@srv1 ~]# vim /var/www/redmine/config/database.yml production: adapter: postgresql # 如果使用的MariaDB,则定义为mysql2 # 定义数据库名称 database: redmine host: localhost # 定义数据库账户 username: redmine # 定义数据库密码 password: 123456 encoding: utf8
[root@srv1 ~]# vim config/configuration.yml [root@srv1 ~]# vim /var/www/redmine/config/configuration.yml production: email_delivery: delivery_method: :smtp smtp_settings: address: "localhost" port: 25 domain: 'srv1.1000cc.net' rmagick_font_path: /usr/share/fonts/ipa-pgothic/ipagp.ttf
3) Redmine其他配置 (1) 安装bundler [root@srv1 ~]# cd /var/www/redmine/ [root@srv1 redmine]# gem install bundler --no-rdoc --no-ri
(2) 安装Gems(请确认用哪个数据库) [root@srv1 redmine]# bundle install --without development test mysql sqlite

[root@srv1 redmine]# bundle install --without development test postgresql sqlite
(3) 生成key [root@srv1 redmine]# bundle exec rake generate_secret_token
(4) 生成tables [root@srv1 redmine]# bundle exec rake db:migrate RAILS_ENV=production
(5) 安装Passenger [root@srv1 redmine]# gem install passenger --no-rdoc --no-ri
(6) 安装模块 [root@srv1 redmine]# passenger-install-apache2-module Welcome to the Phusion Passenger Apache 2 module installer, v6.0.4.
This installer will guide you through the entire installation process. It shouldn't take more than 3 minutes in total.
Here's what you can expect from the installation process:
1. The Apache 2 module will be installed for you. 2. You'll learn how to configure Apache. 3. You'll learn how to deploy a Ruby on Rails application.
Don't worry if anything goes wrong. This installer will advise you on how to solve any problems.
Press Enter to continue, or Ctrl-C to abort. 1
--------------------------------------------
Which languages are you interested in?
Use <space> to select. If the menu doesn't display correctly, press '!'
‣ ⬢ Ruby ⬢ Python ⬡ Node.js ⬡ Meteor # 回车 ...... ...... Enjoy Phusion Passenger, a product of Phusion® (www.phusion.nl) :-) https://www.phusionpassenger.com
Passenger® is a registered trademark of Phusion Holding B.V.
4) 配置httpd [root@srv1 ~]# vim /etc/httpd/conf.d/passenger.conf LoadModule passenger_module /opt/rh/rh-ruby24/root/usr/local/share/gems/gems/passenger-6.0.4/buildout/apache2/mod_passenger.so PassengerRoot /opt/rh/rh-ruby24/root/usr/local/share/gems/gems/passenger-6.0.4 PassengerDefaultRuby /opt/rh/rh-ruby24/root/usr/bin/ruby SetEnv LD_LIBRARY_PATH /opt/rh/rh-ruby24/root/usr/lib64
NameVirtualHost *:80 <VirtualHost *:80> ServerName redmine.1000cc.net DocumentRoot /var/www/redmine/public </VirtualHost>

[root@srv1 ~]# chown -R apache. /var/www/redmine [root@srv1 ~]# systemctl restart httpd
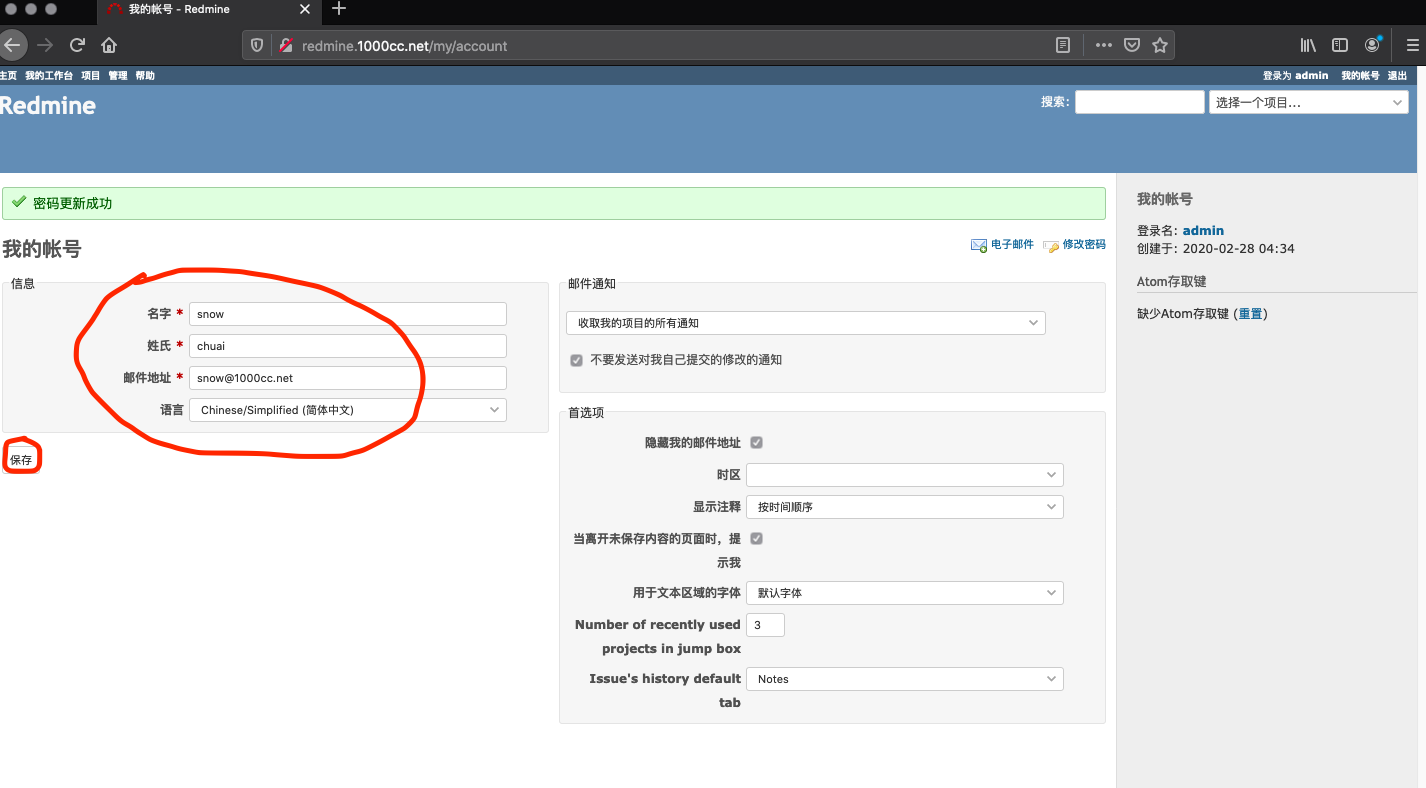
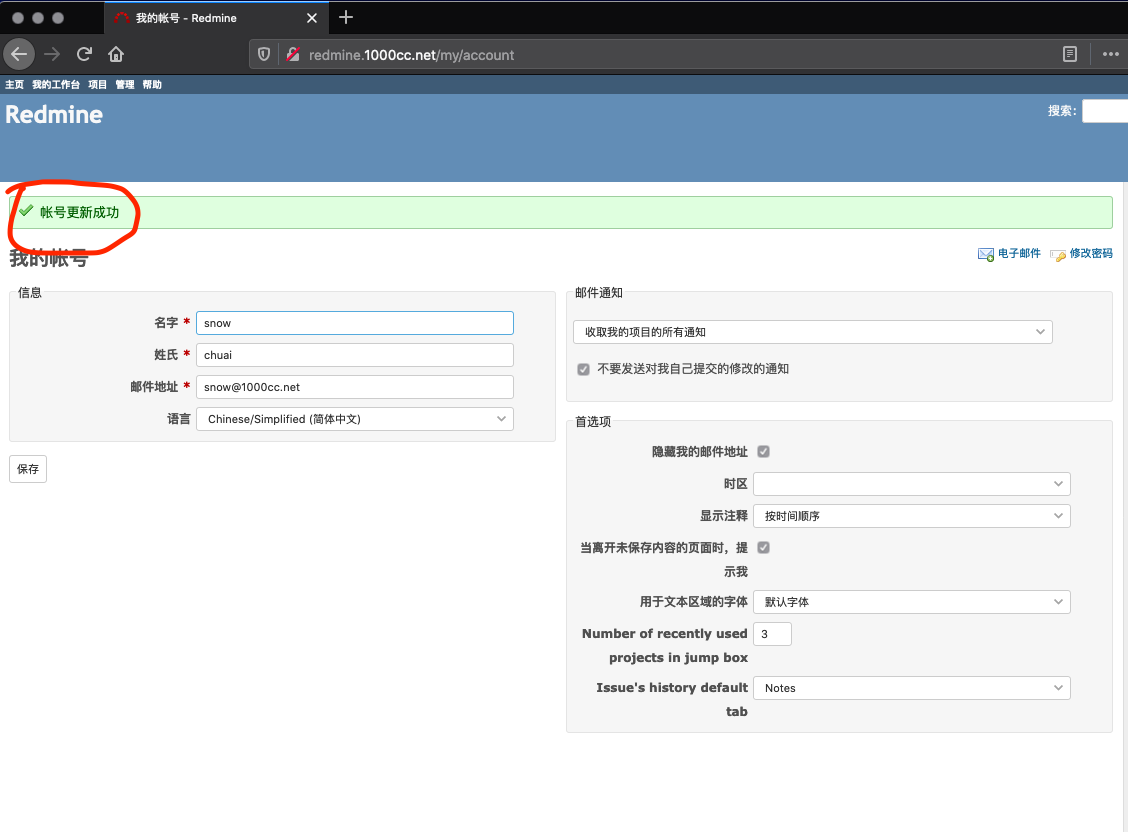
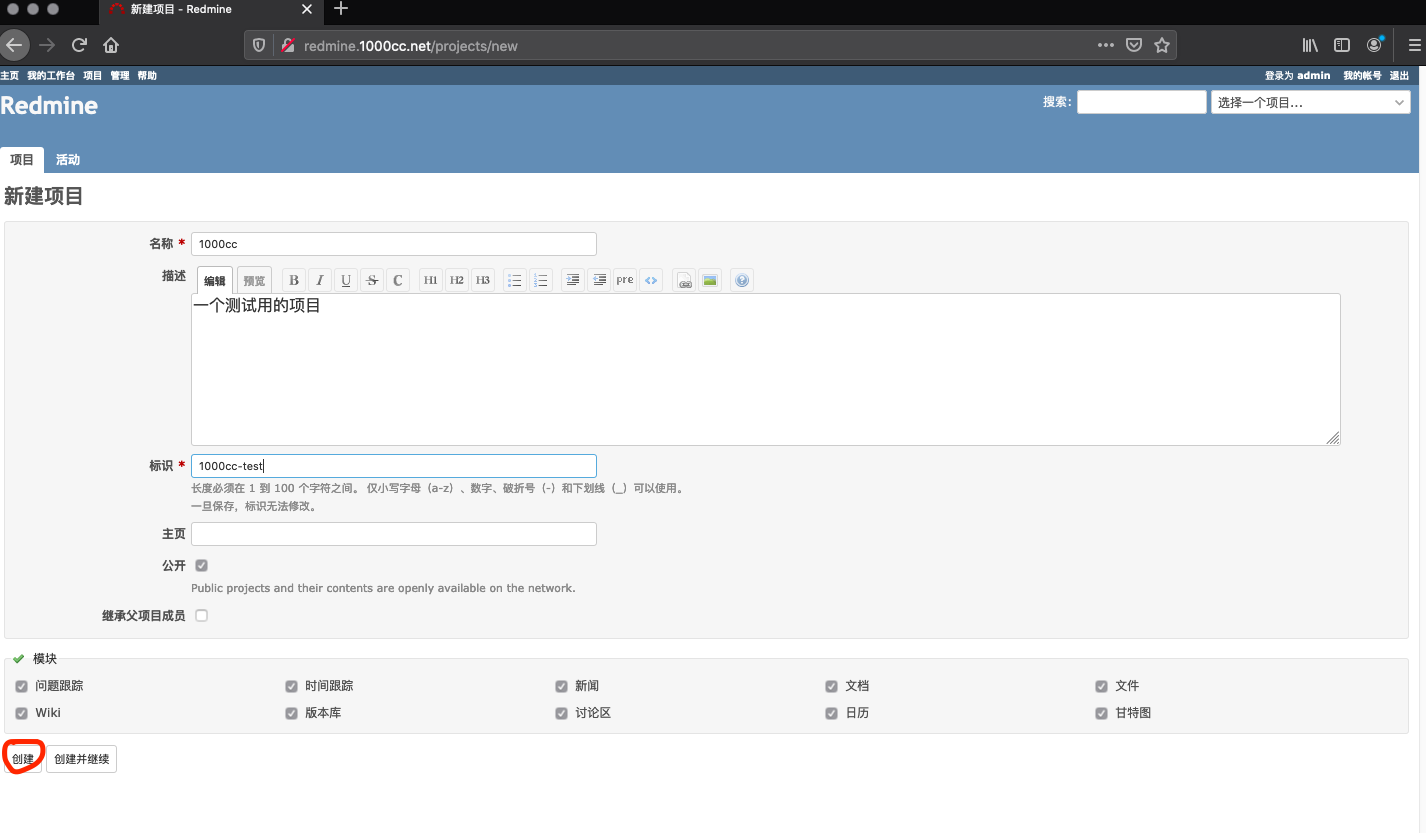
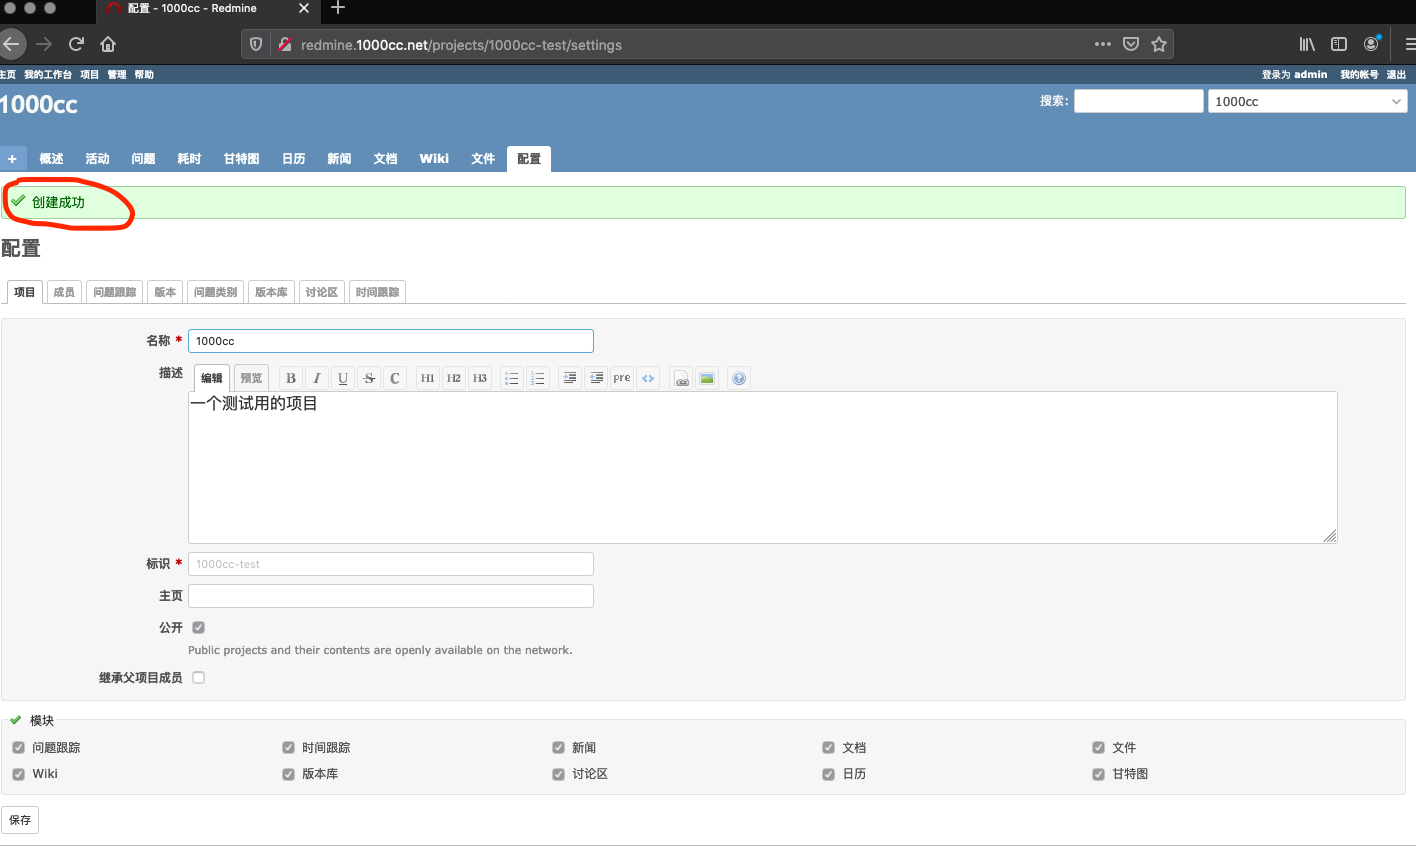
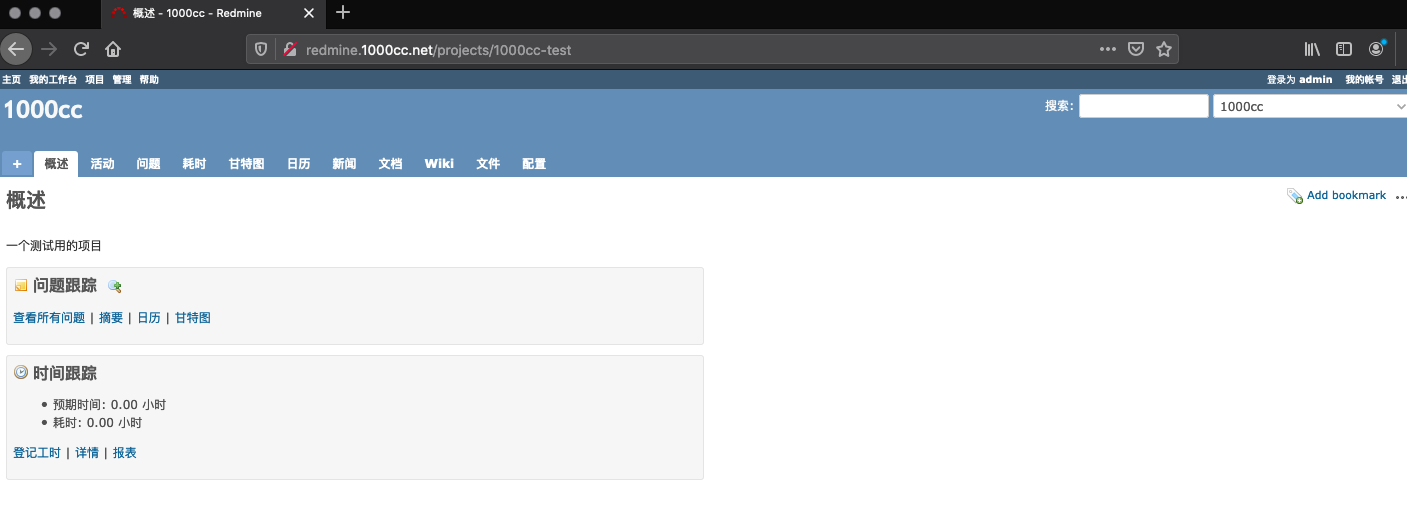
3. 访问Redmine并创建一个项目
[浏览器]===>http://redmine.1000cc.net


如对您有帮助,请随缘打个赏。^-^

gold