Zabbix配置手册-5.0 LTS
版本发布时间:2020-05-11
snow chuai汇总、整理、撰写---2022/08/24
最后更新日期---2020/12/18
1. 安装及配置Zabbix5.0 LTS
1.1 安装httpd和PHP7
[root@srv1 ~]# yum install yum-plugin-priorities -y [root@srv1 ~]# yum install http://rpms.famillecollet.com/enterprise/remi-release-7.rpm -y [root@srv1 ~]# sed -i -e "s/\]$/\]\npriority=10/g" /etc/yum.repos.d/remi-safe.repo [root@srv1 ~]# sed -i -e "s/enabled=1/enabled=0/g" /etc/yum.repos.d/remi-safe.repo
[root@srv1 ~]# yum --enablerepo=remi-safe,epel install php74 php74-php-pear php74-php-mbstring -y
[root@srv1 ~]# scl enable php74 bash [root@srv1 ~]# php -v PHP 7.4.33 (cli) (built: Feb 14 2023 08:49:52) ( NTS ) Copyright (c) The PHP Group Zend Engine v3.4.0, Copyright (c) Zend Technologies
[root@srv1 ~]# vim /etc/profile.d/php74.sh #!/bin/bash
source /opt/remi/php74/enable export X_SCLS="`scl enable php74 'echo $X_SCLS'`"
[root@srv1 ~]# yum --enablerepo=remi-safe,epel -y install php74-php [root@srv1 ~]# systemctl enable --now httpd
[root@srv1 ~]# echo '<?php phpinfo(); ?>' > /var/www/html/info.php [root@srv1 ~]# curl http://localhost/info.php | grep 'PHP Version' | tail -1 | sed -e 's/<[^>]*>//g' % Total % Received % Xferd Average Speed Time Time Time Current Dload Upload Total Spent Left Speed 100 68986 0 68986 0 0 1309k 0 --:--:-- --:--:-- --:--:-- 1320k PHP Version 7.4.331.2 安装及配置MariaDB
[root@srv1 ~]# sed -i -e "s/\]$/\]\npriority=10/g" /etc/yum.repos.d/CentOS-SCLo-scl.repo [root@srv1 ~]# sed -i -e "s/\]$/\]\npriority=10/g" /etc/yum.repos.d/CentOS-SCLo-scl-rh.repo
[root@srv1 ~]# sed -i -e "s/enabled=1/enabled=0/g" /etc/yum.repos.d/CentOS-SCLo-scl.repo [root@srv1 ~]# sed -i -e "s/enabled=1/enabled=0/g" /etc/yum.repos.d/CentOS-SCLo-scl-rh.repo
[root@srv1 ~]# yum --enablerepo=centos-sclo-rh install rh-mariadb105-mariadb-server -y
2) 配置并启用MariaDB环境 [root@srv1 ~]# scl enable rh-mariadb105 bash [root@srv1 ~]# mysql -V mysql Ver 15.1 Distrib 10.5.16-MariaDB, for Linux (x86_64) using EditLine wrapper
[root@srv1 ~]# vim /etc/profile.d/rh-mariadb105.sh #! /bin/bash
source /opt/rh/rh-mariadb105/enable export X_SCLS="`scl enable rh-mariadb105 'echo $X_SCLS'`"
[root@srv1 ~]# vim /etc/my.cnf.d/charaset.cnf # 修改MariaDB默认字符集(latin1)改为utf8mb4 [mysqld] character-set-server = utf8mb4
[client] default-character-set = utf8mb4
[root@srv1 ~]# systemctl enable --now rh-mariadb105-mariadb
[root@srv1 ~]# mysql_secure_installation ...... ......
Thanks for using MariaDB!
1.3 安装Zabbix Server
1.4 配置Zabbix Server
mysql> grant all privileges on zabbix.* to zabbix@'localhost' identified by 'password'; Query OK, 0 rows affected (0.00 sec)
mysql> flush privileges; Query OK, 0 rows affected (0.00 sec)
mysql> exit Bye
[root@srv1 ~]# cd /usr/share/doc/zabbix-server-mysql-5.0.2/ [root@node1 zabbix-server-mysql]# gunzip create.sql.gz [root@node1 zabbix-server-mysql]# mysql -u root -p zabbix < create.sql Enter password: # 如果出现 "ERROR 1118 (42000) at line 1278: Row size too large (> 8126). Changing some columns to TEXT or BLOB may help. In current row format, BLOB prefix of 0 bytes is stored inline." 错误,请按以下步骤解决此错误 [root@node1 zabbix-server-mysql-4.0.17]# vim /etc/opt/rh/rh-mariadb102/my.cnf.d/mariadb-server.cnf # 在[mysqld]区段最后追加如下内容 max_allowed_packet = 256M innodb_buffer_pool_size = 512M innodb_log_file_size = 30M innodb_log_buffer_size = 32M
innodb_file_per_table = 1 innodb_large_prefix=1 innodb_file_format = Barracuda # innodb_strict_mode设置影响CREATE TABLE,ALTER TABLE和CREATE INDEX语句的语法错误的处理。innodb_strict_mode还启用了记录大小检查,因此INSERT或UPDATE永远不会失败,因为记录对于所选页面大小而言太大。 innodb_strict_mode = 0
[root@node1 zabbix-server-mysql-4.0.17]# systemctl restart rh-mariadb102-mariadb
# 错误解决完成之后,进入MariaDB使用drop database zabbix;指令删除数据库。并根据1.5小节中的第一步重新创建数据库及授权
[root@node1 zabbix-server-mysql]# cd
[root@srv1 ~]# vim /etc/zabbix/zabbix_server.conf # 更改92行,添加如下设定 DBHost=localhost
# 更改125行,设定Zabbix数据库密码 DBPassword=password
[root@srv1 ~]# systemctl enable --now zabbix-server
2) 设置SELinux [root@srv1 ~]# setsebool -P zabbix_can_network on [root@srv1 ~]# setsebool -P httpd_can_connect_zabbix on [root@srv1 ~]# setsebool -P domain_can_mmap_files on [root@srv1 ~]# setsebool -P daemons_enable_cluster_mode on [root@srv1 ~]# vim zabbix_server.te # create new module zabbix_server 1.0;
require { type zabbix_t; type zabbix_agent_t; type rpm_exec_t; type rpm_var_lib_t; class file { execute execute_no_trans map open }; class capability dac_override; }
#============= zabbix_t ============== allow zabbix_t self:capability dac_override;
#============= zabbix_agent_t ============== allow zabbix_agent_t rpm_var_lib_t:file open; allow zabbix_agent_t rpm_exec_t:file { execute execute_no_trans map };
[root@srv1 ~]# checkmodule -m -M -o zabbix_server.mod zabbix_server.te checkmodule: loading policy configuration from zabbix_server.te checkmodule: policy configuration loaded checkmodule: writing binary representation (version 17) to zabbix_server.mod
[root@srv1 ~]# semodule_package --outfile zabbix_server.pp --module zabbix_server.mod [root@srv1 ~]# semodule -i zabbix_server.pp
3) Firewalld设置 [root@srv1 ~]# firewall-cmd --add-service={http,https} --permanent success [root@srv1 ~]# firewall-cmd --add-port={10050/tcp,10051/tcp} --permanent success [root@srv1 ~]# firewall-cmd --reload success
4) 配置Zabbix Agentd [root@srv1 ~]# vim /etc/zabbix/zabbix_agentd.conf # 更改117行,指定Zabbix Server的IP Server=127.0.0.1
# 更改158行,指定Zabbix Server的IP ServerActive=127.0.0.1
# 更改169行,指定Zabbix Server的FQDN Hostname=srv1.1000y.cloud
[root@srv1 ~]# systemctl enable --now zabbix-agent
5) 为Zabbix Server配置httpd服务 [root@srv1 ~]# vim /etc/httpd/conf.d/zabbix.conf # 更改10行,允许指定网络访问 #Require all granted Require ip 127.0.0.1 192.168.10.0/24
6) 定义zabbix的timezone [root@srv1 ~]# vim /etc/opt/rh/rh-php72/php-fpm.d/zabbix.conf # 更改24行 php_value[date.timezone] = Asia/Shanghai
[root@srv1 ~]# systemctl enable --now httpd rh-php72-php-fpm
2. 初始化Zabbix Server
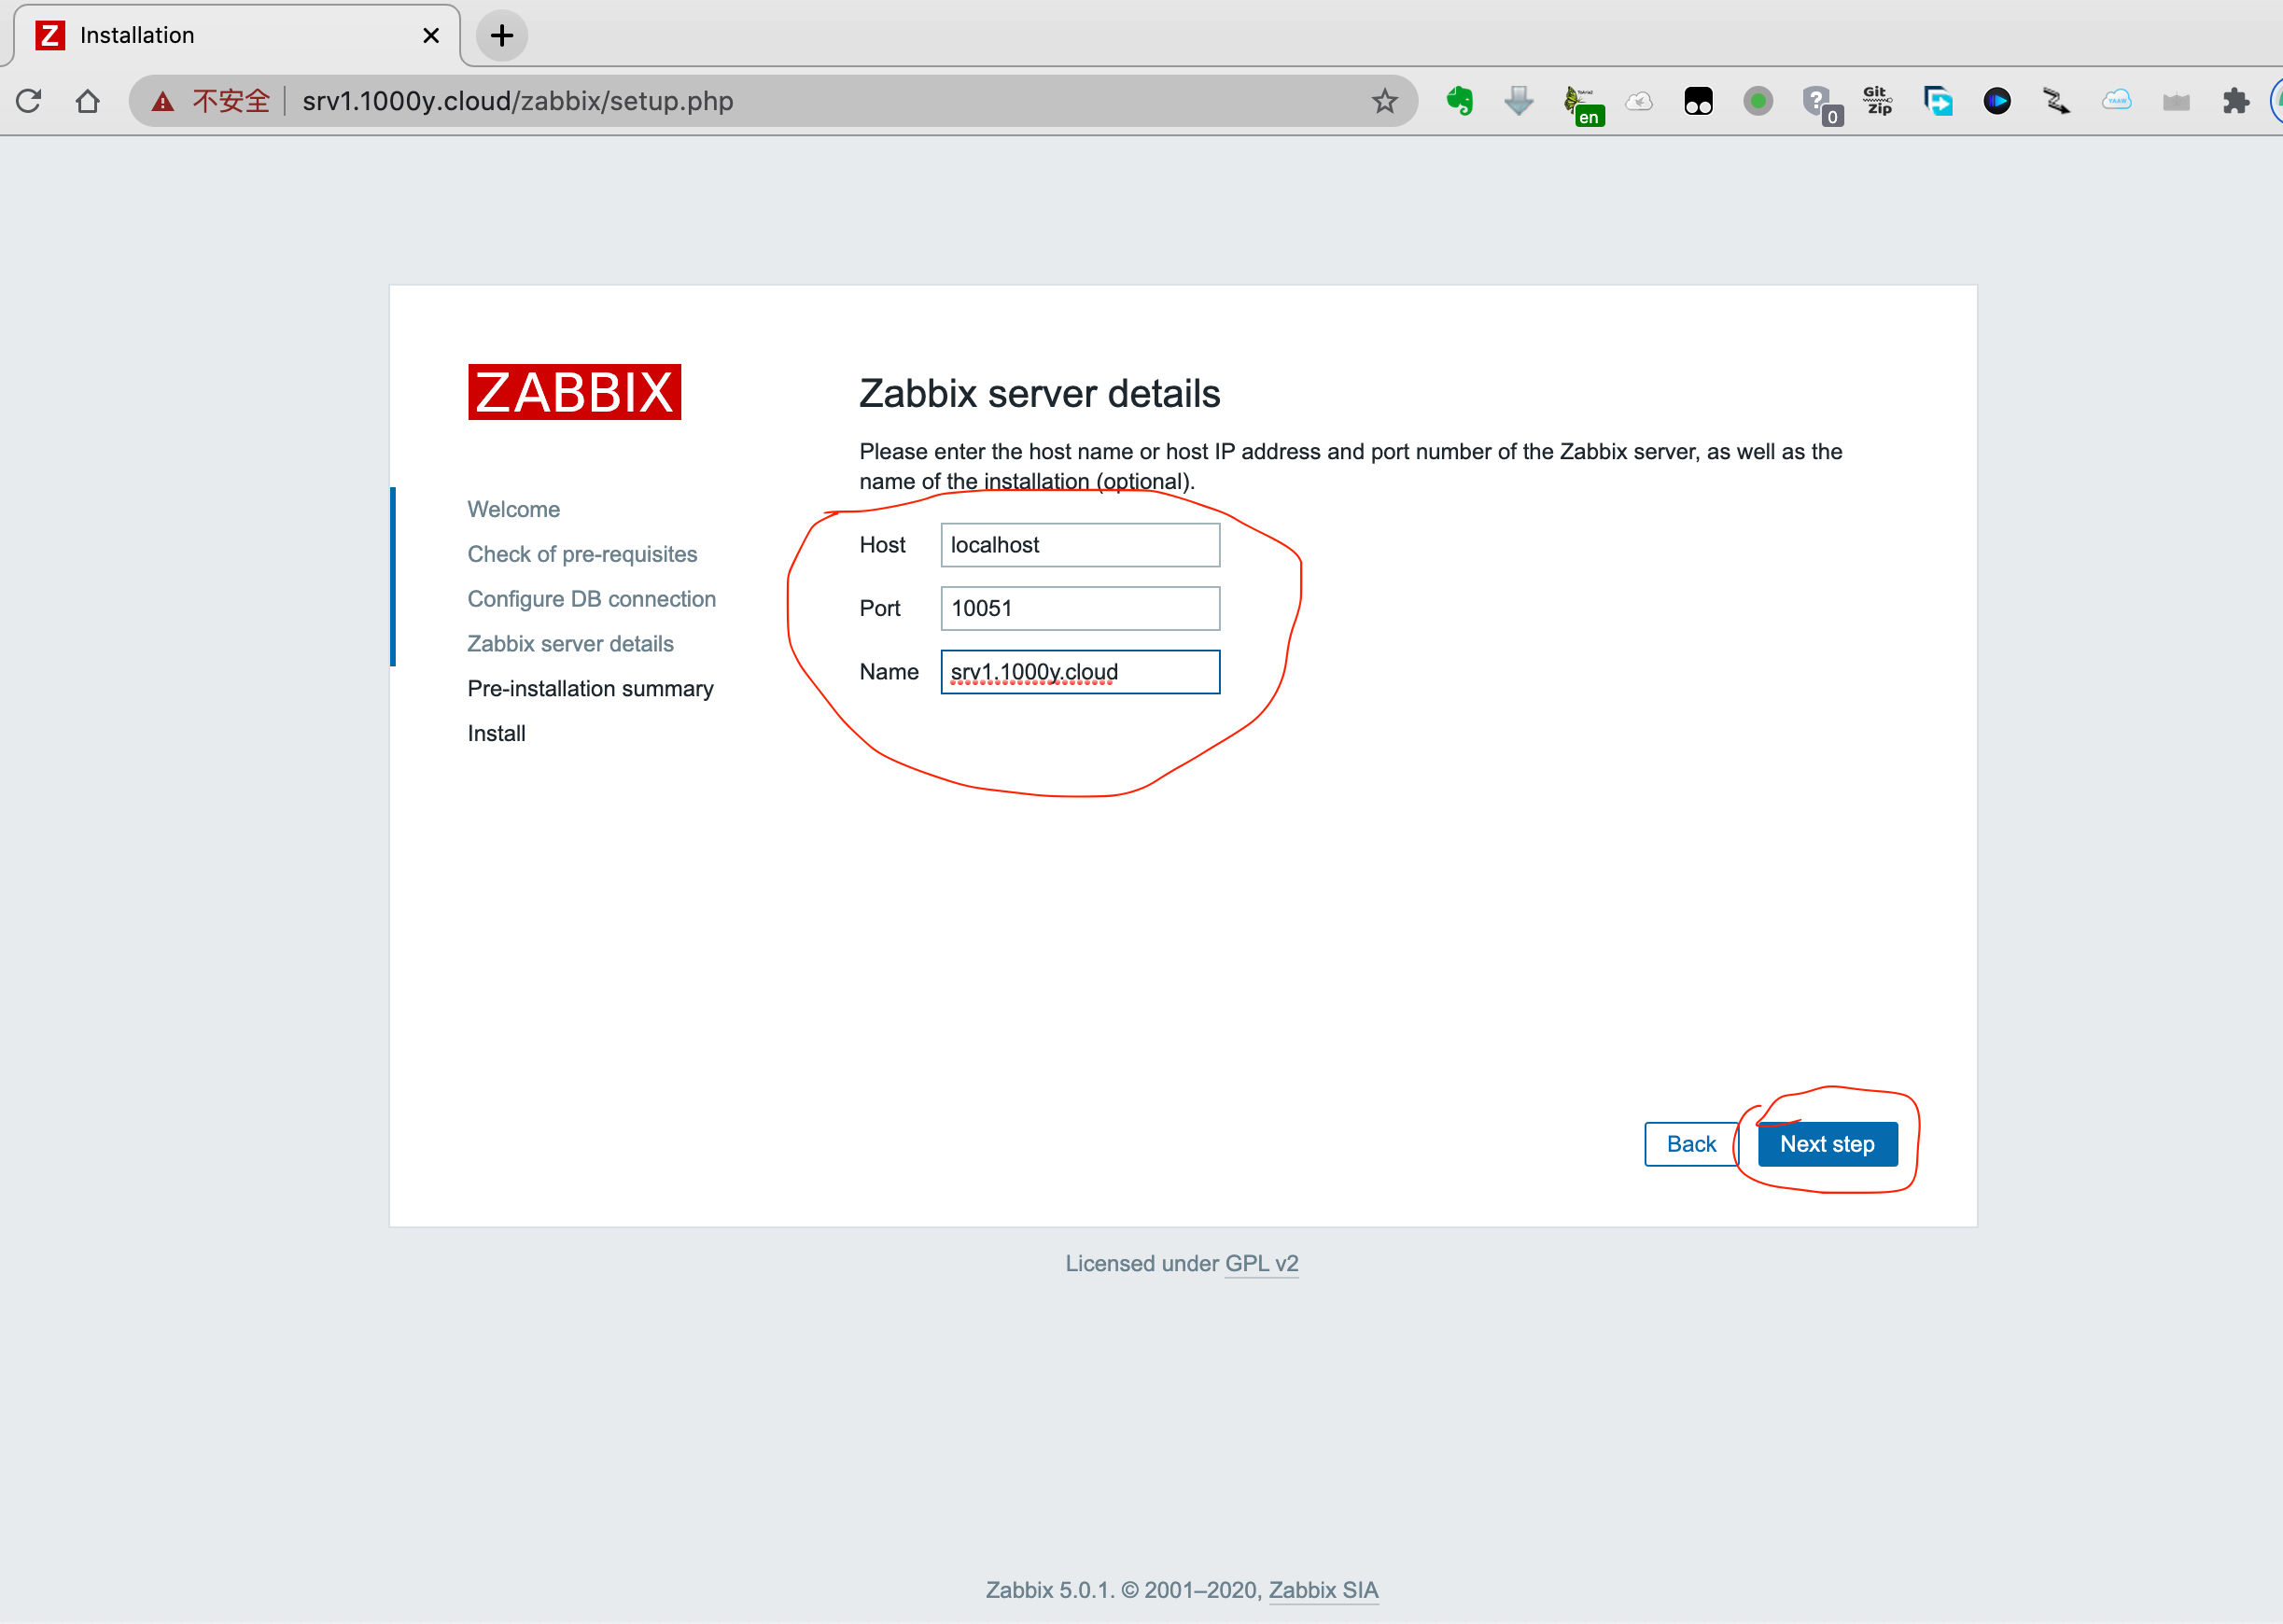
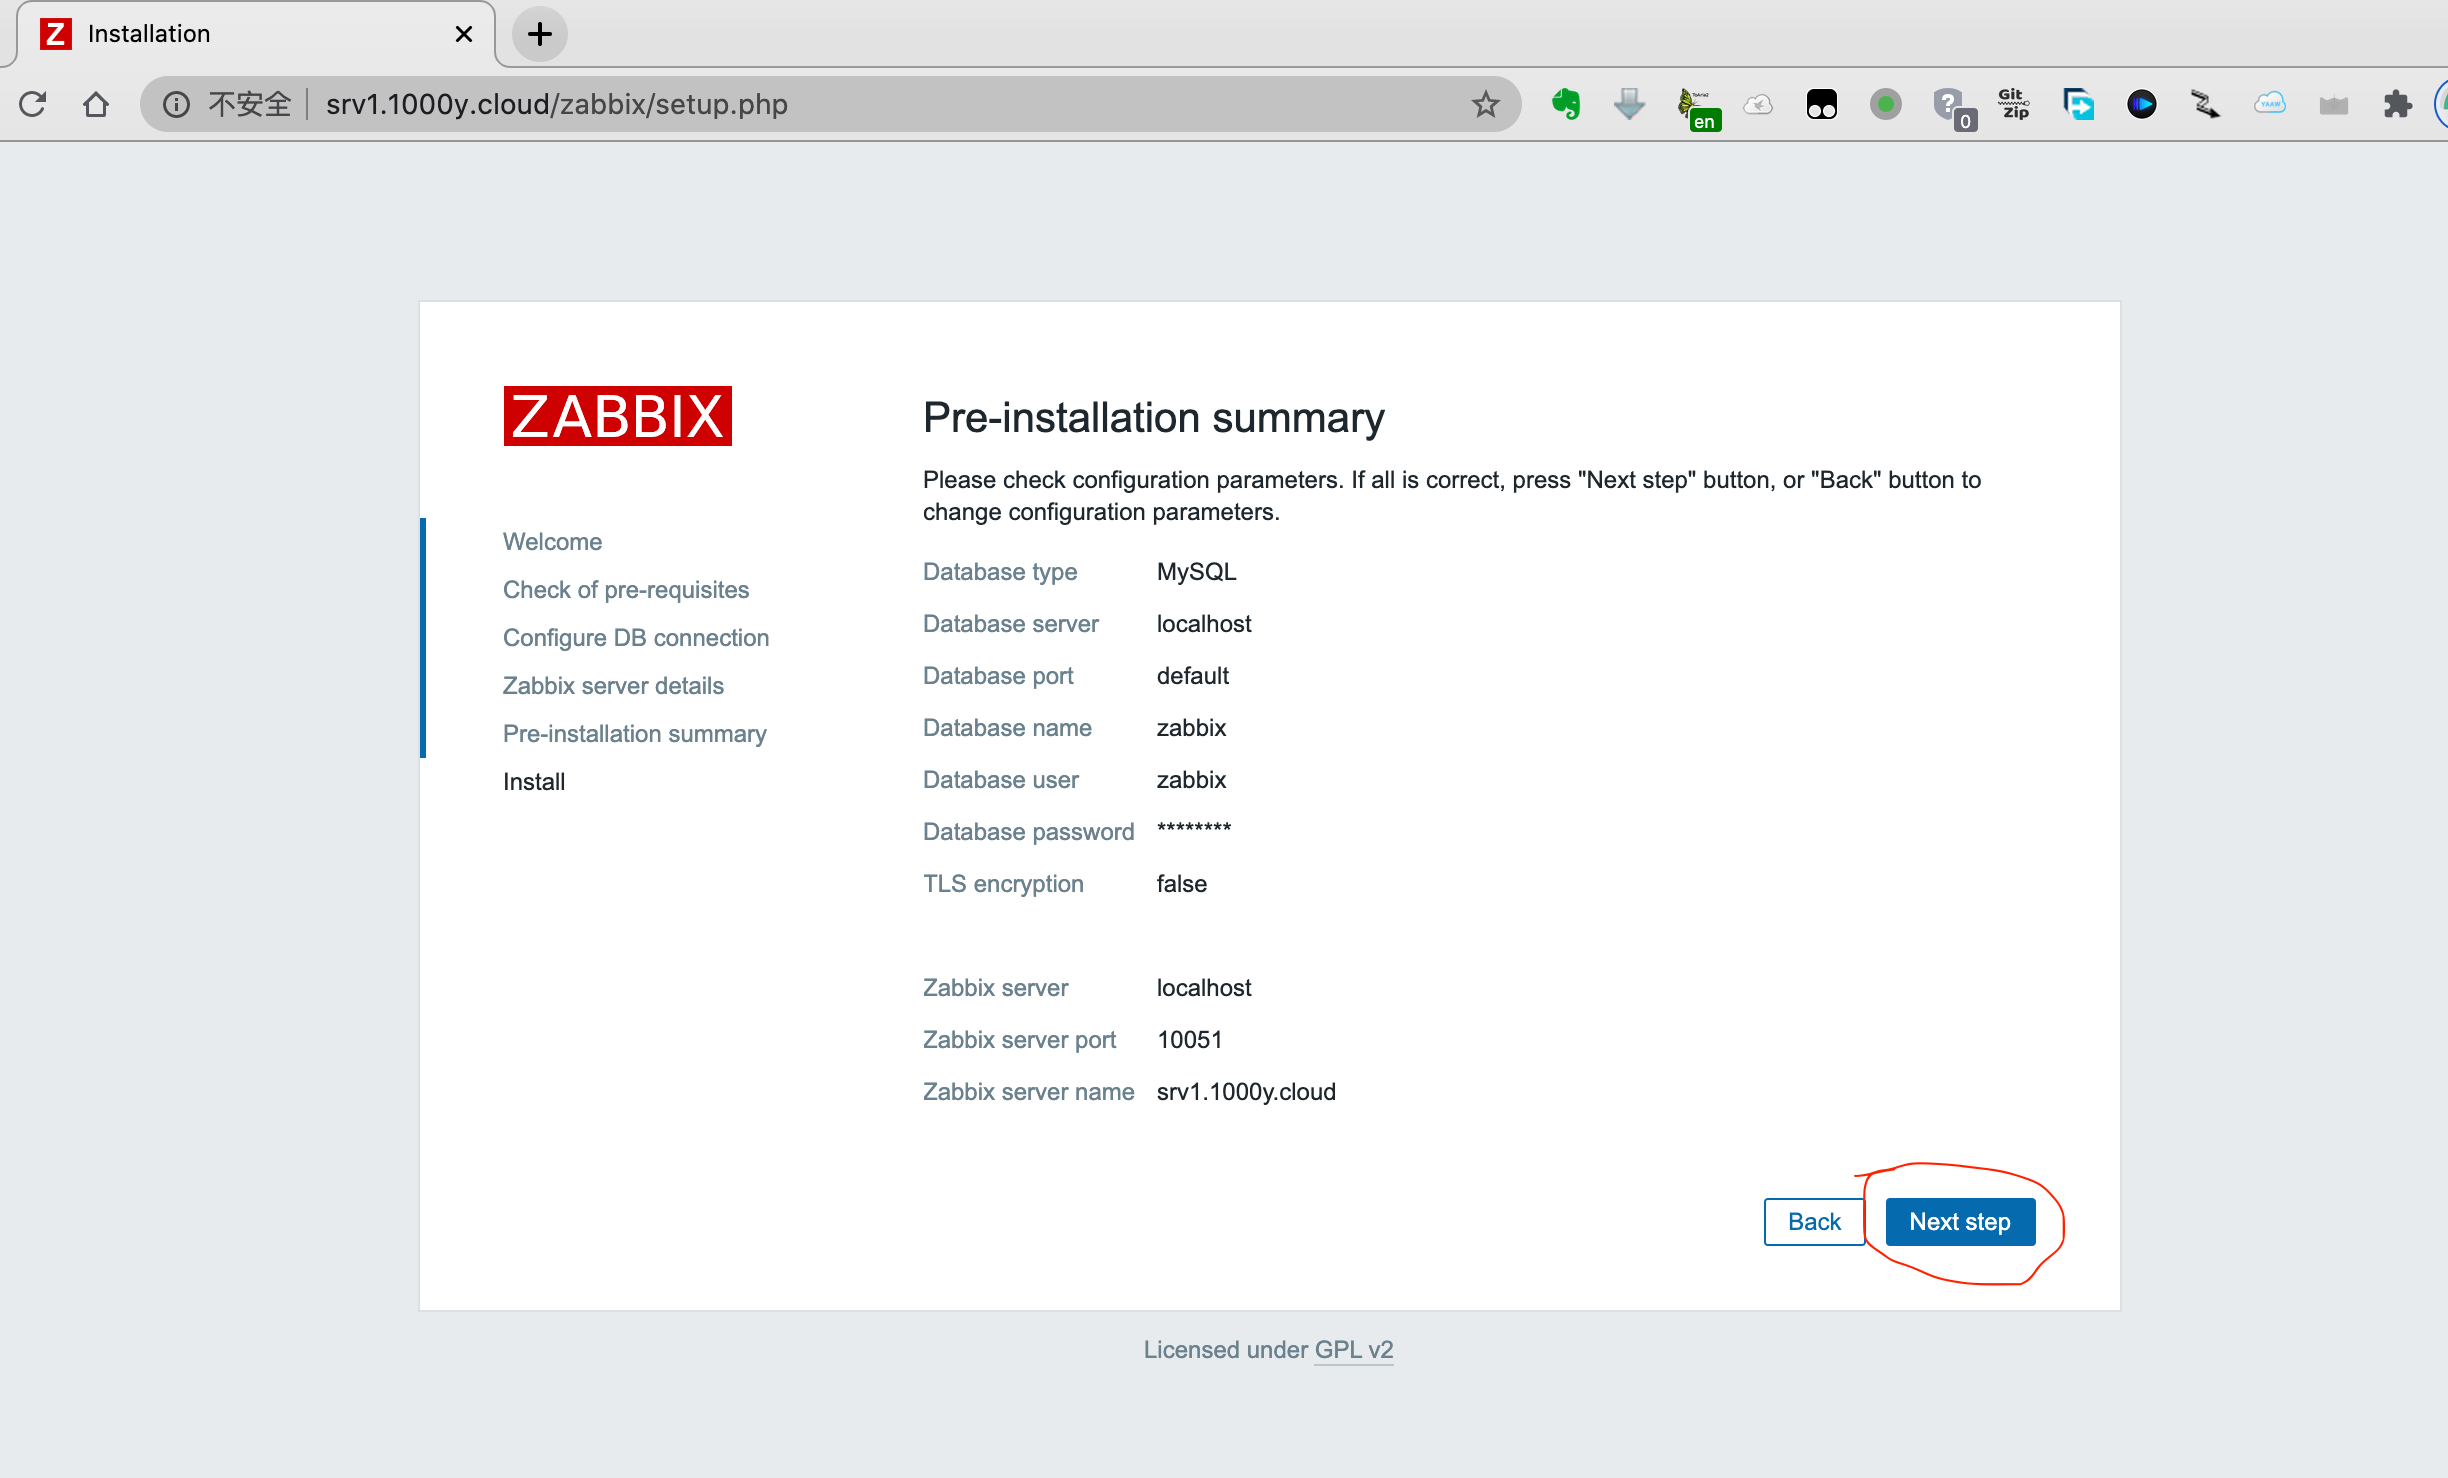
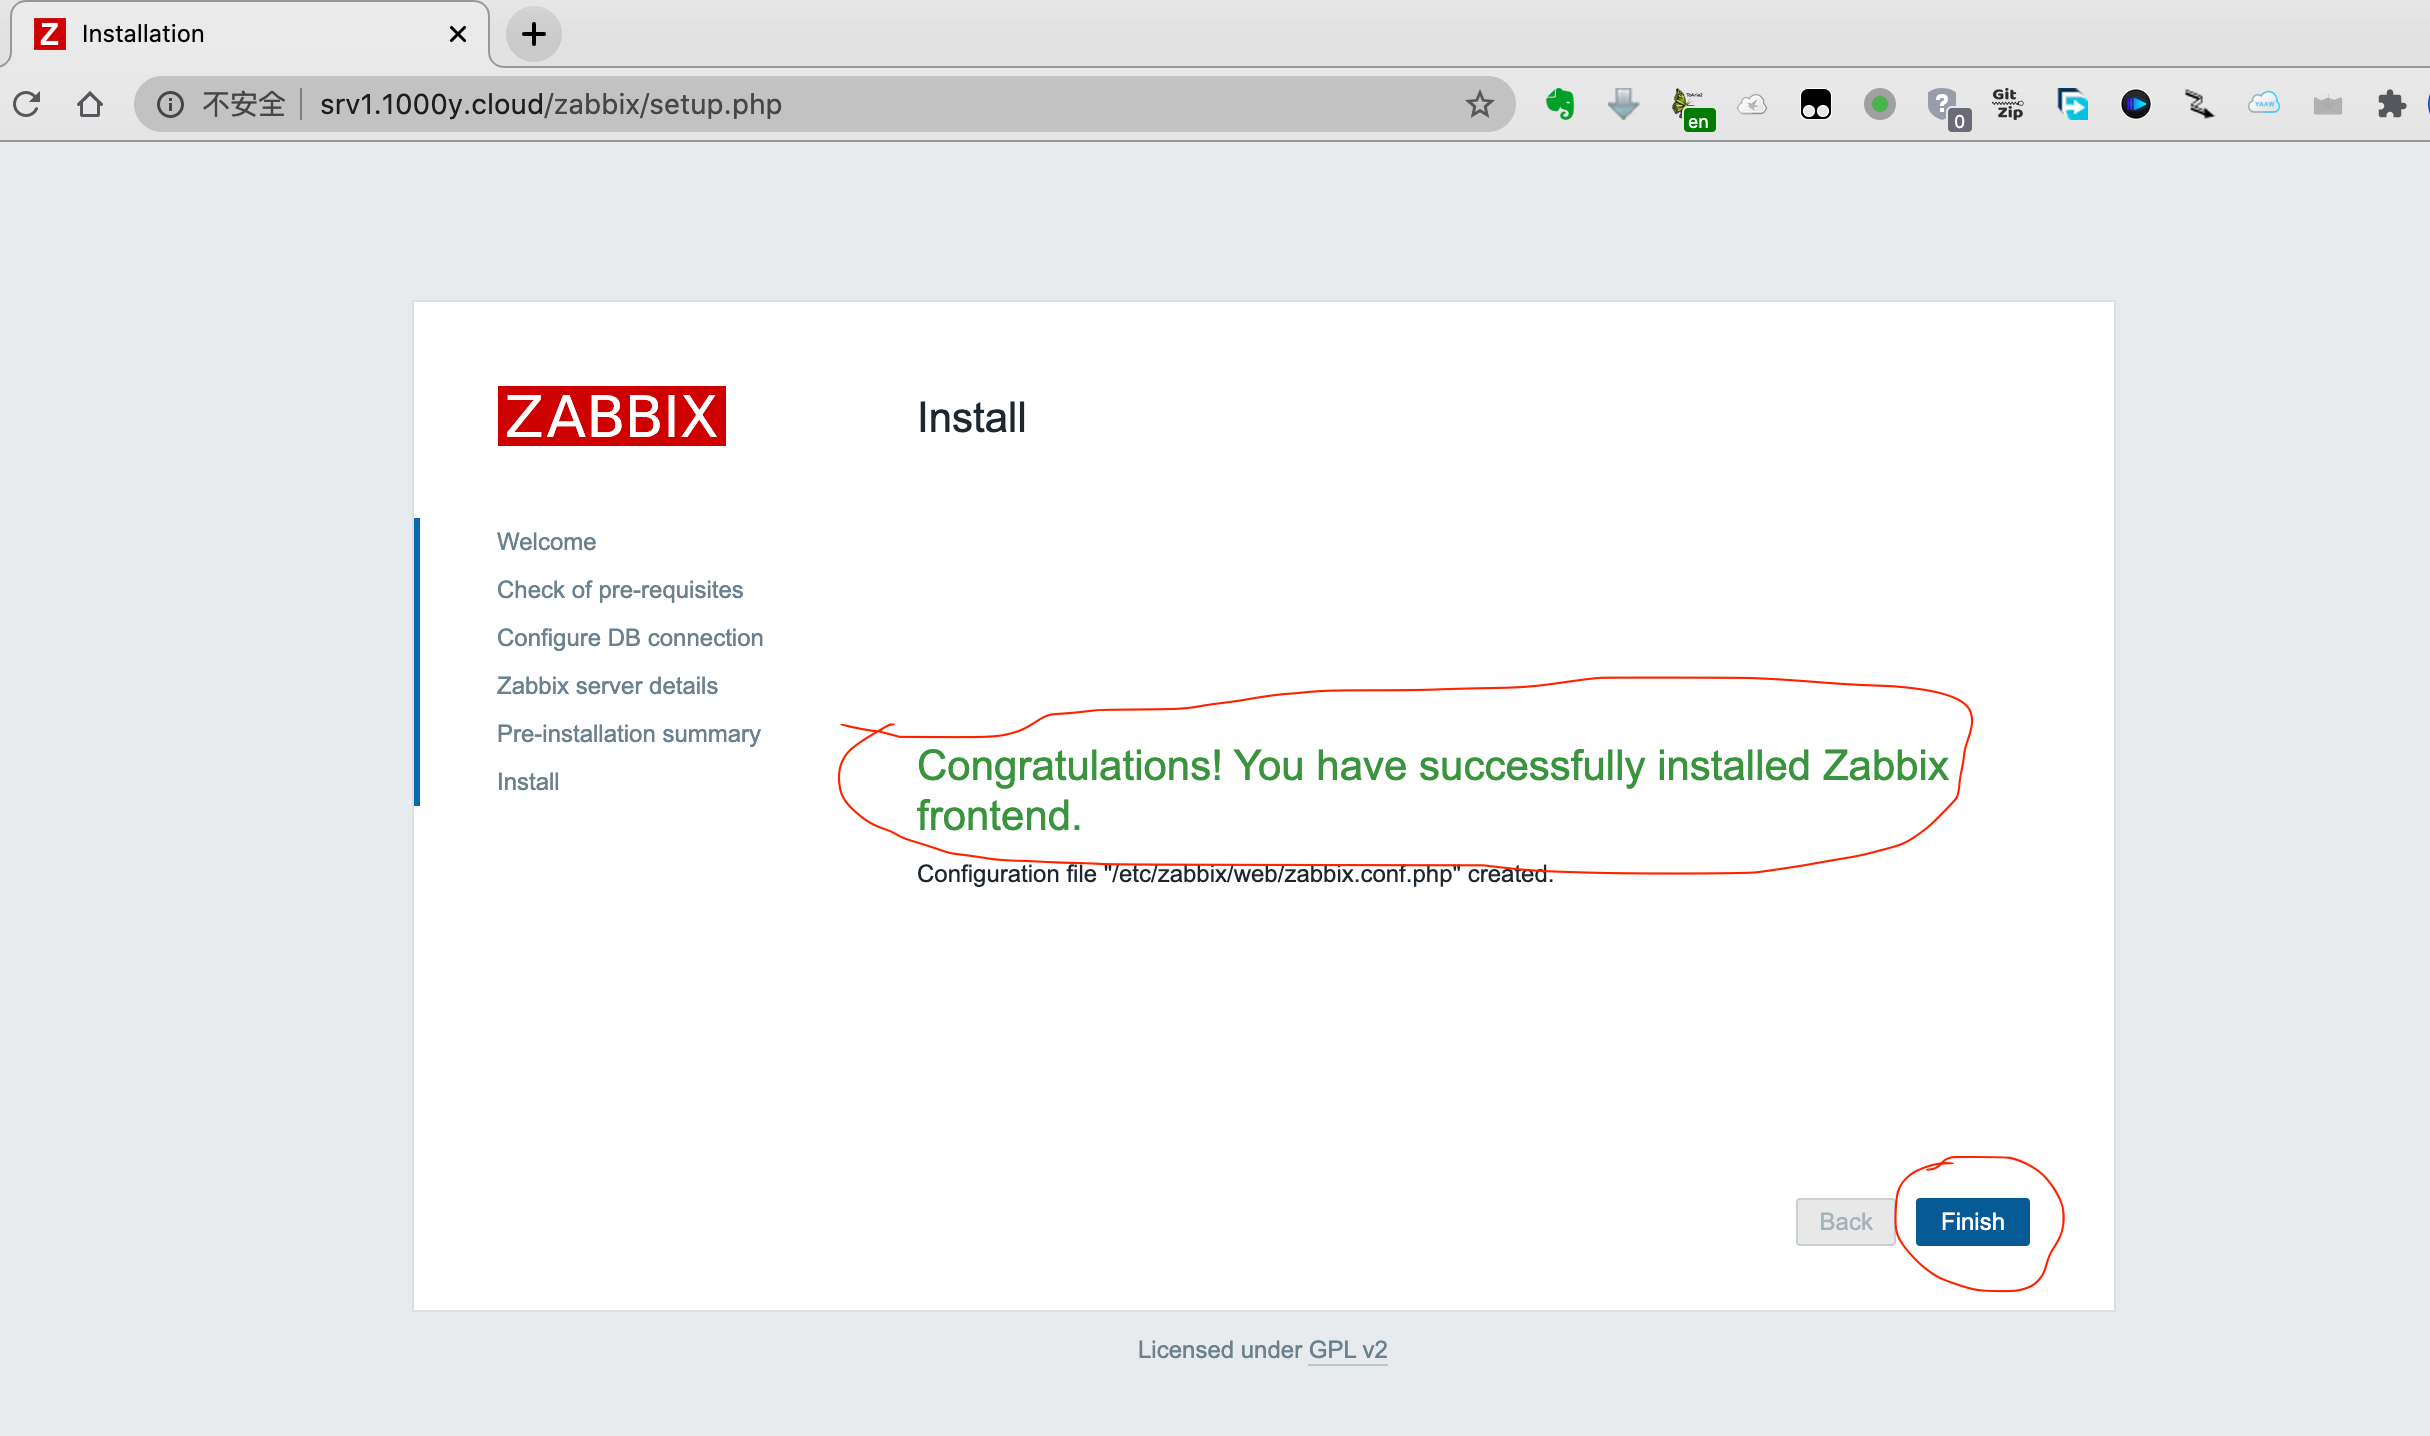
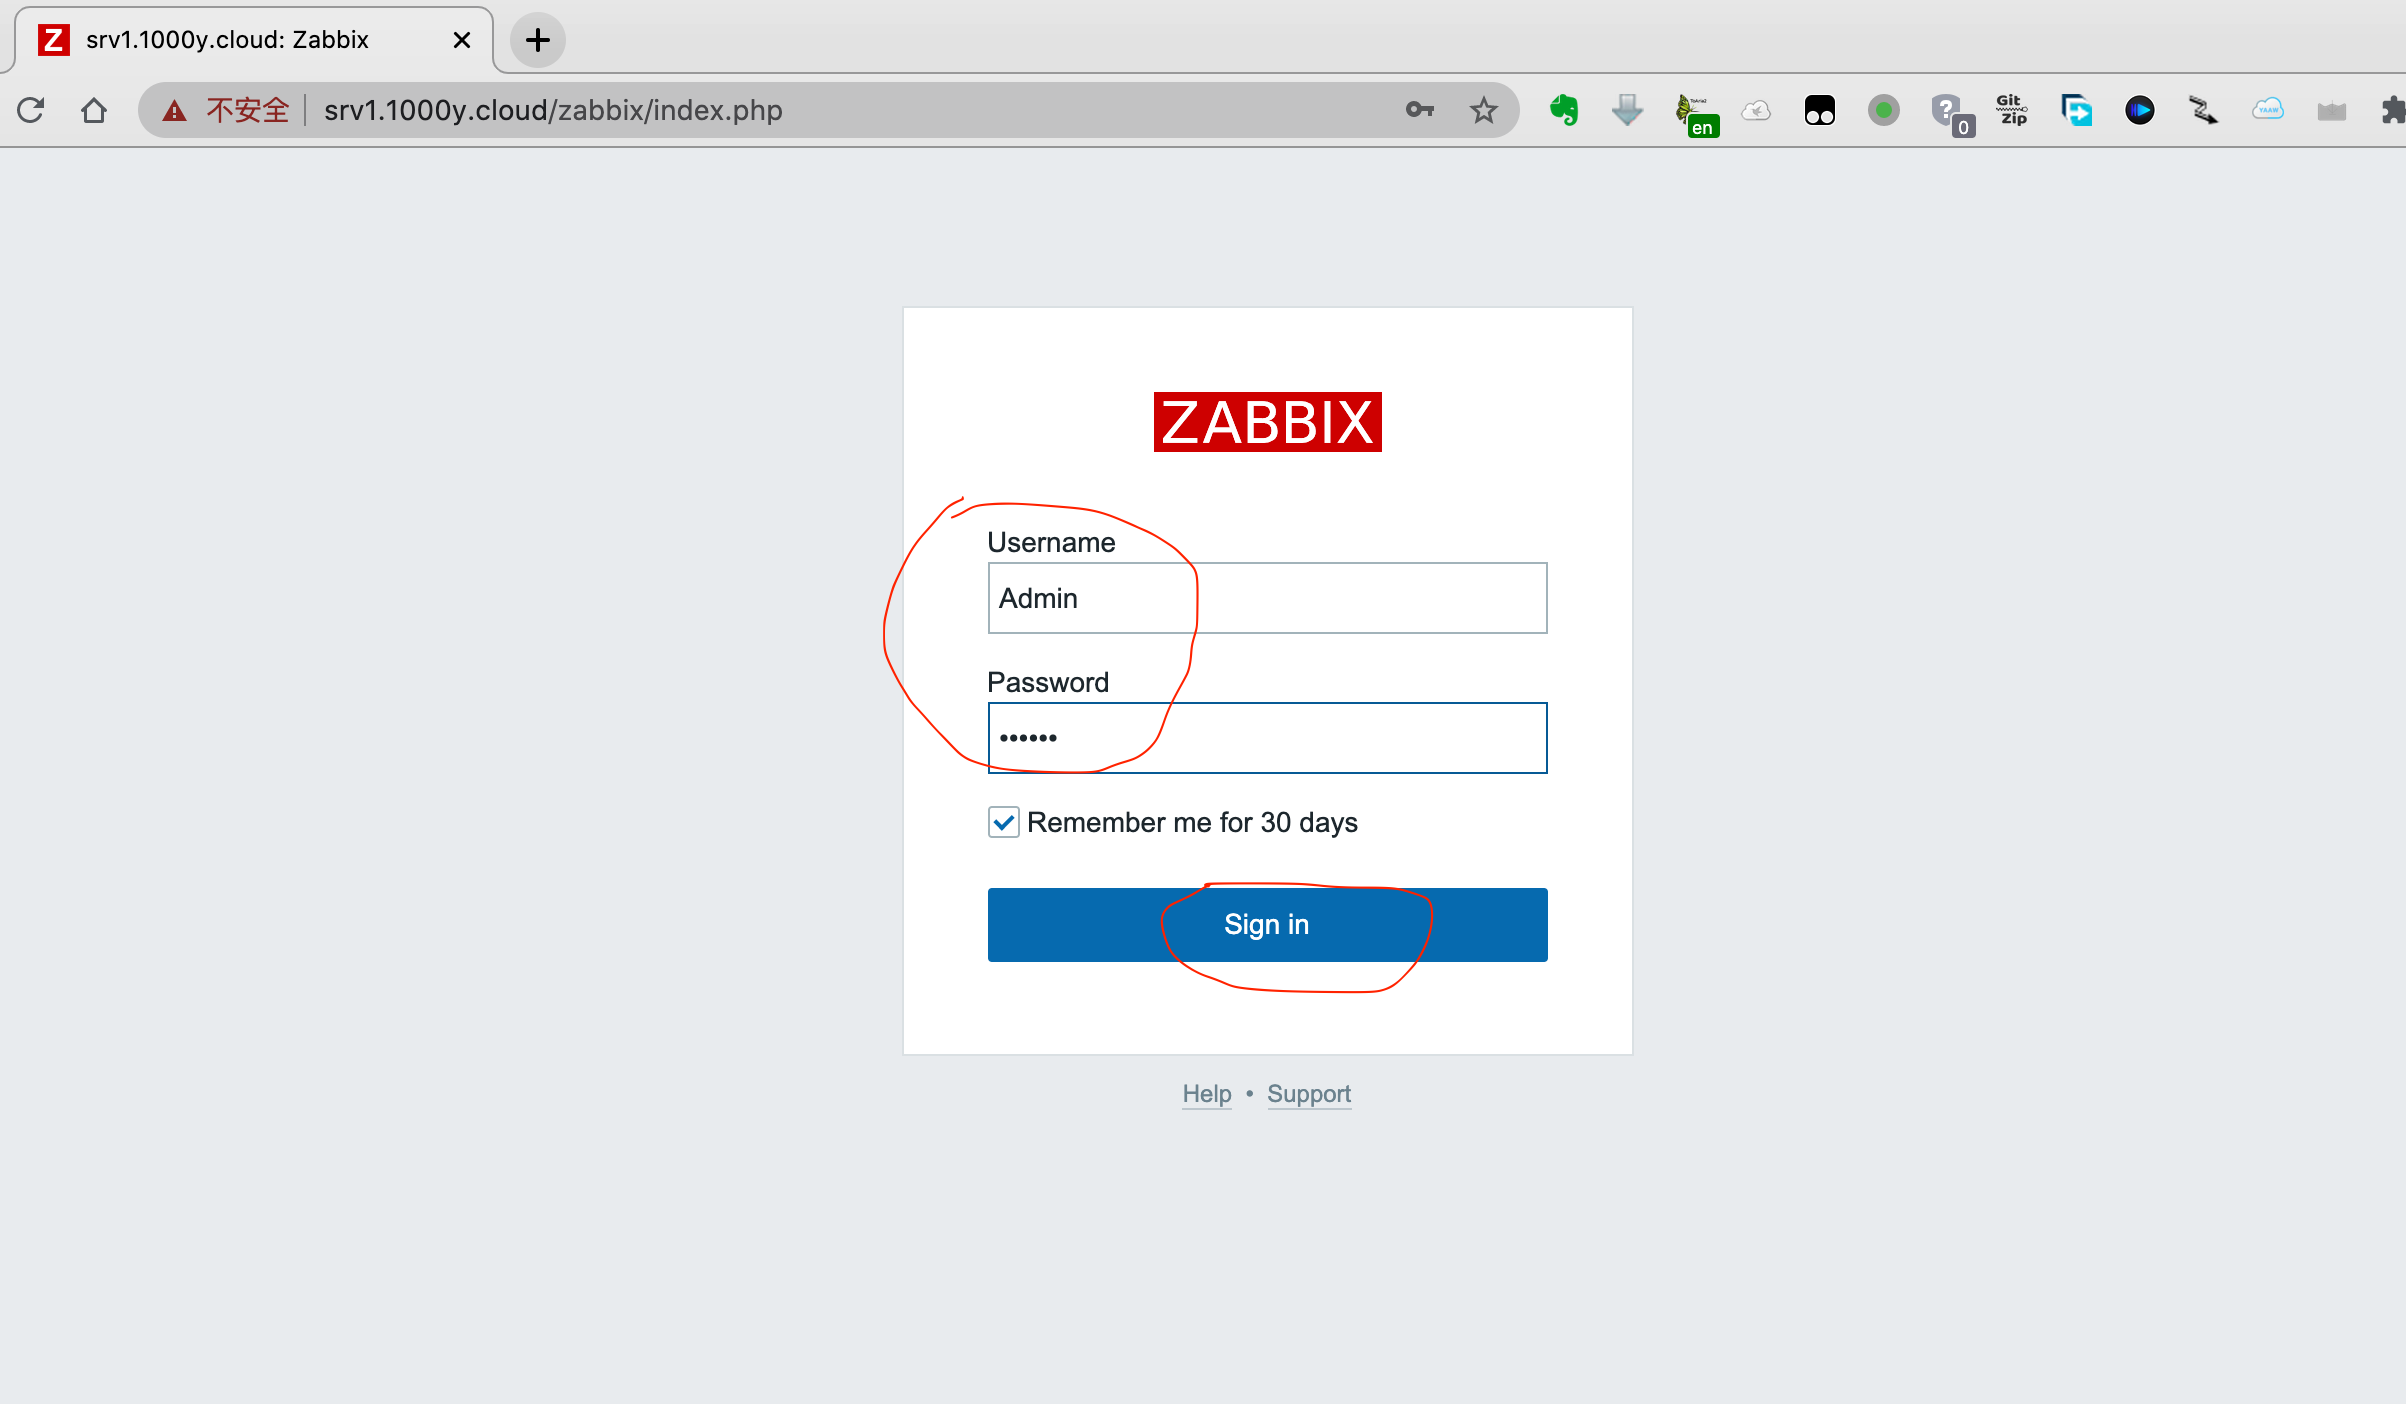
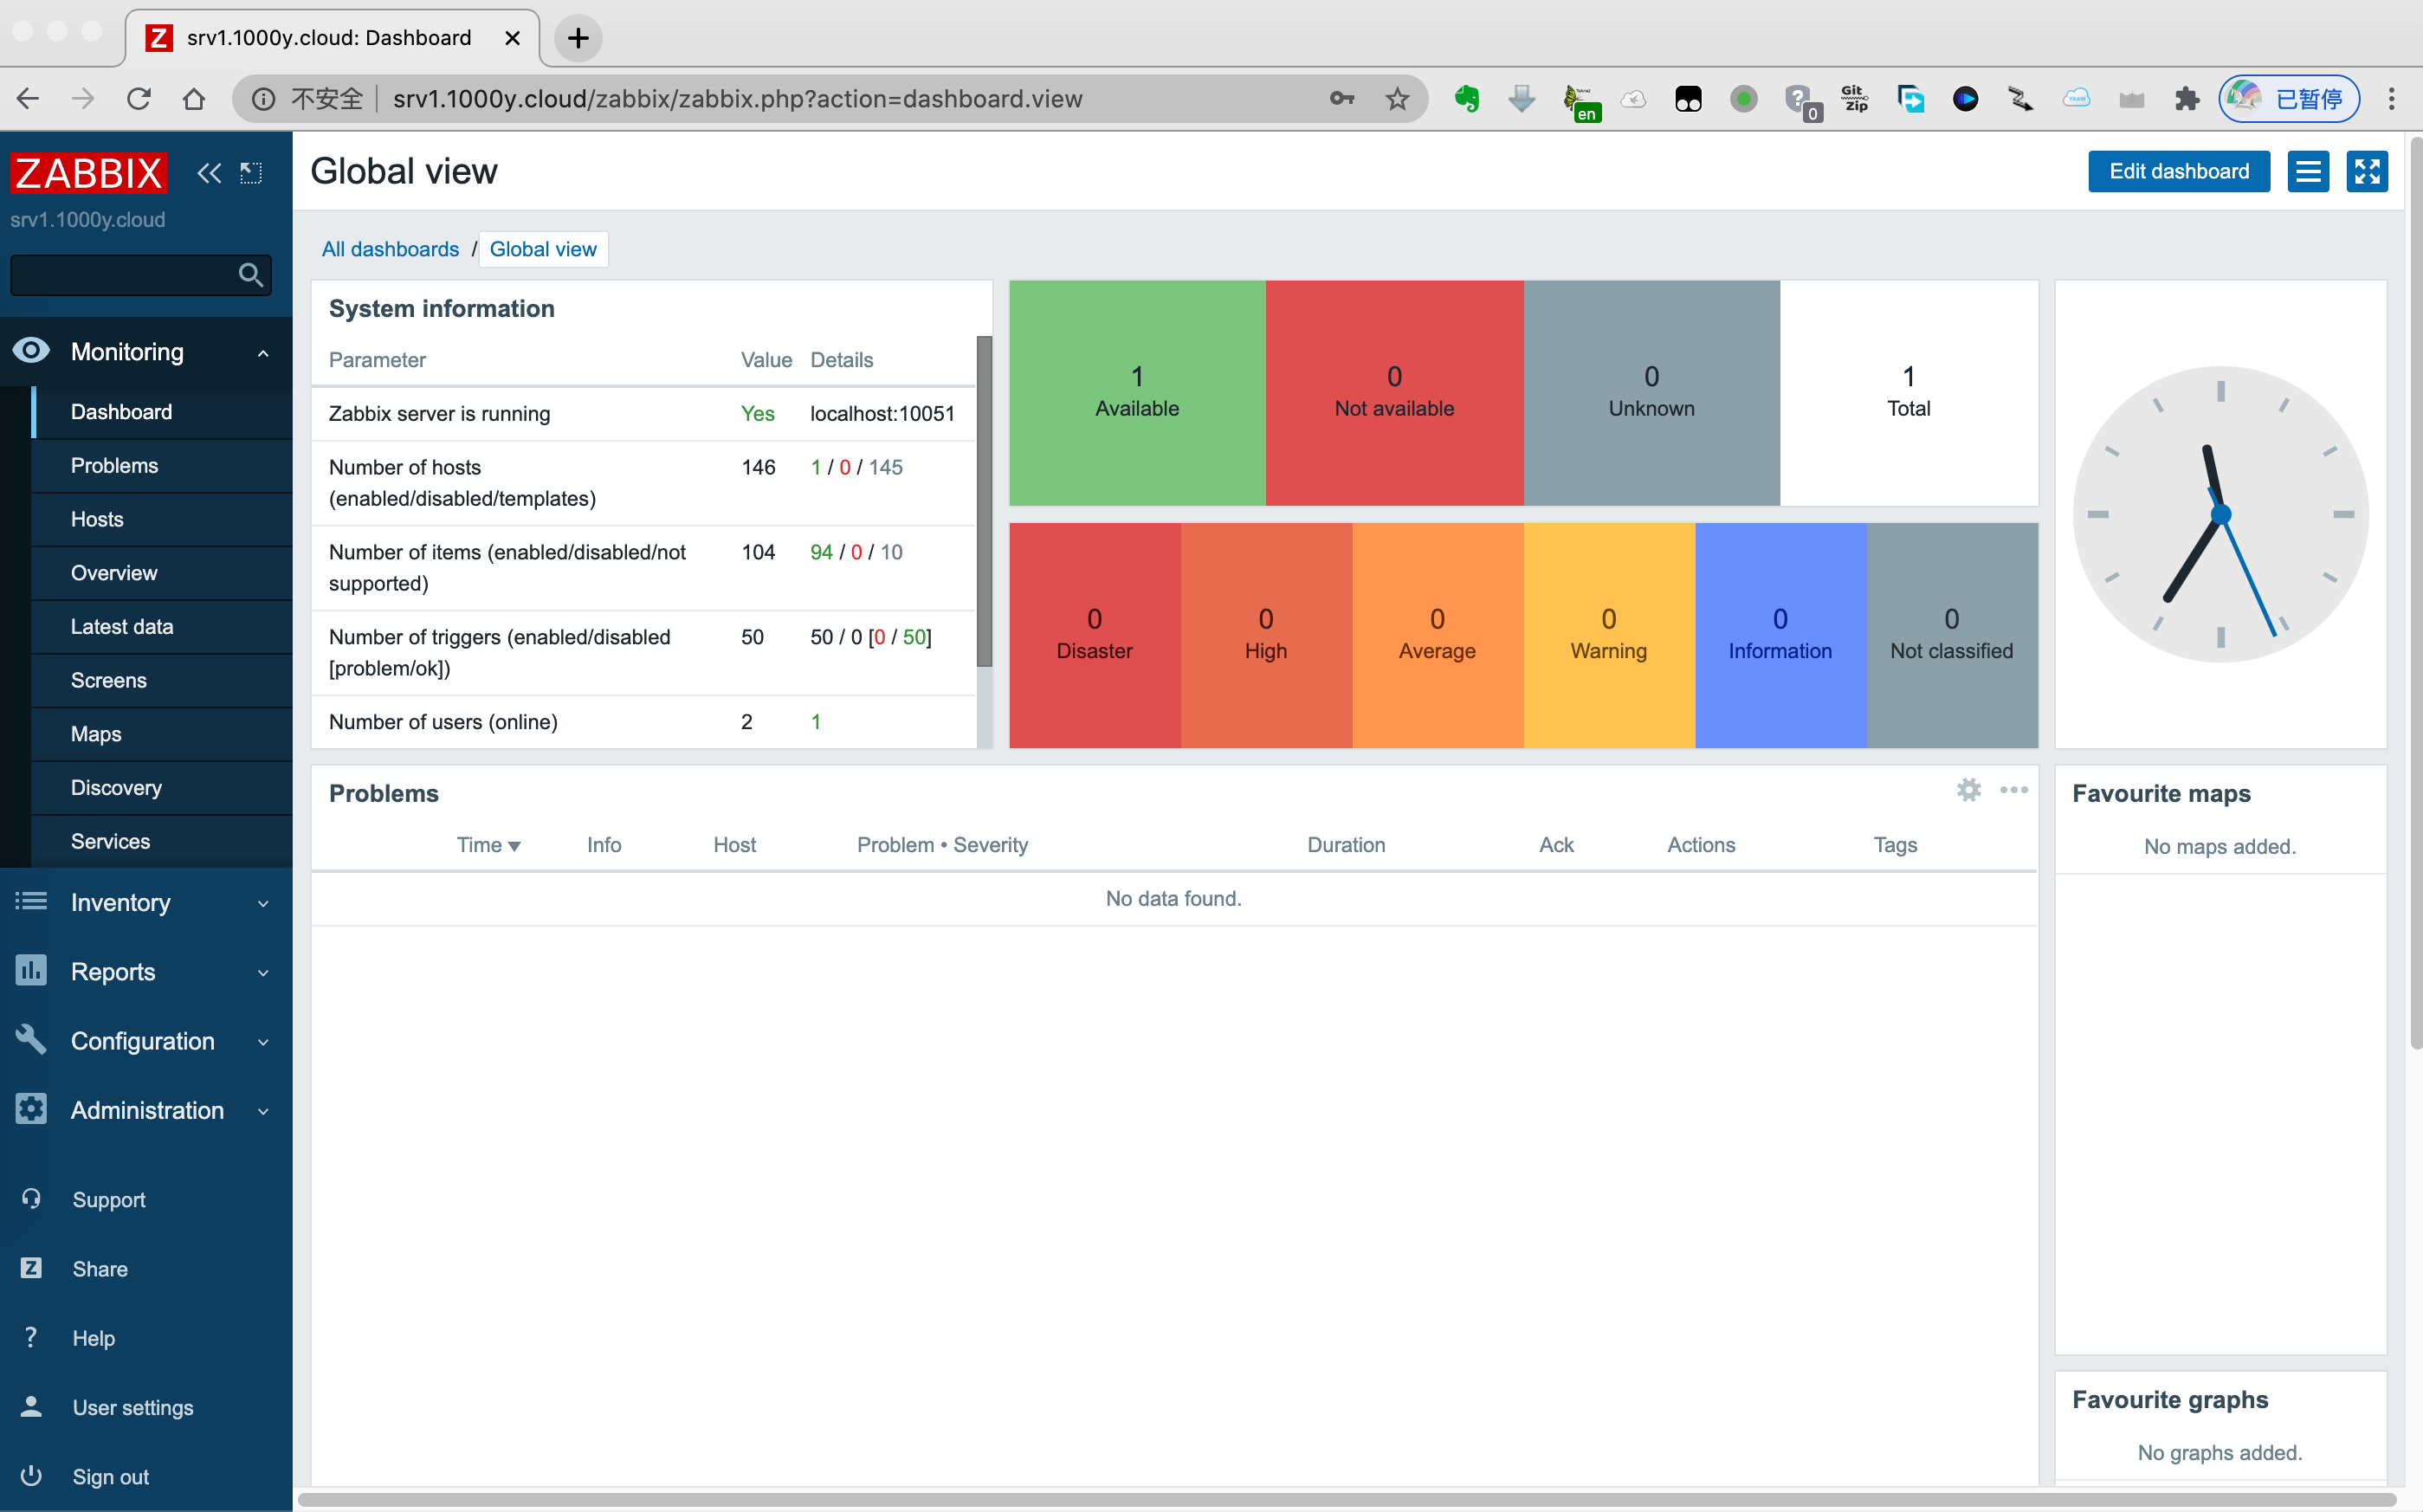
1) 开启浏览器进入zabbix初始化界面 浏览器->http://Zabbix-Server/zabbix |

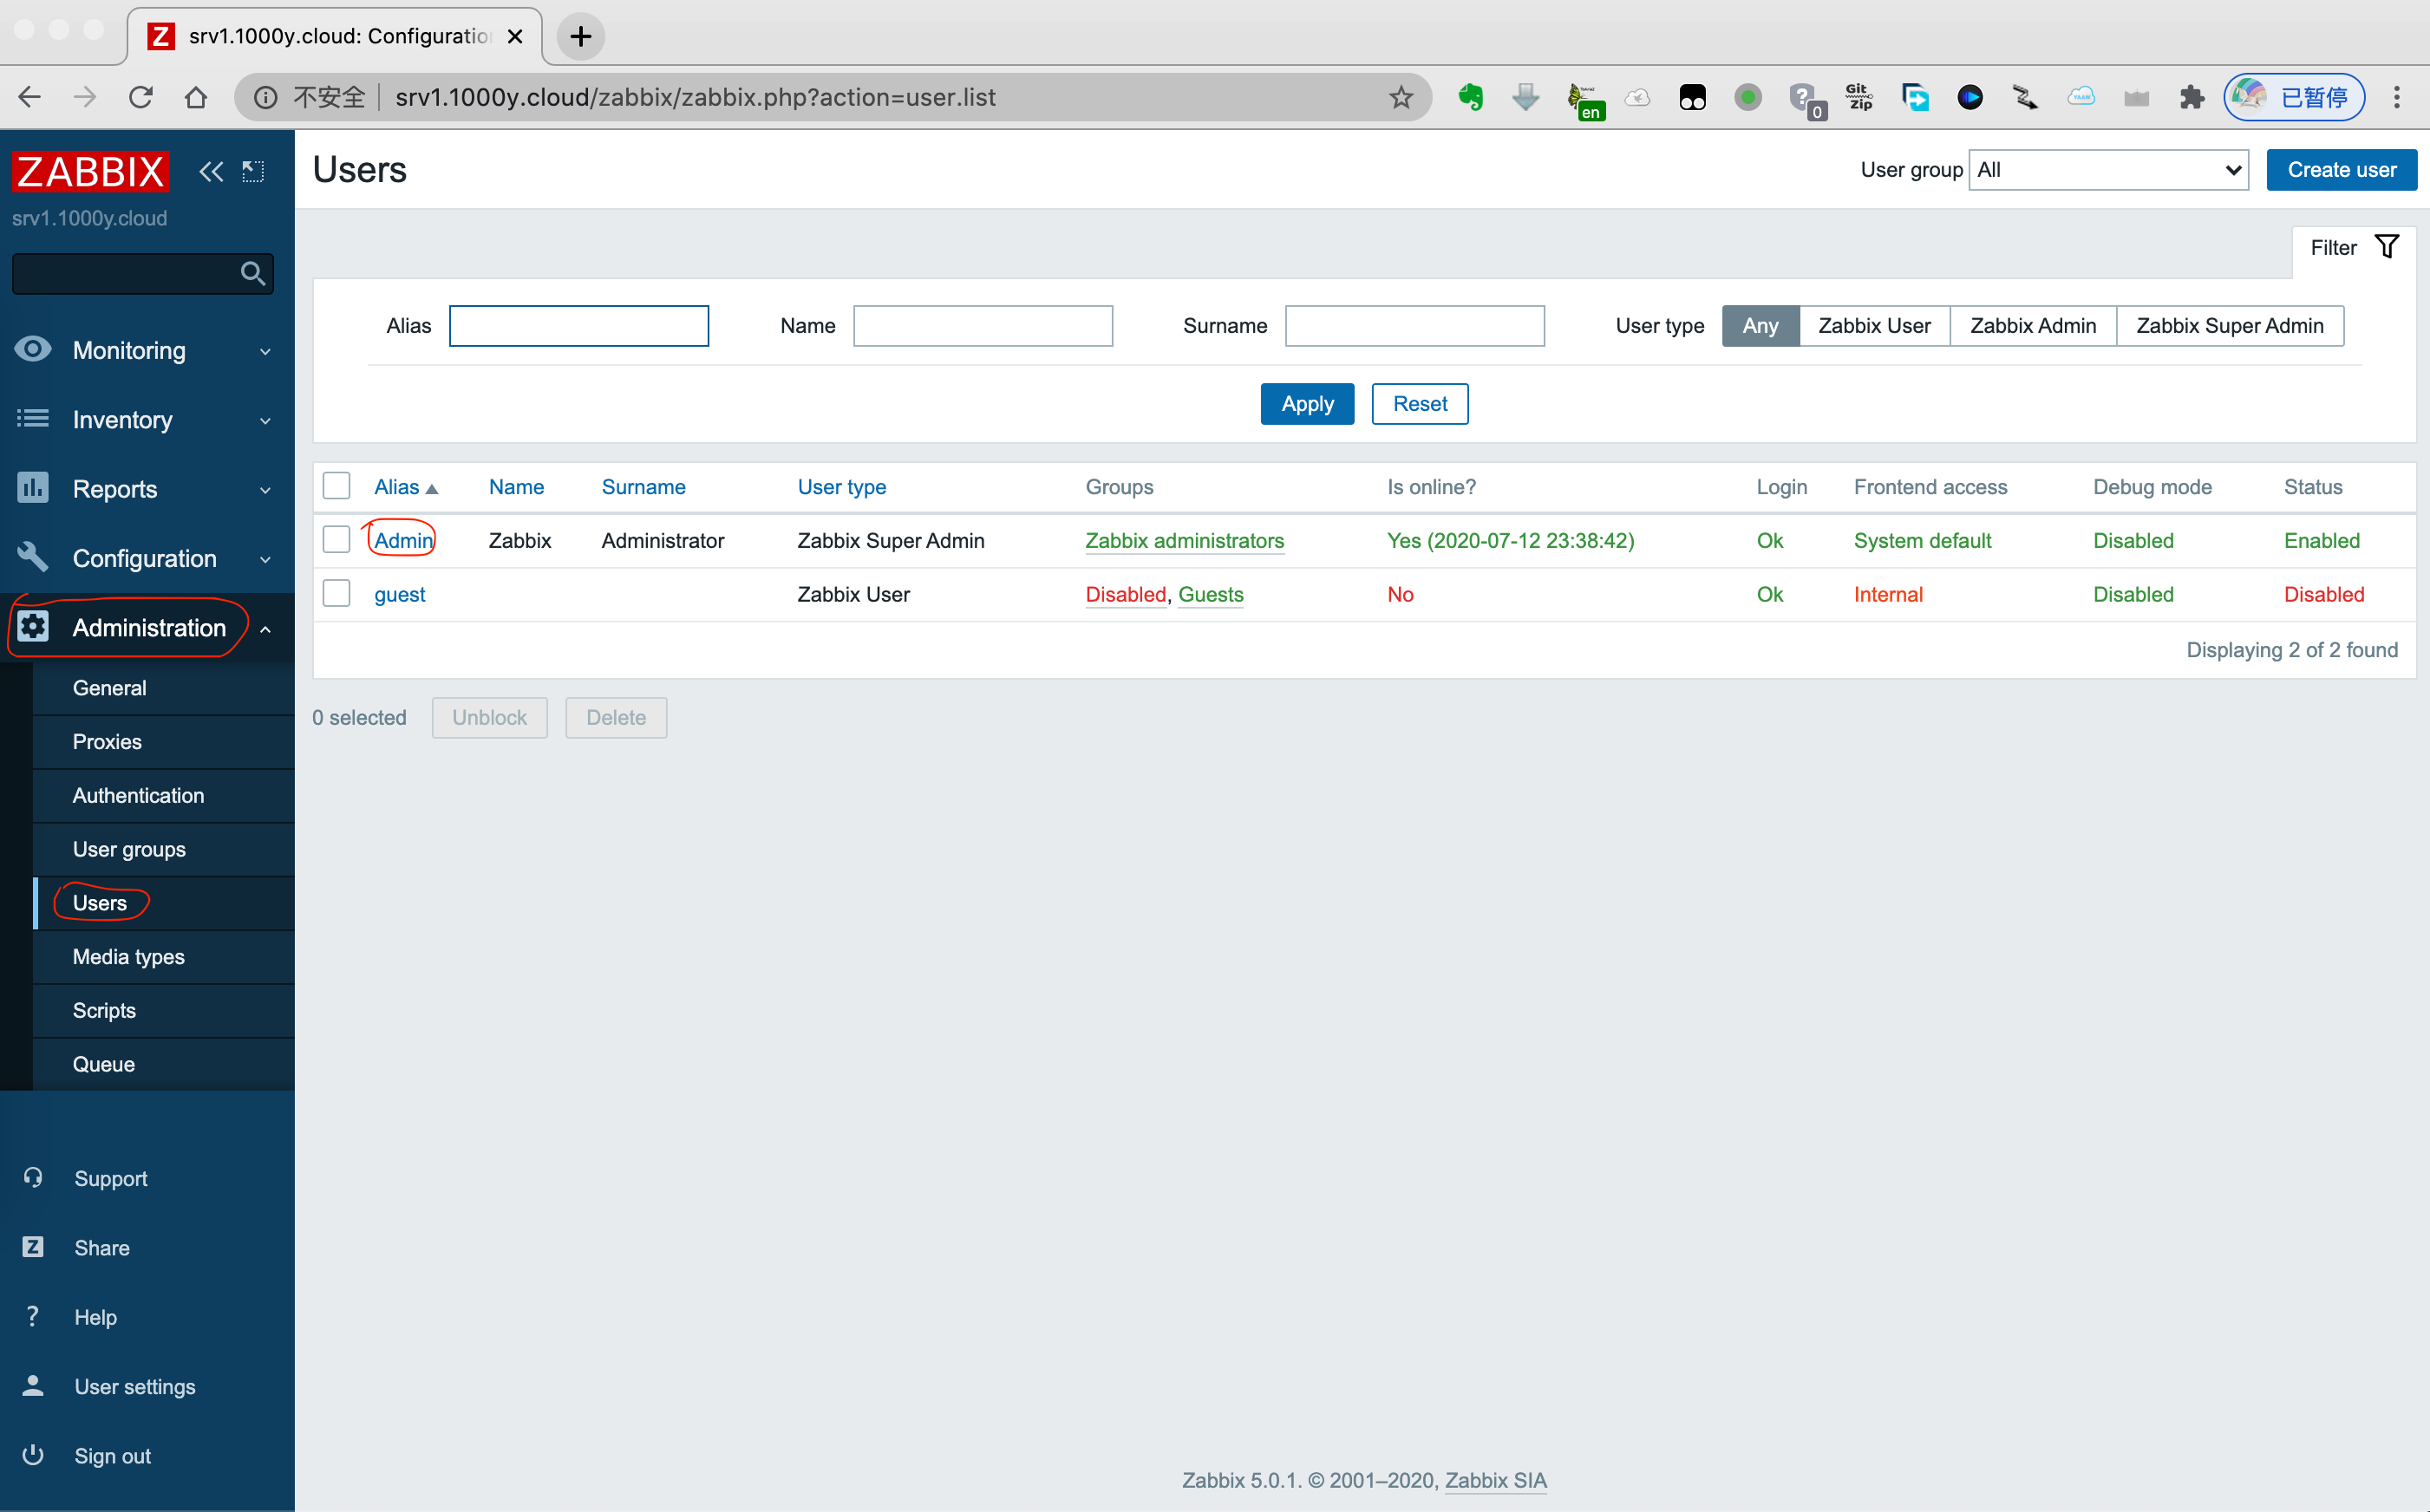
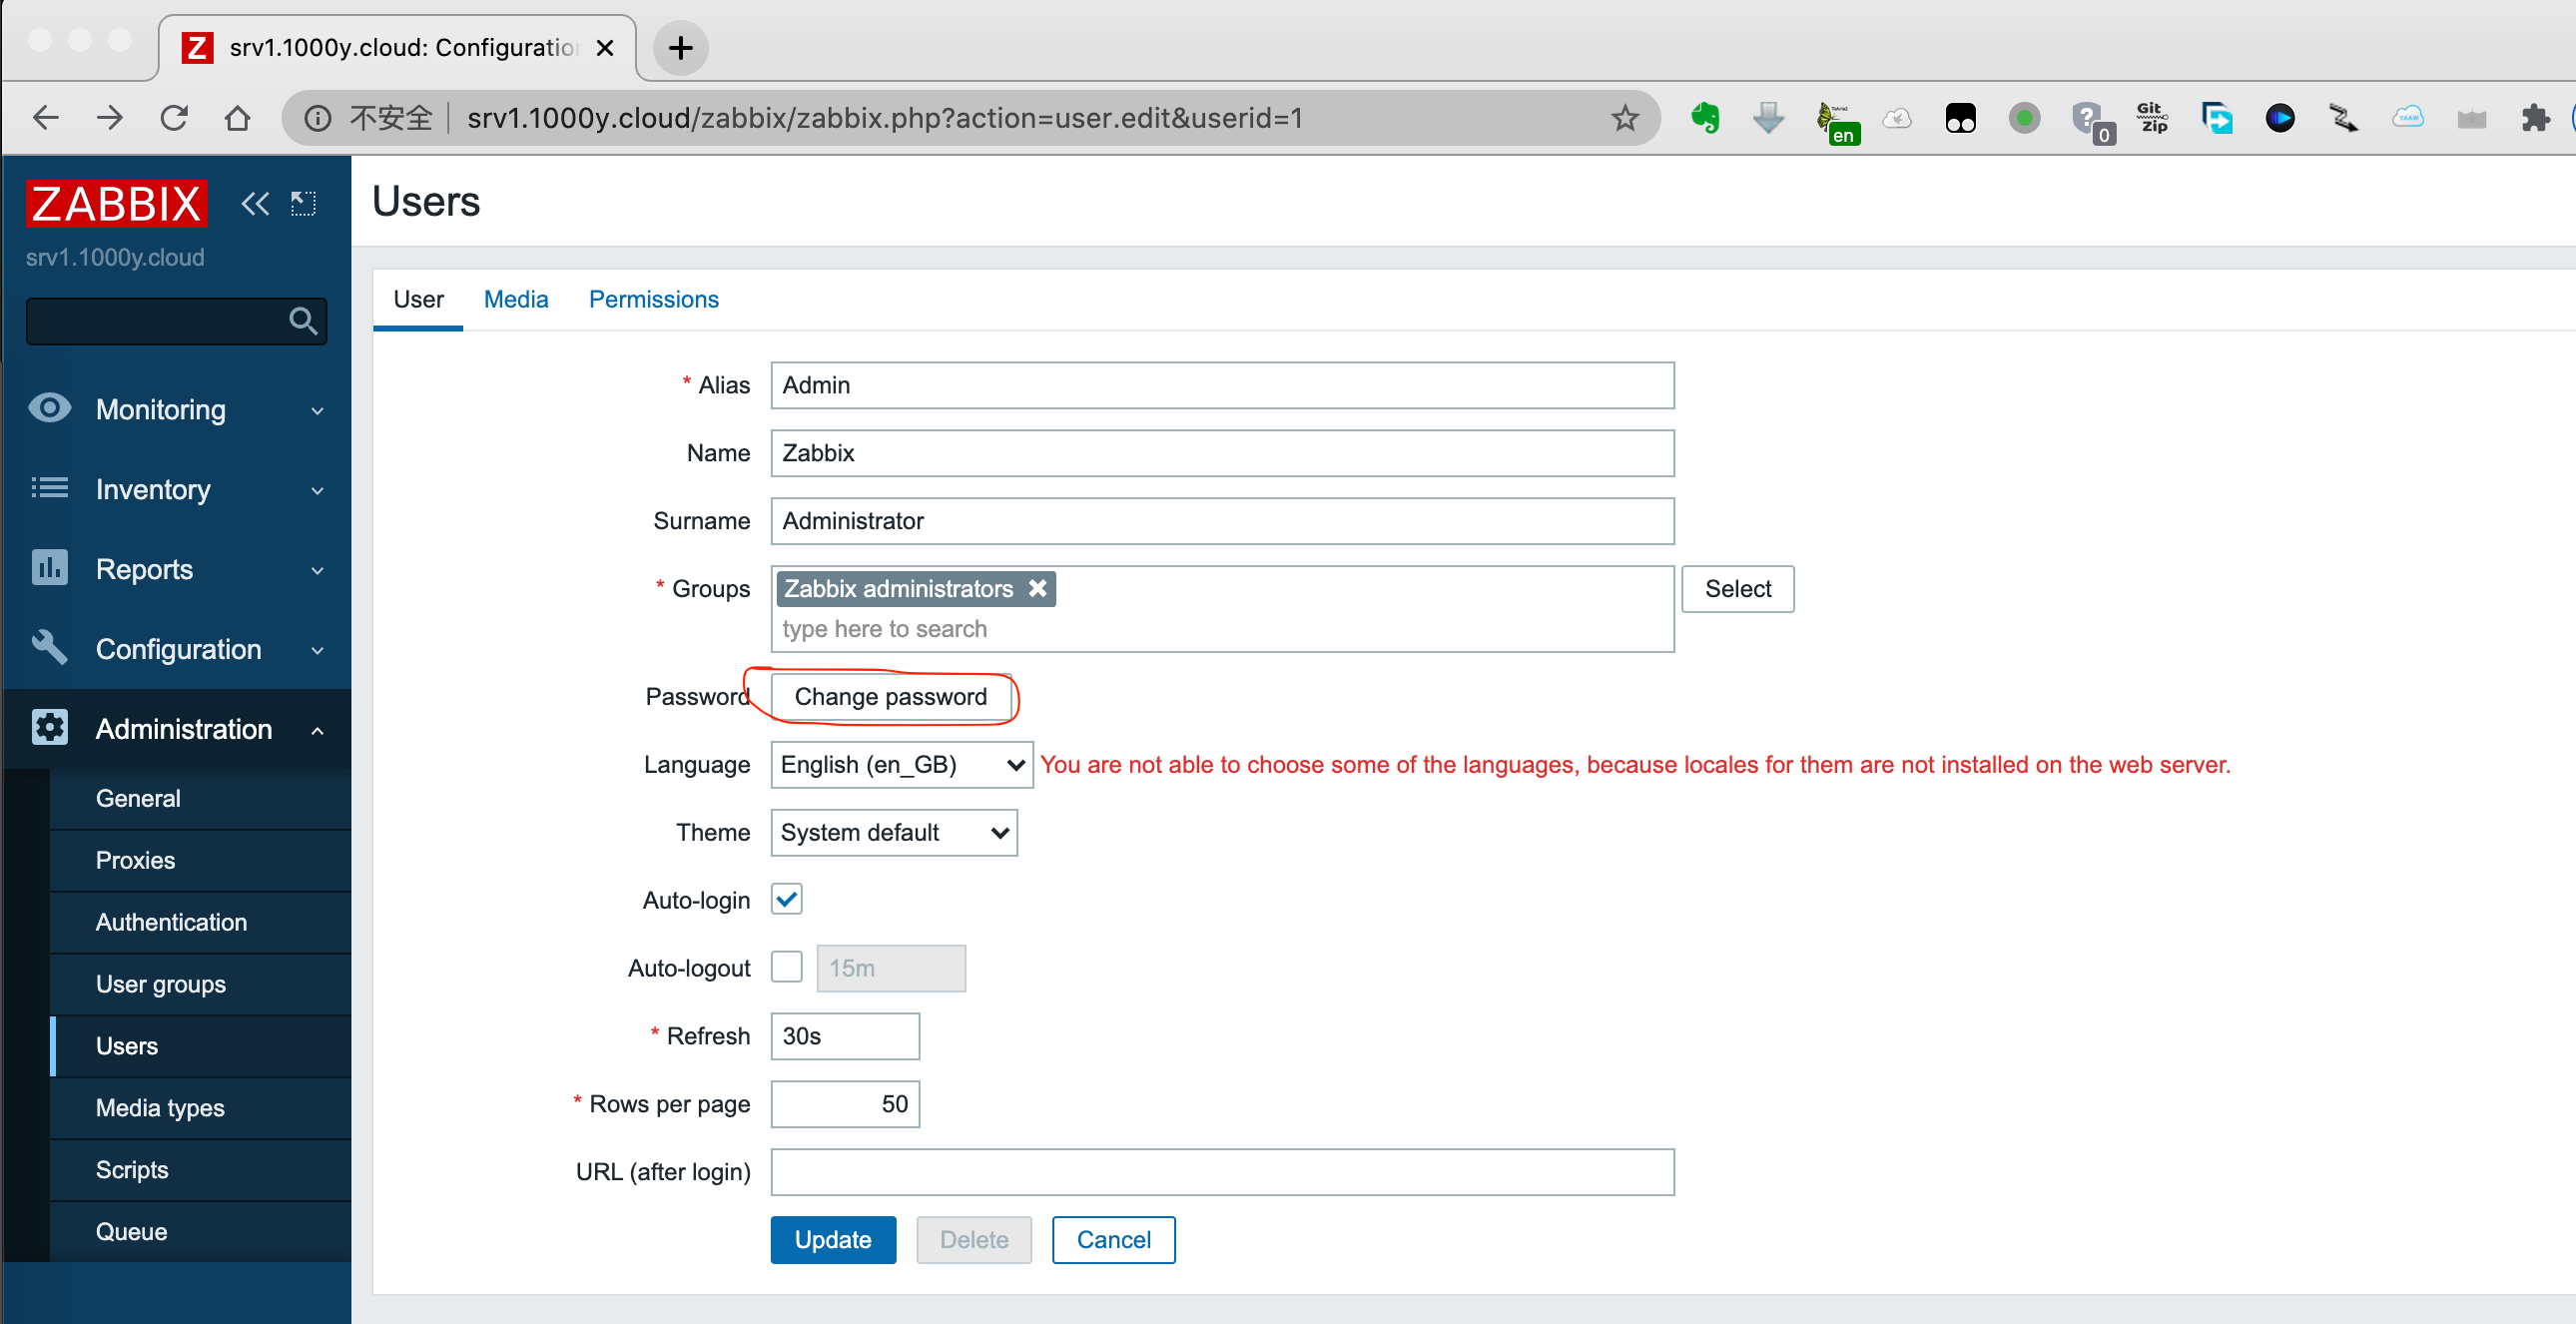
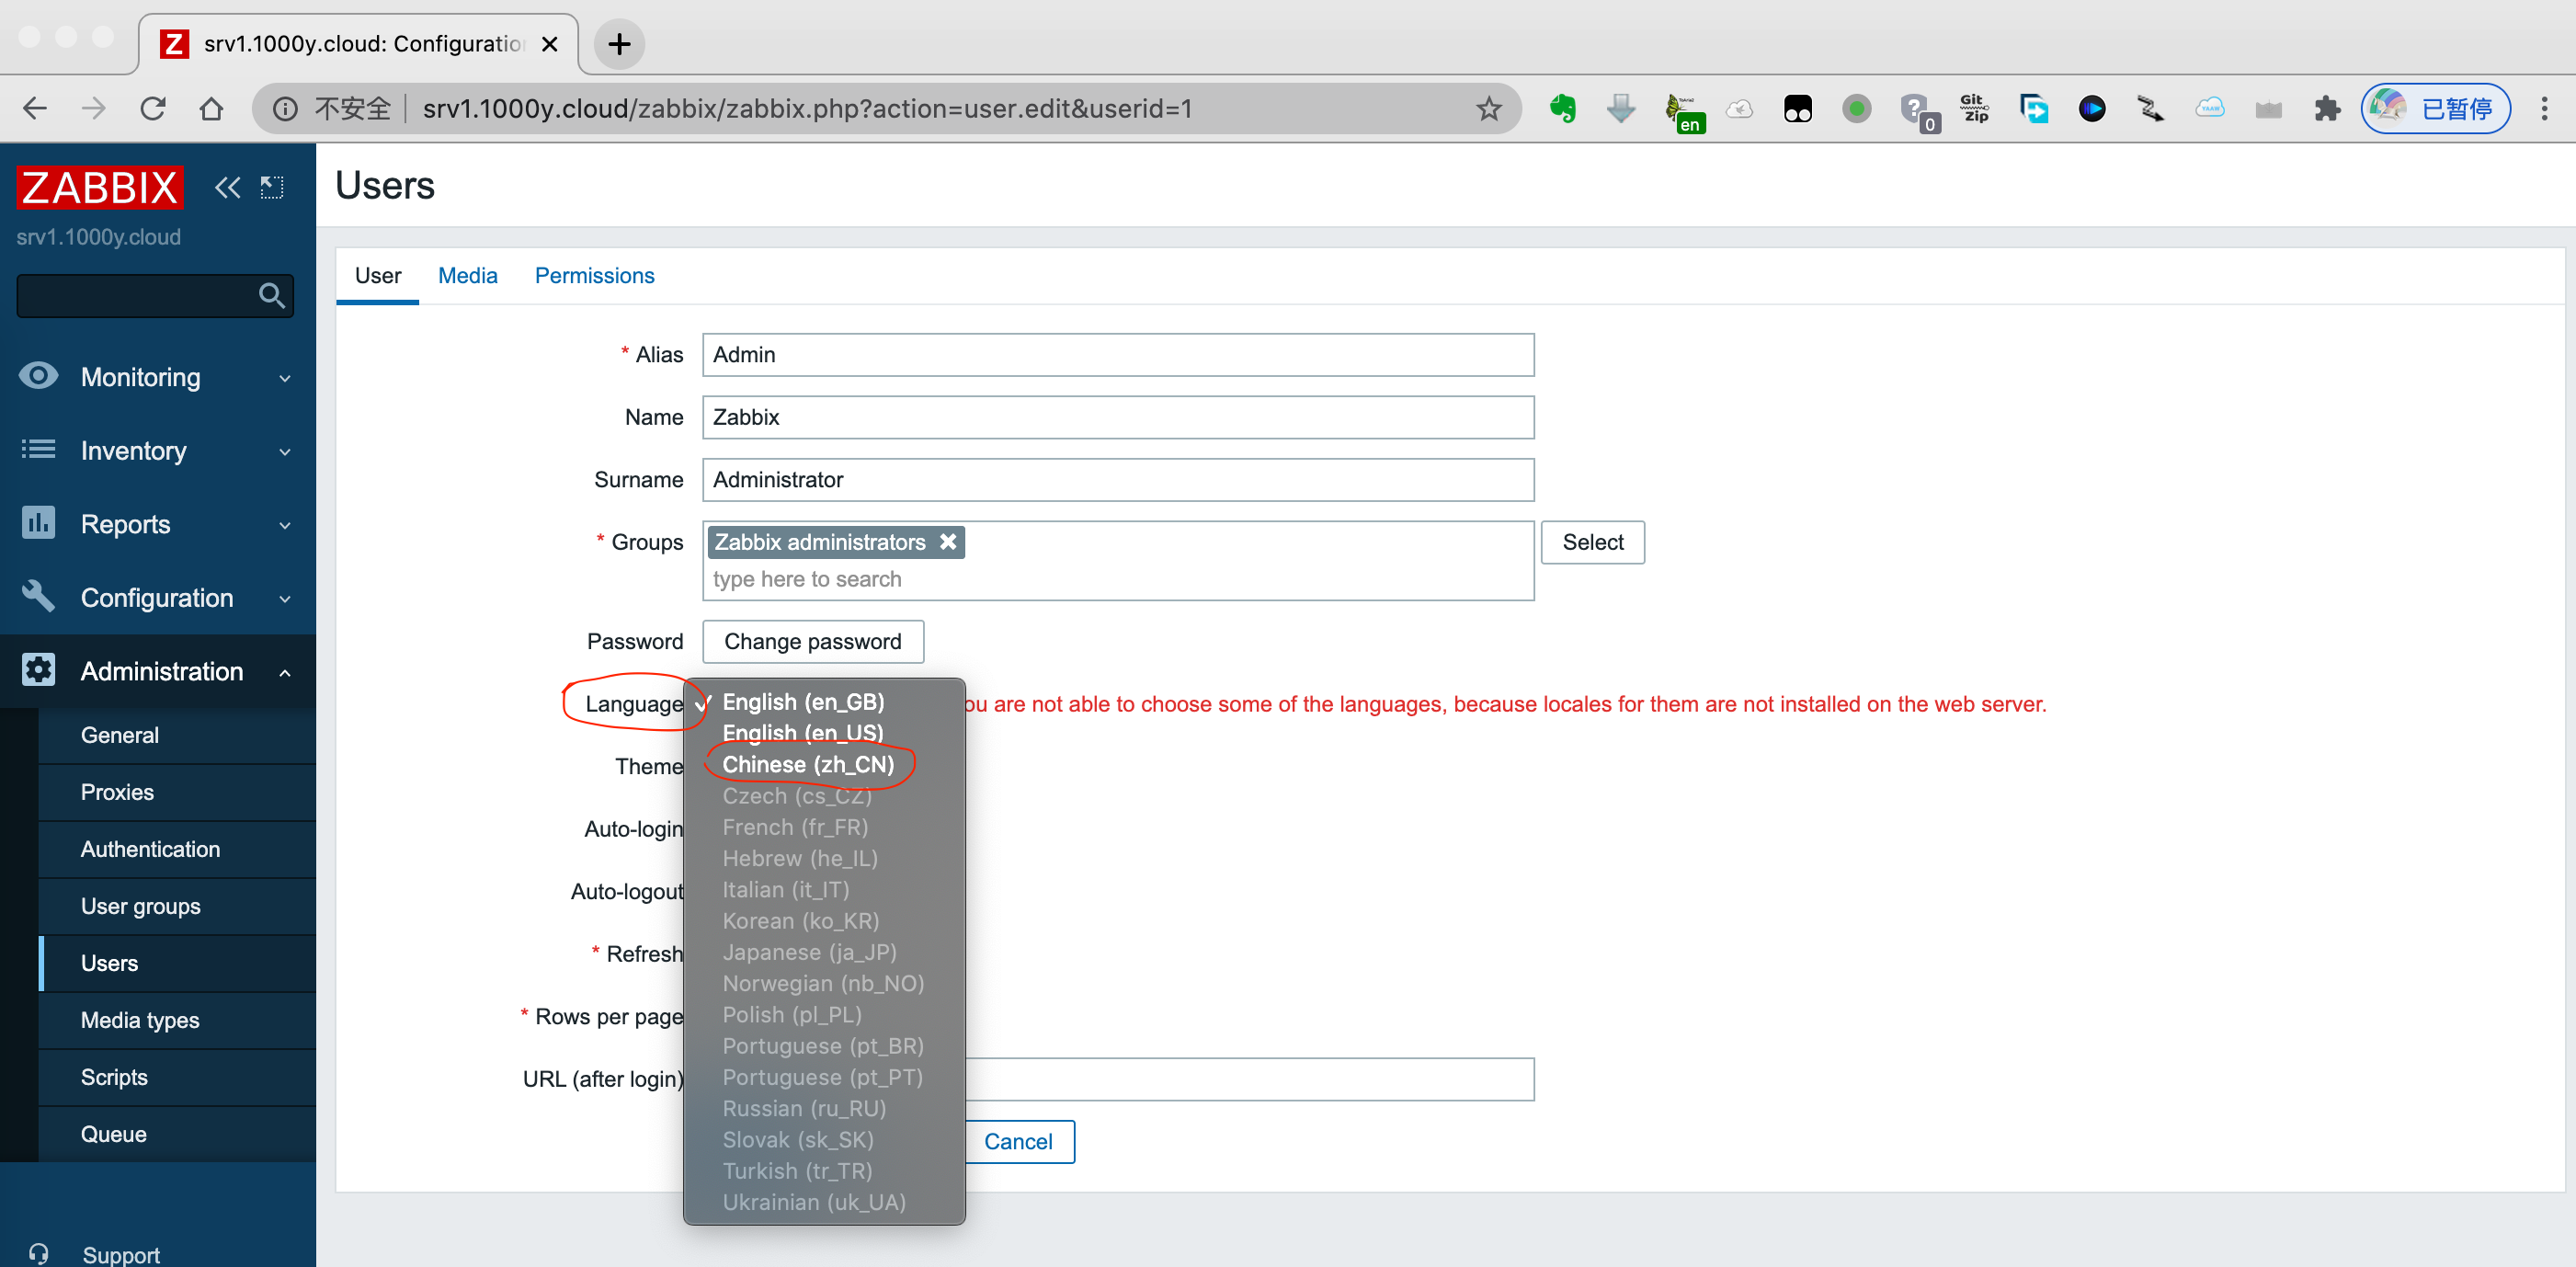
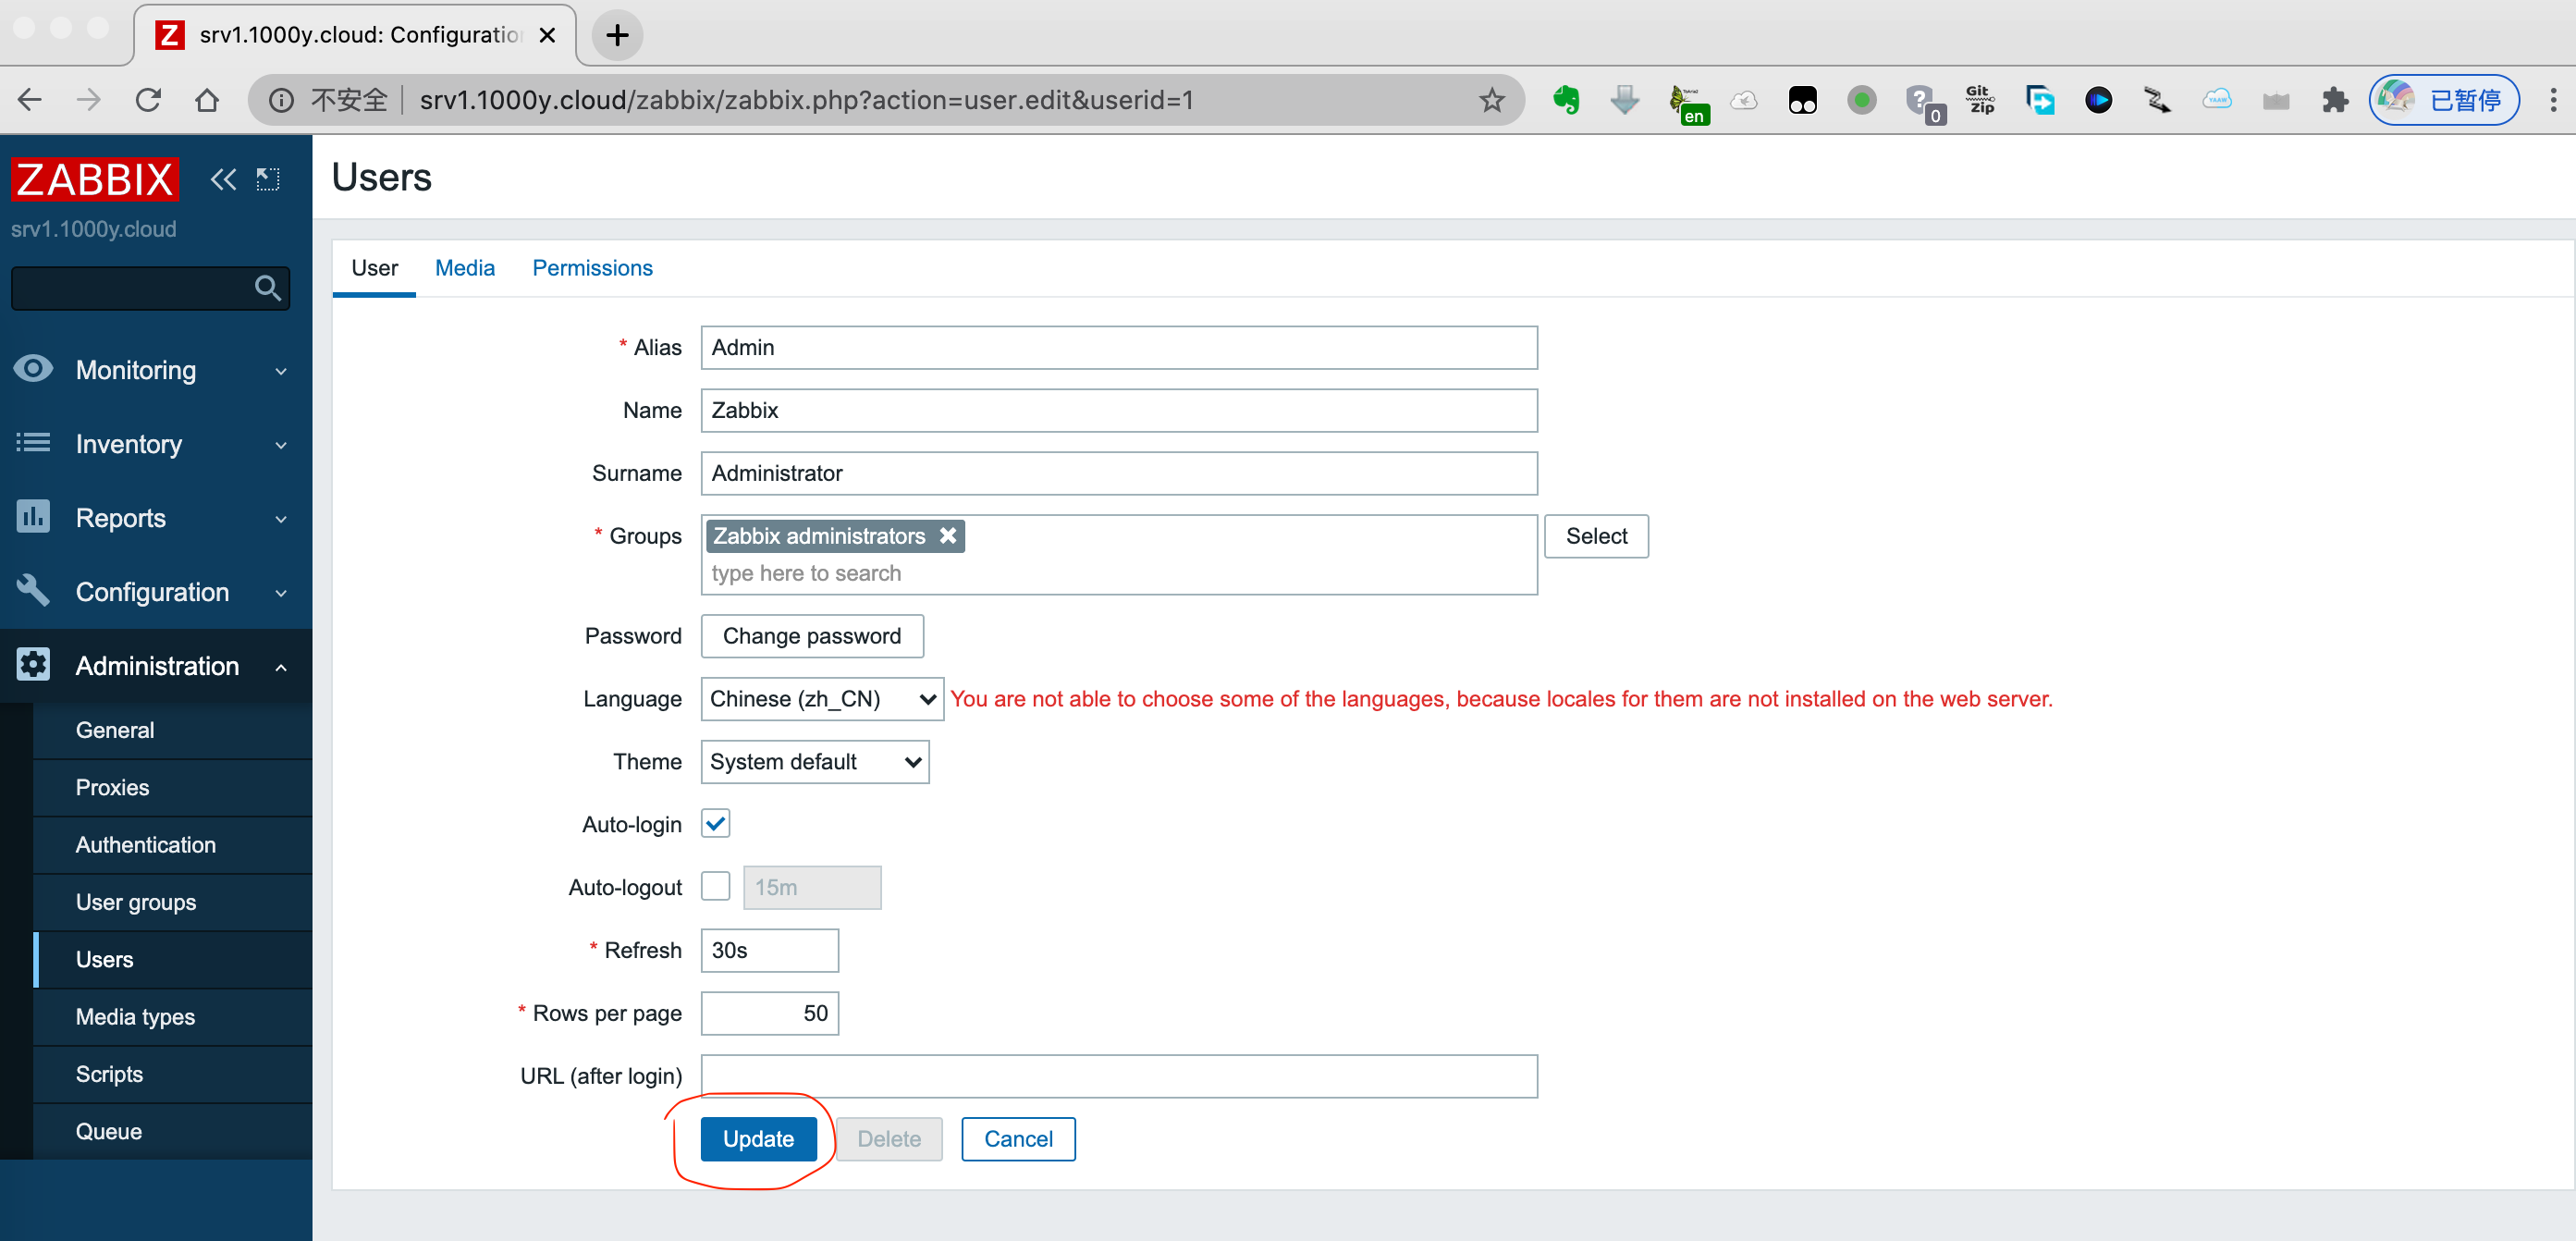
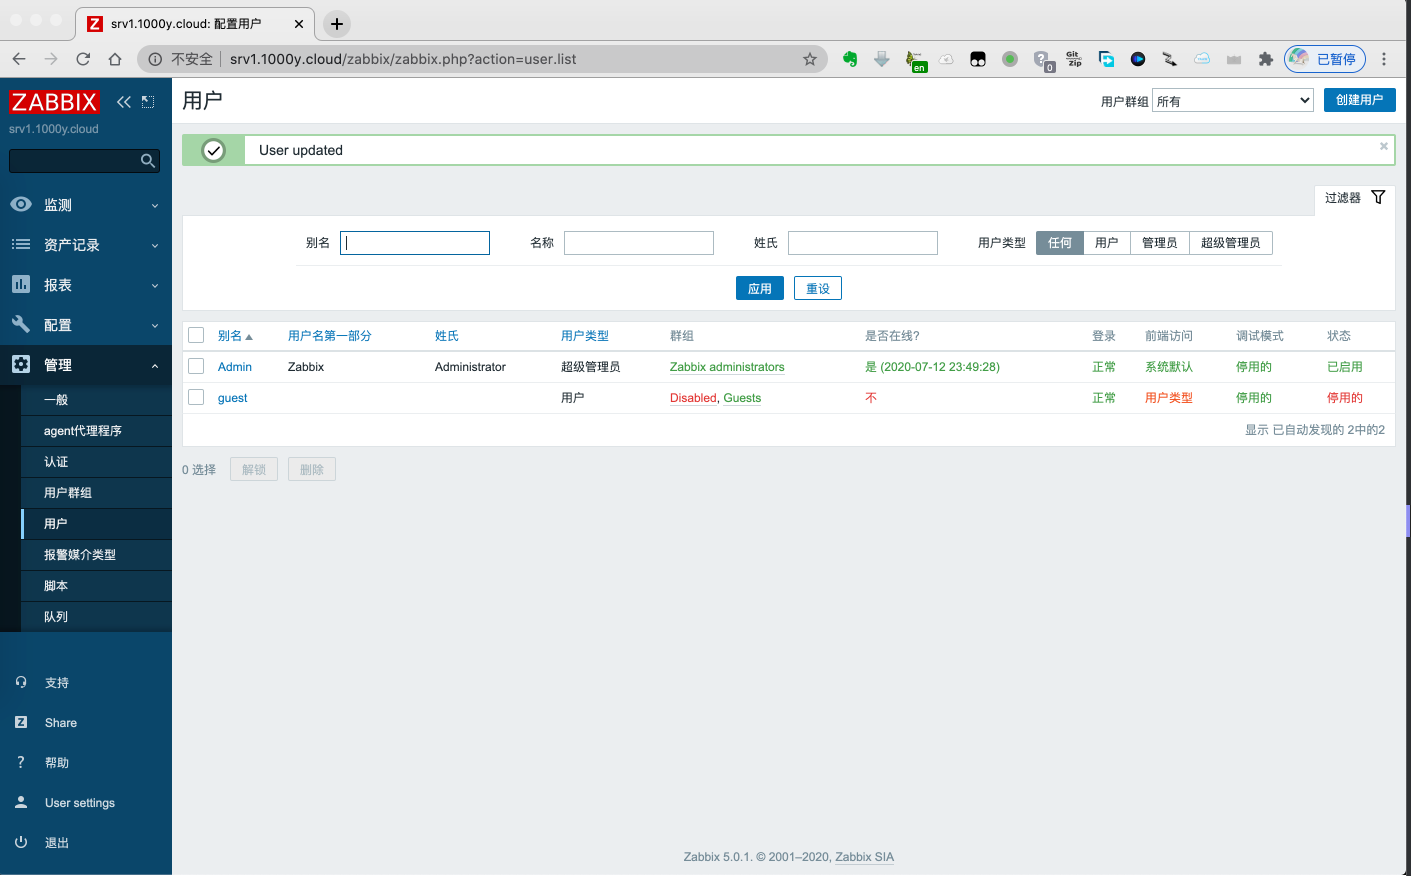
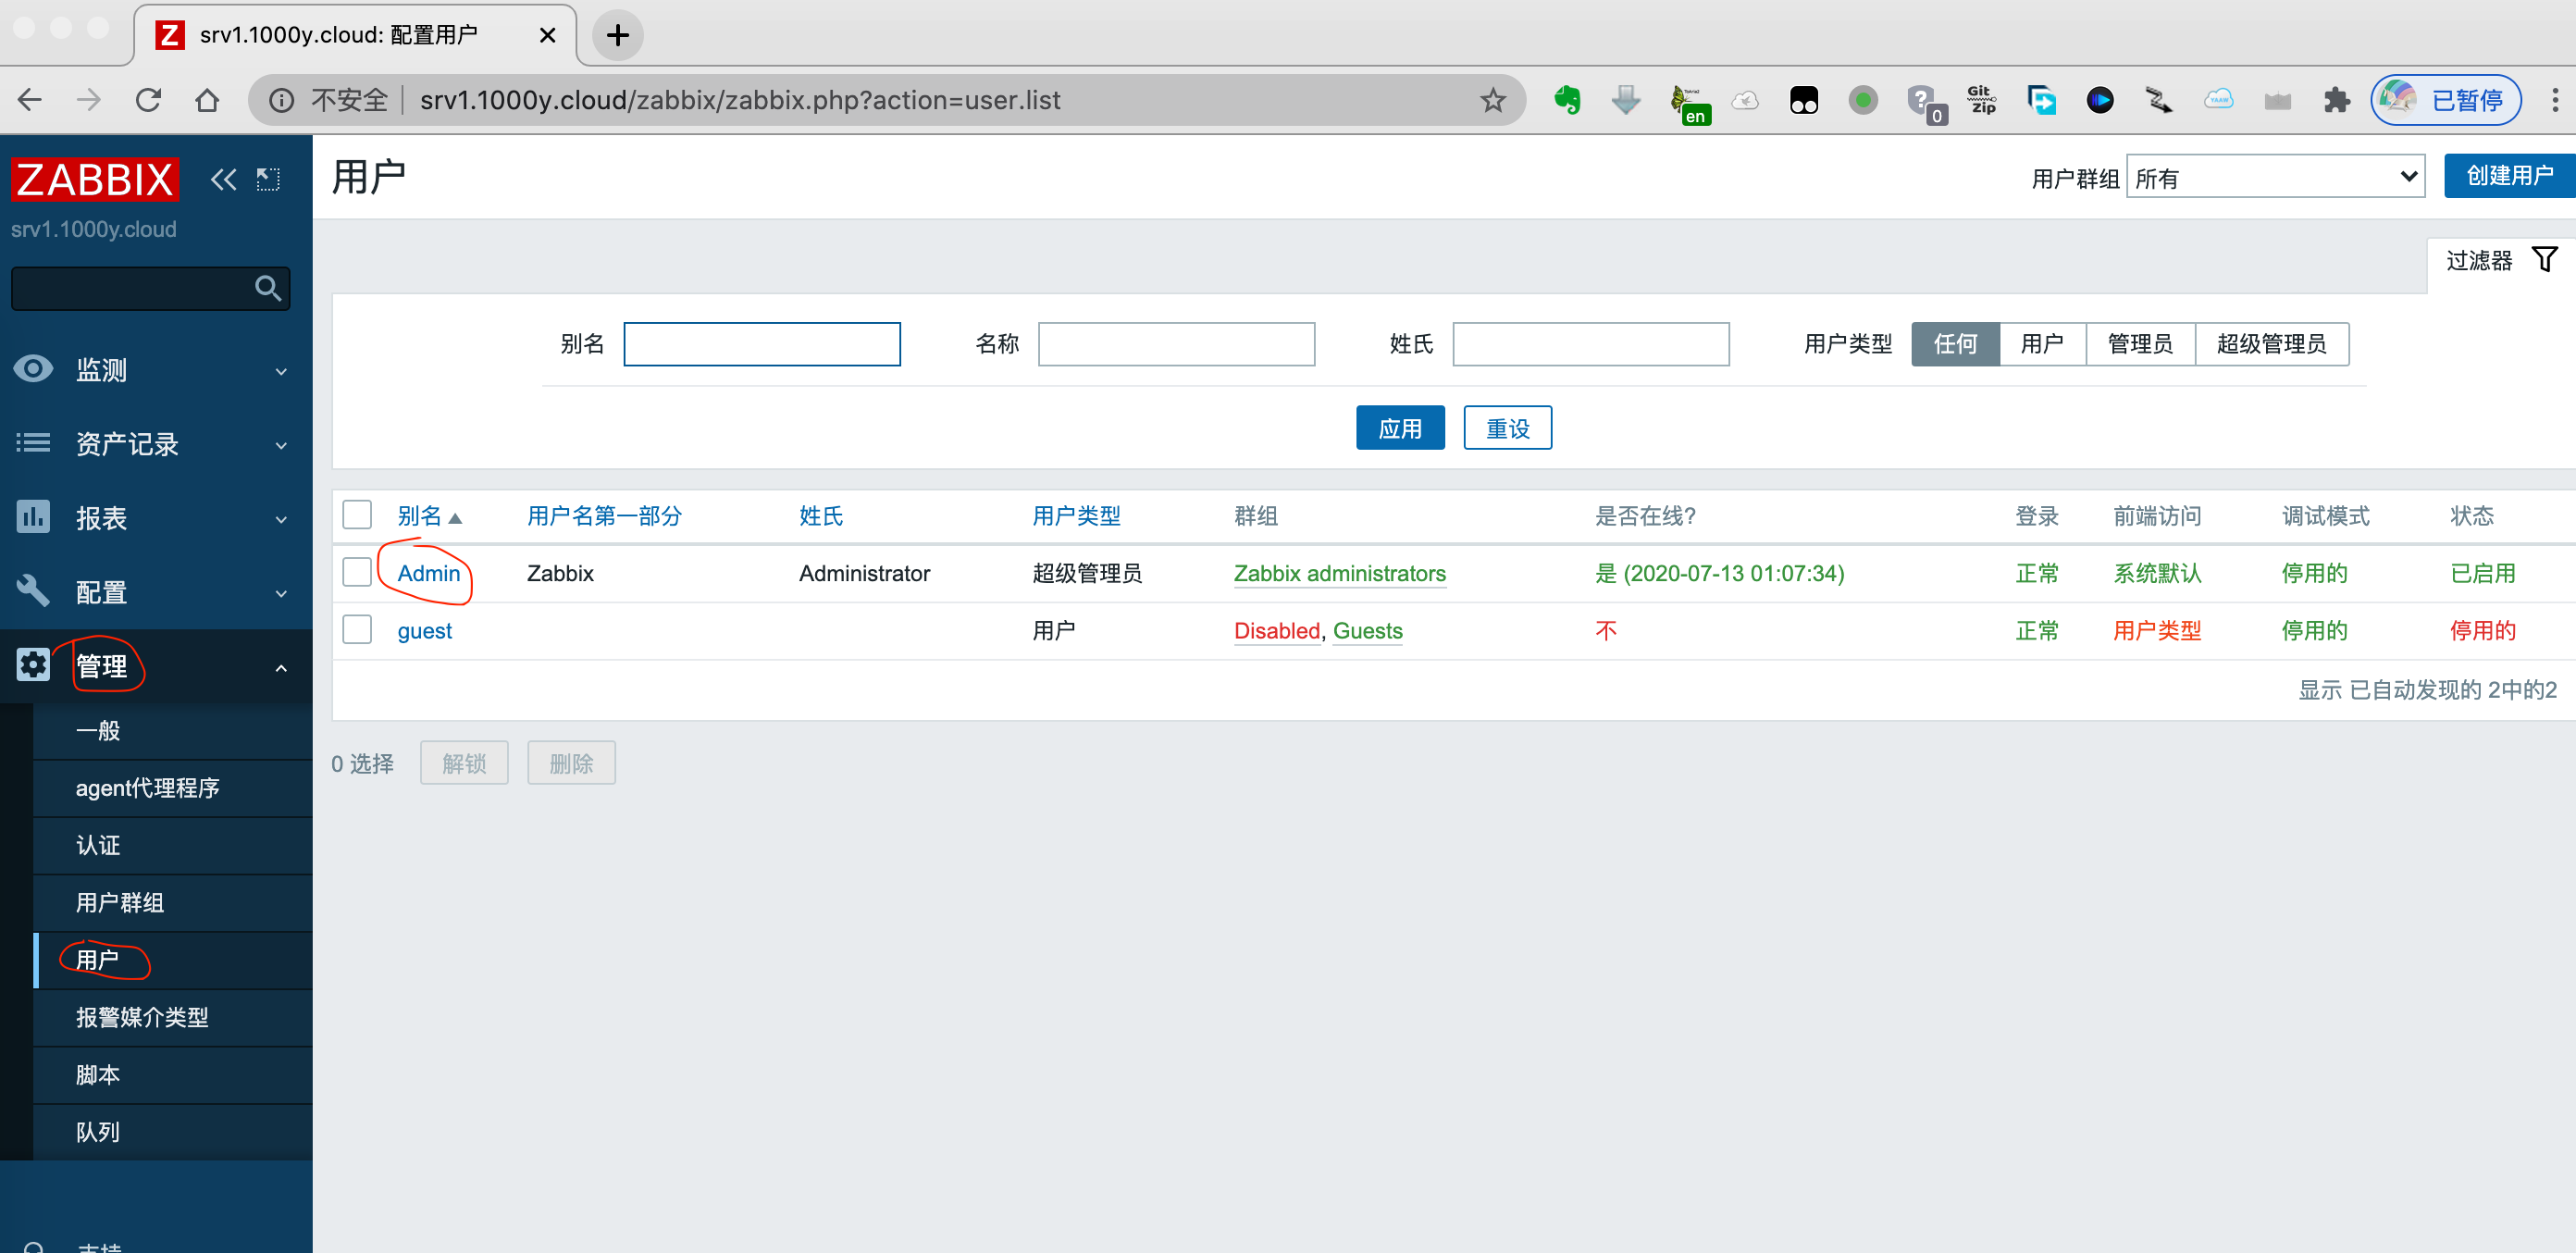
3. 修改初始化密码并改变界面语言
1) 点击"Administaation"->"Users"->"Admin" |

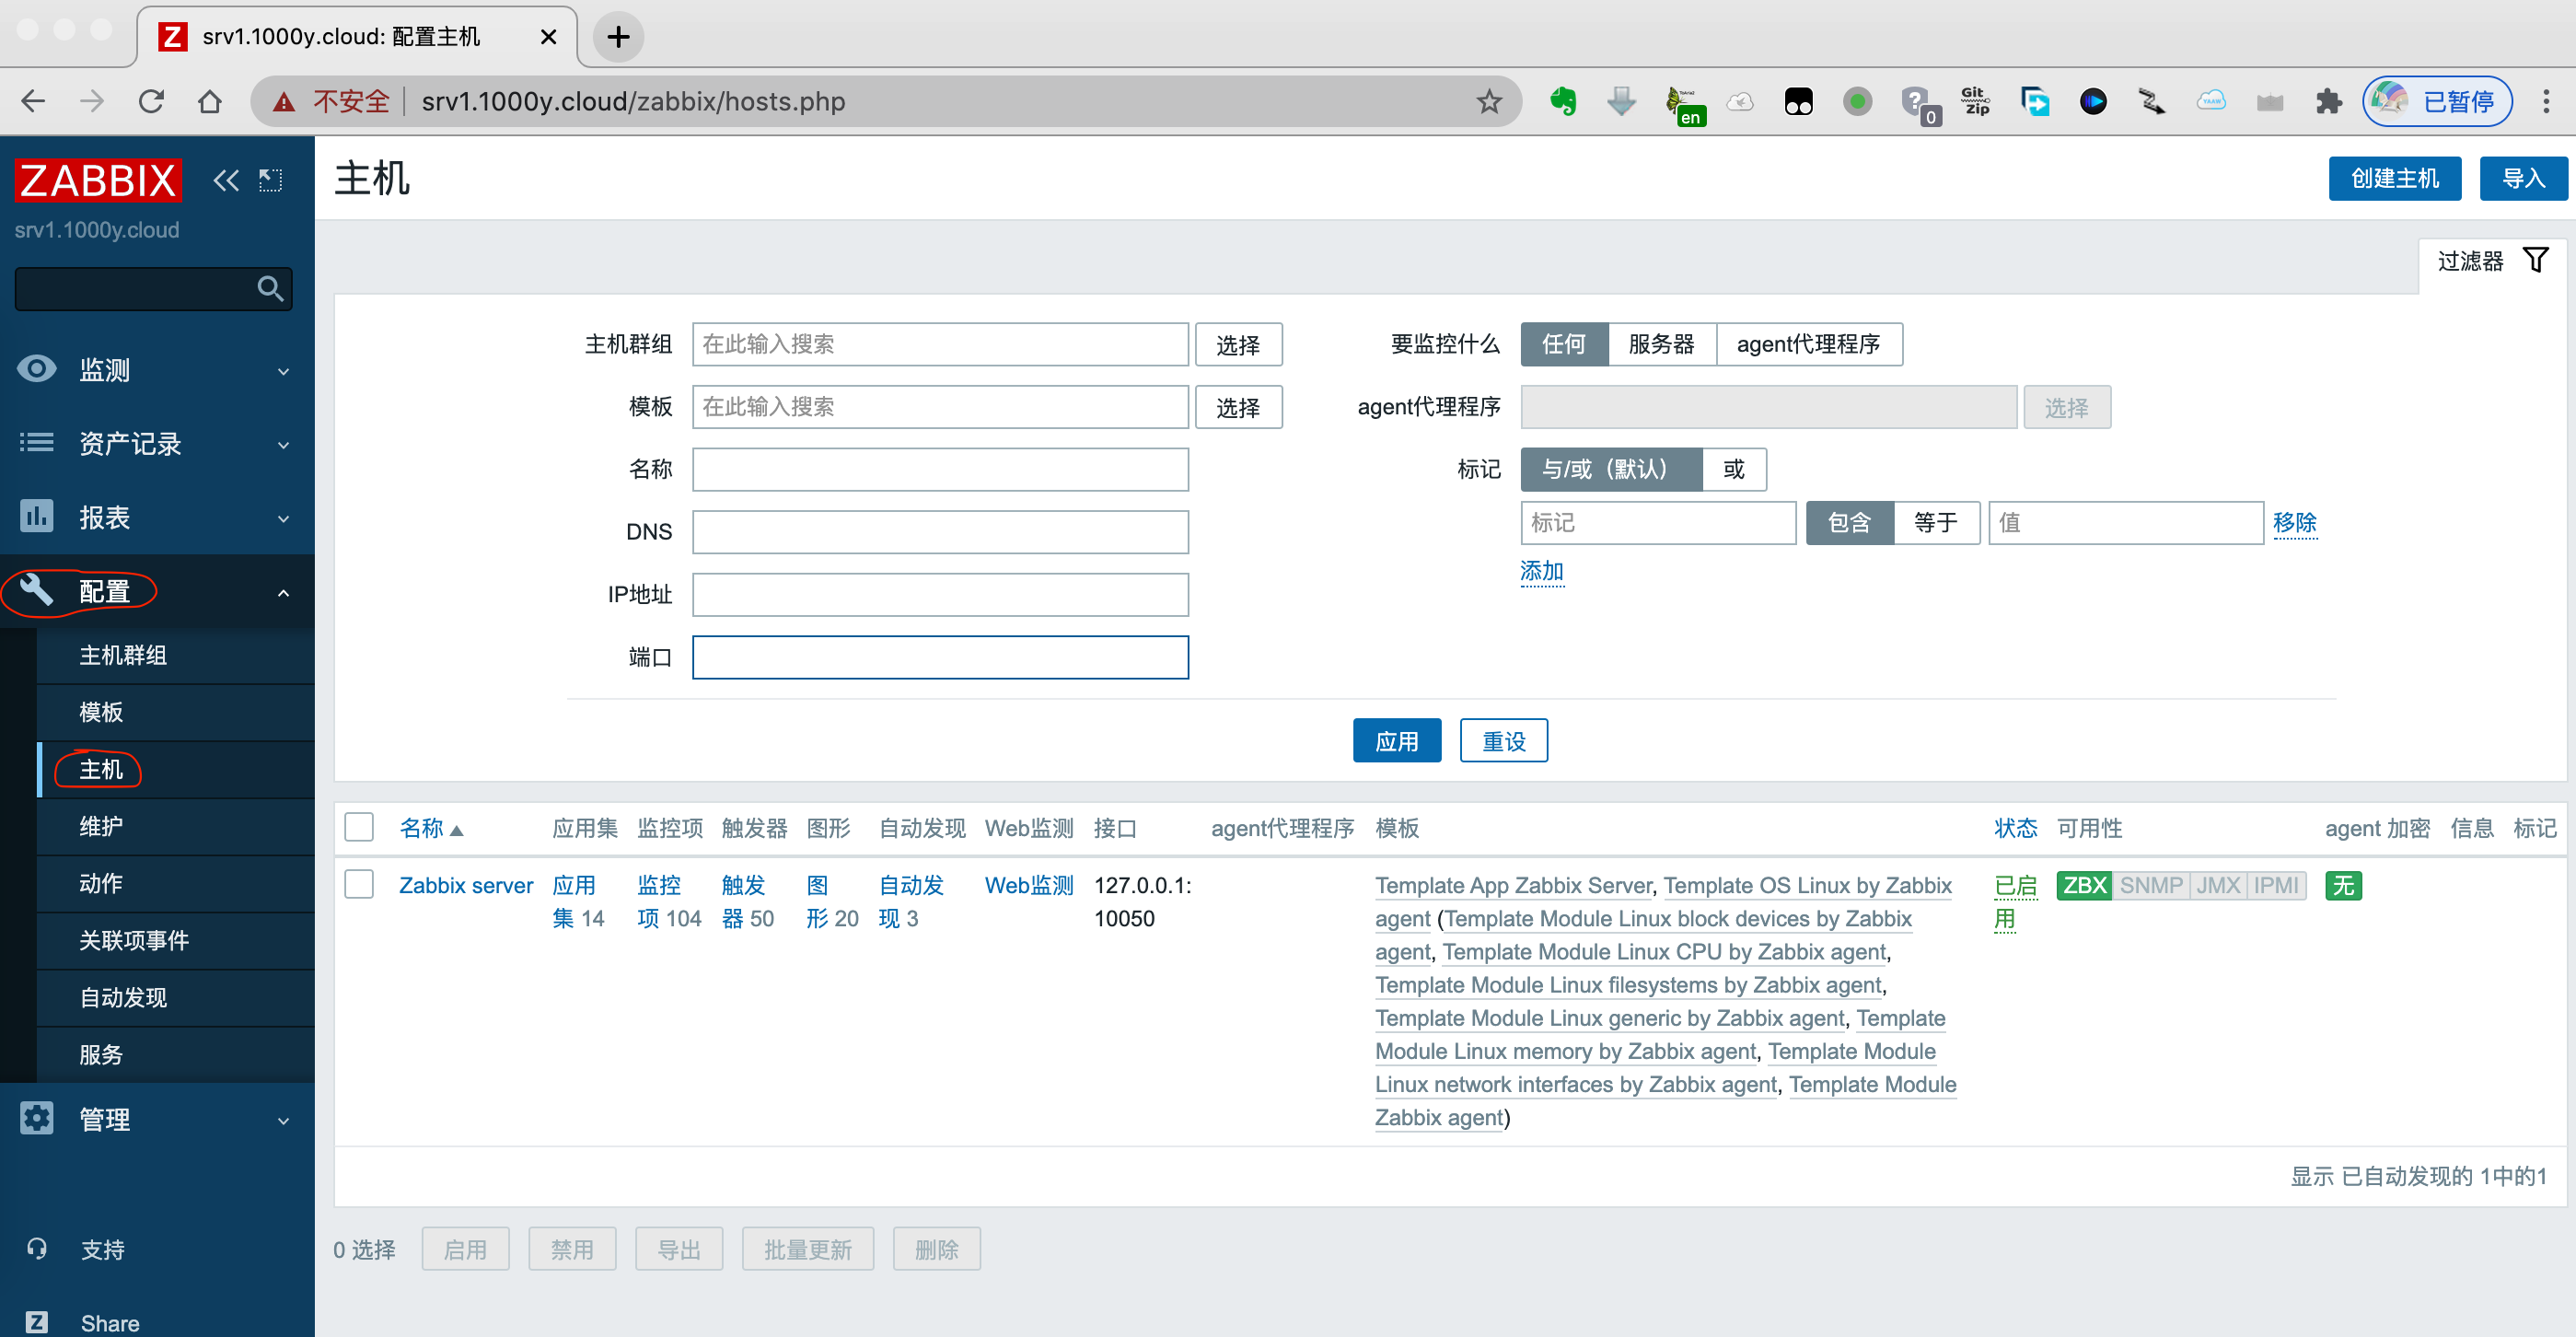
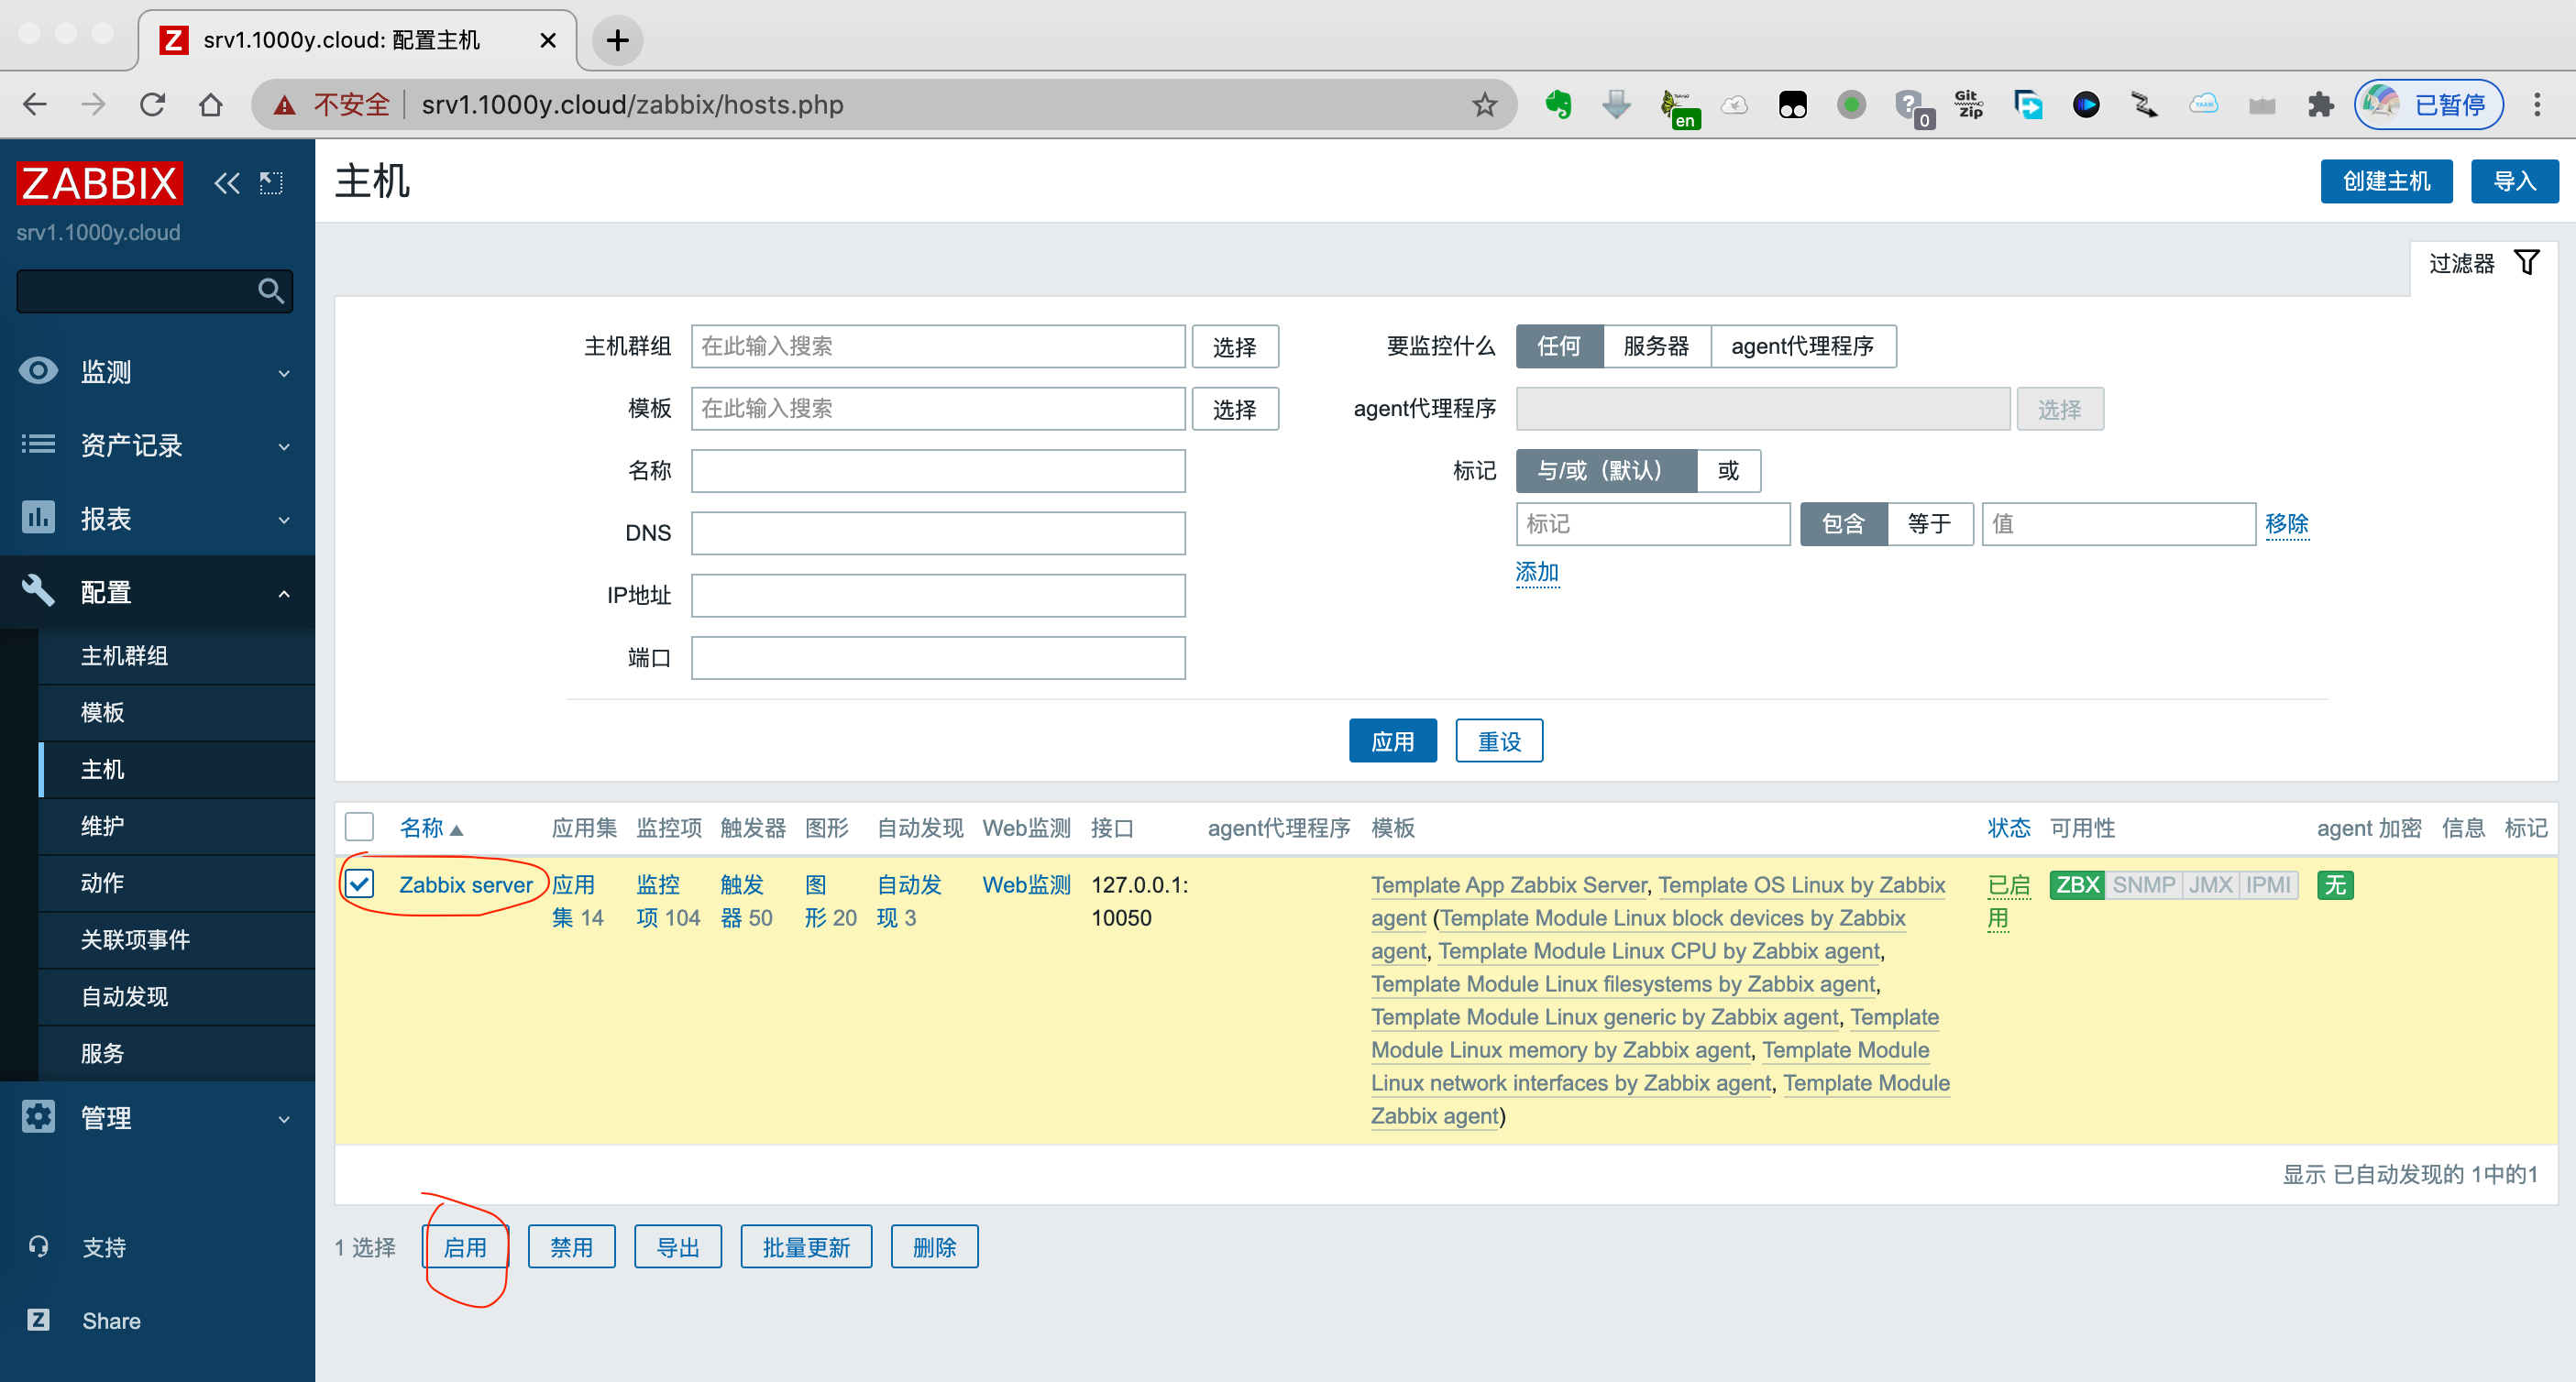
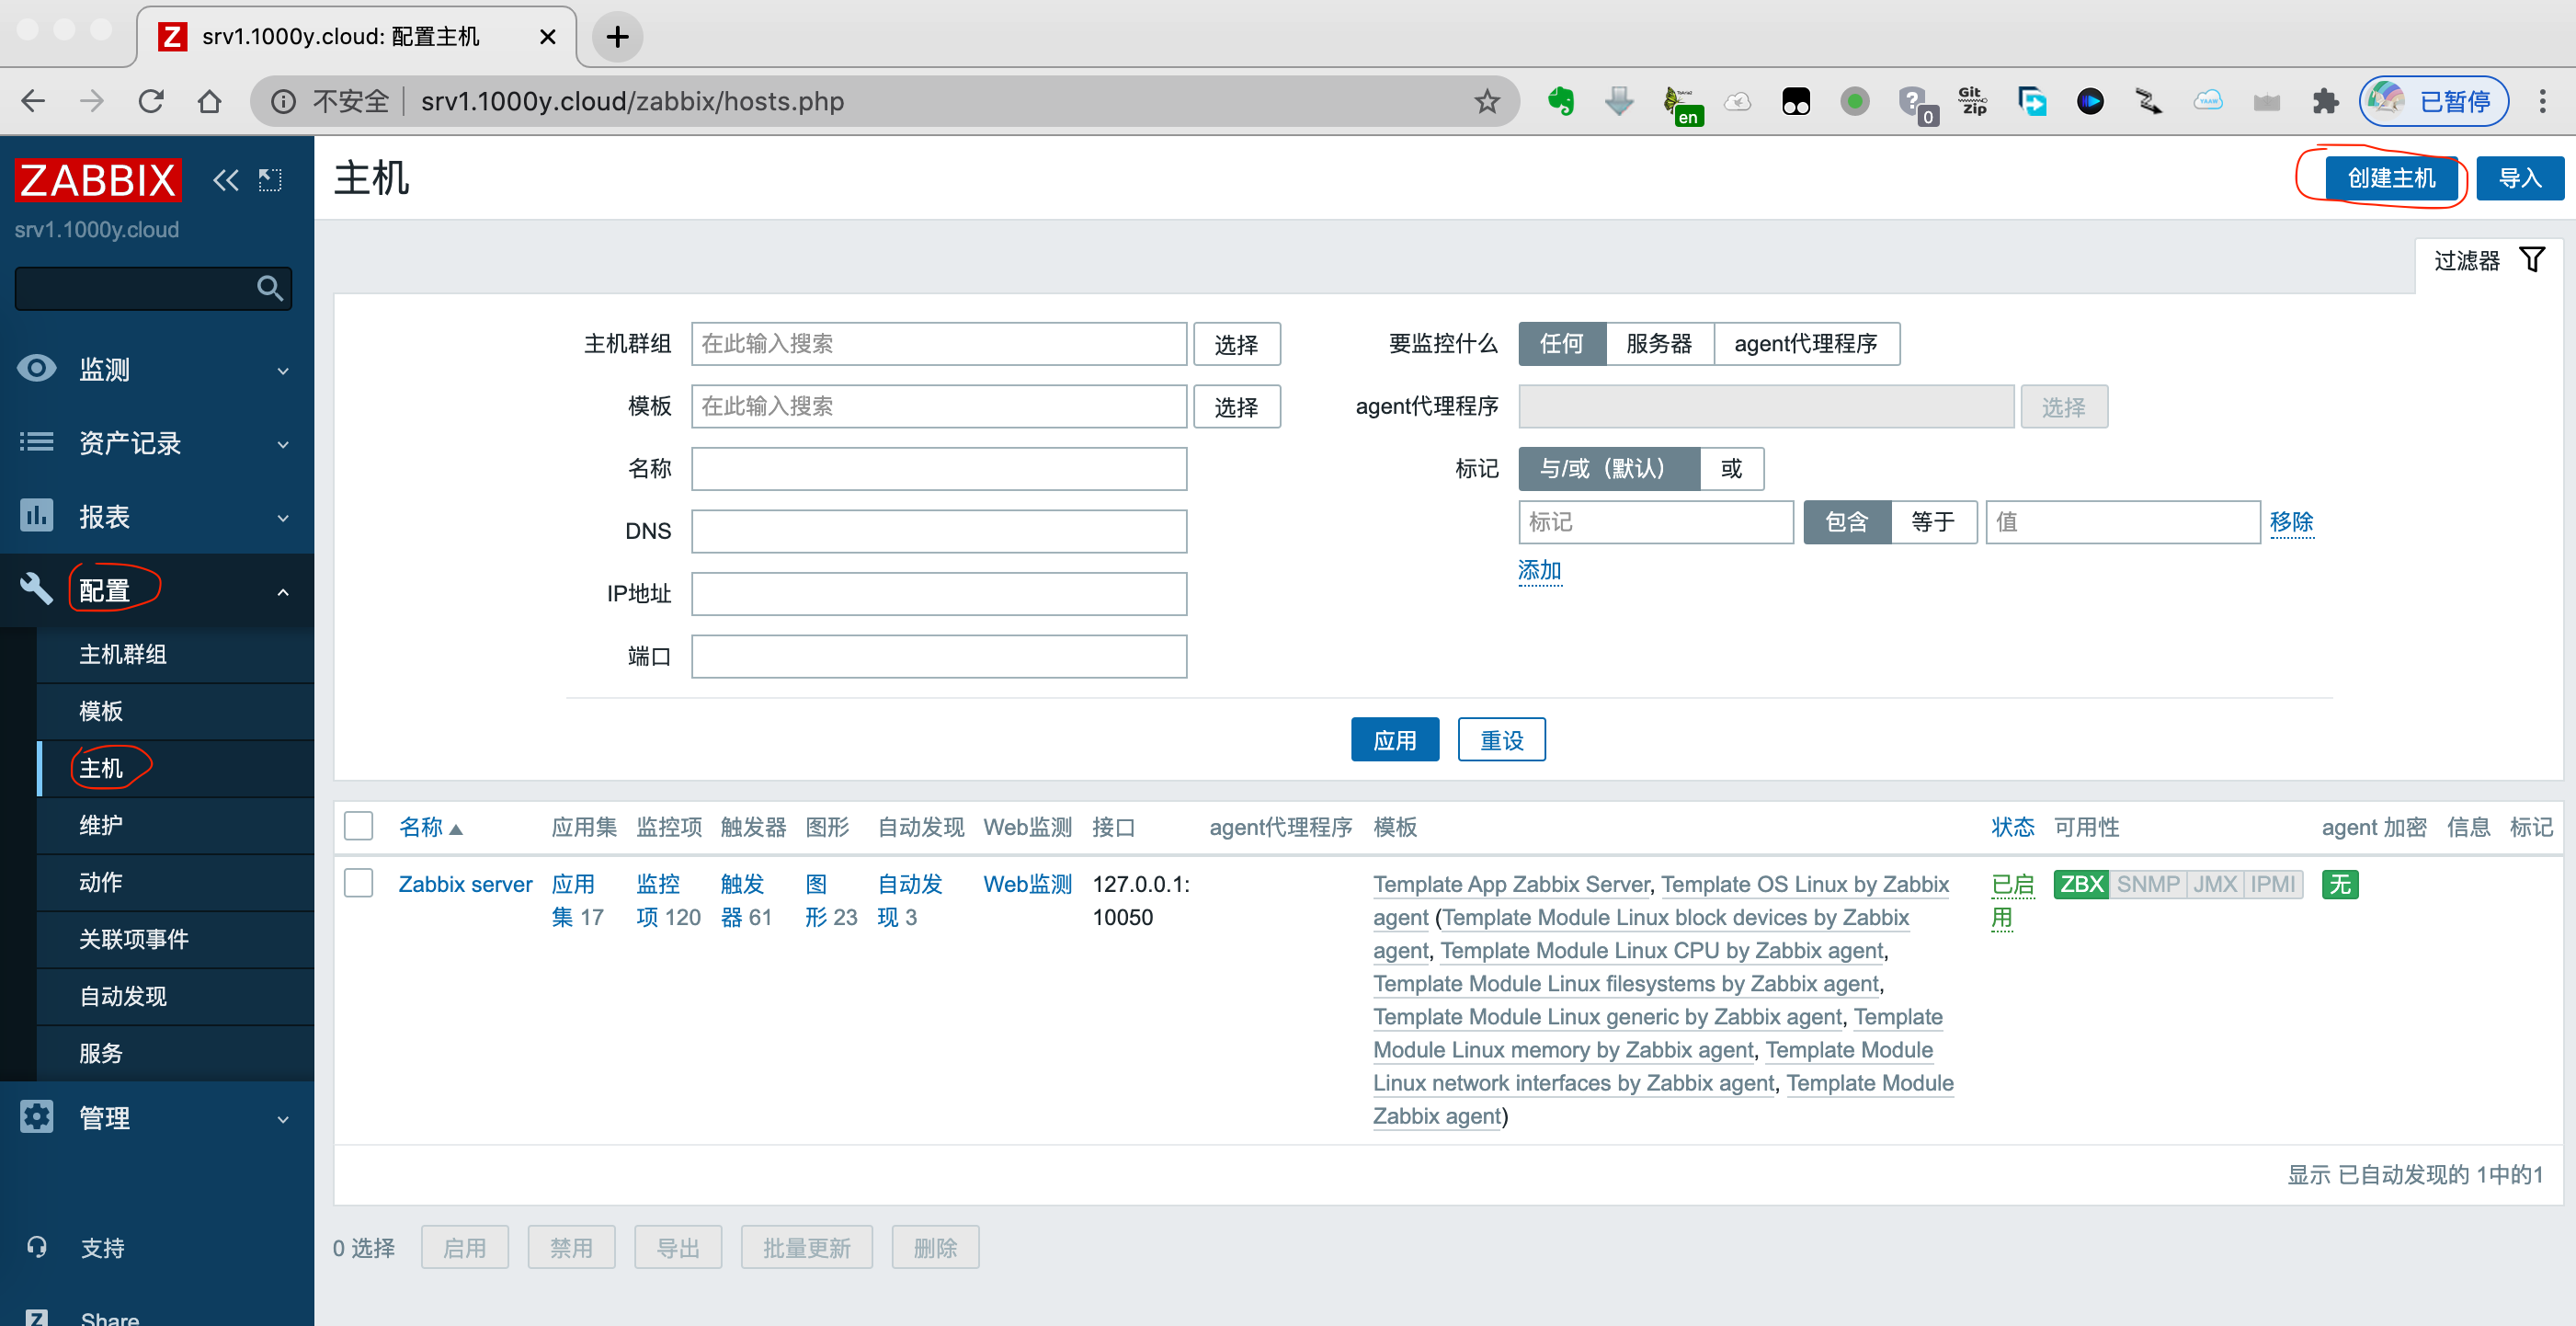
4. 添加监测主机(本地Zabbix Server)
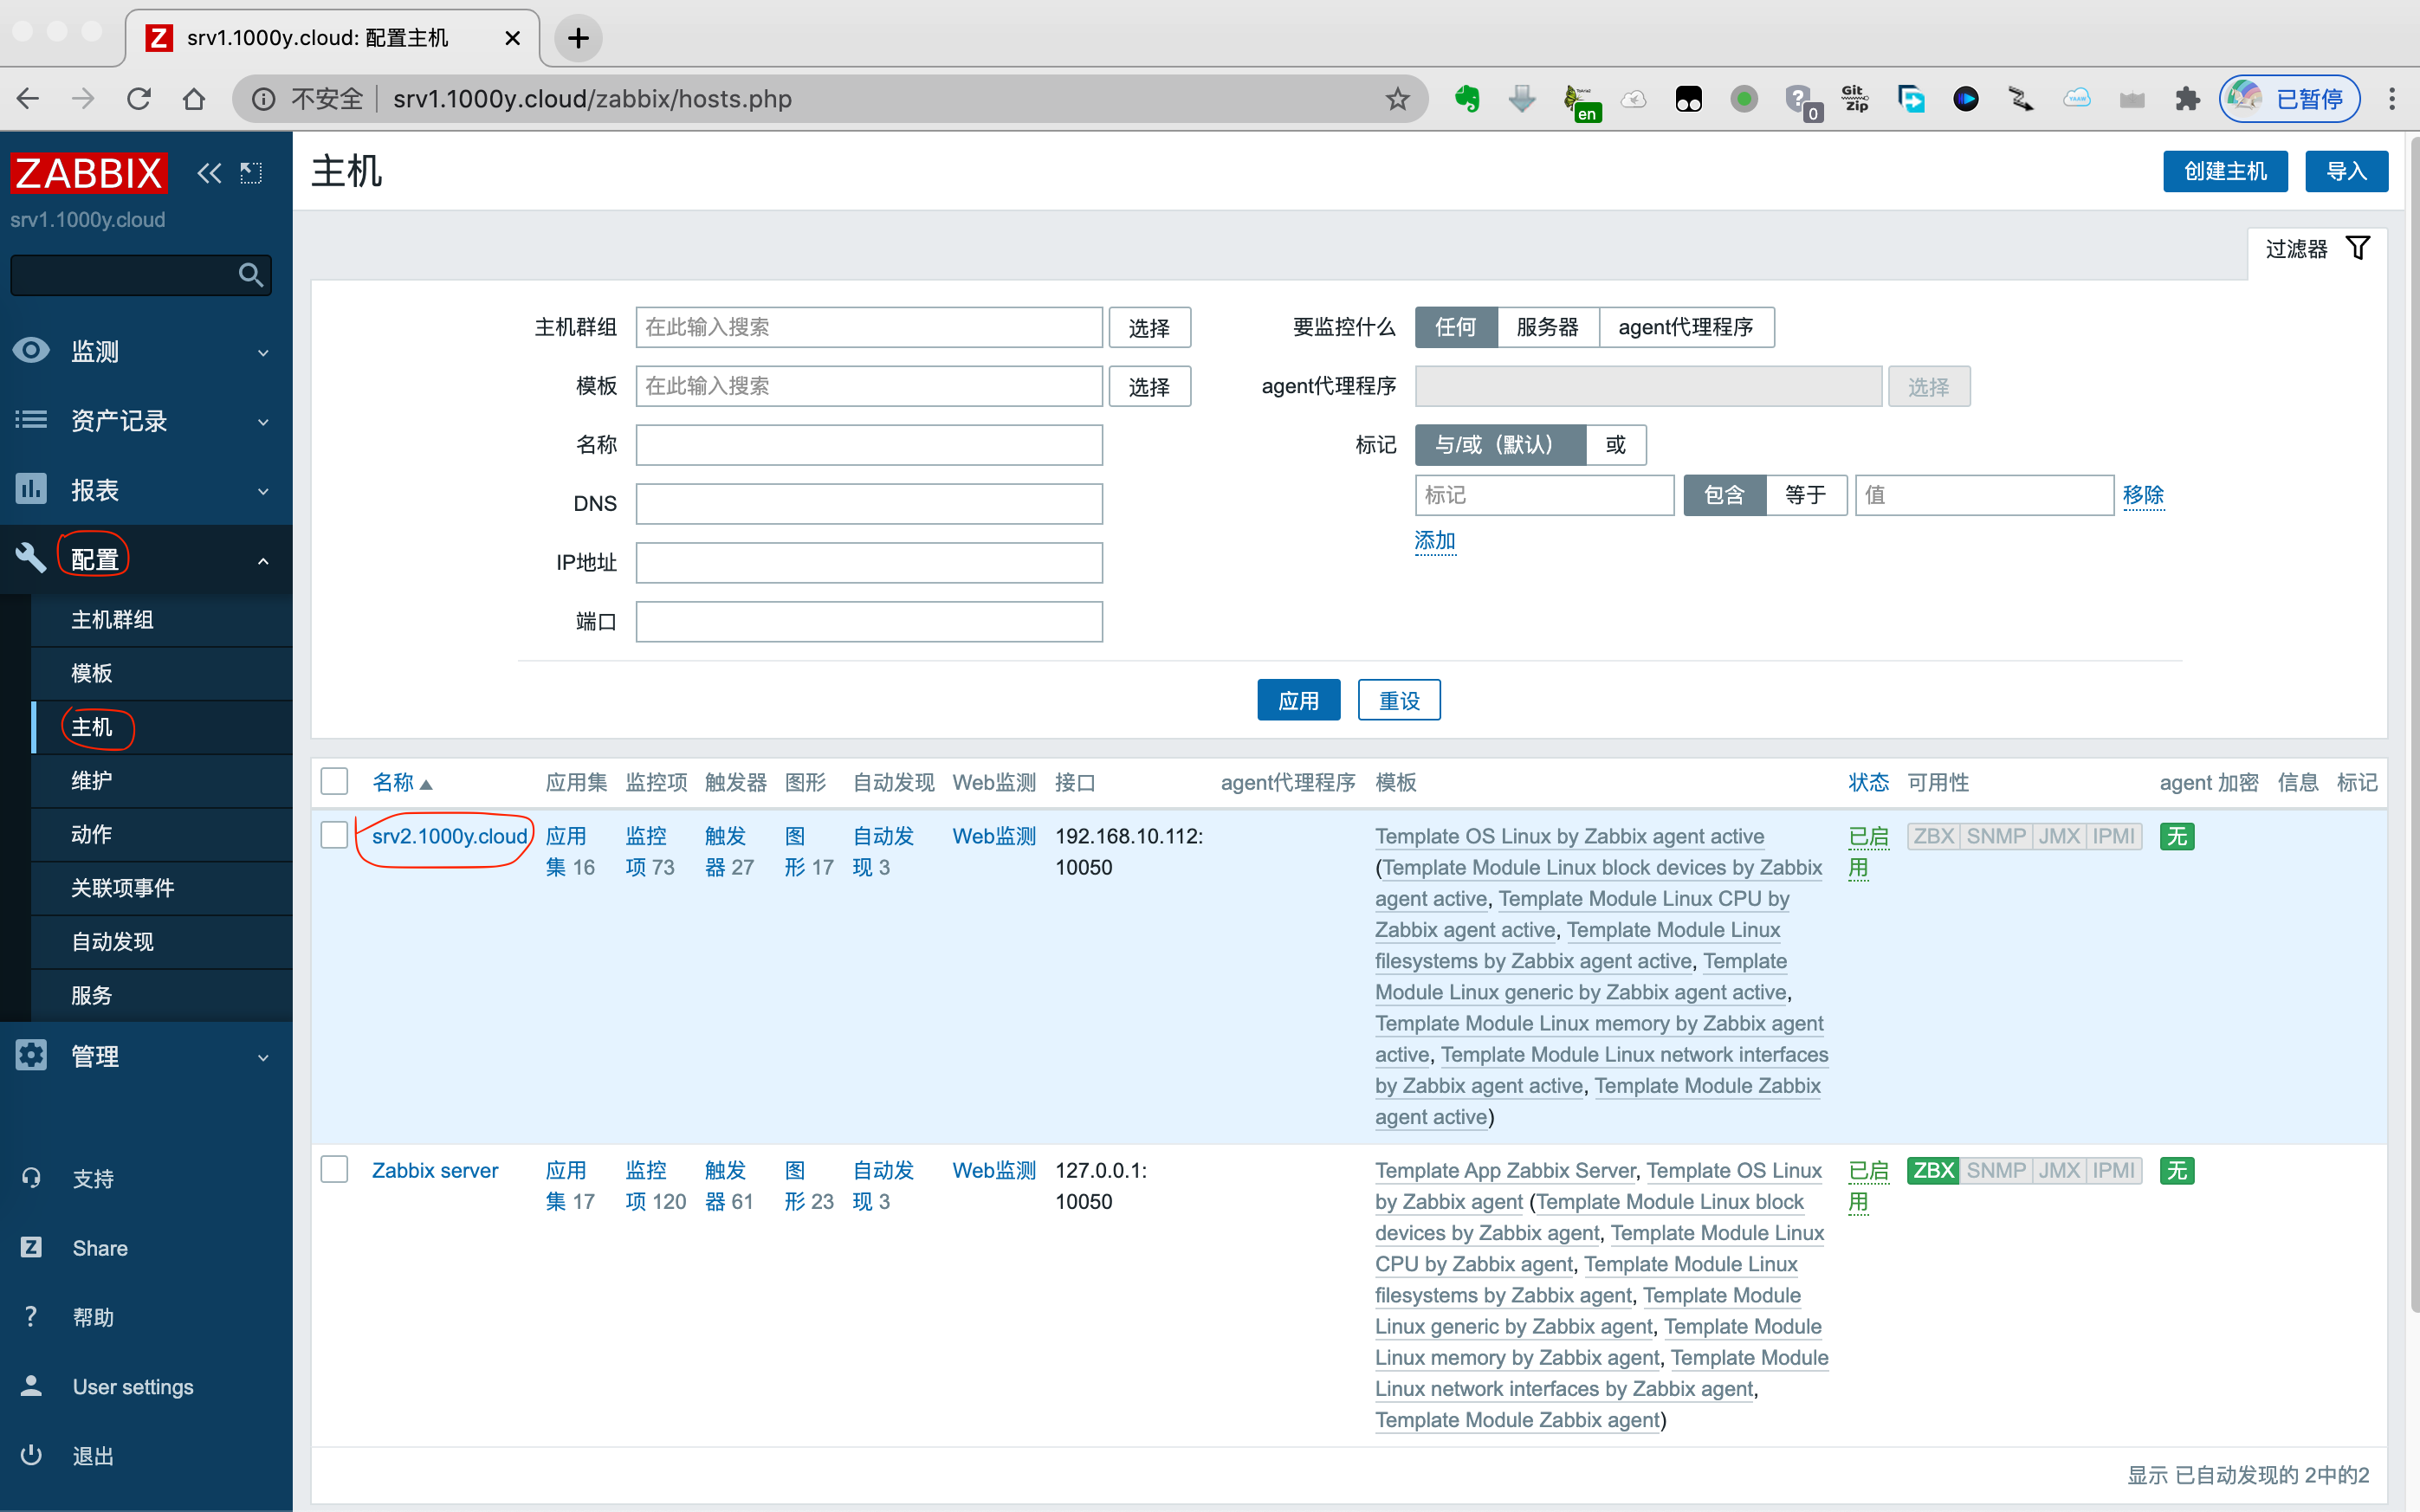
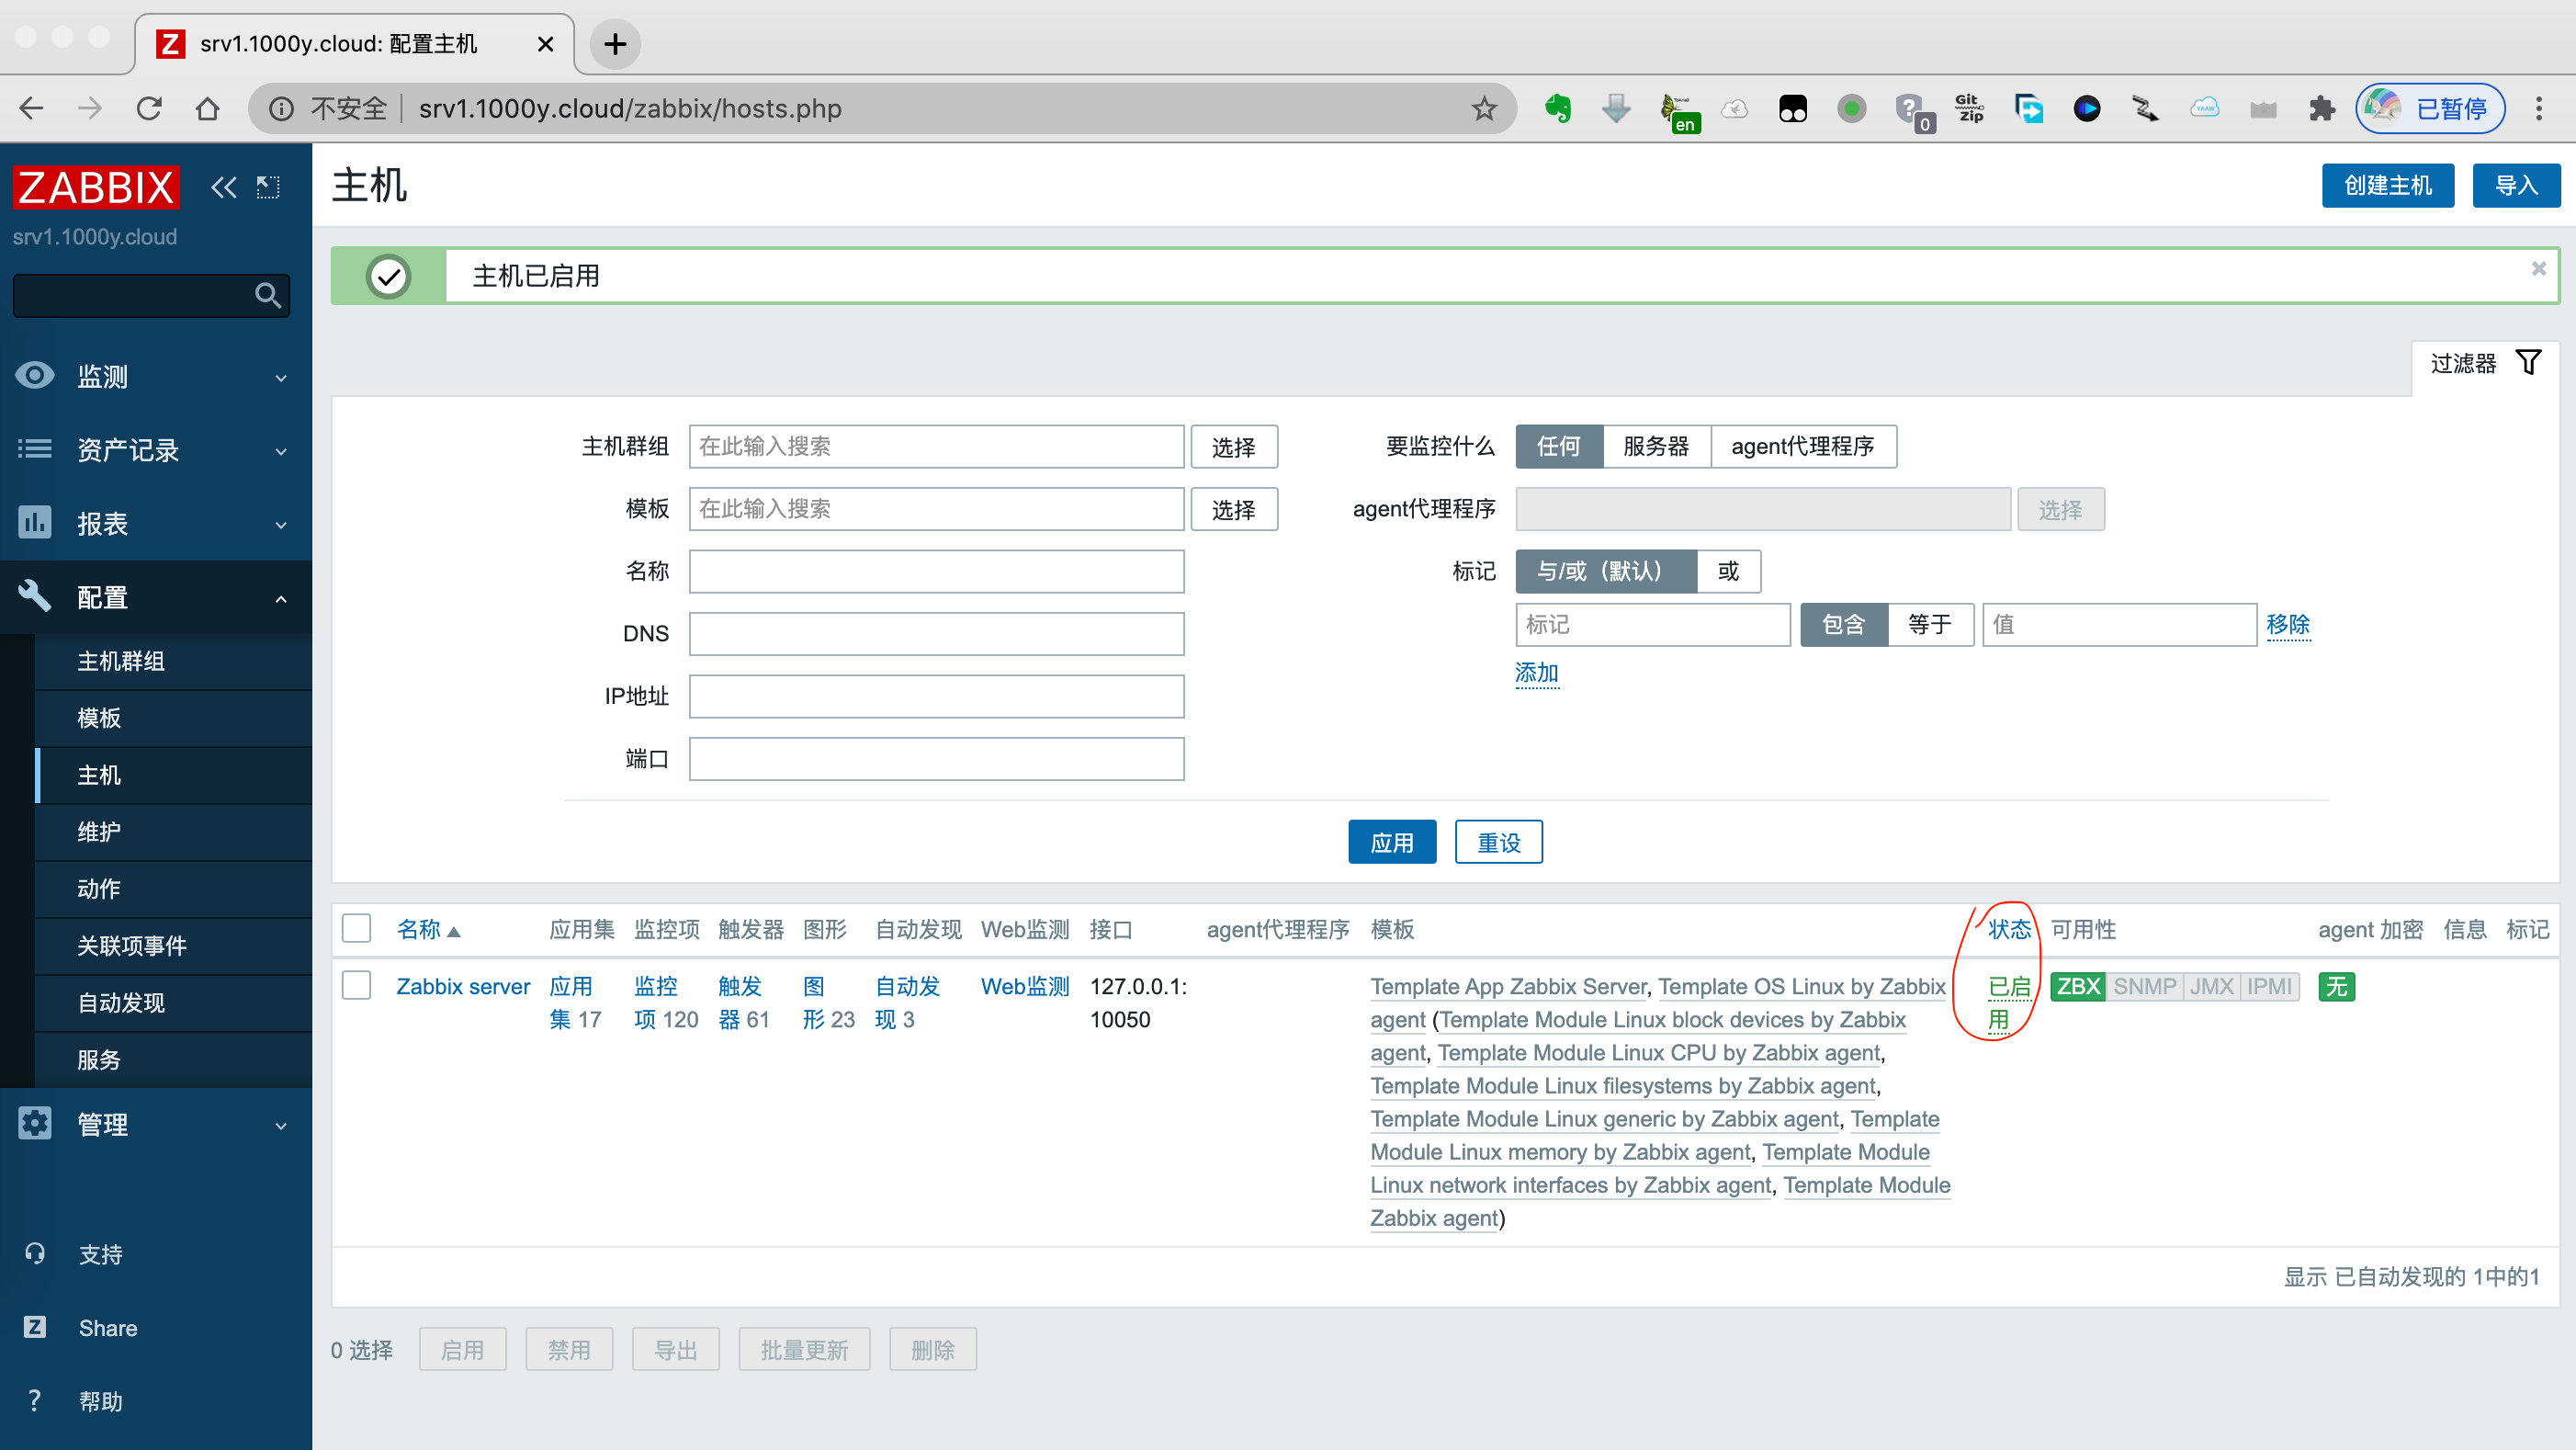
1) 点击[配置]=>[主机] |


5. 配置邮件通知
5.1 设置SMTP
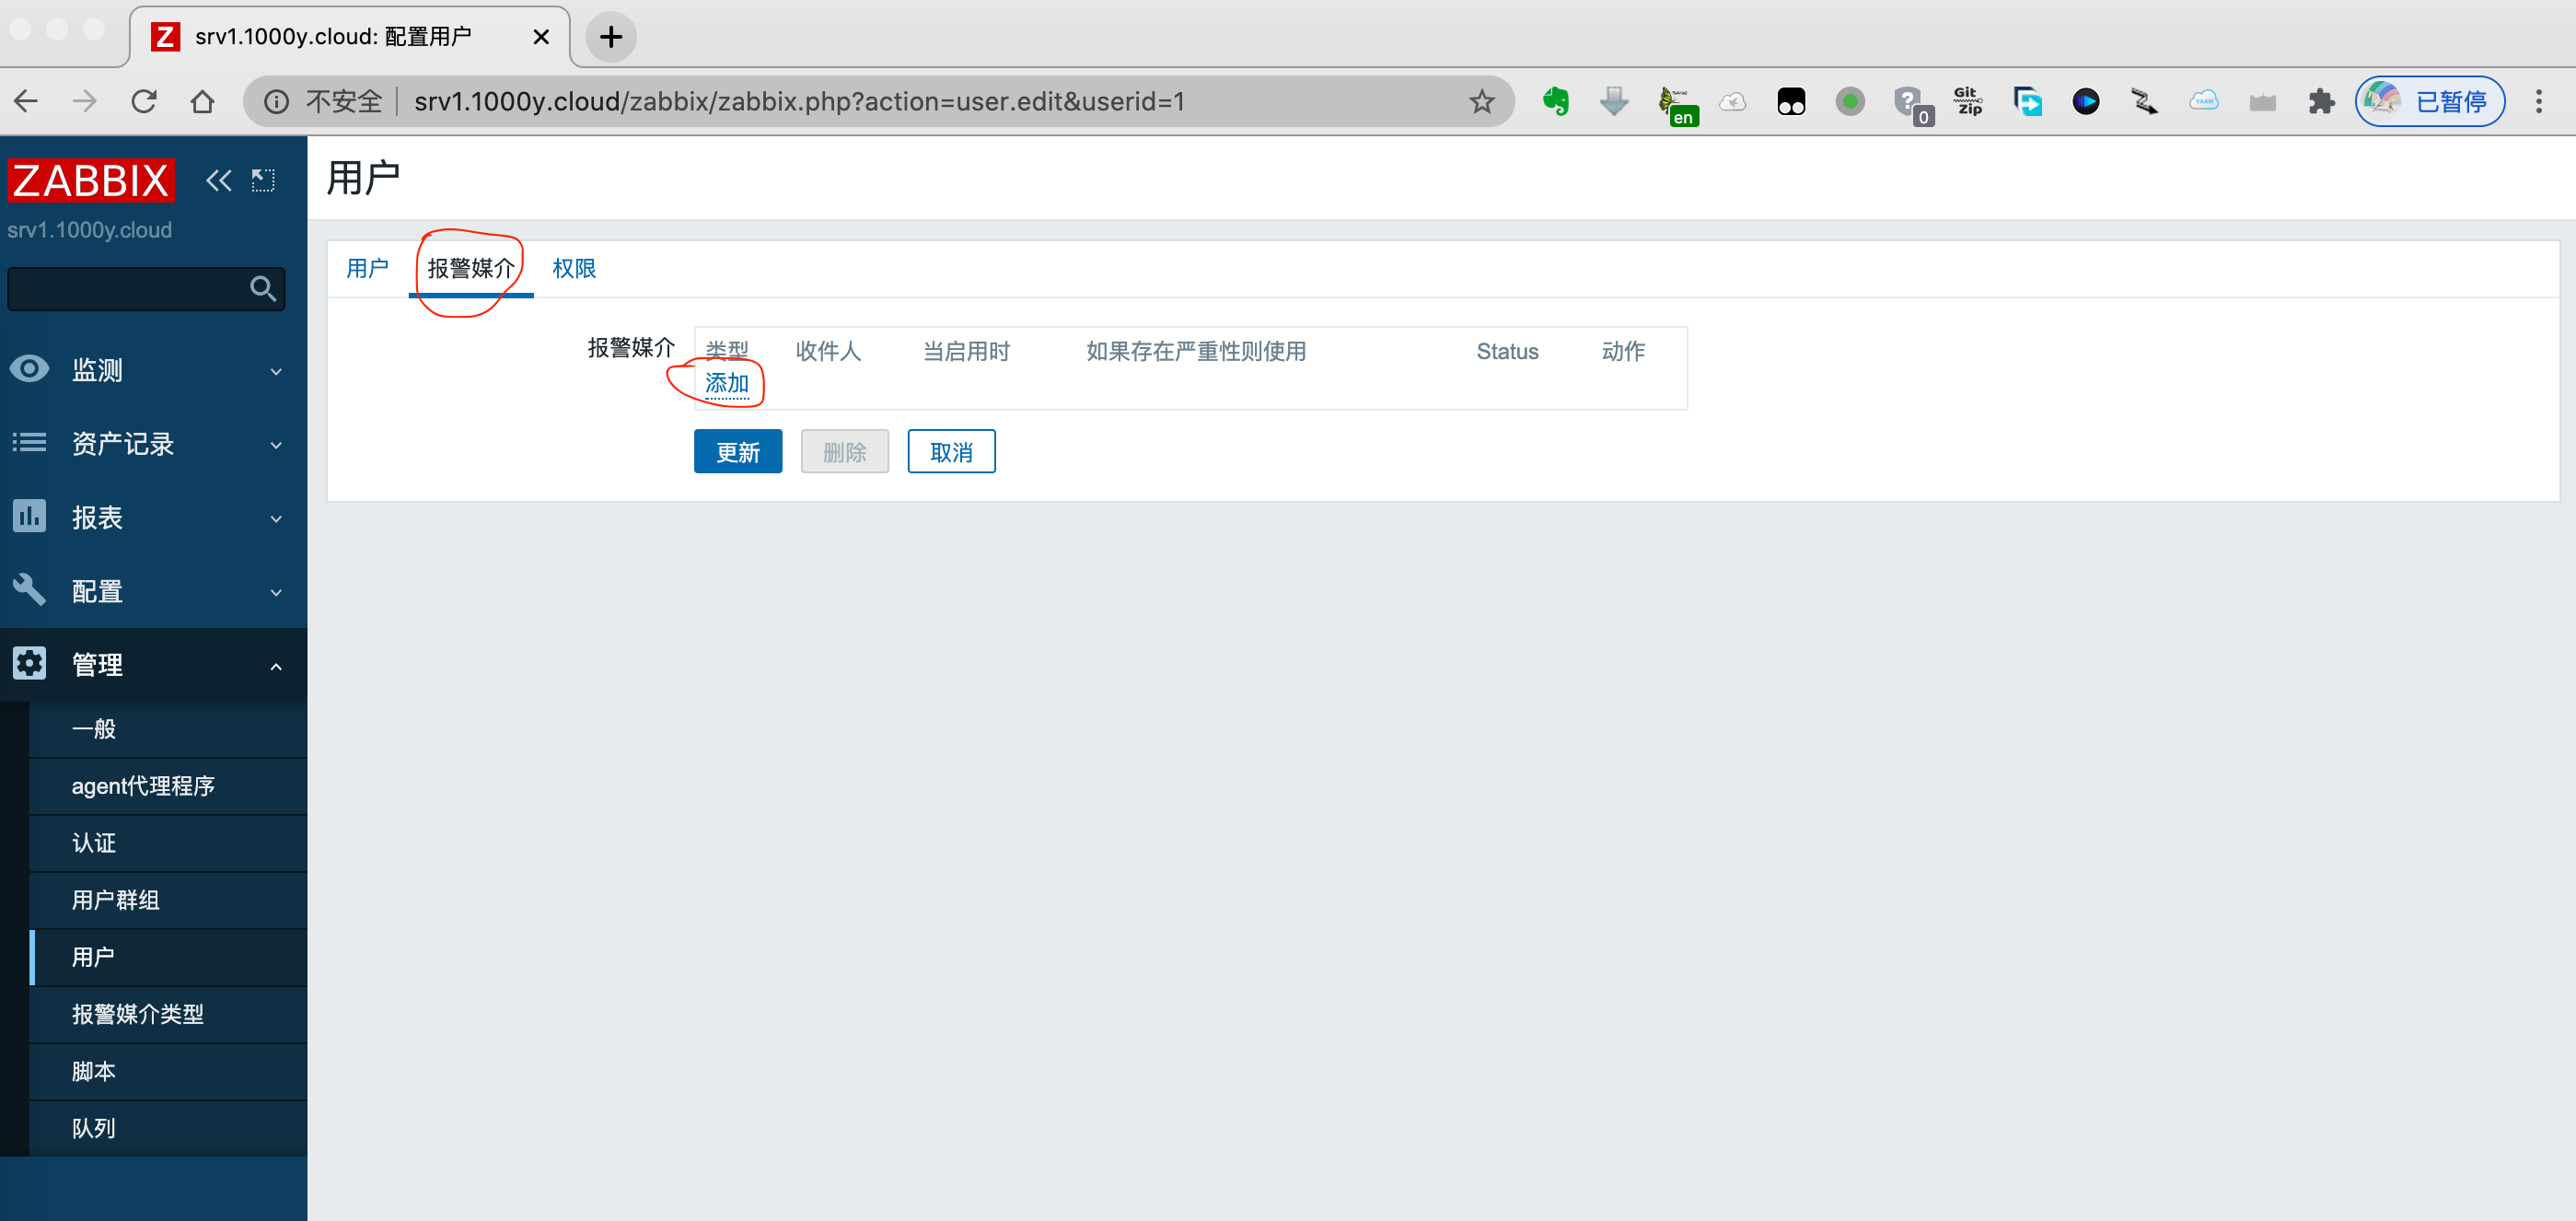
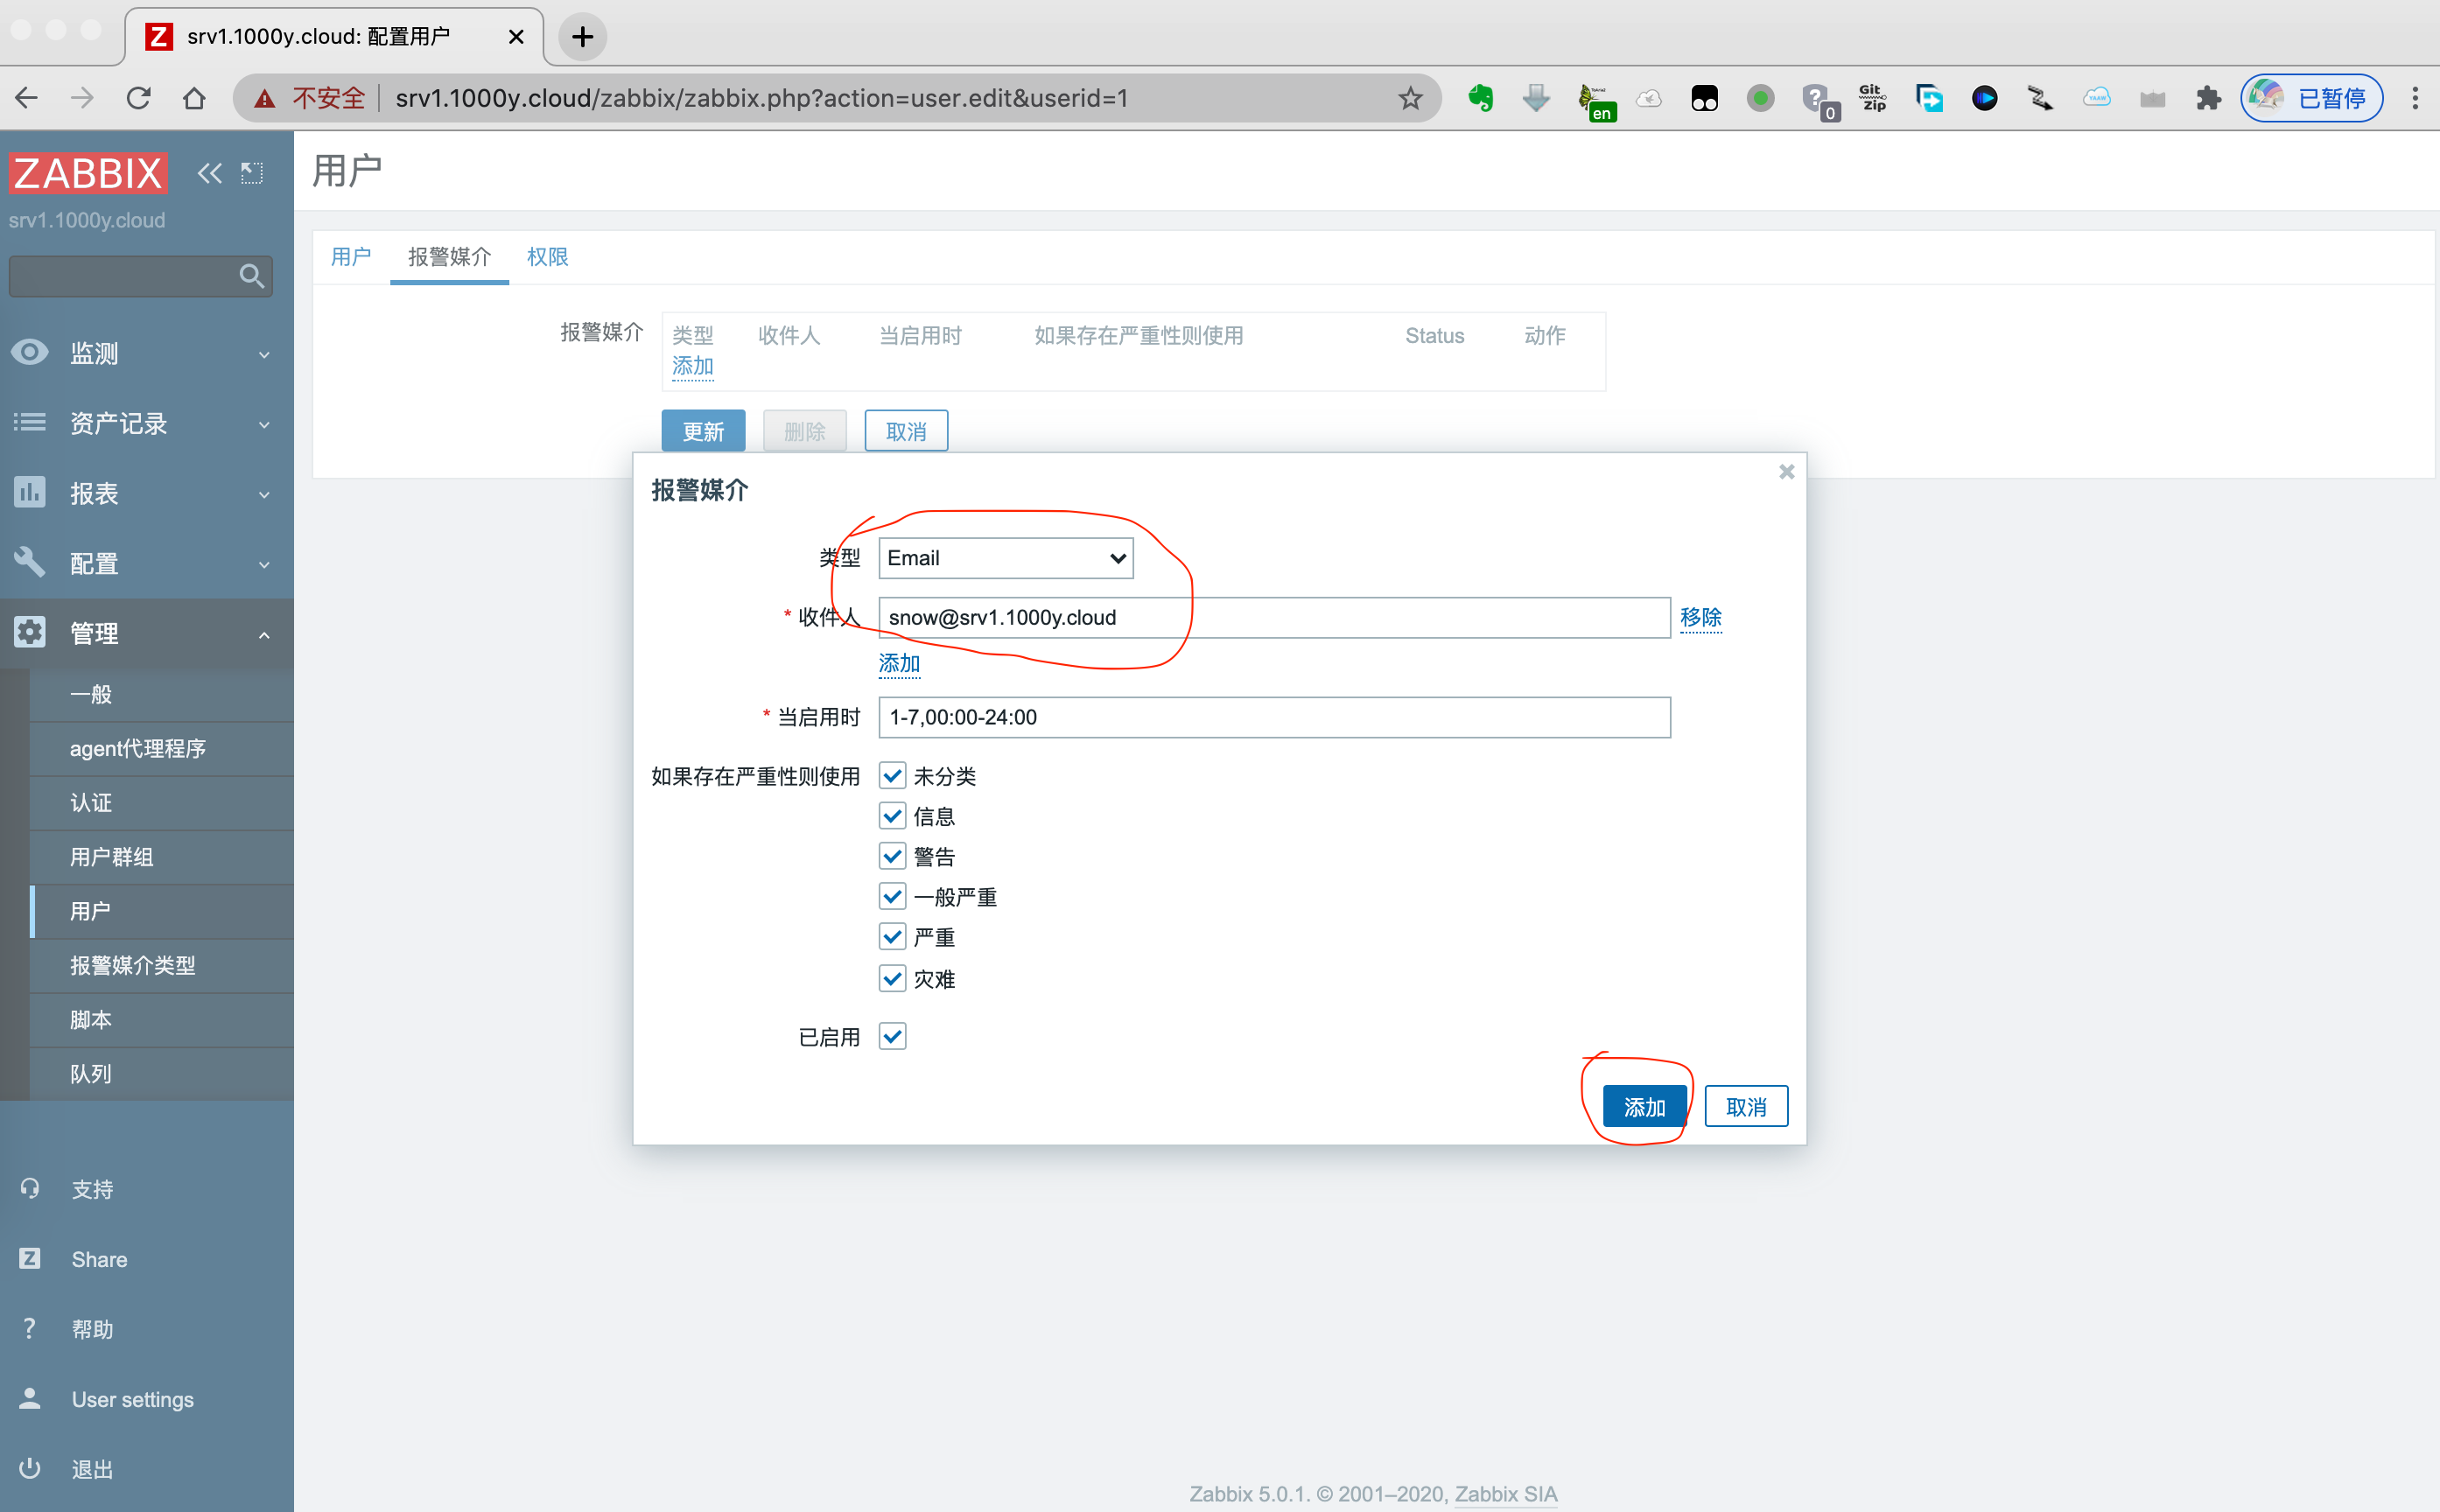
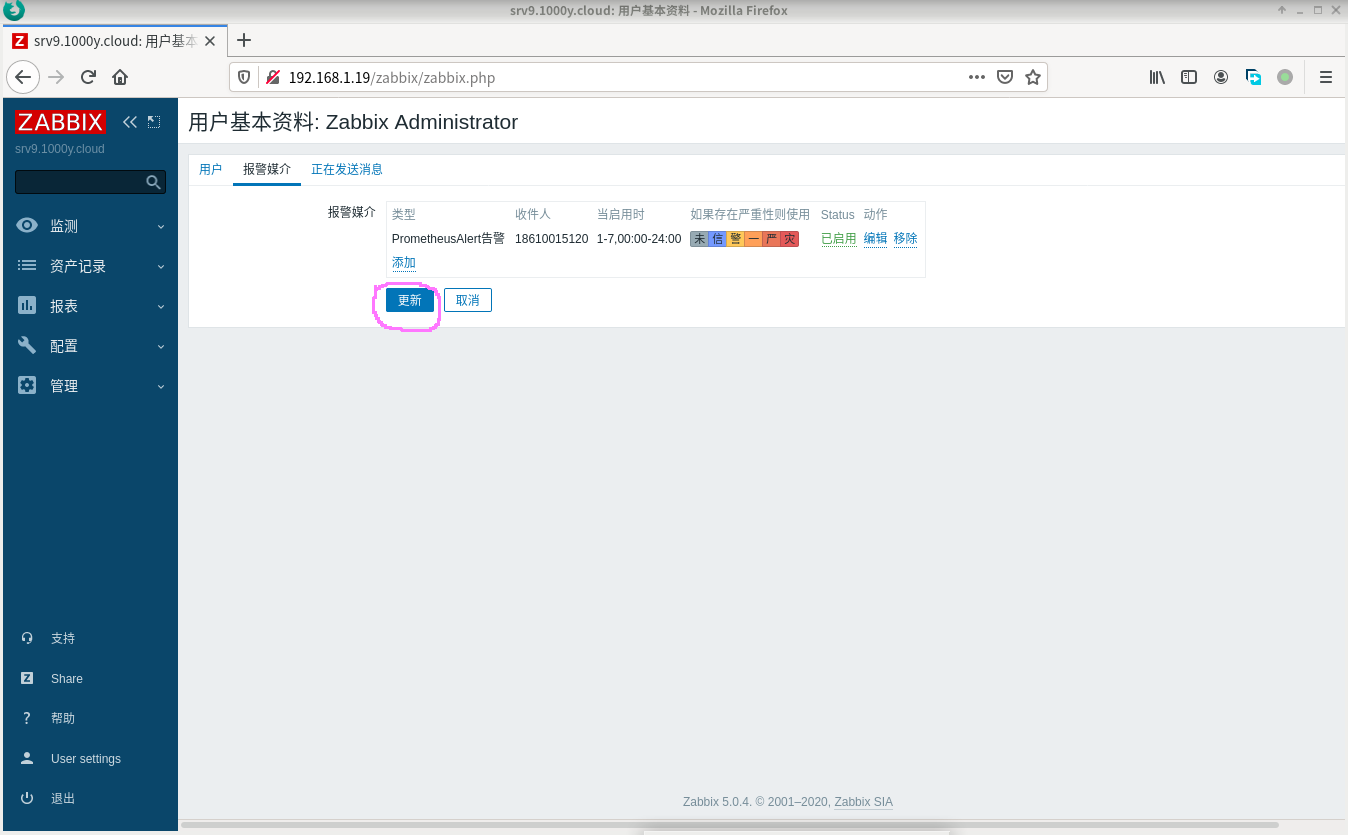
1) 为管理员配置E-Mail地址并配置Zabbix SMTP信息
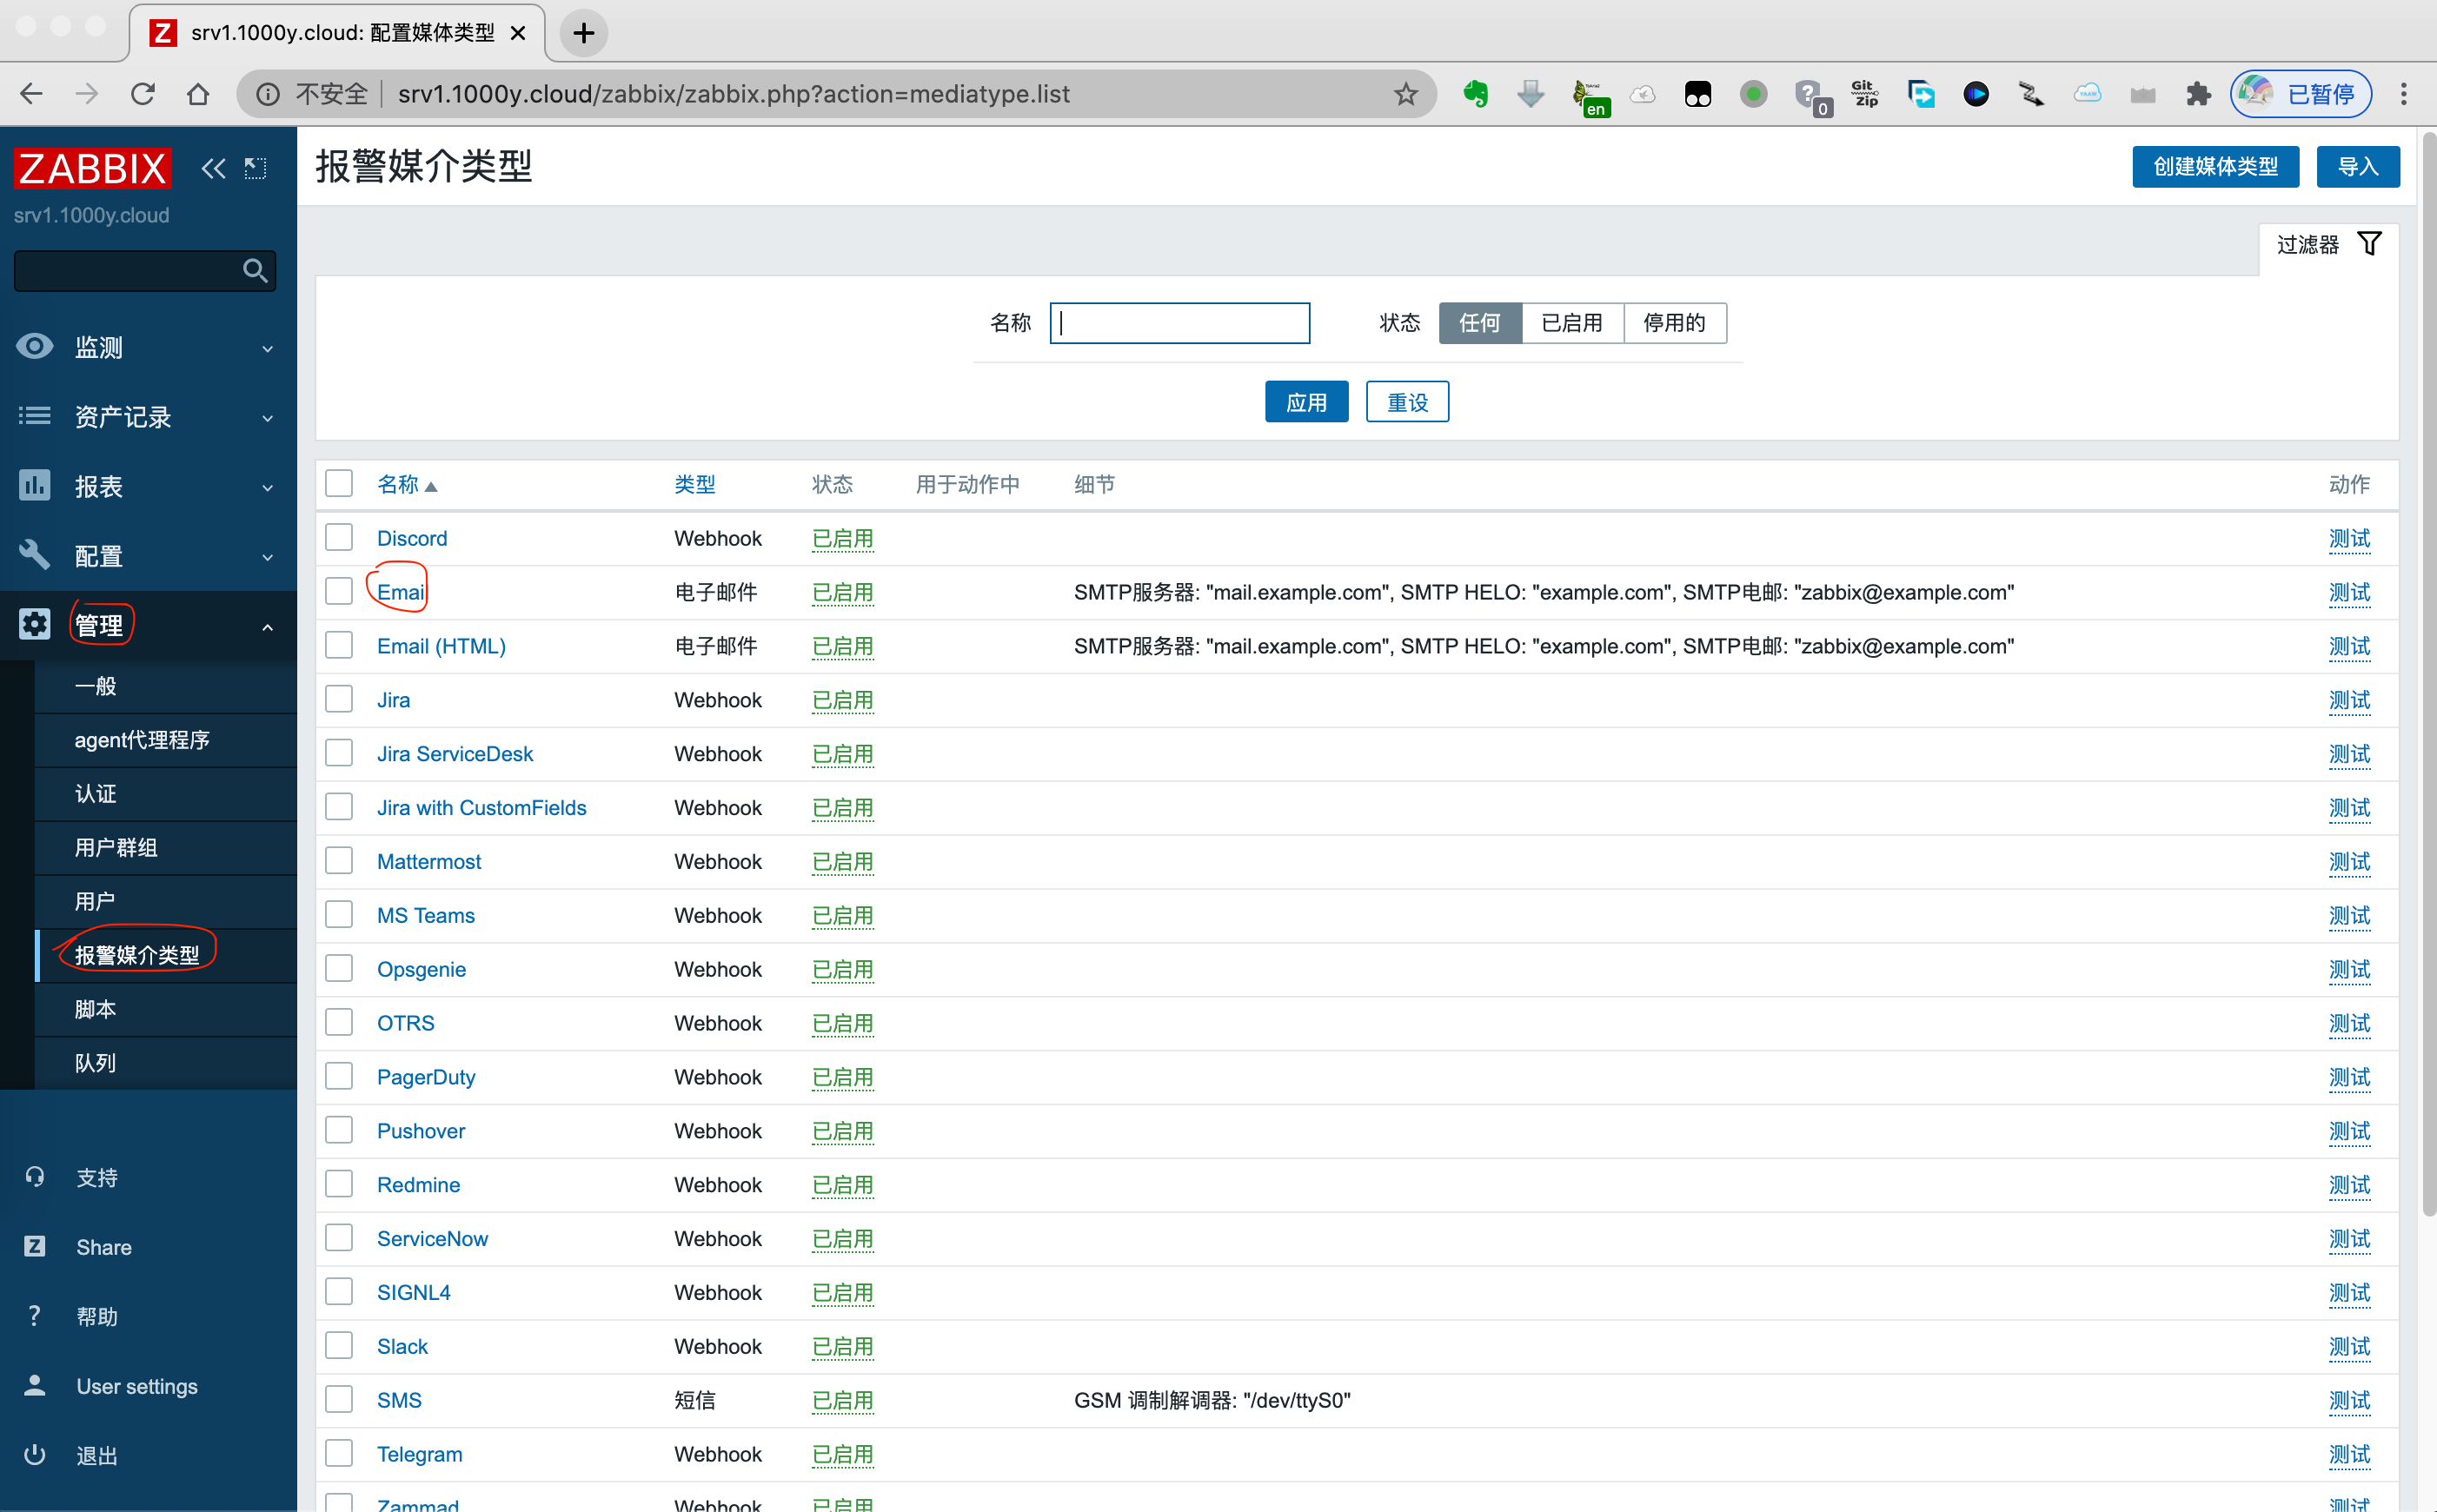
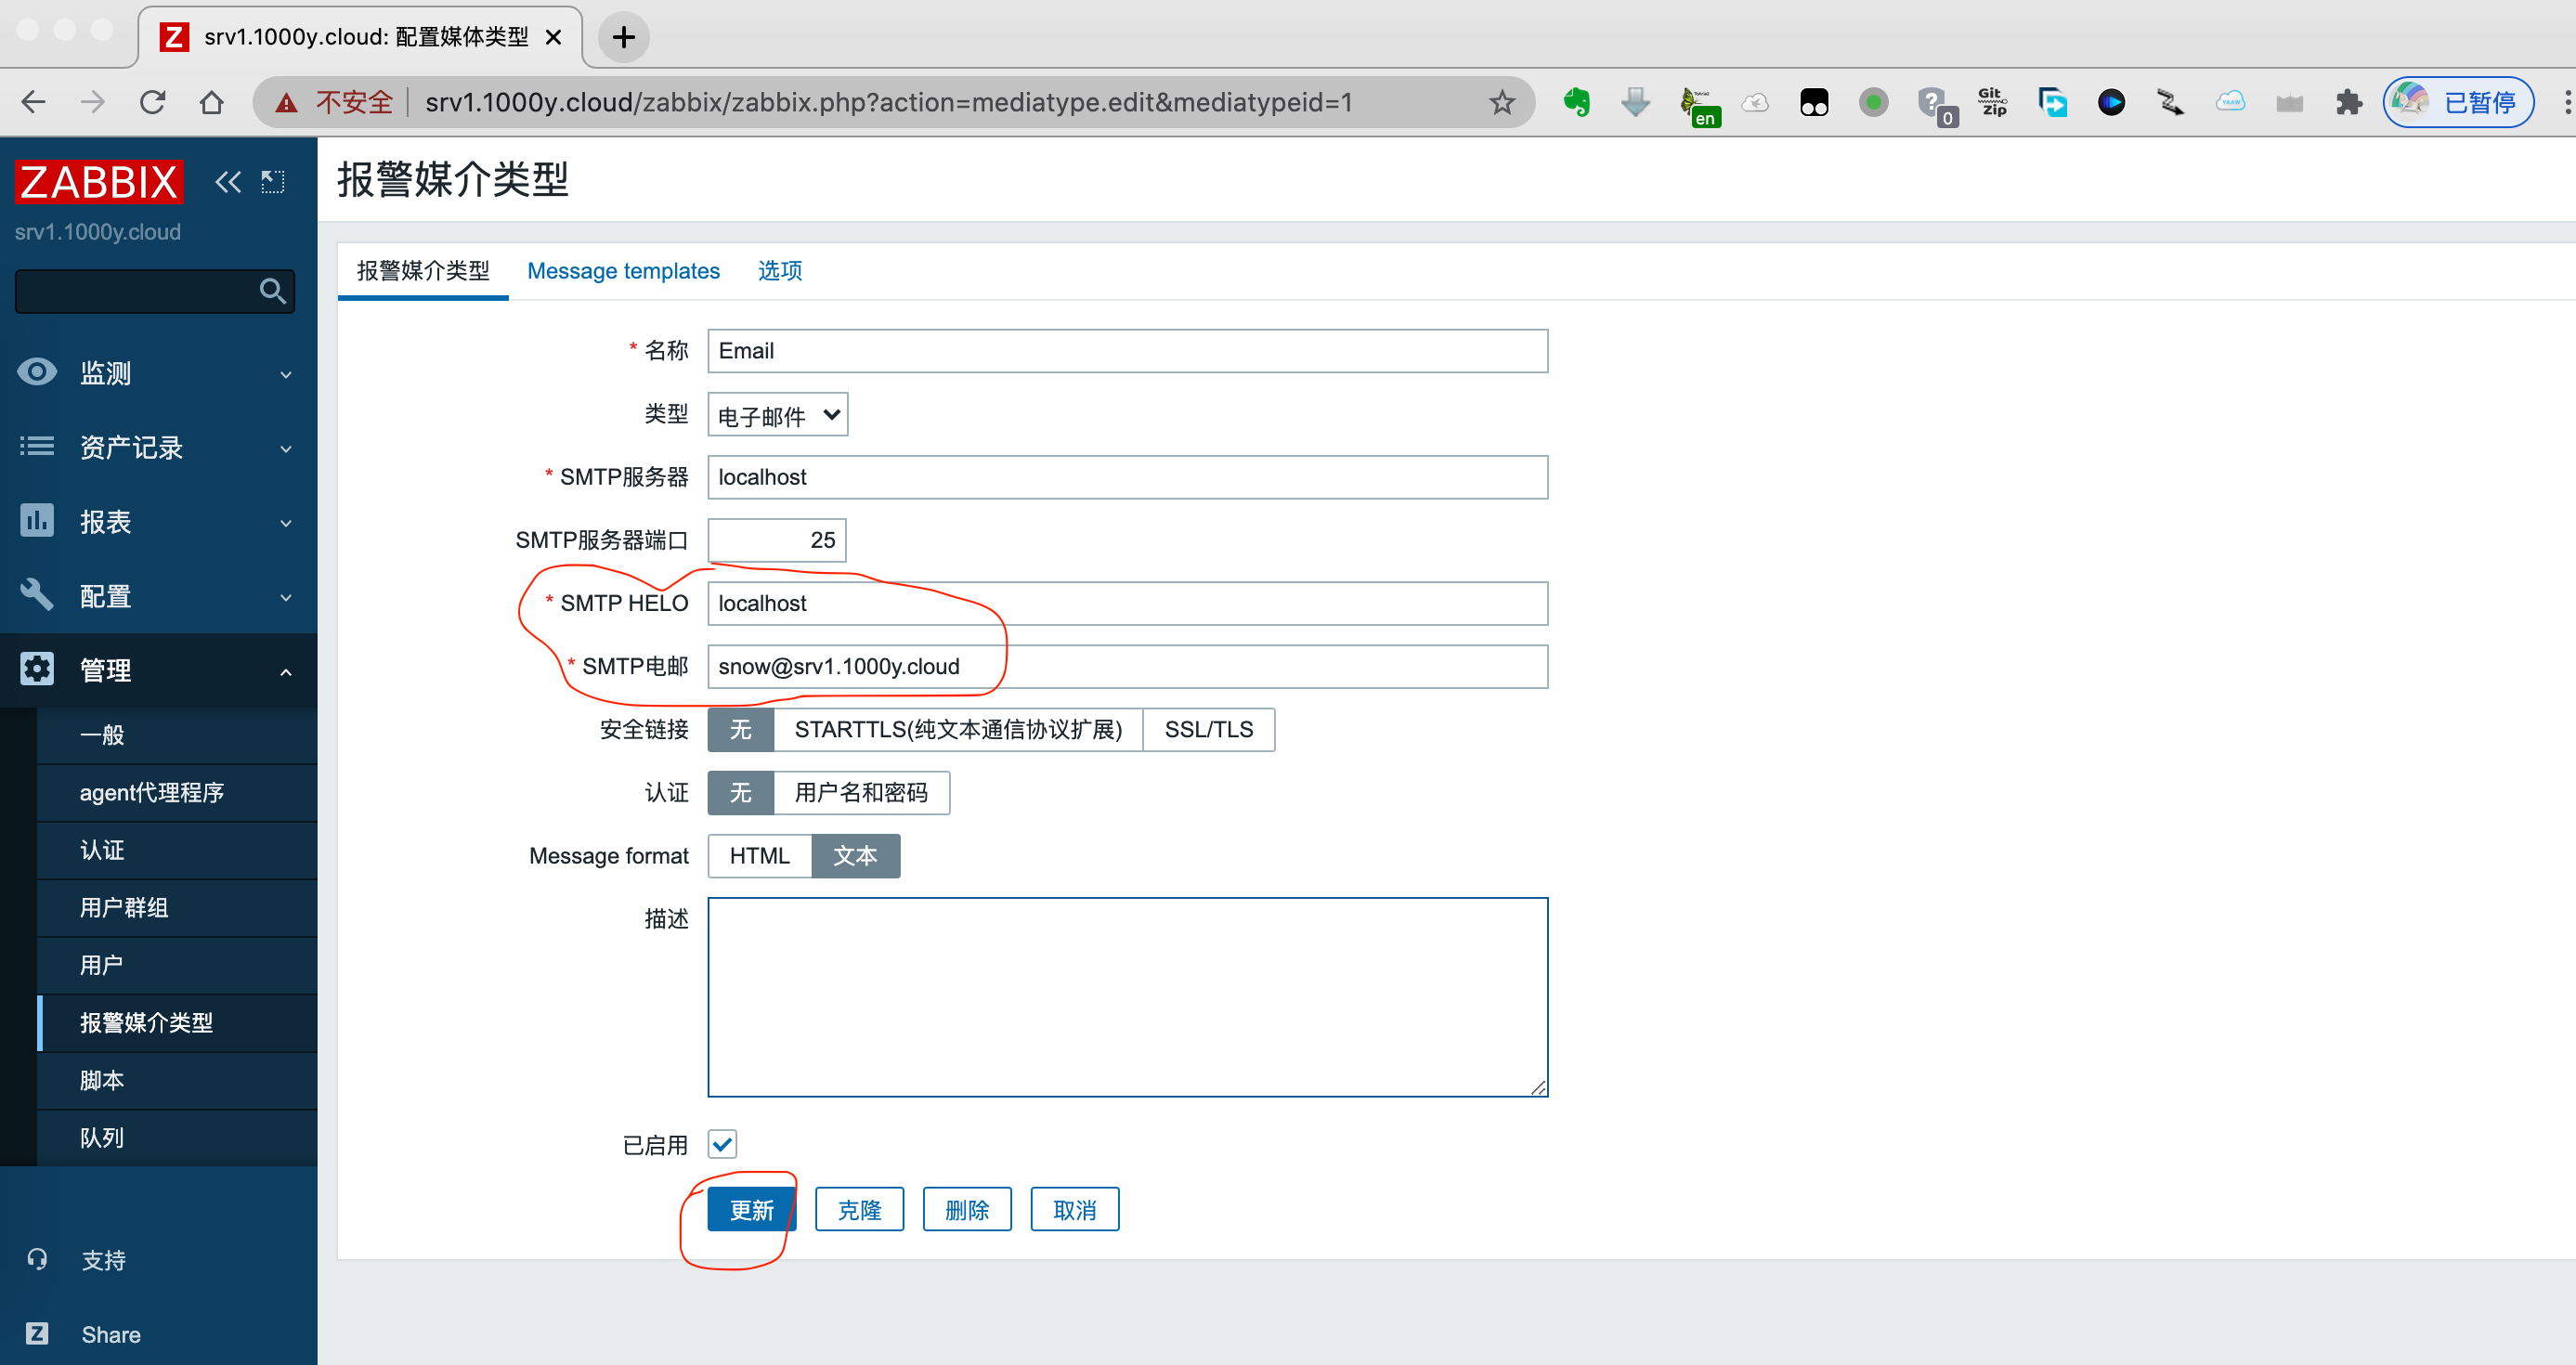
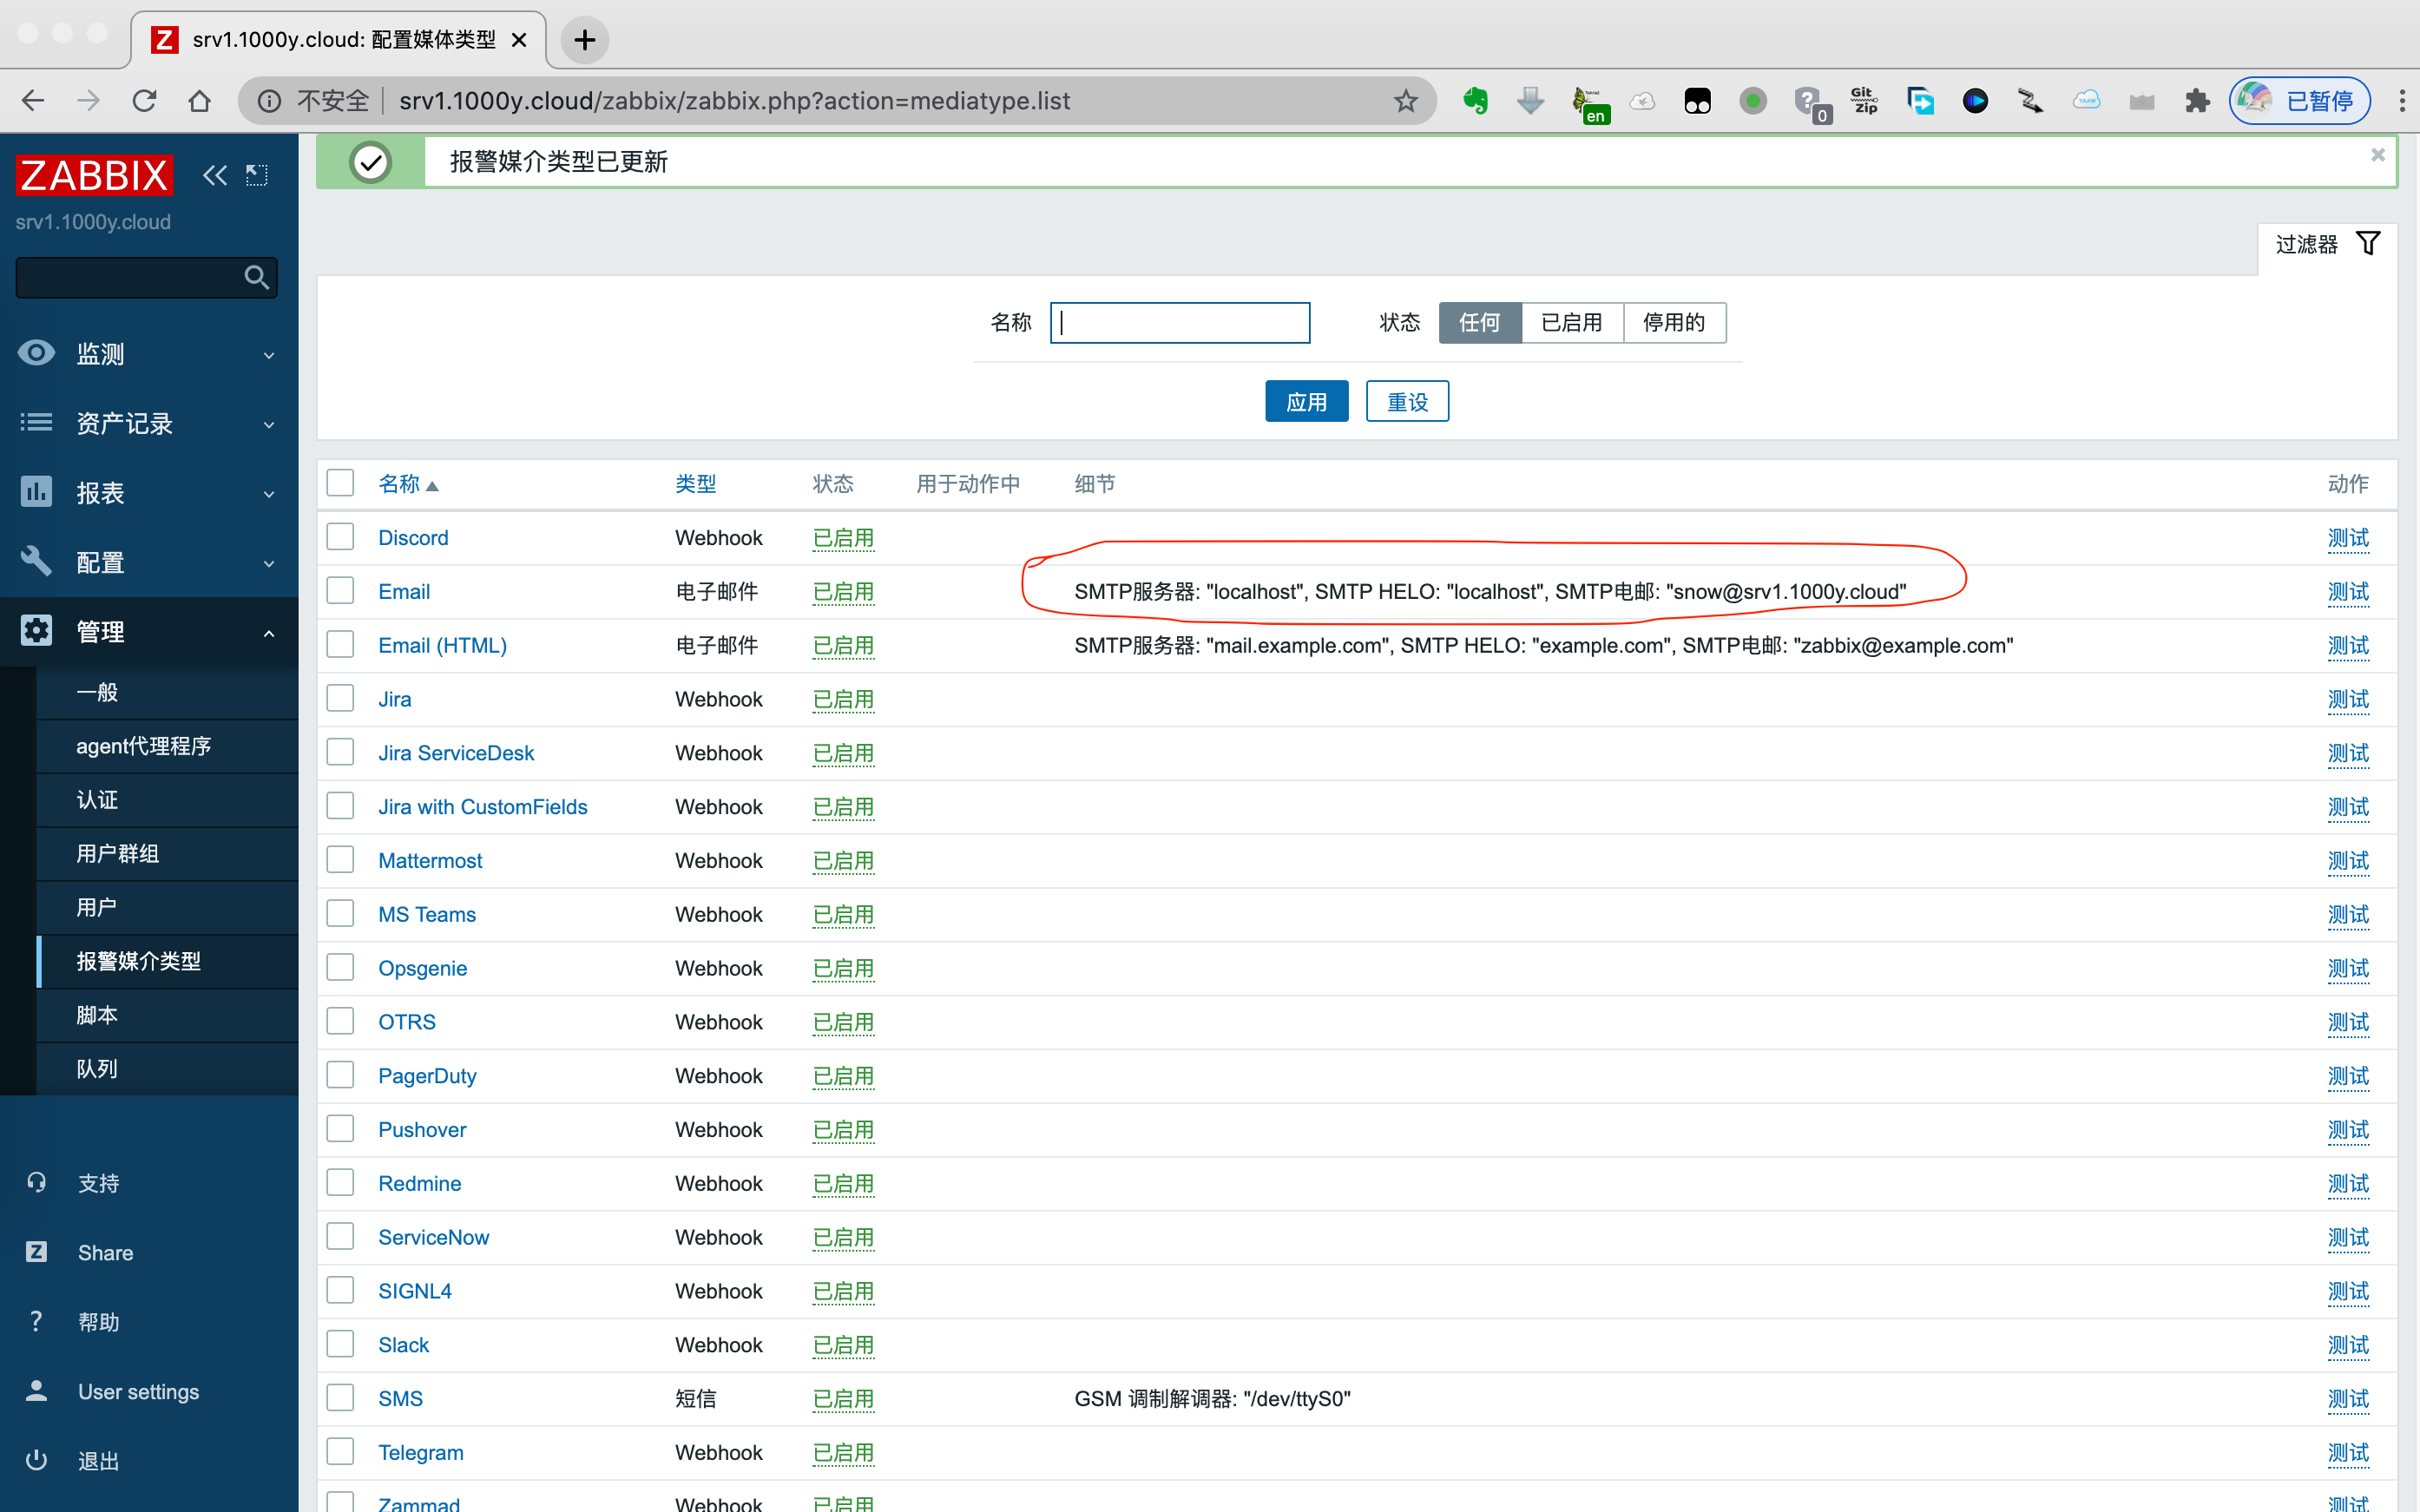
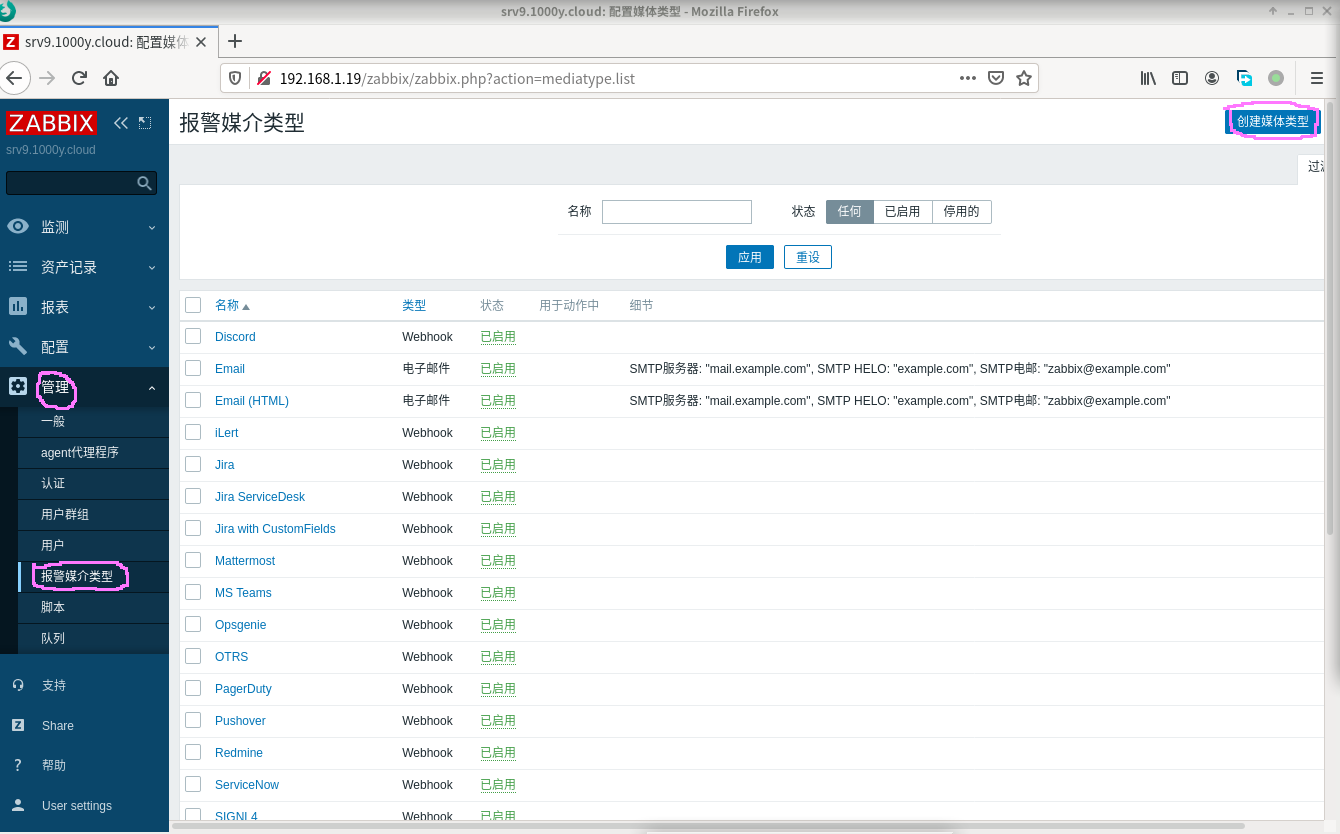
2) 点击[管理]==>[报警媒介类型]===>[Email]
3) 设置Email报警的SMTP相关信息,完成后点击[更新]
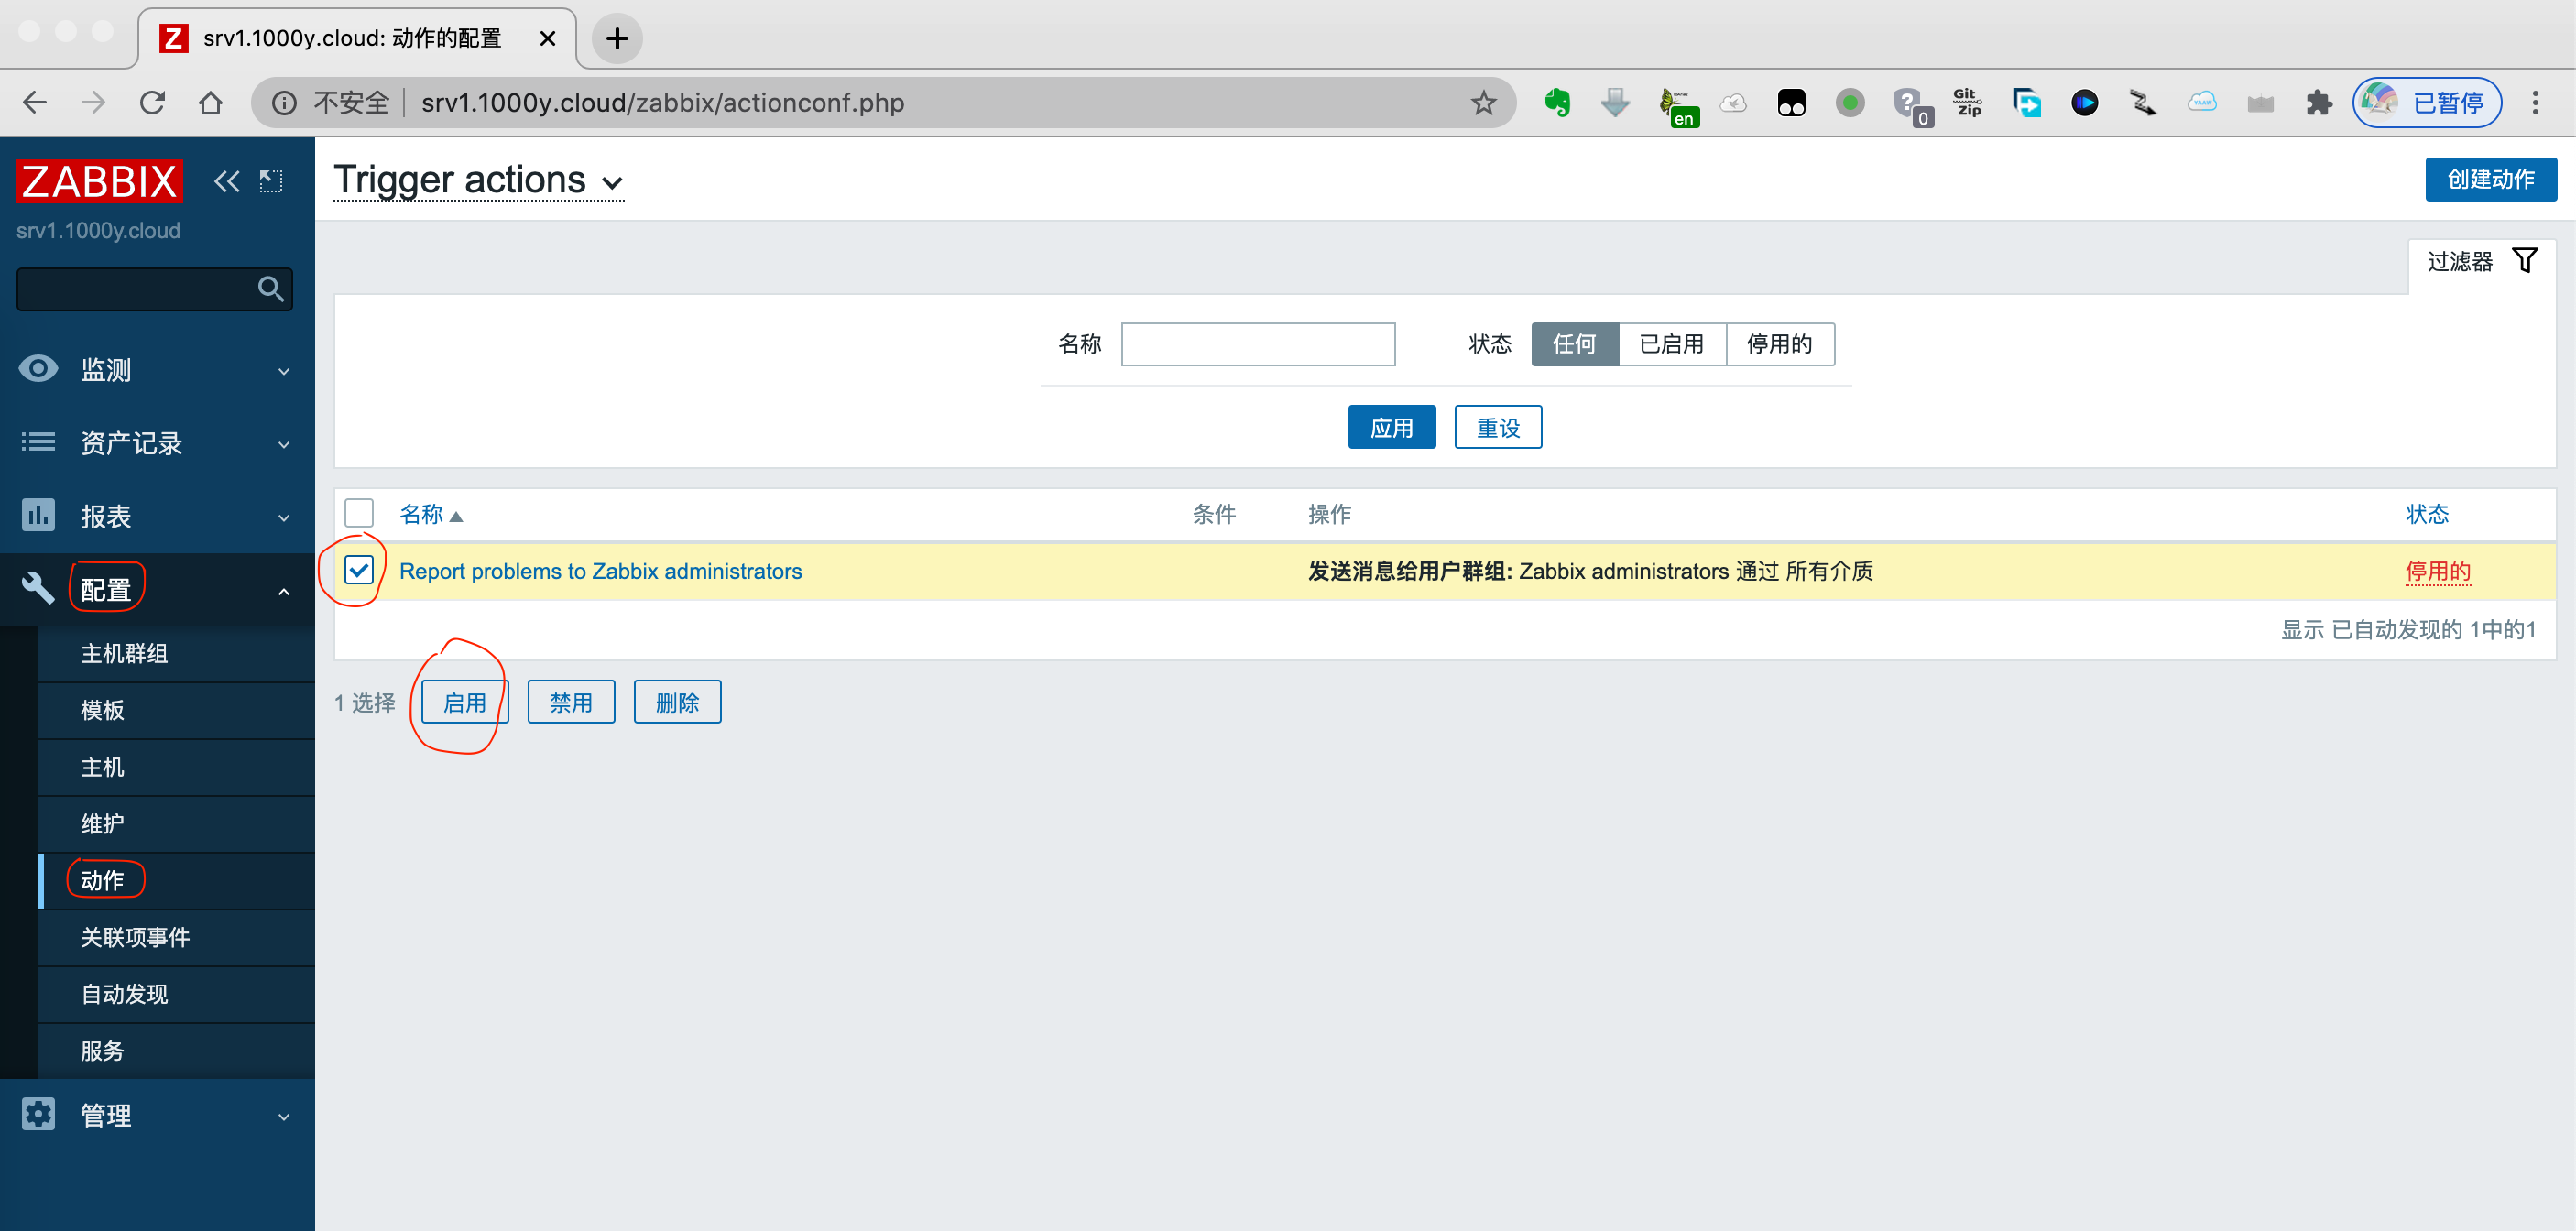
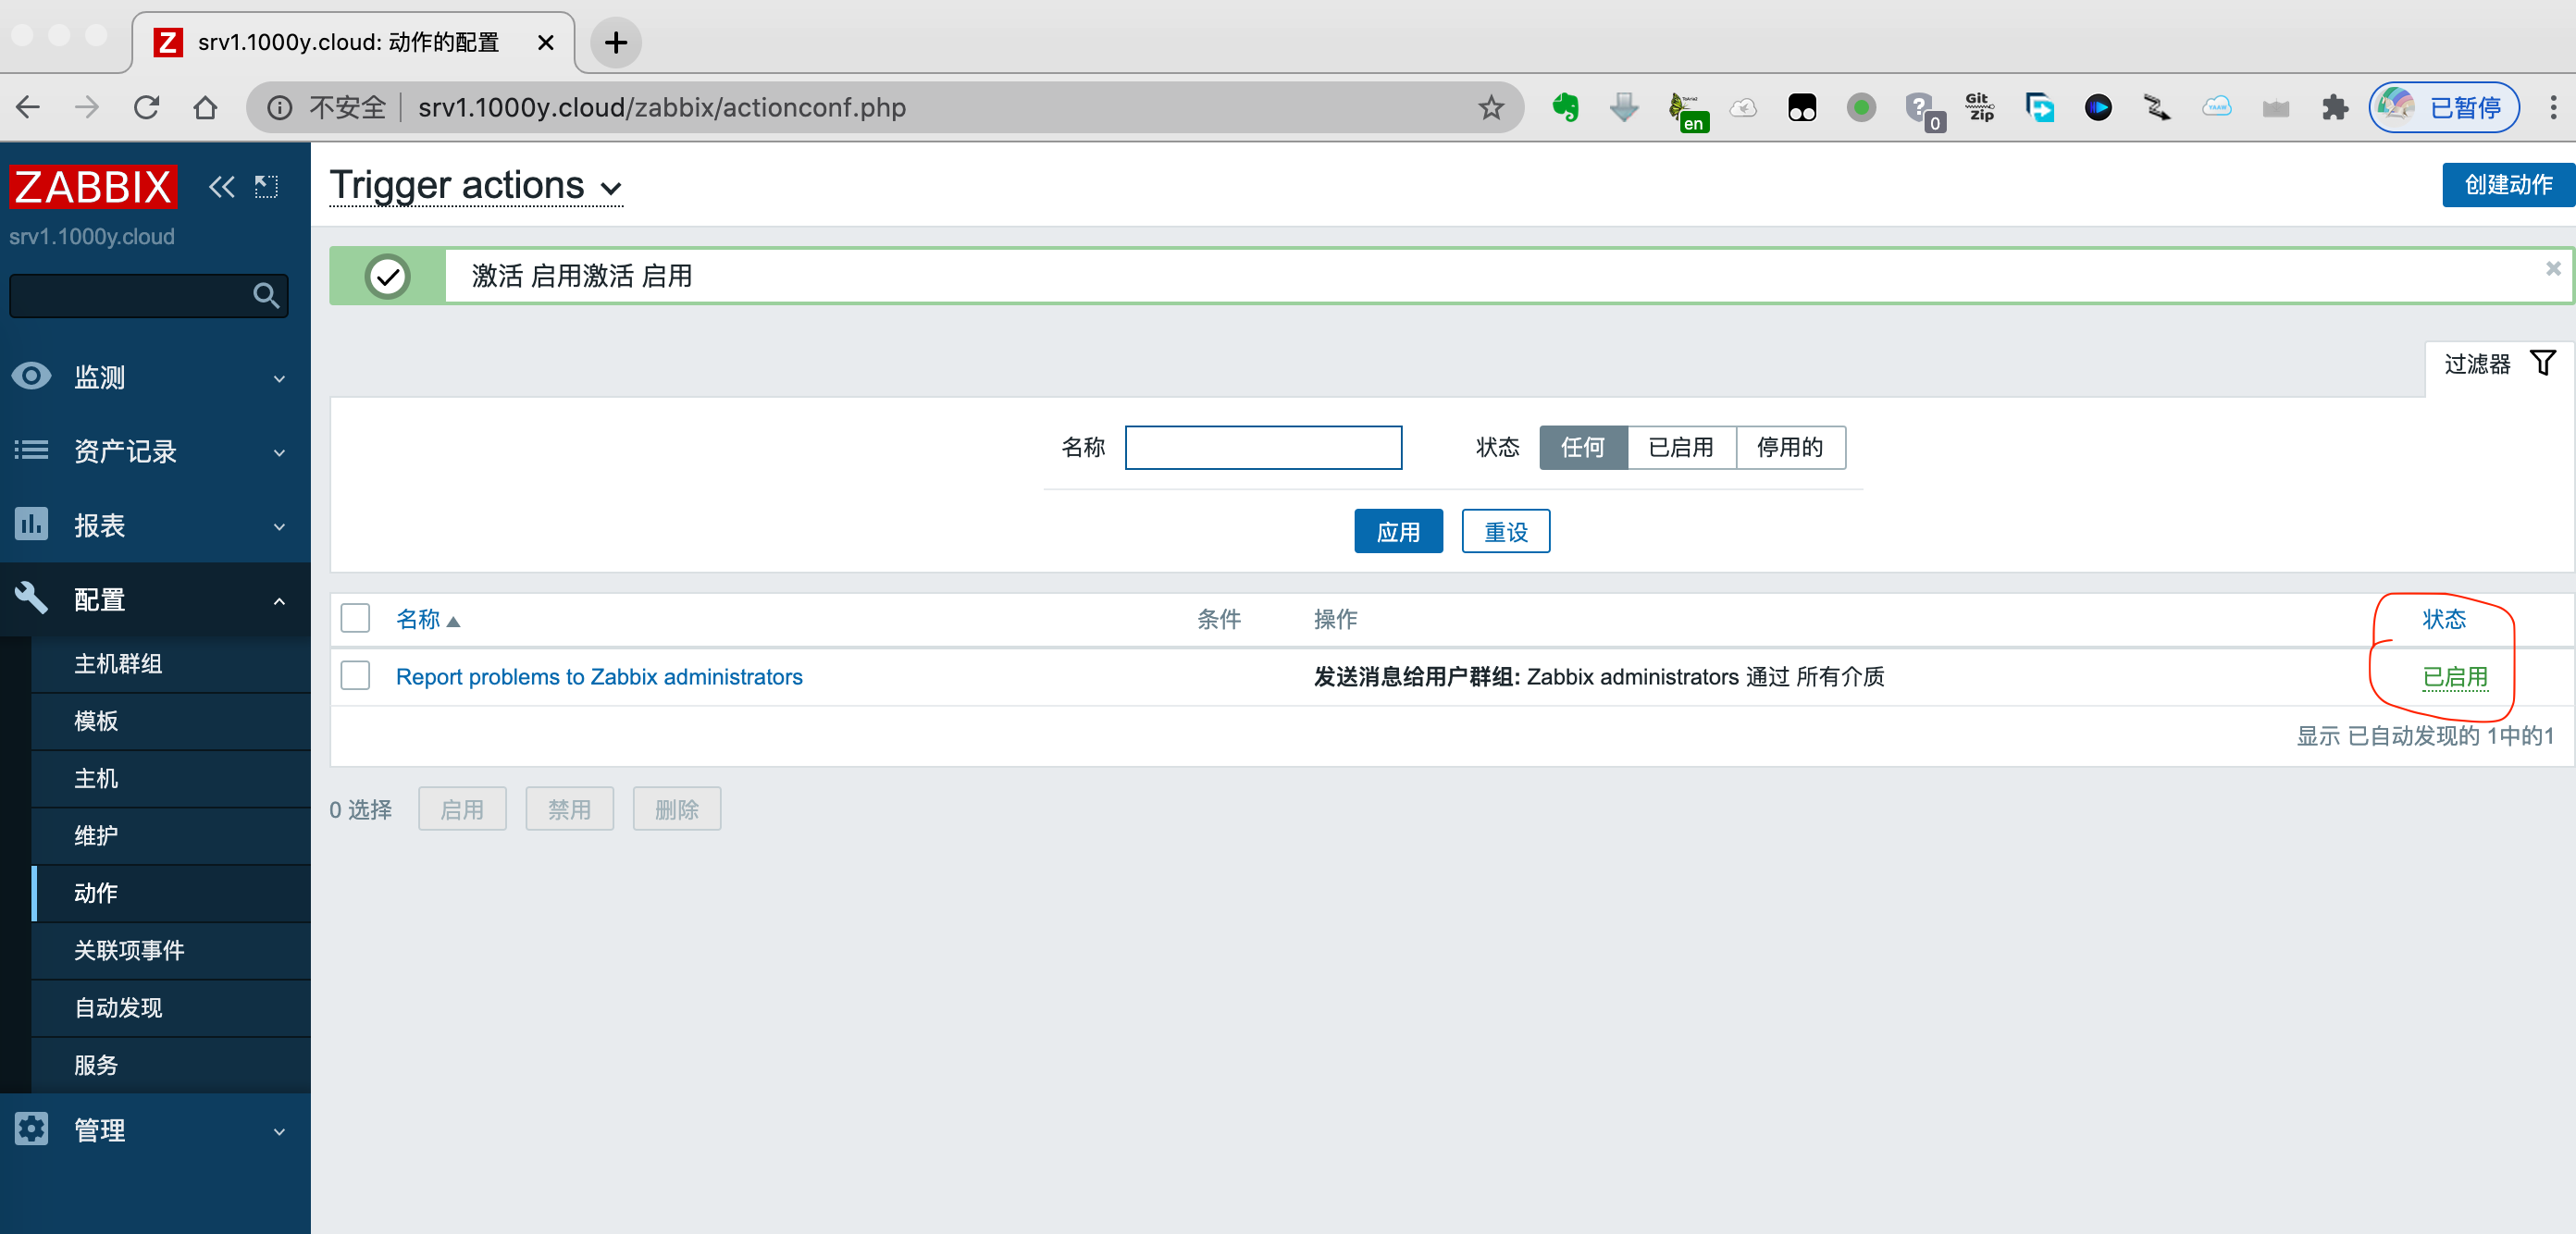
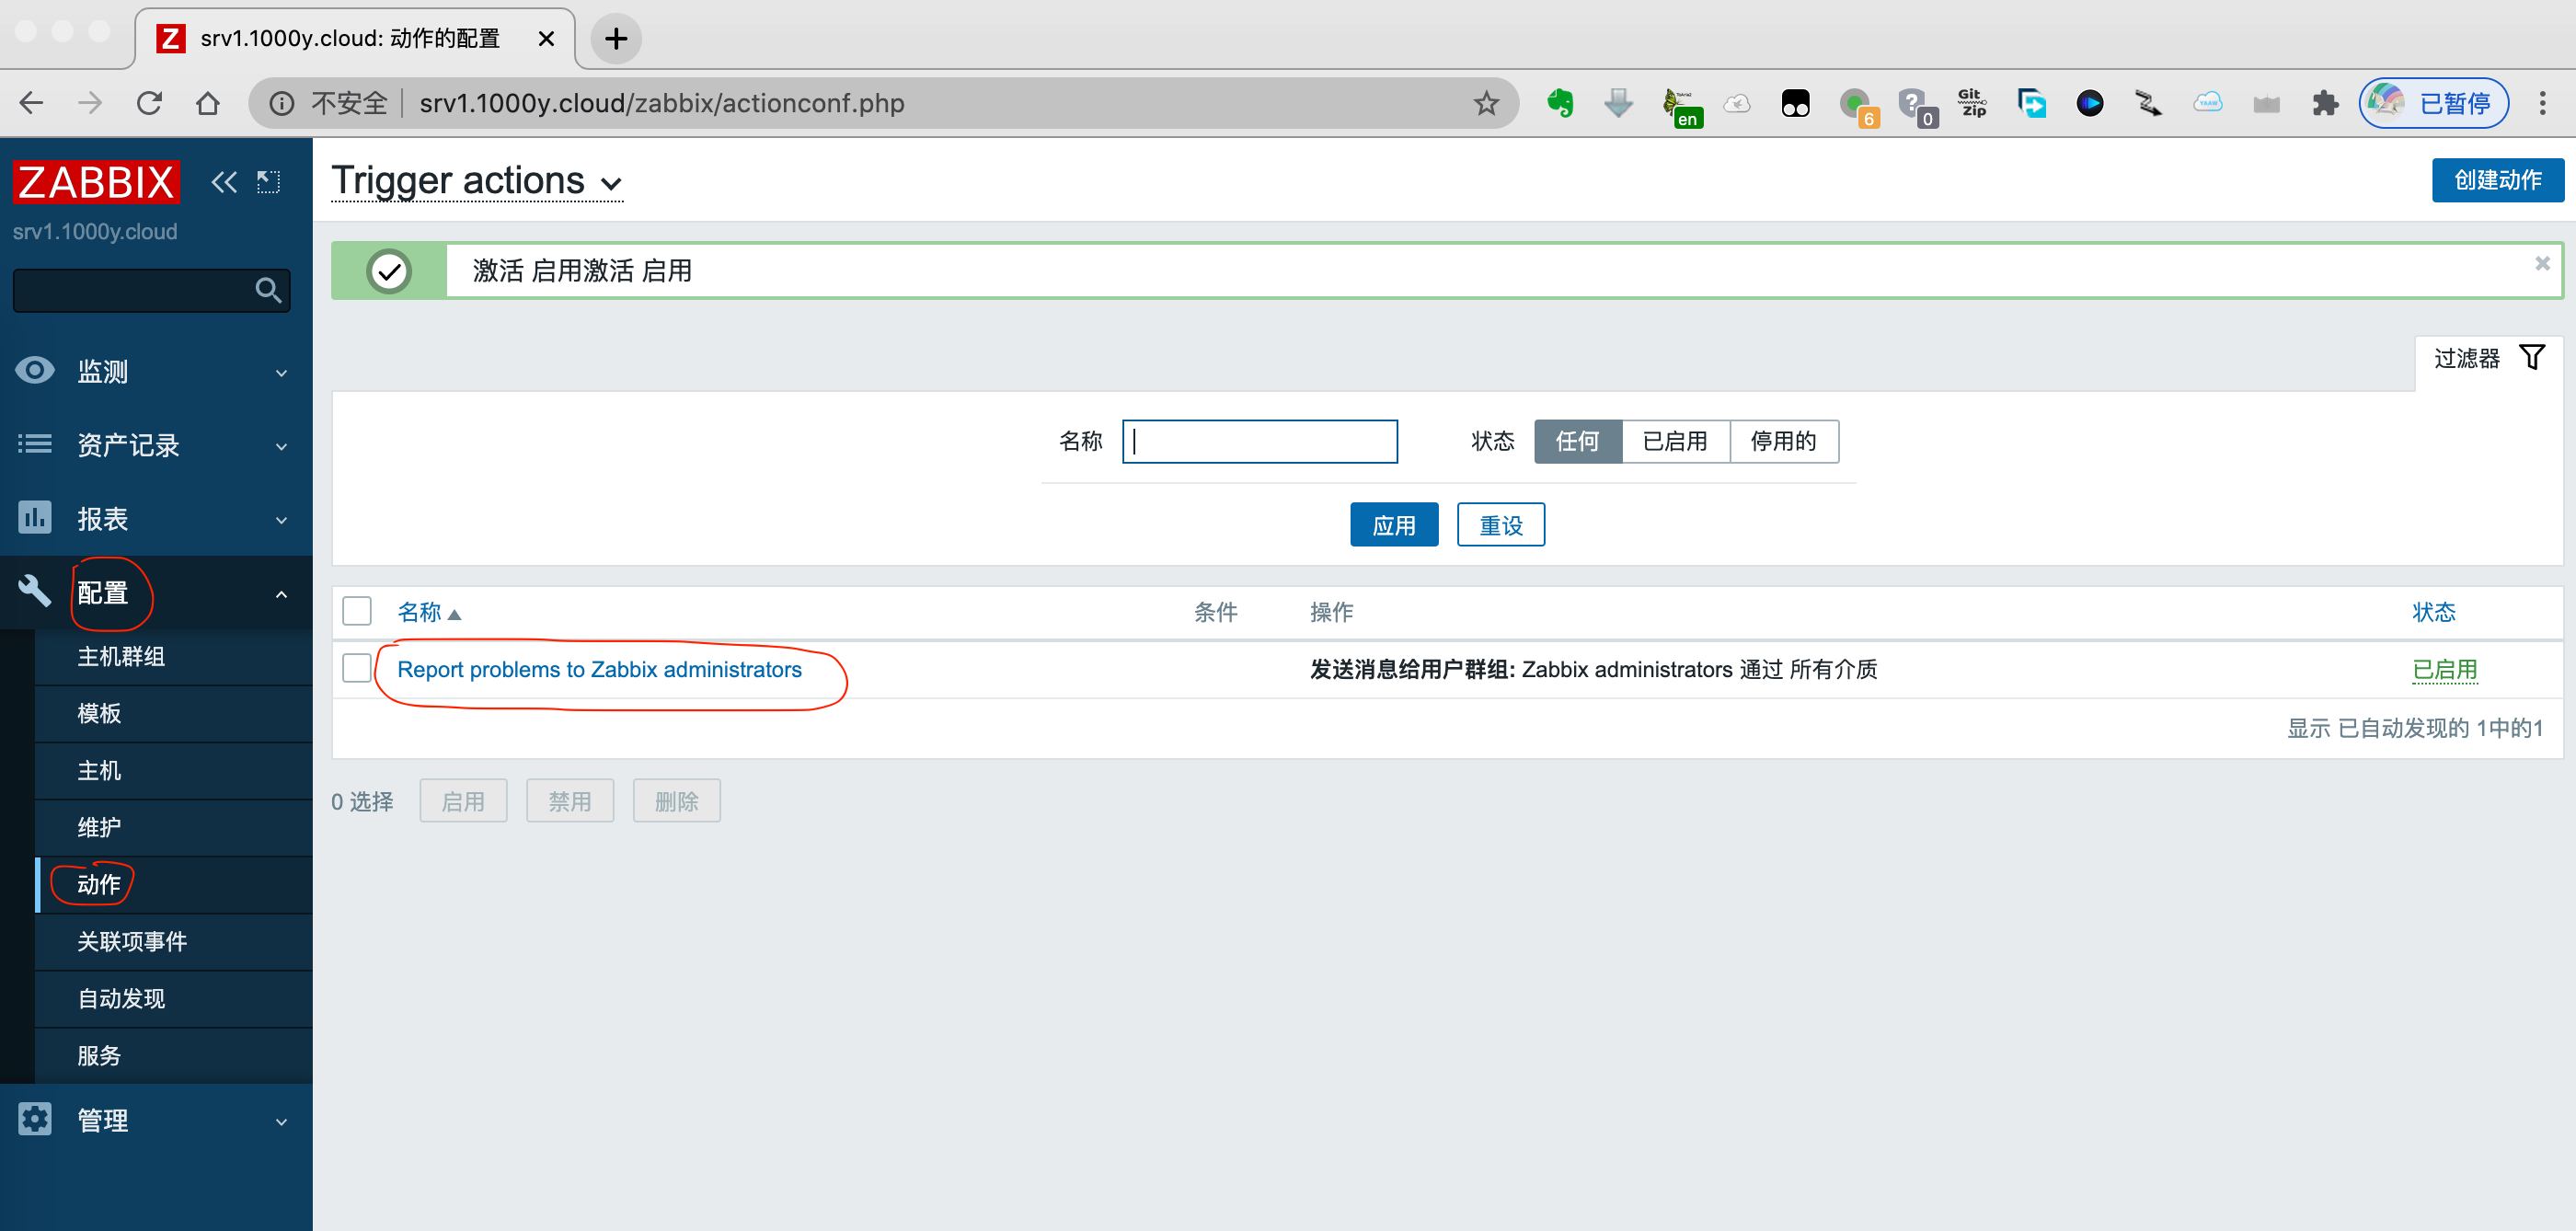
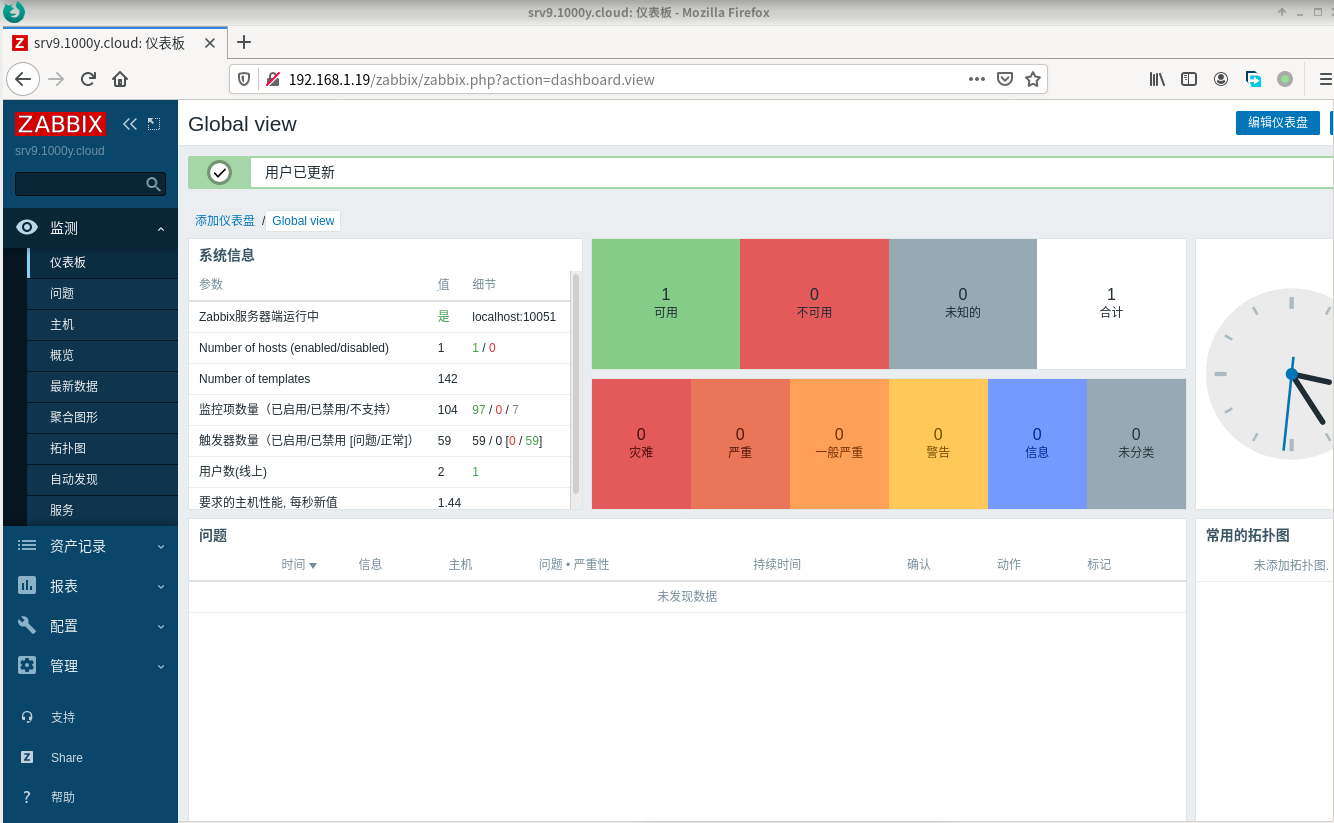
5.2 启用Report
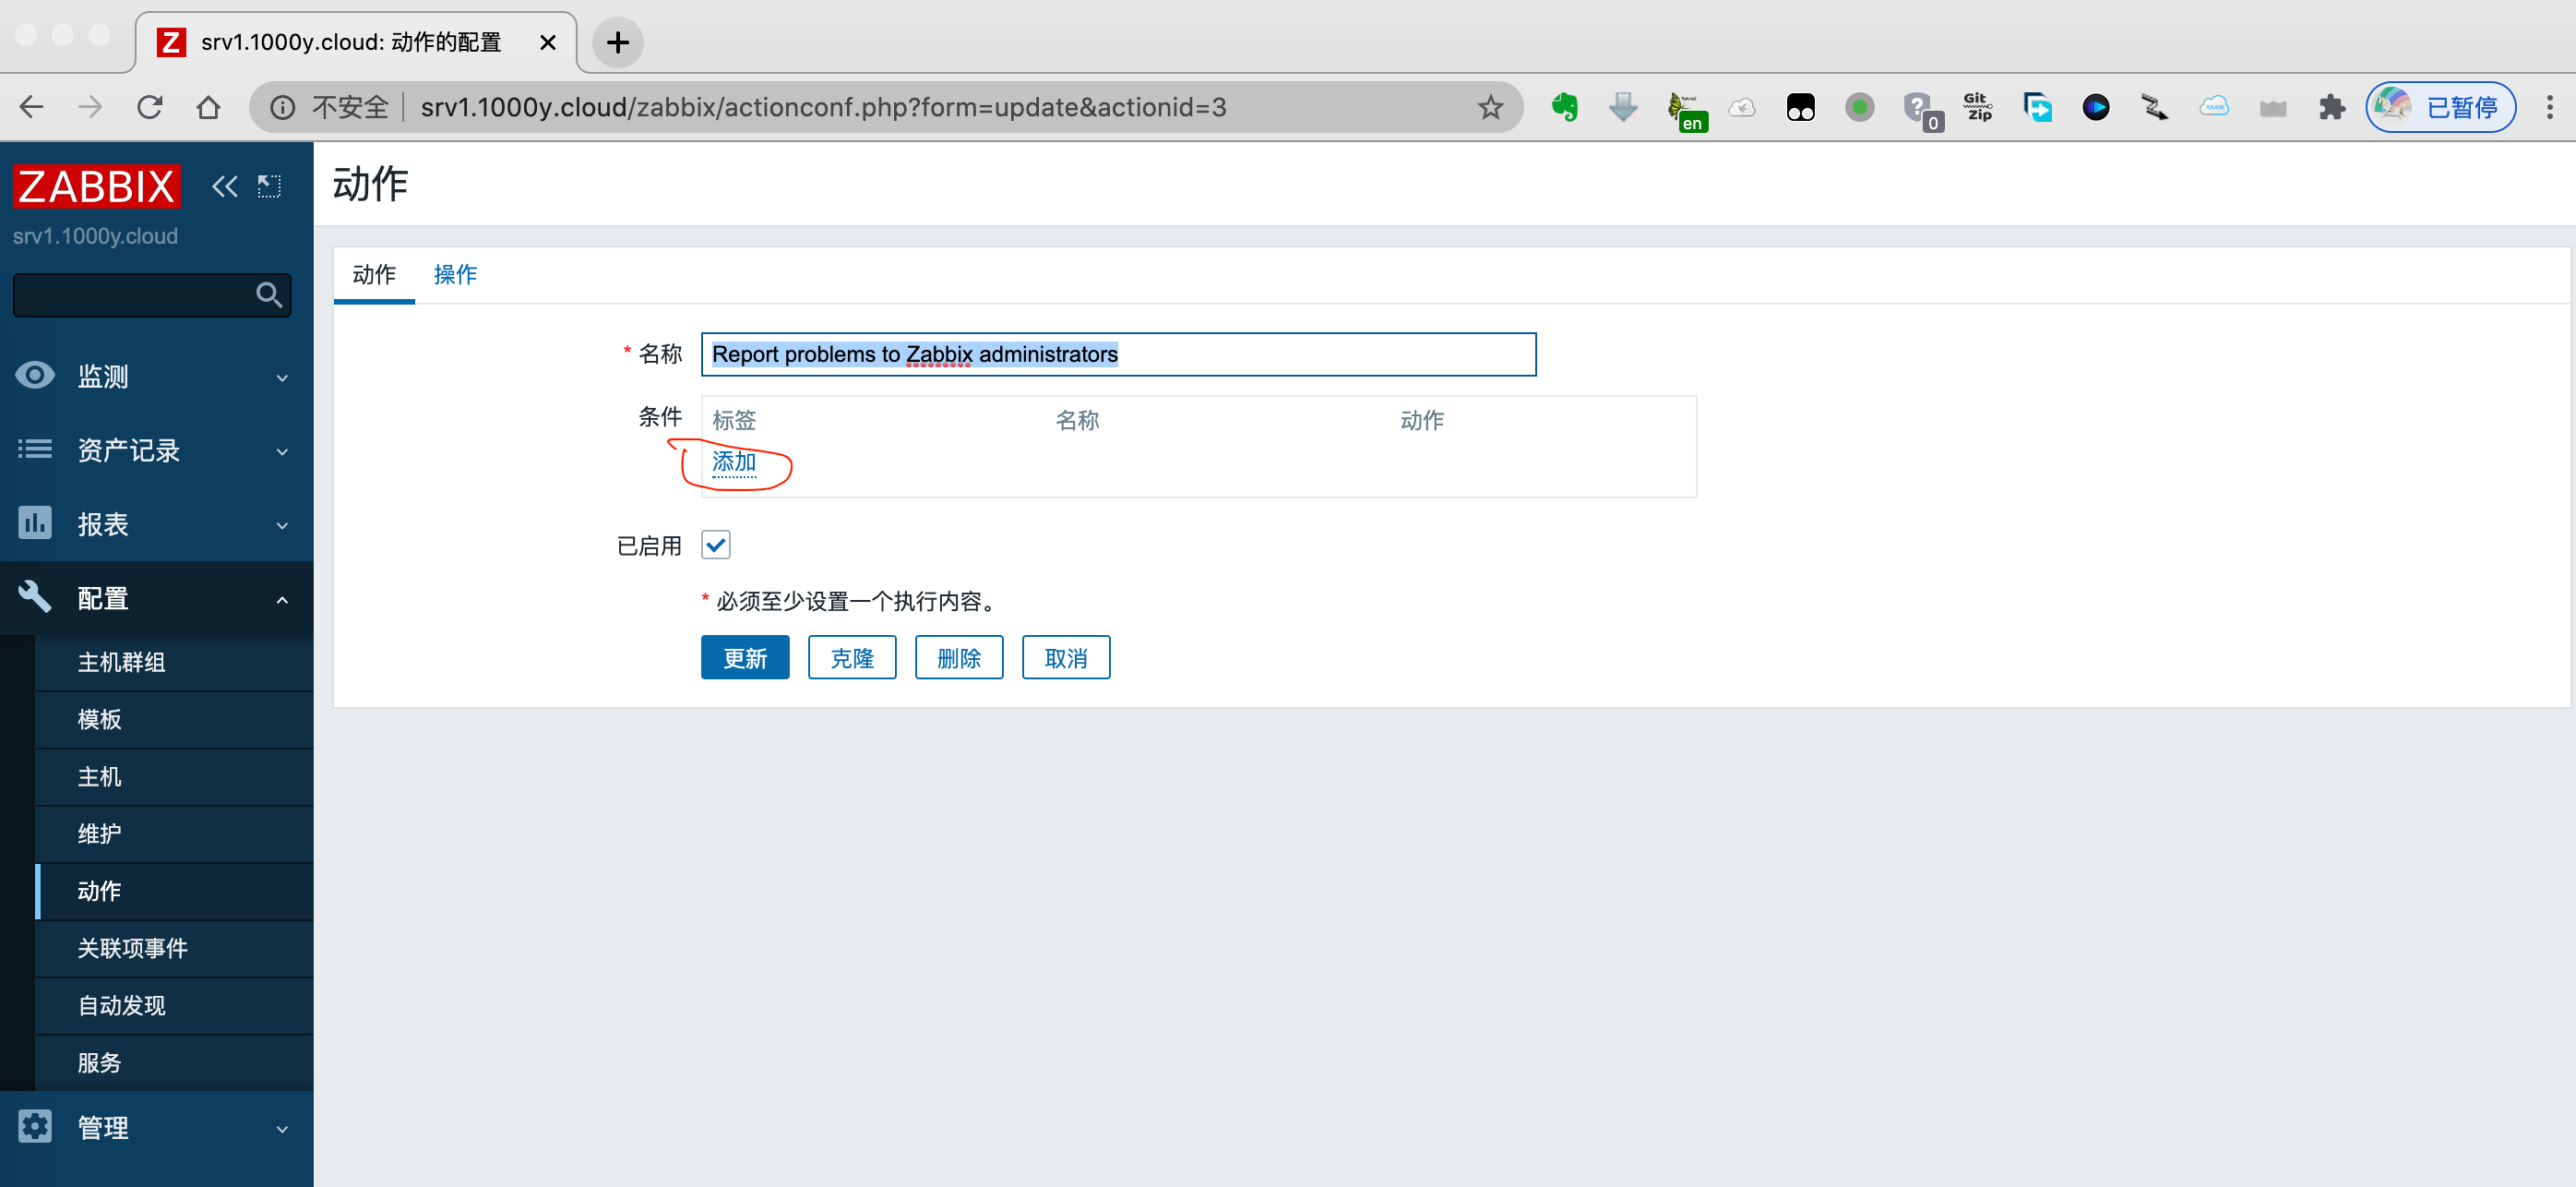
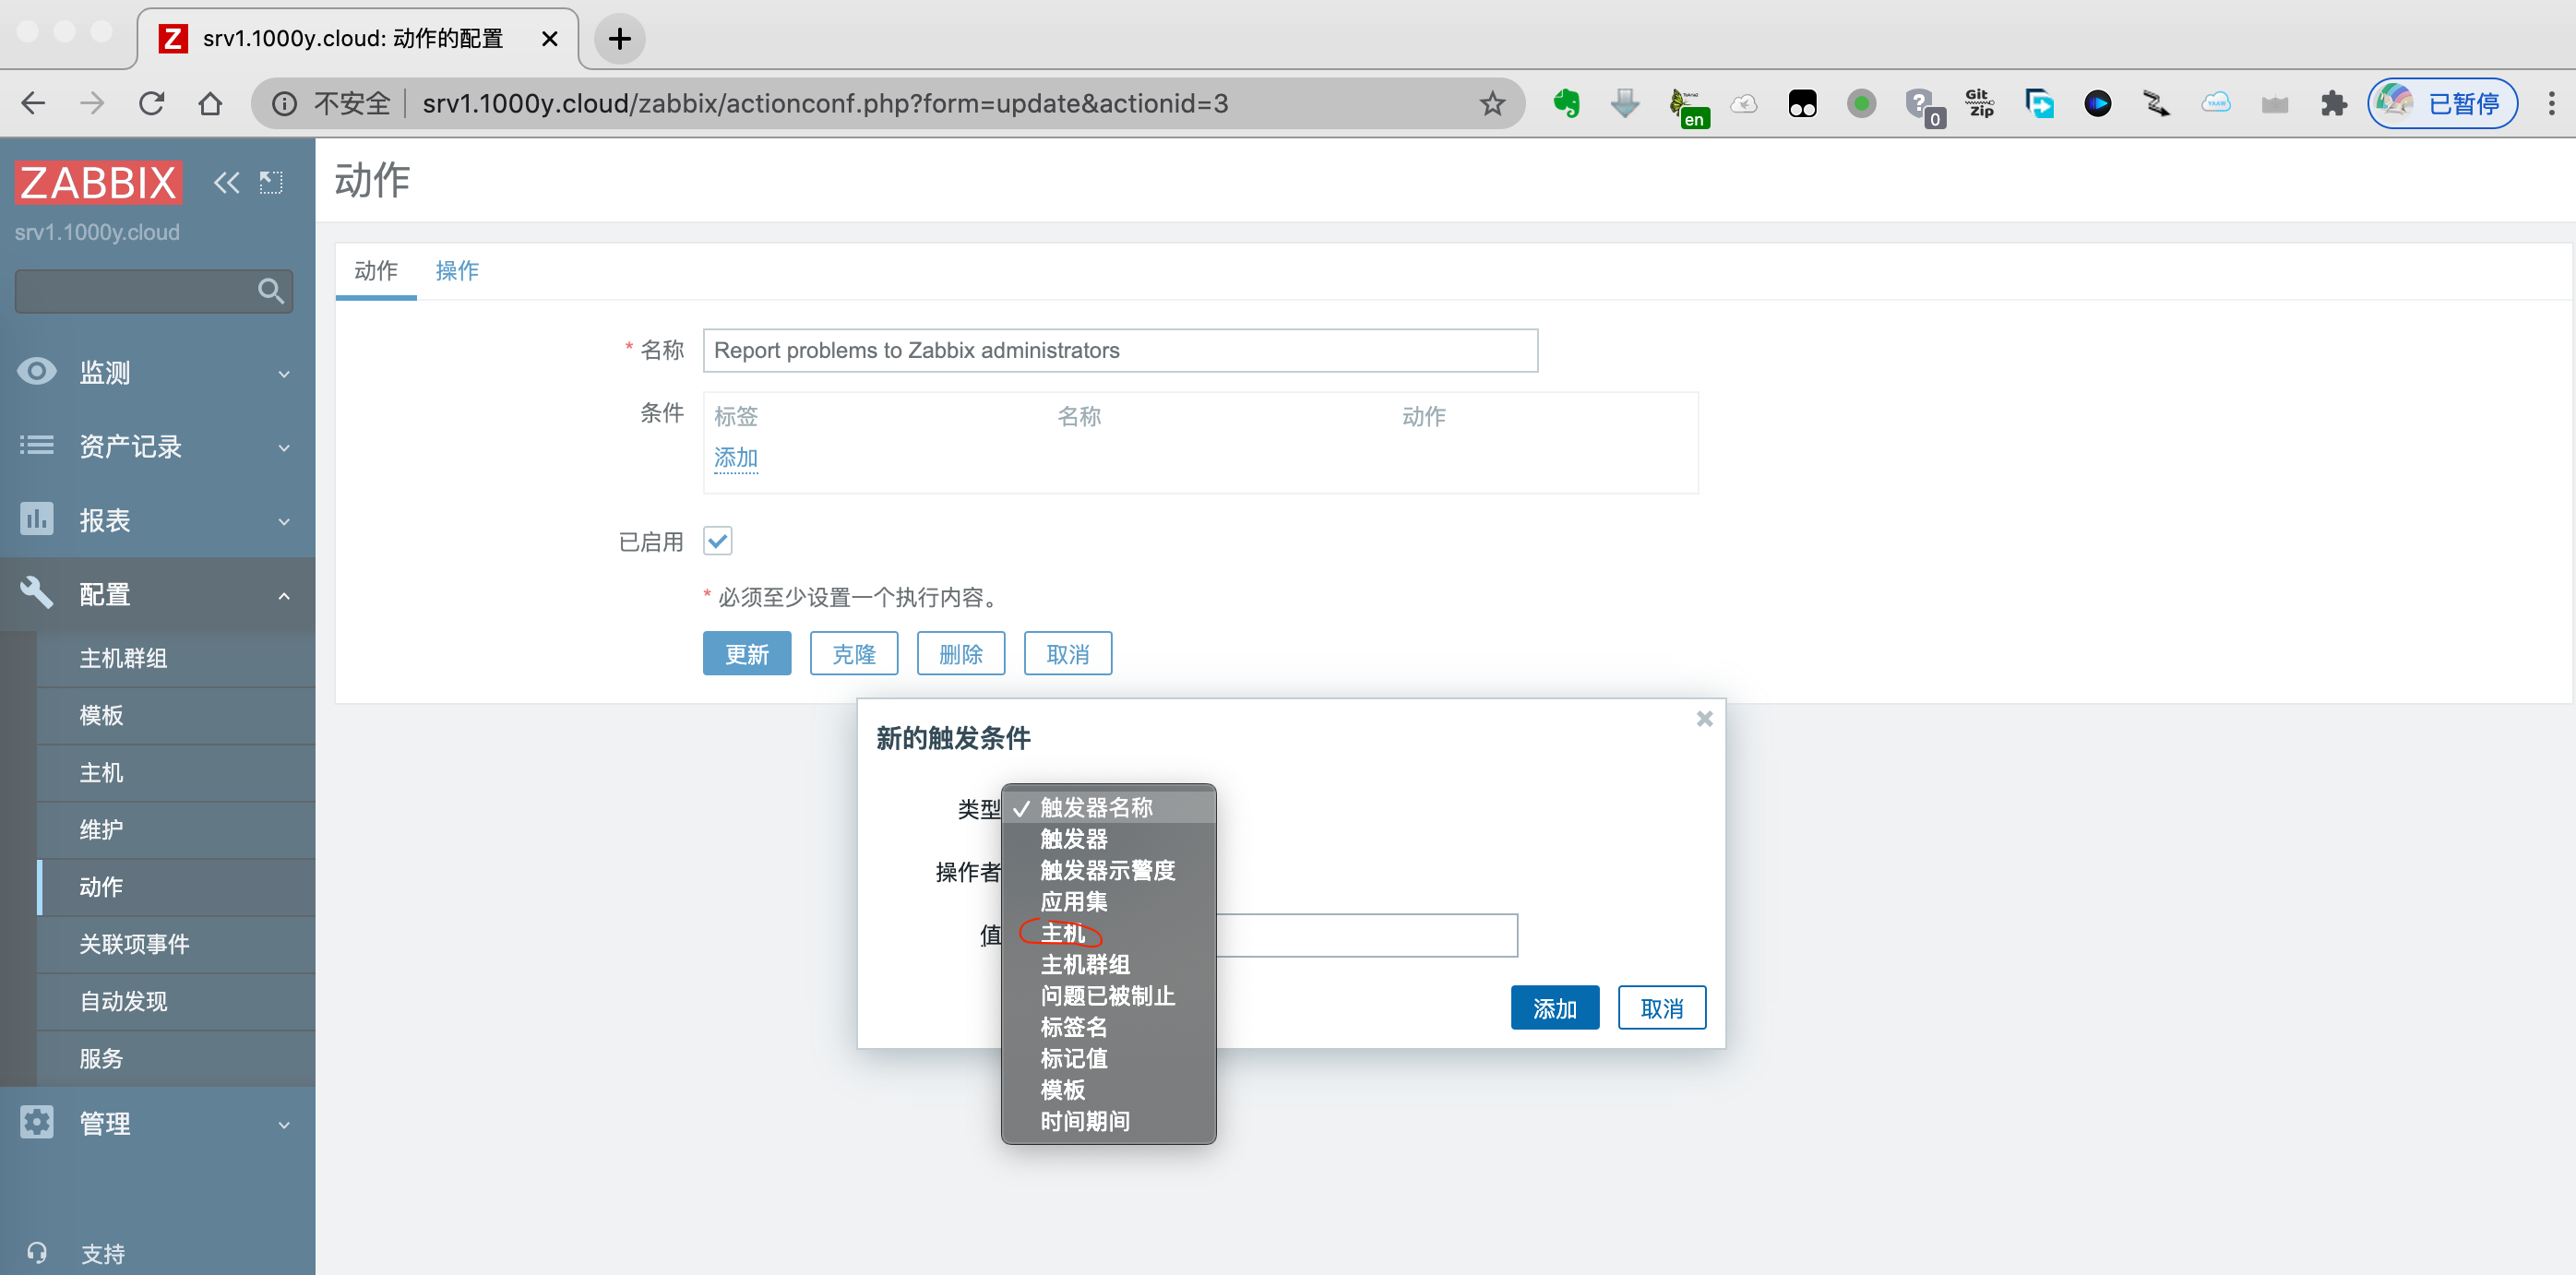
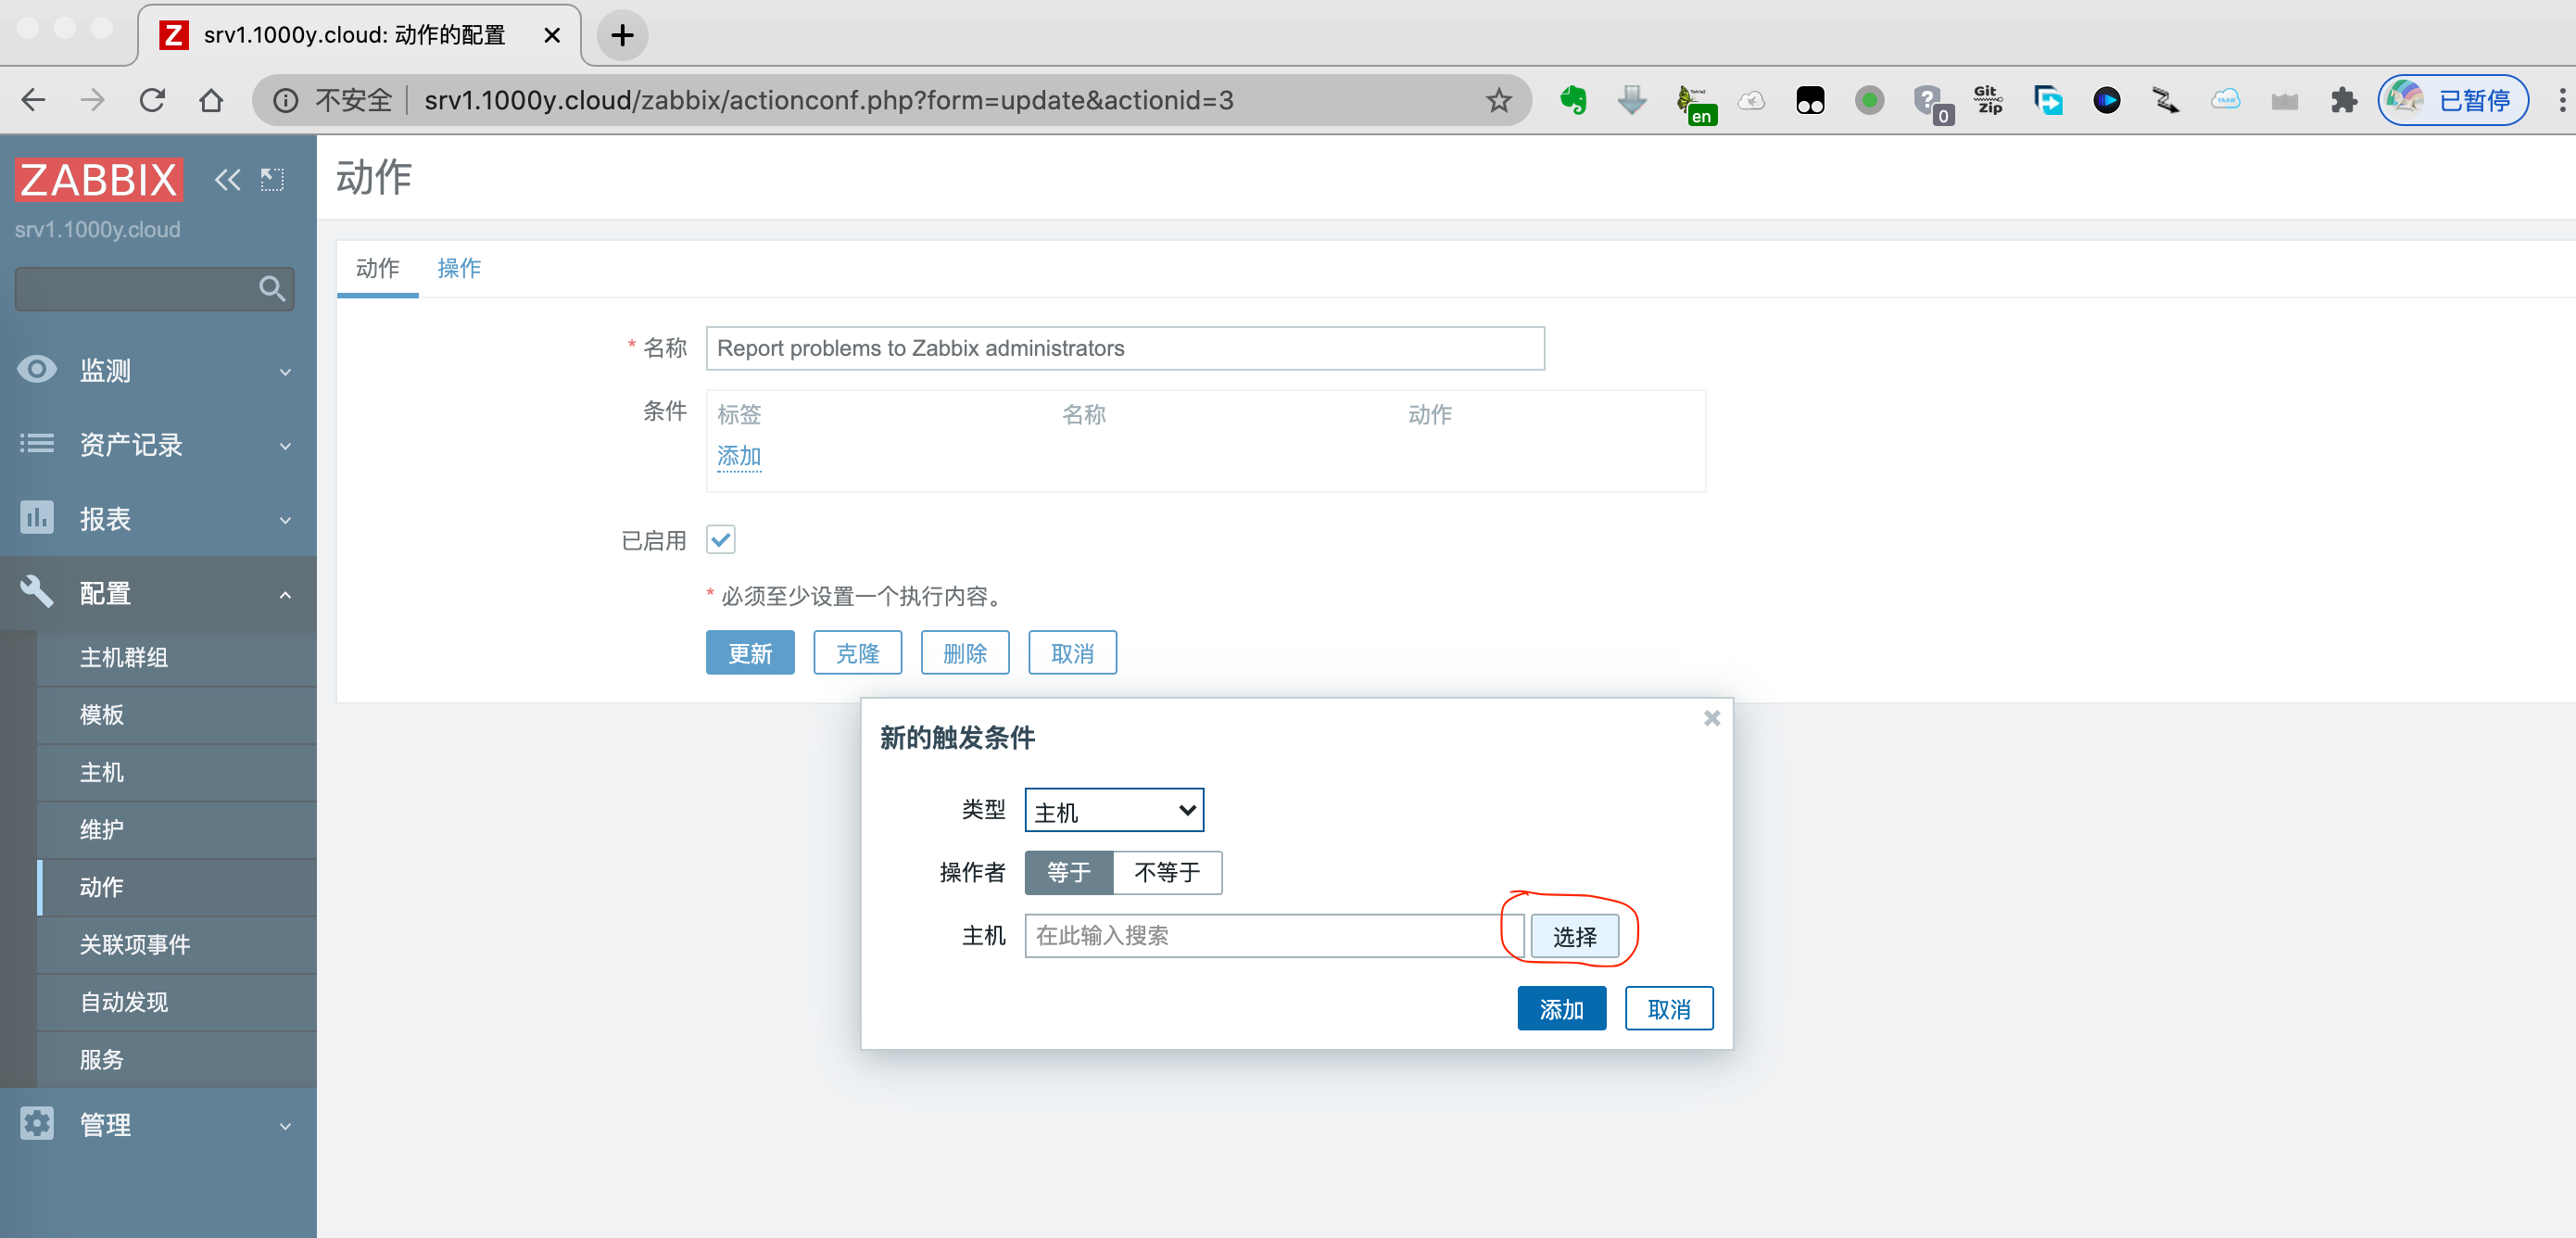
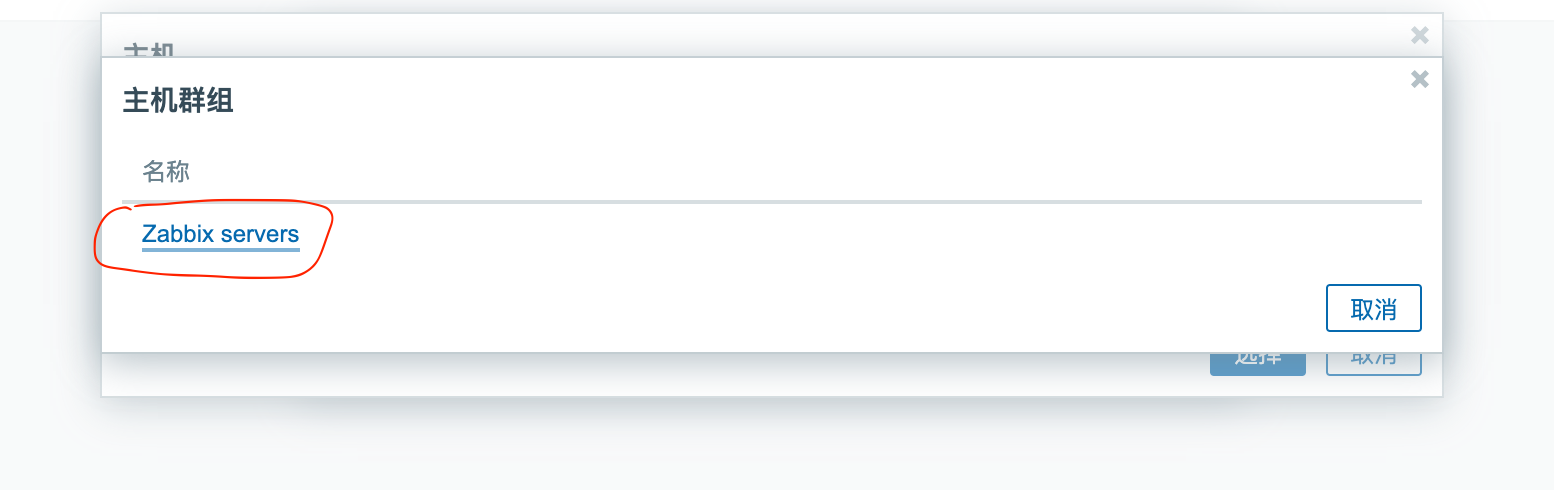
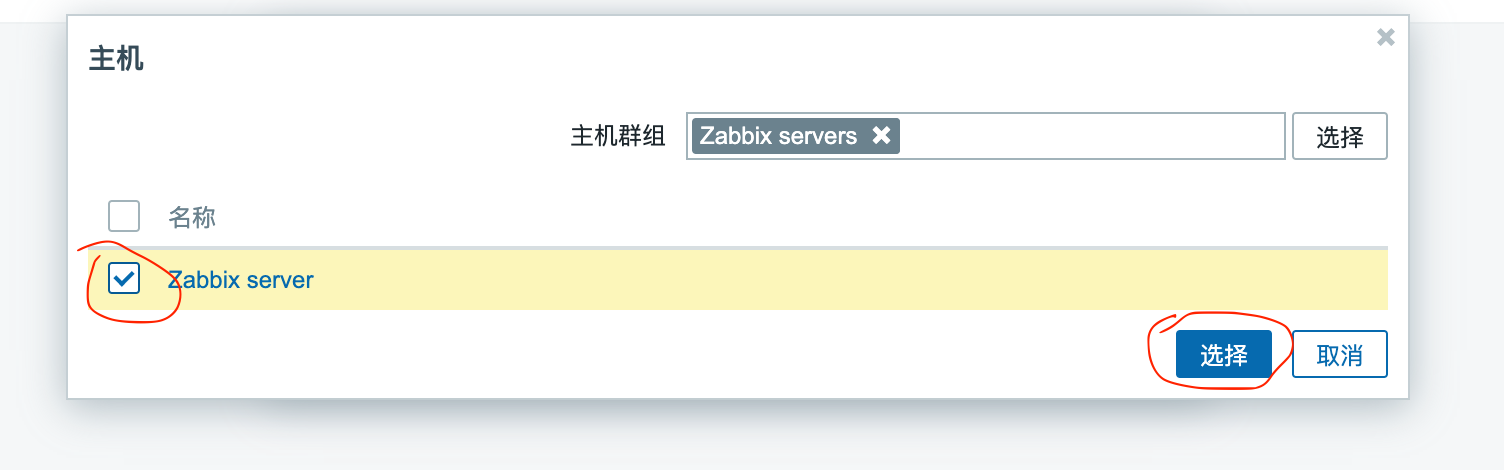
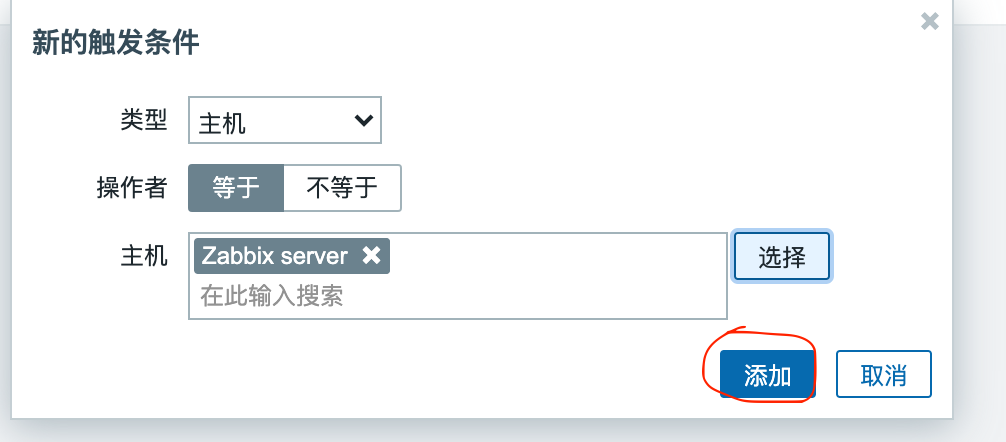
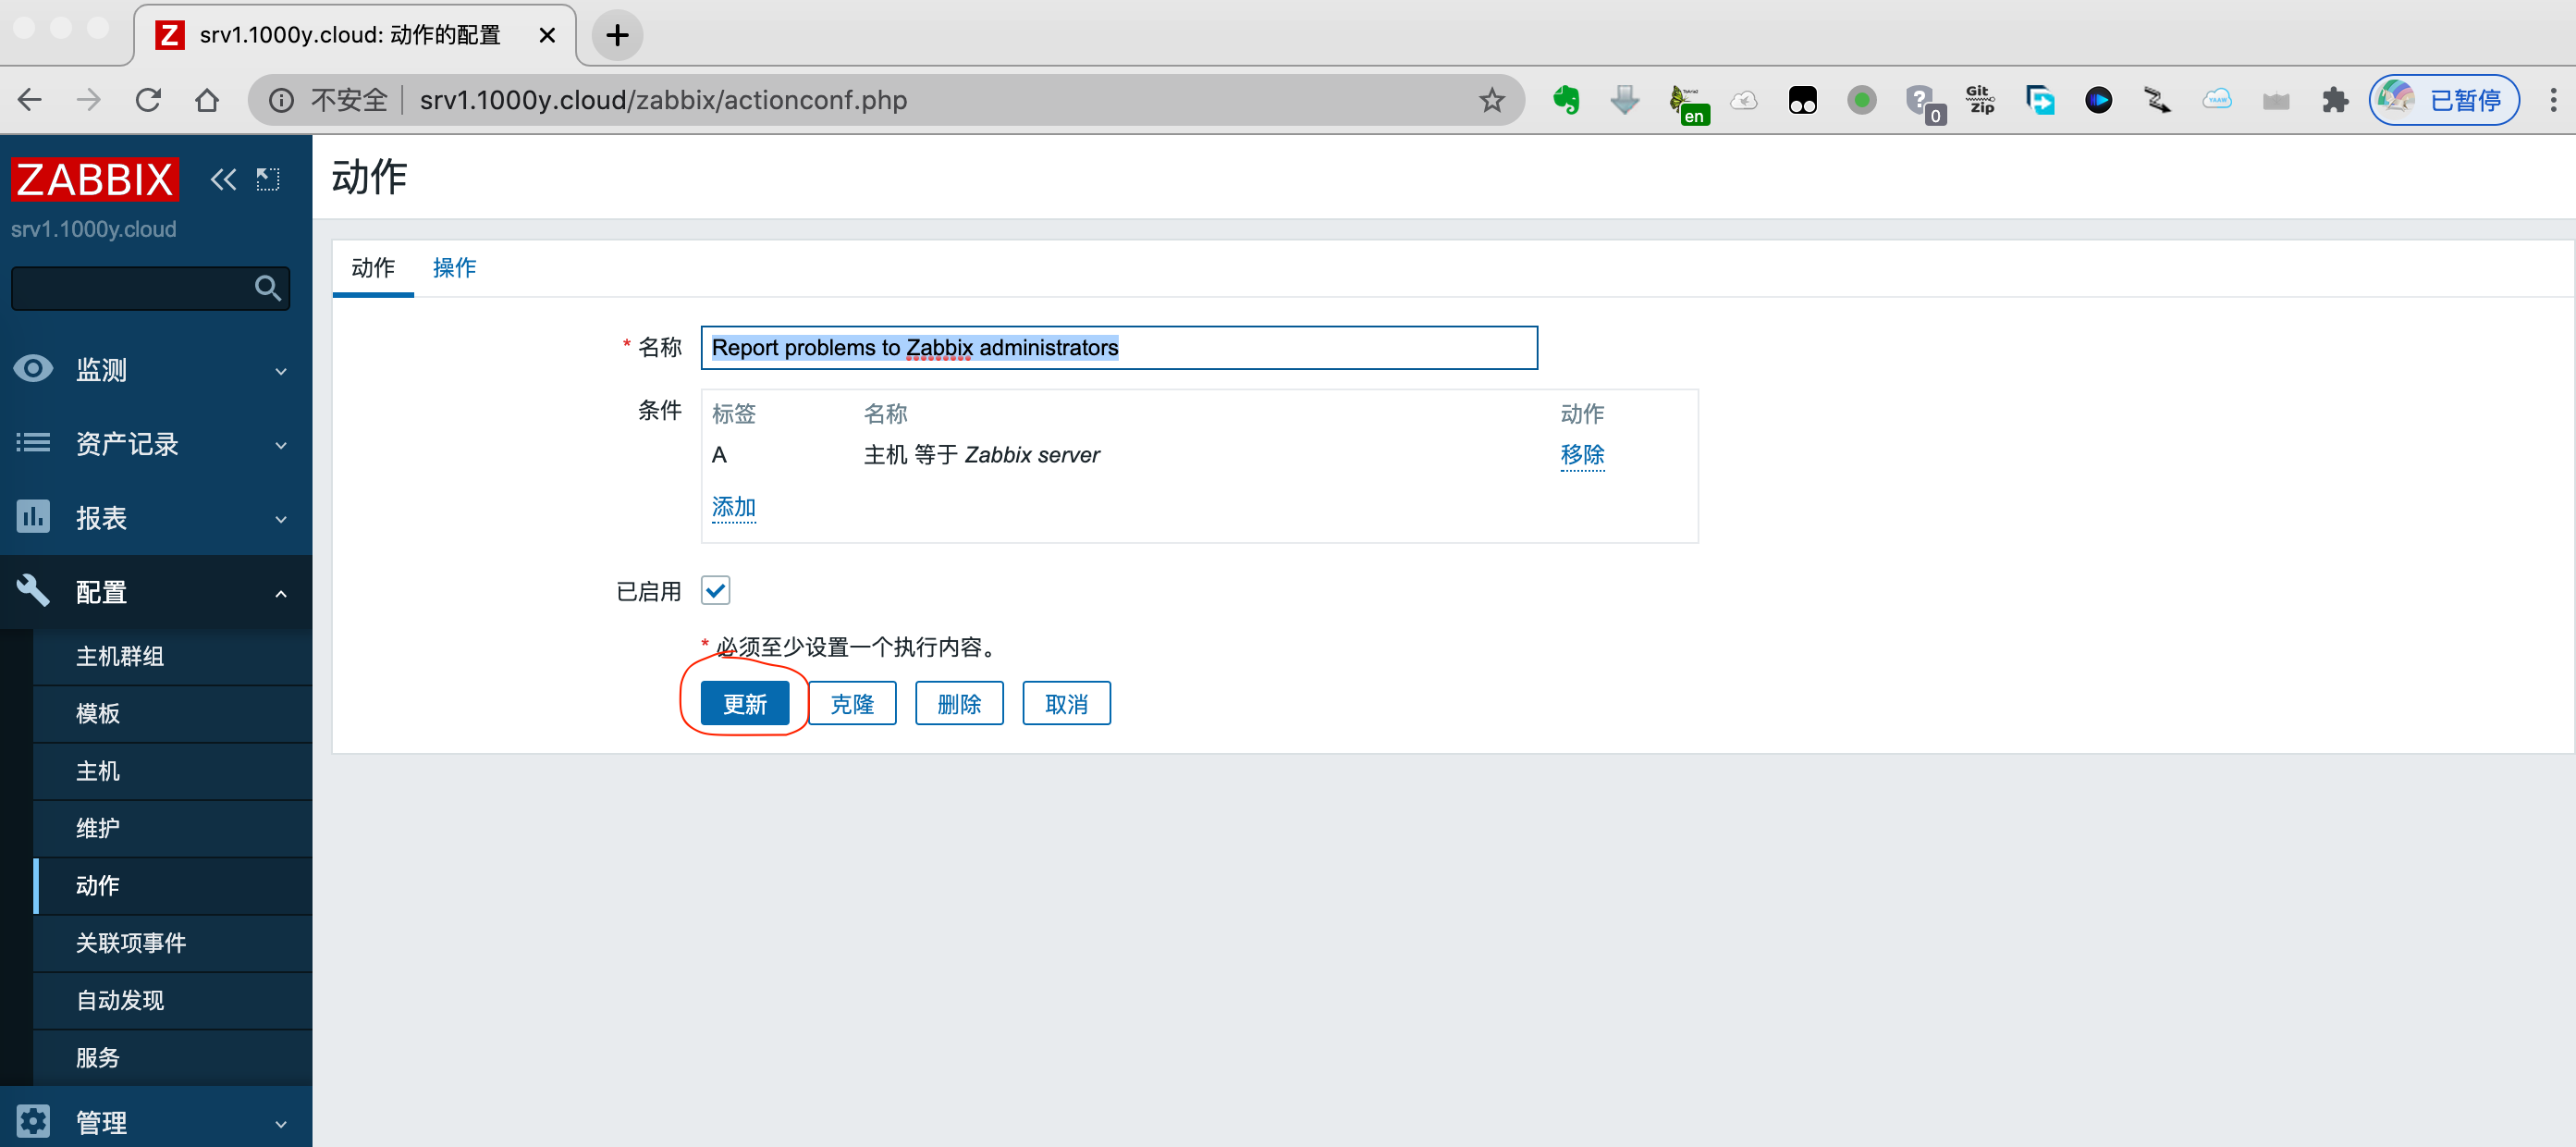
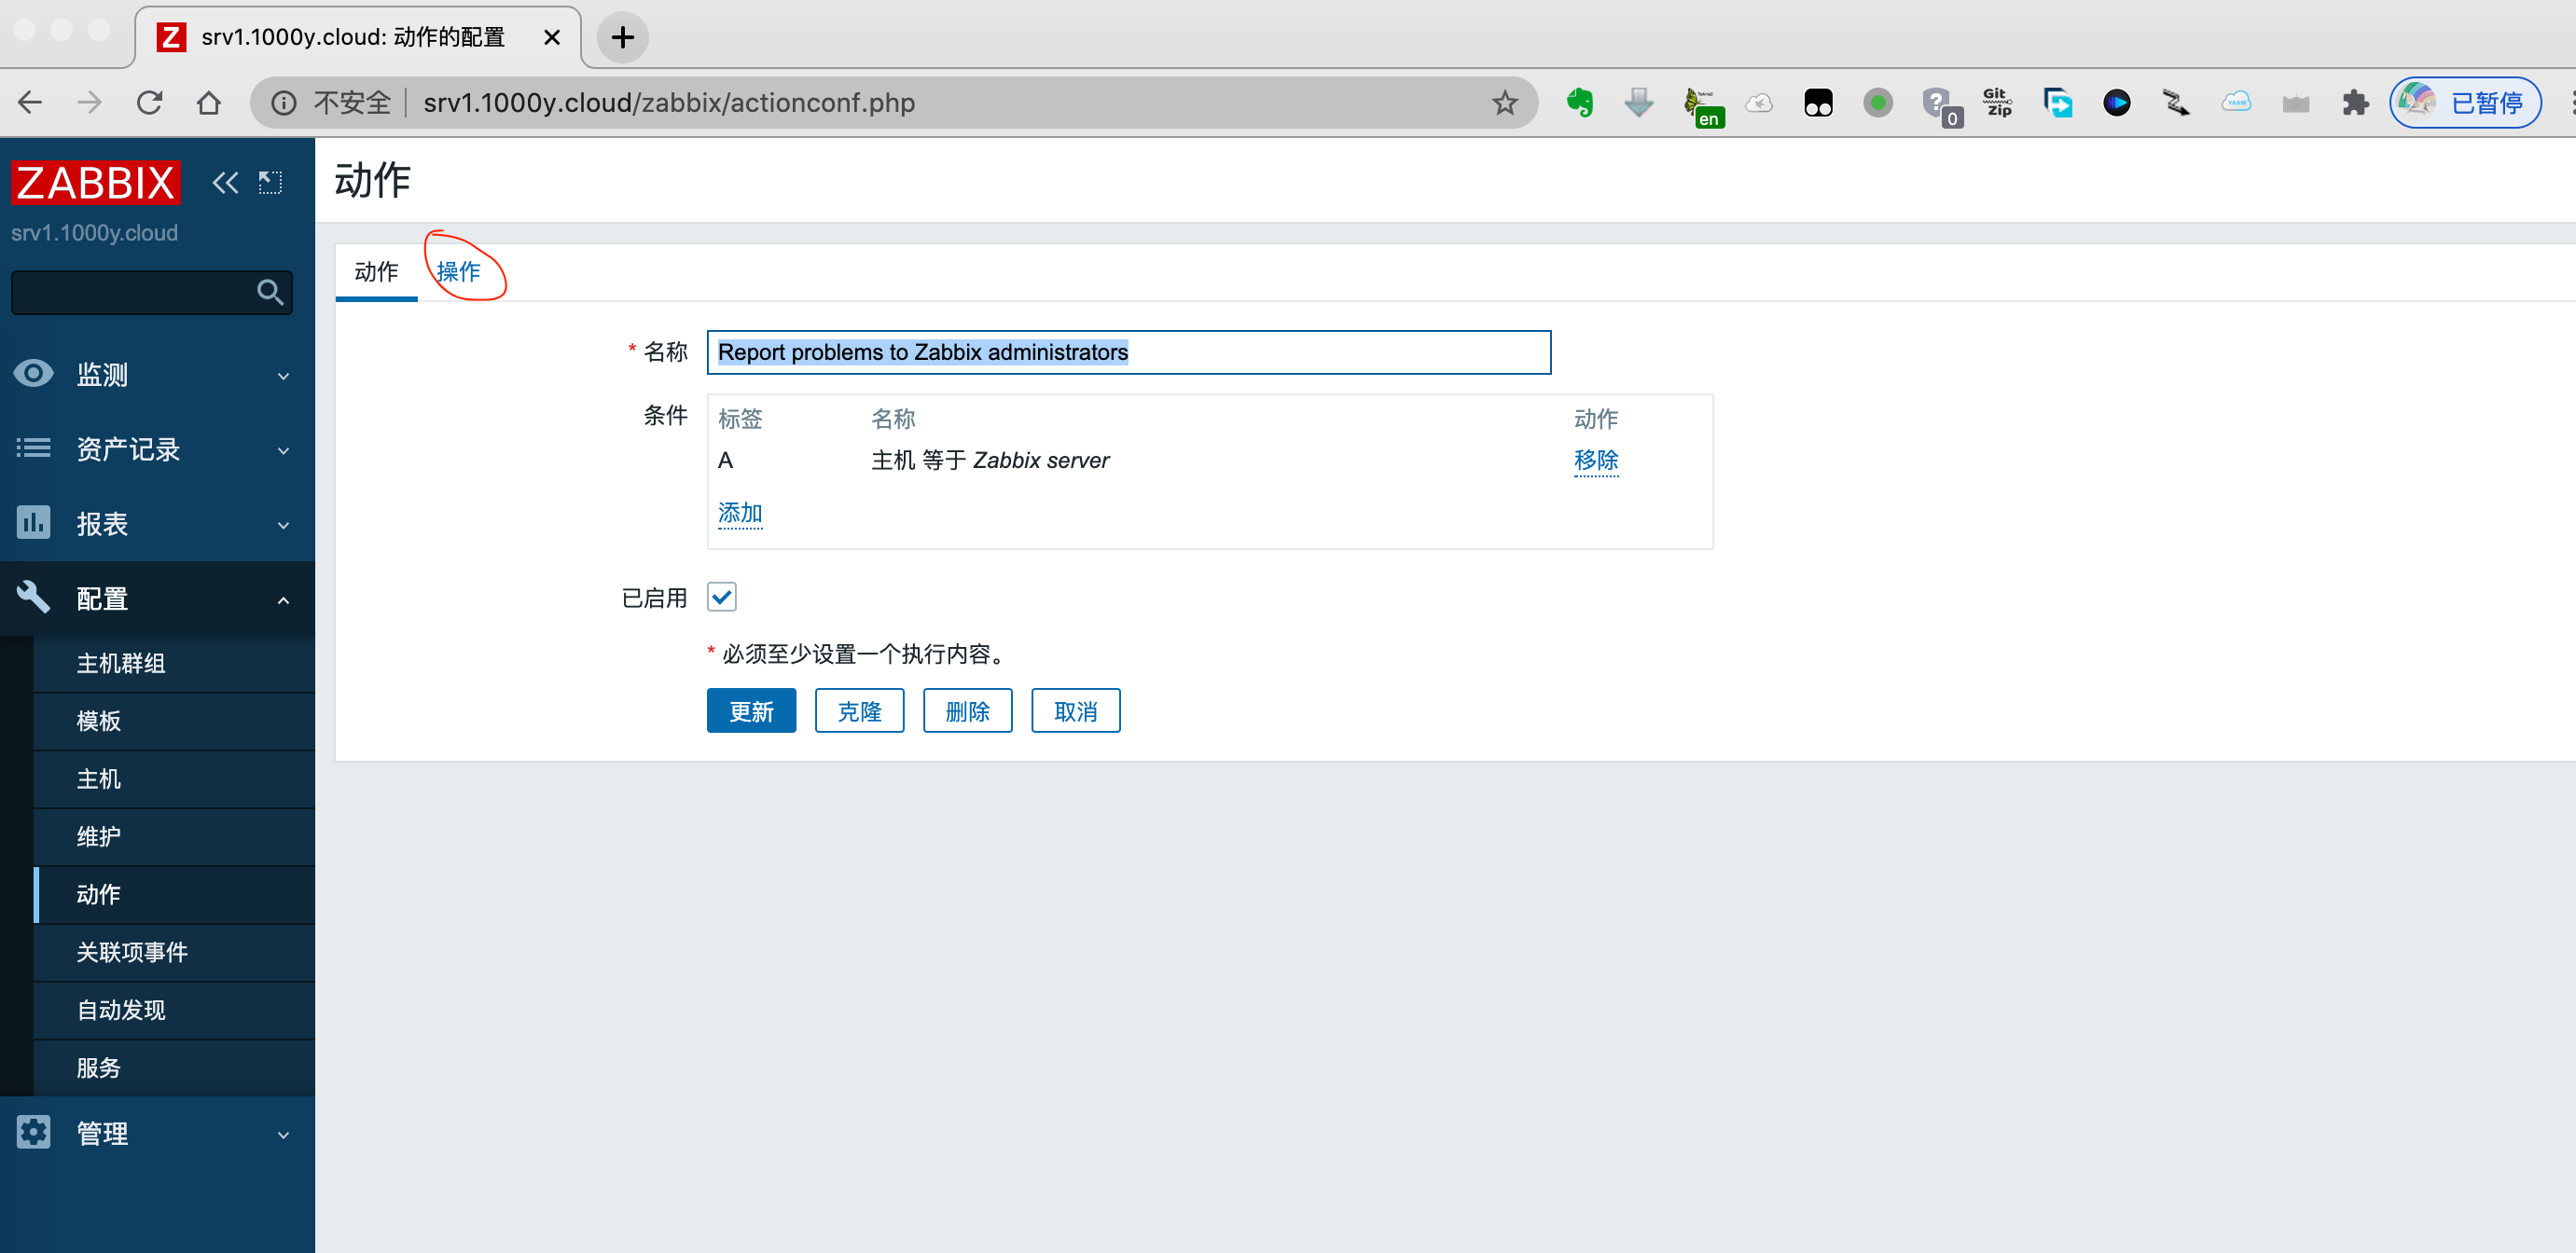
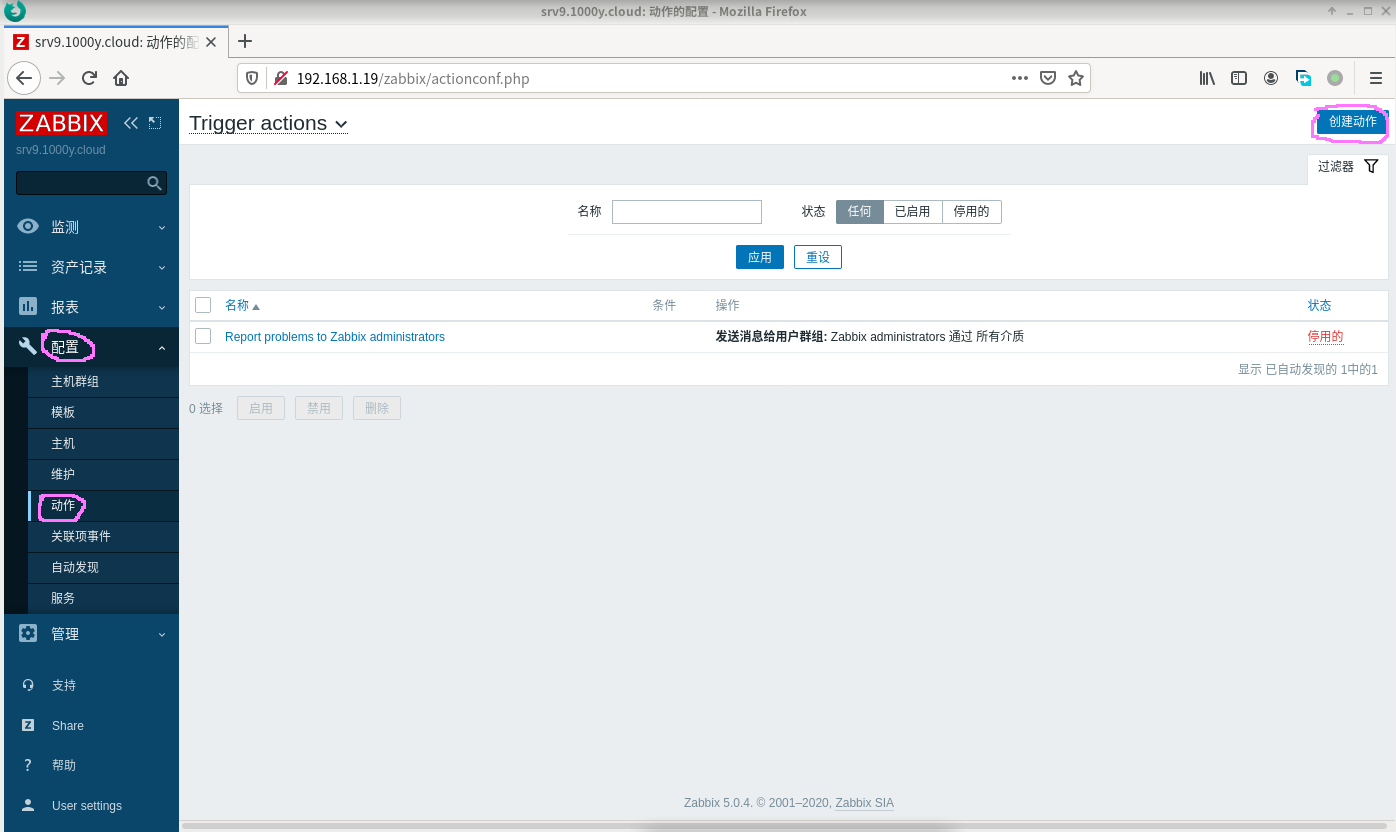
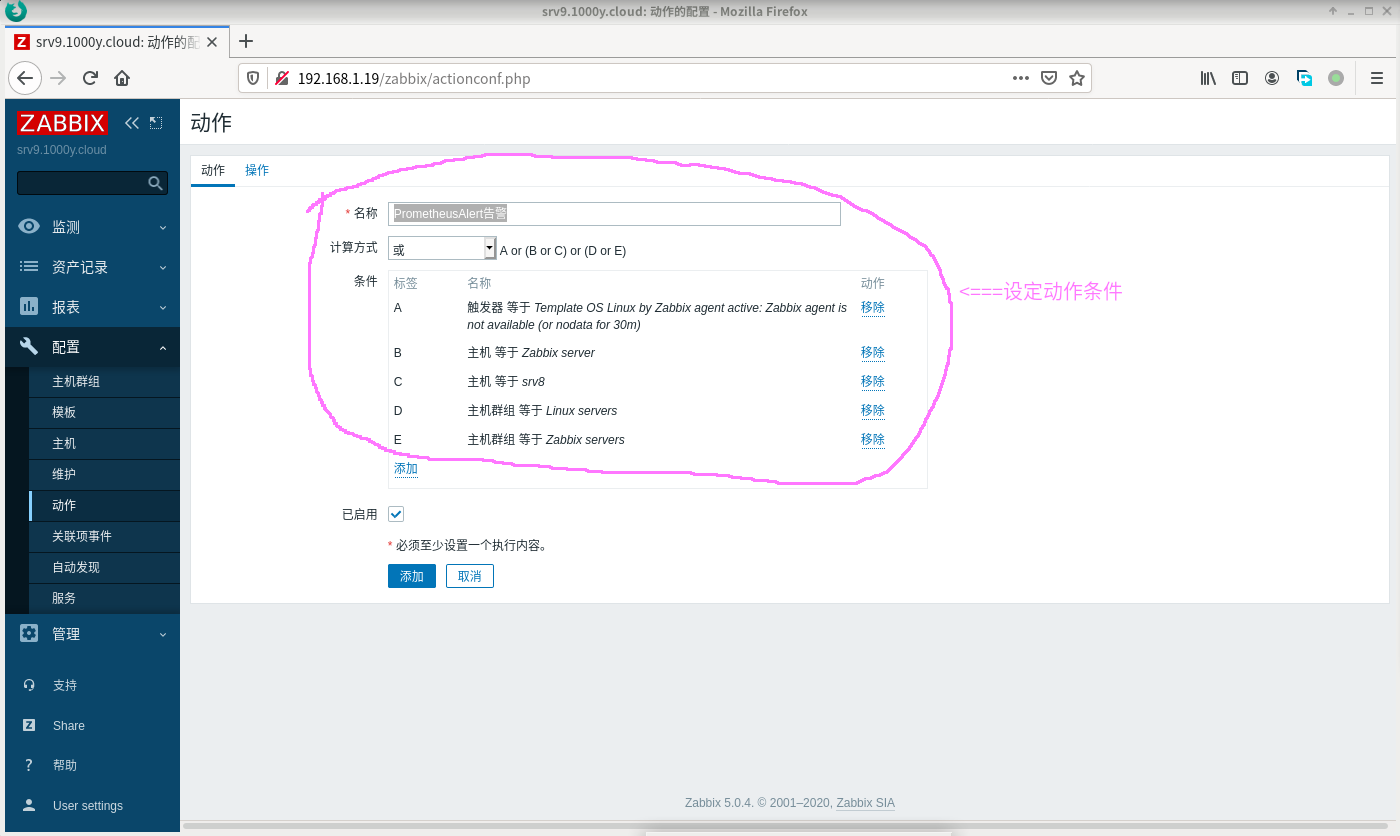
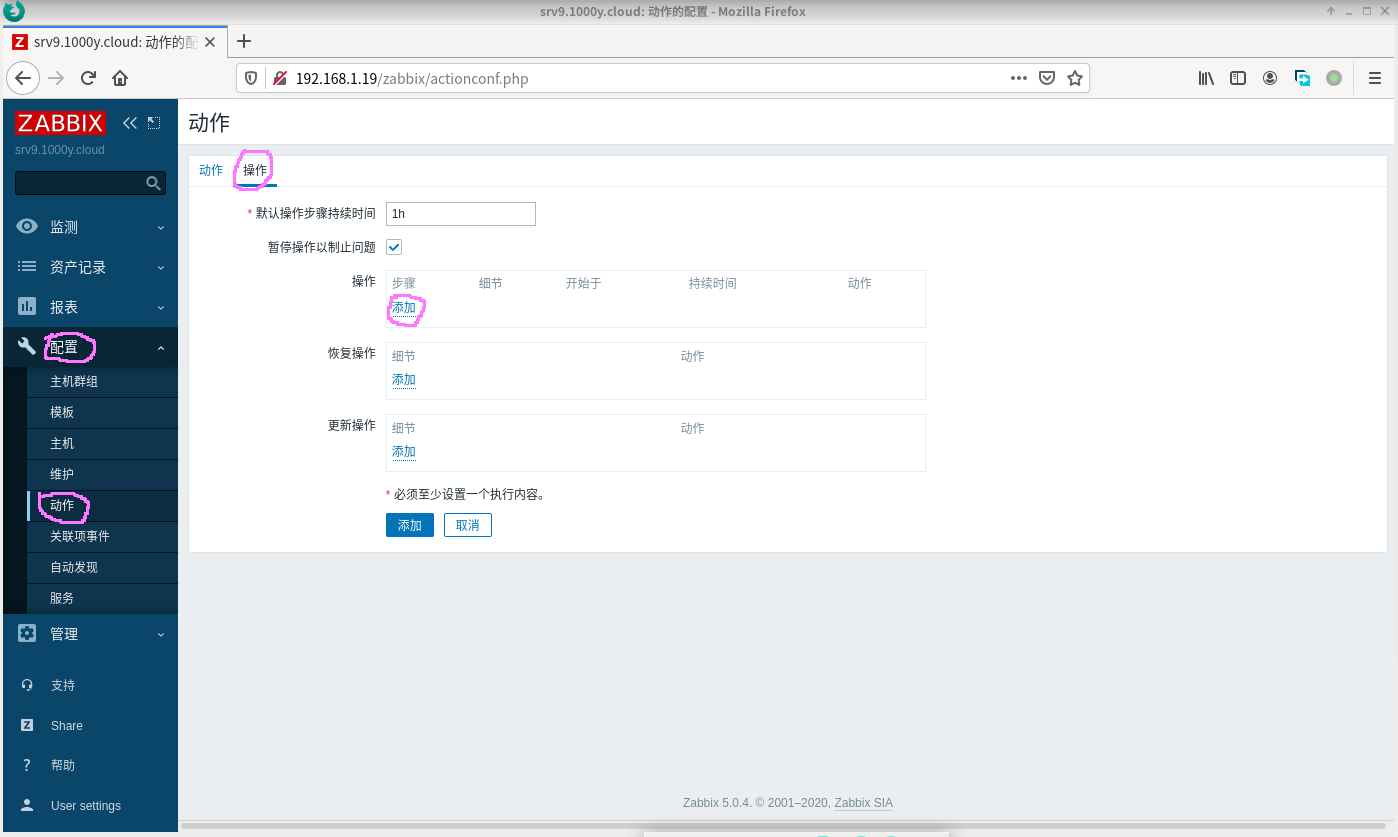
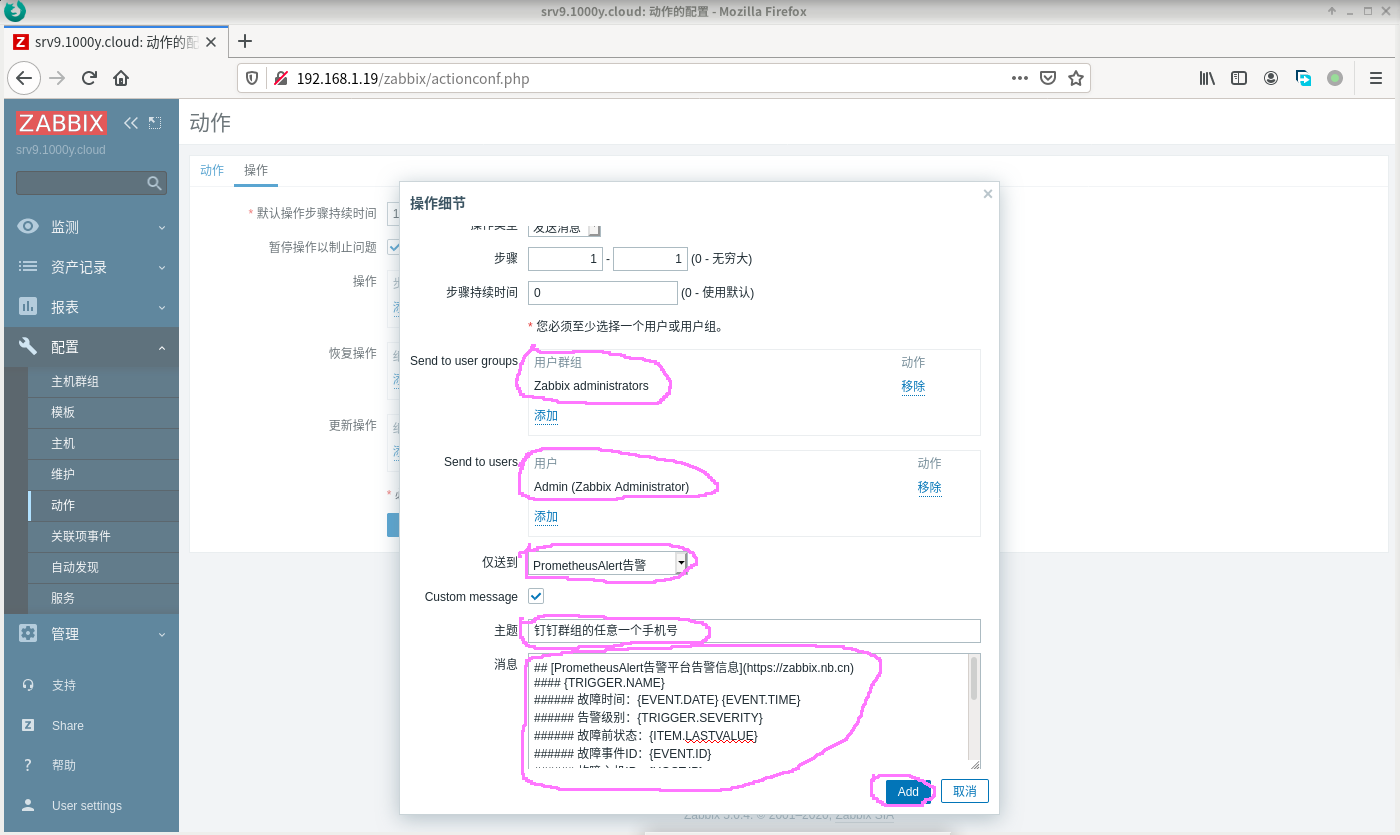
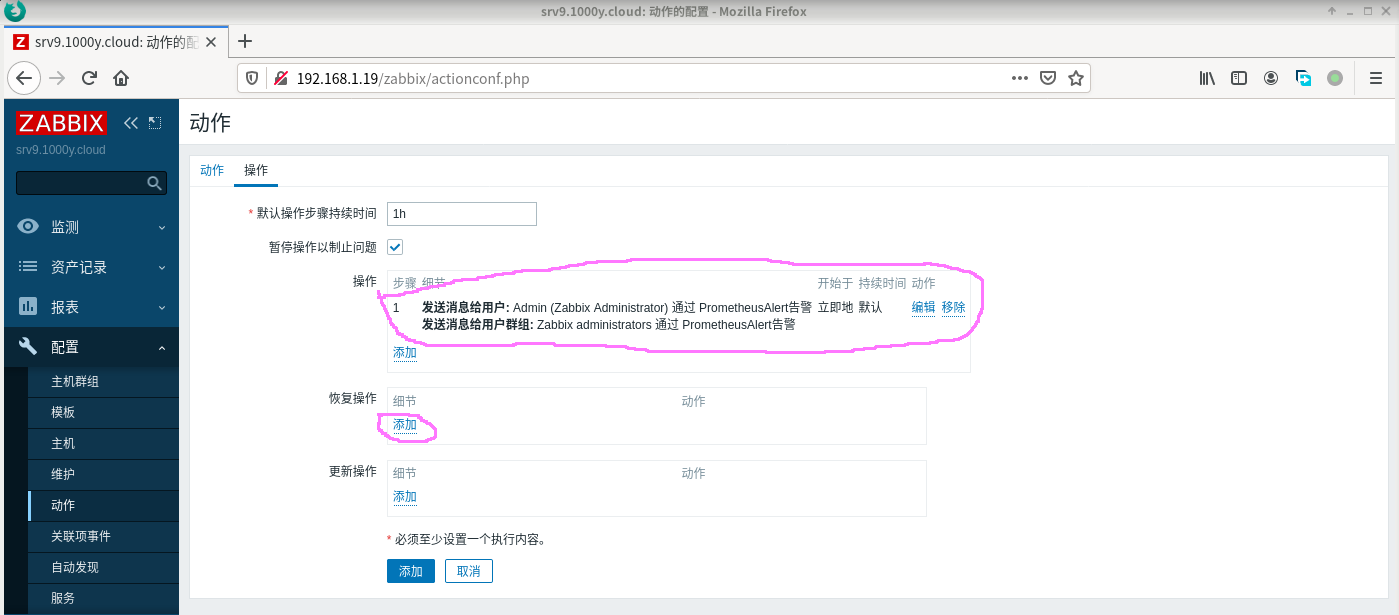
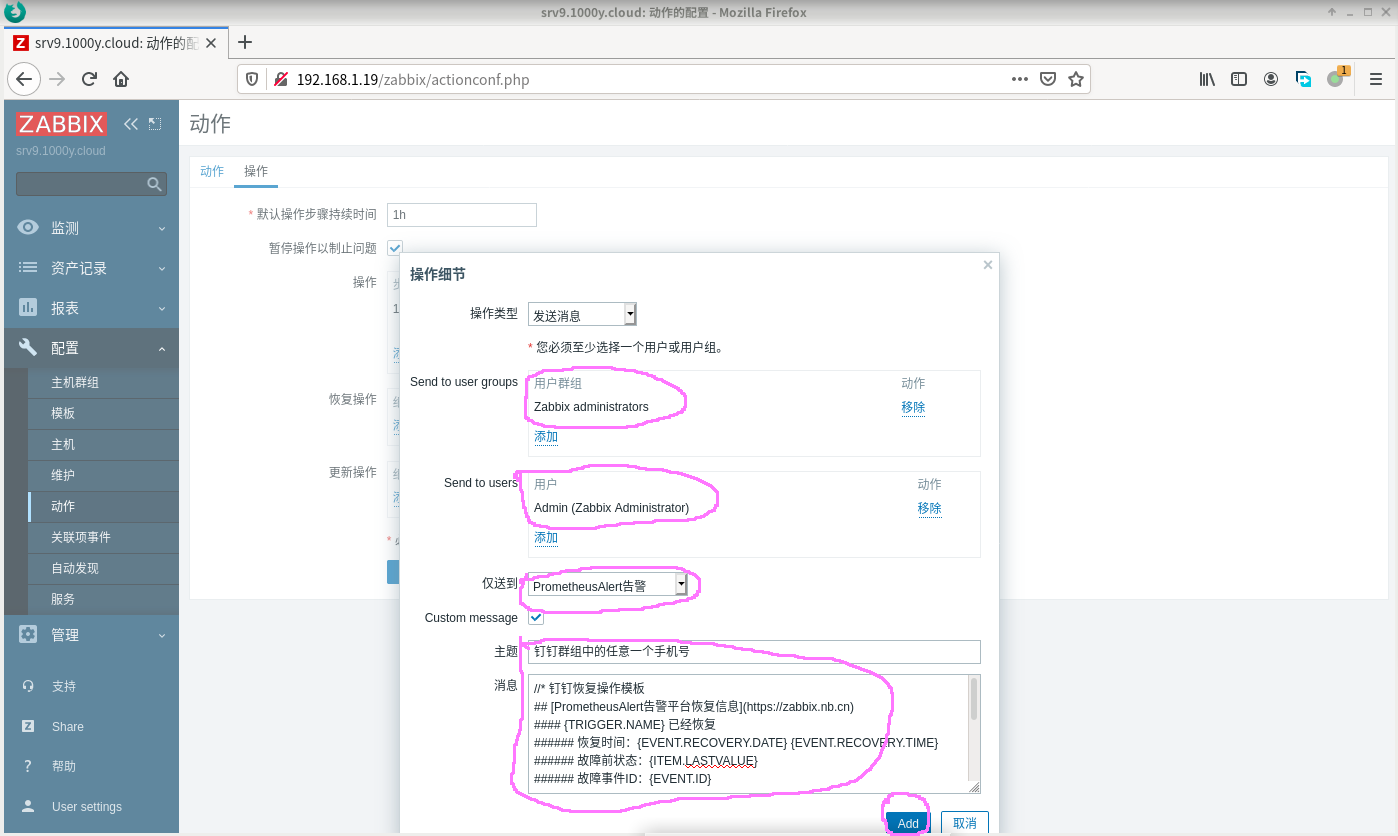
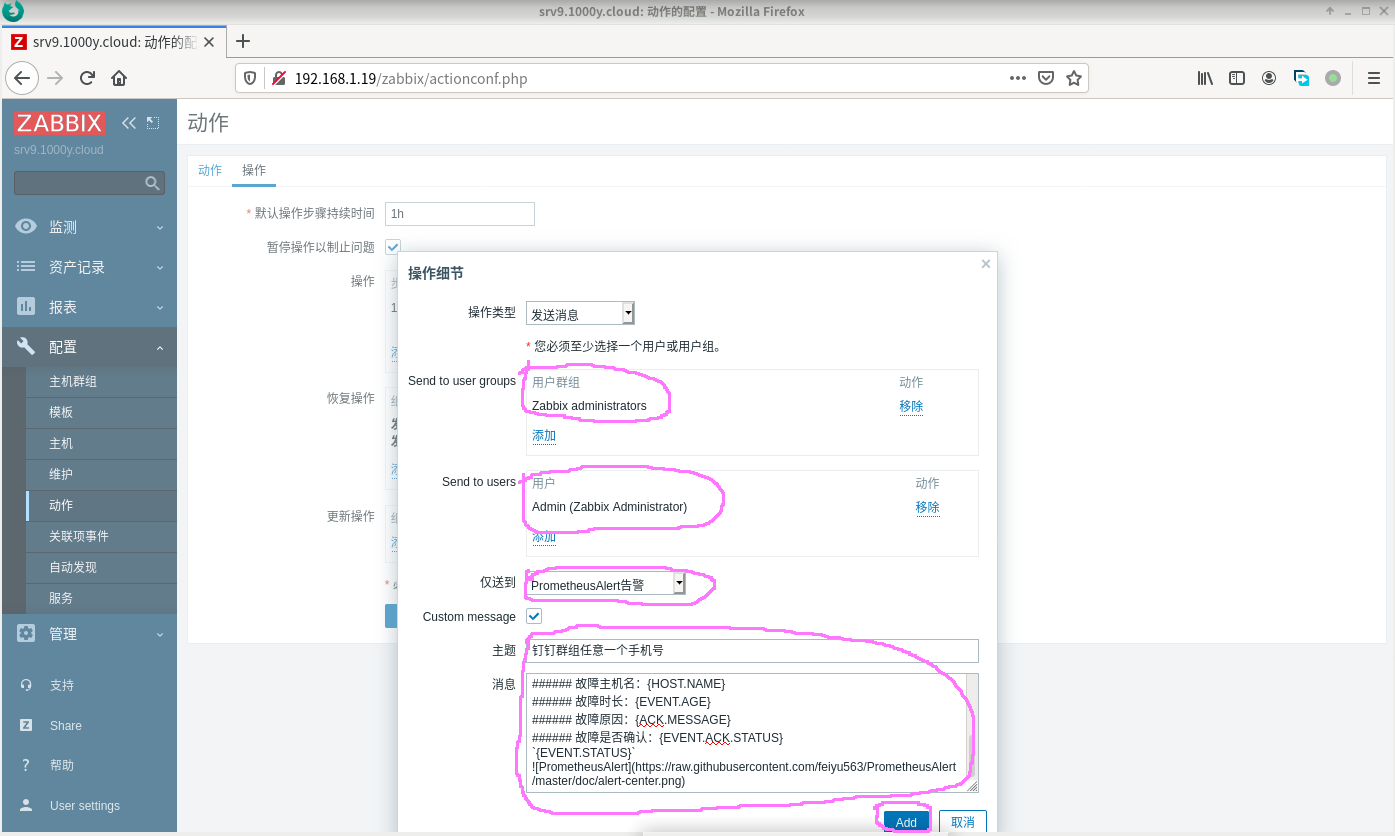
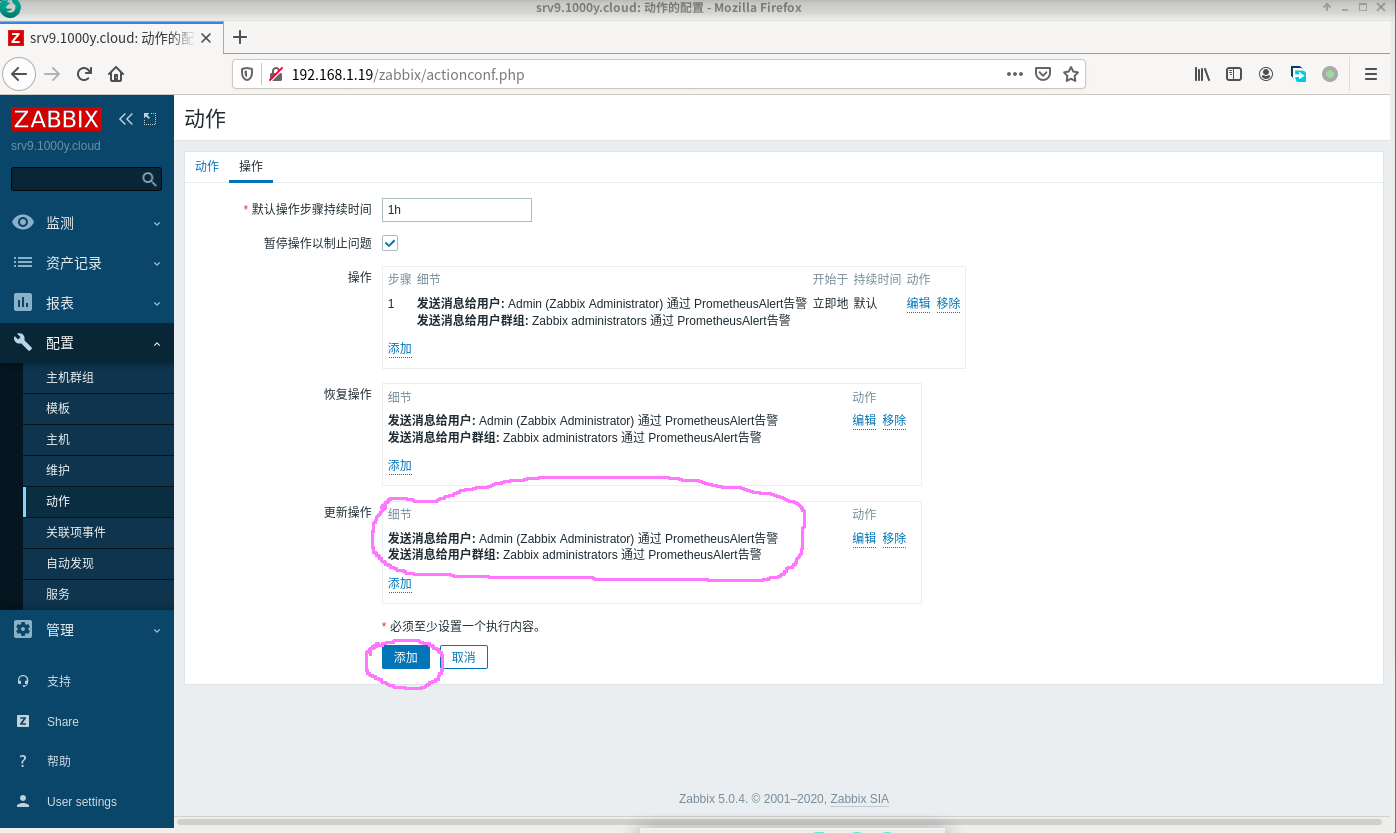
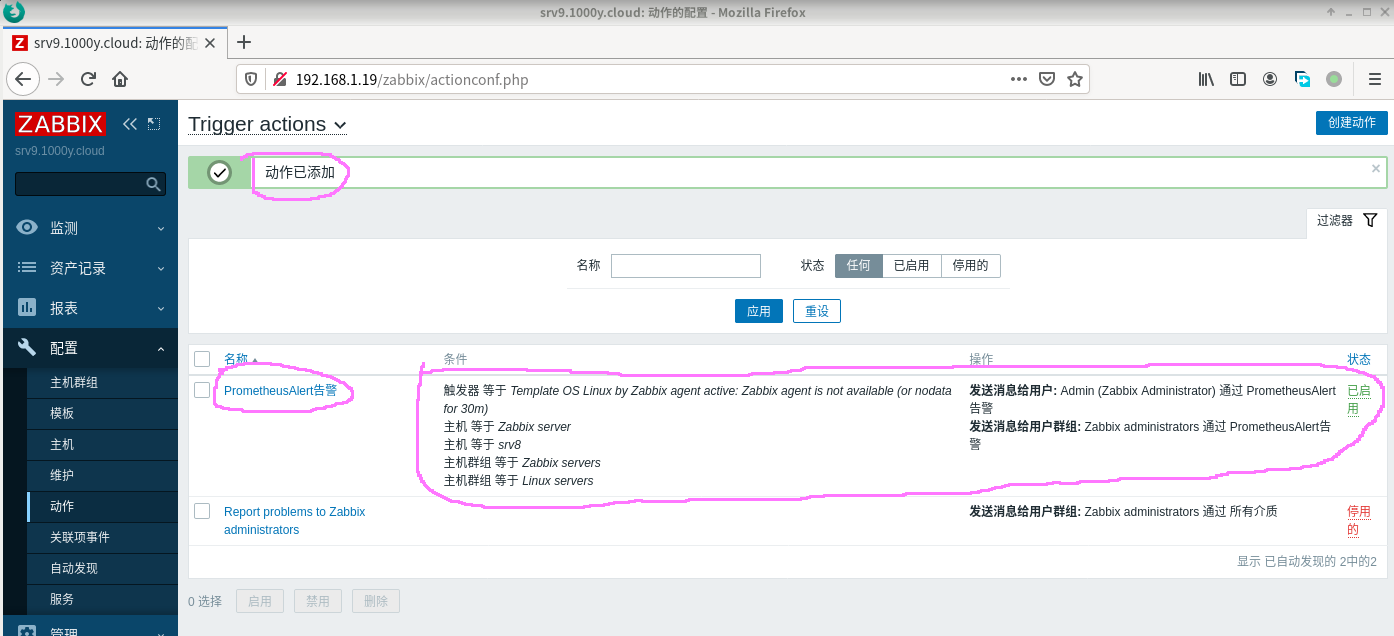
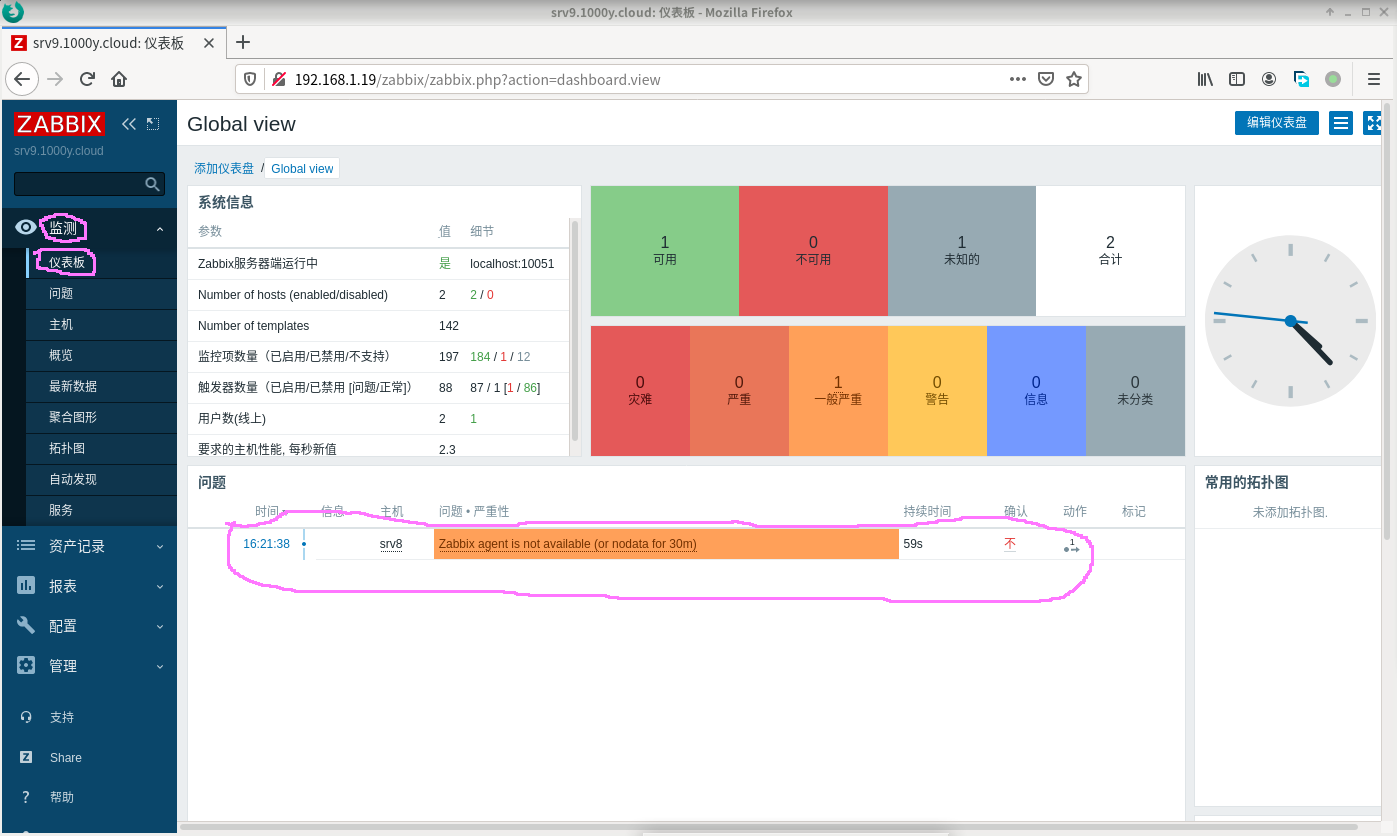
5.3 设定报警动作
2) 点击"操作"进行针对性配置


6. 添加监测主机(远程客户端)
6.1 为监测机配置Zabbix Agent
2) 配置并启动Zabbix Agent [root@srv2 ~]# vim /etc/zabbix/zabbix_agentd.conf # 设定117行,指定Zabbix Server的IP/FQDN Server=192.168.10.111
# 设定158行,指定Zabbix Server的IP/FQDN ServerActive=192.168.10.111
# 设定169行,指定本节点的IP/FQDN Hostname=srv2.1000y.cloud
[root@srv2 ~]# systemctl enable --now zabbix-agent
3) 防火墙设置 [root@srv2 ~]# firewall-cmd --add-port=10050/tcp --permanent success [root@srv2 ~]# firewall-cmd --reload success
4) SELinux设置 [root@srv2 ~]# setsebool -P domain_can_mmap_files on [root@srv2 ~]# vim zabbix_agent.te module zabbix_agent 1.0;
require { type zabbix_agent_t; type rpm_exec_t; type rpm_var_lib_t; class file { execute execute_no_trans map open }; }
#============= zabbix_agent_t ============== allow zabbix_agent_t rpm_var_lib_t:file open; allow zabbix_agent_t rpm_exec_t:file { execute execute_no_trans map };
[root@srv2 ~]# checkmodule -m -M -o zabbix_agent.mod zabbix_agent.te [root@srv2 ~]# semodule_package --outfile zabbix_agent.pp --module zabbix_agent.mod [root@srv2 ~]# semodule -i zabbix_agent.pp6.2 在Zabbix Server上添加监测主机(Active模式)
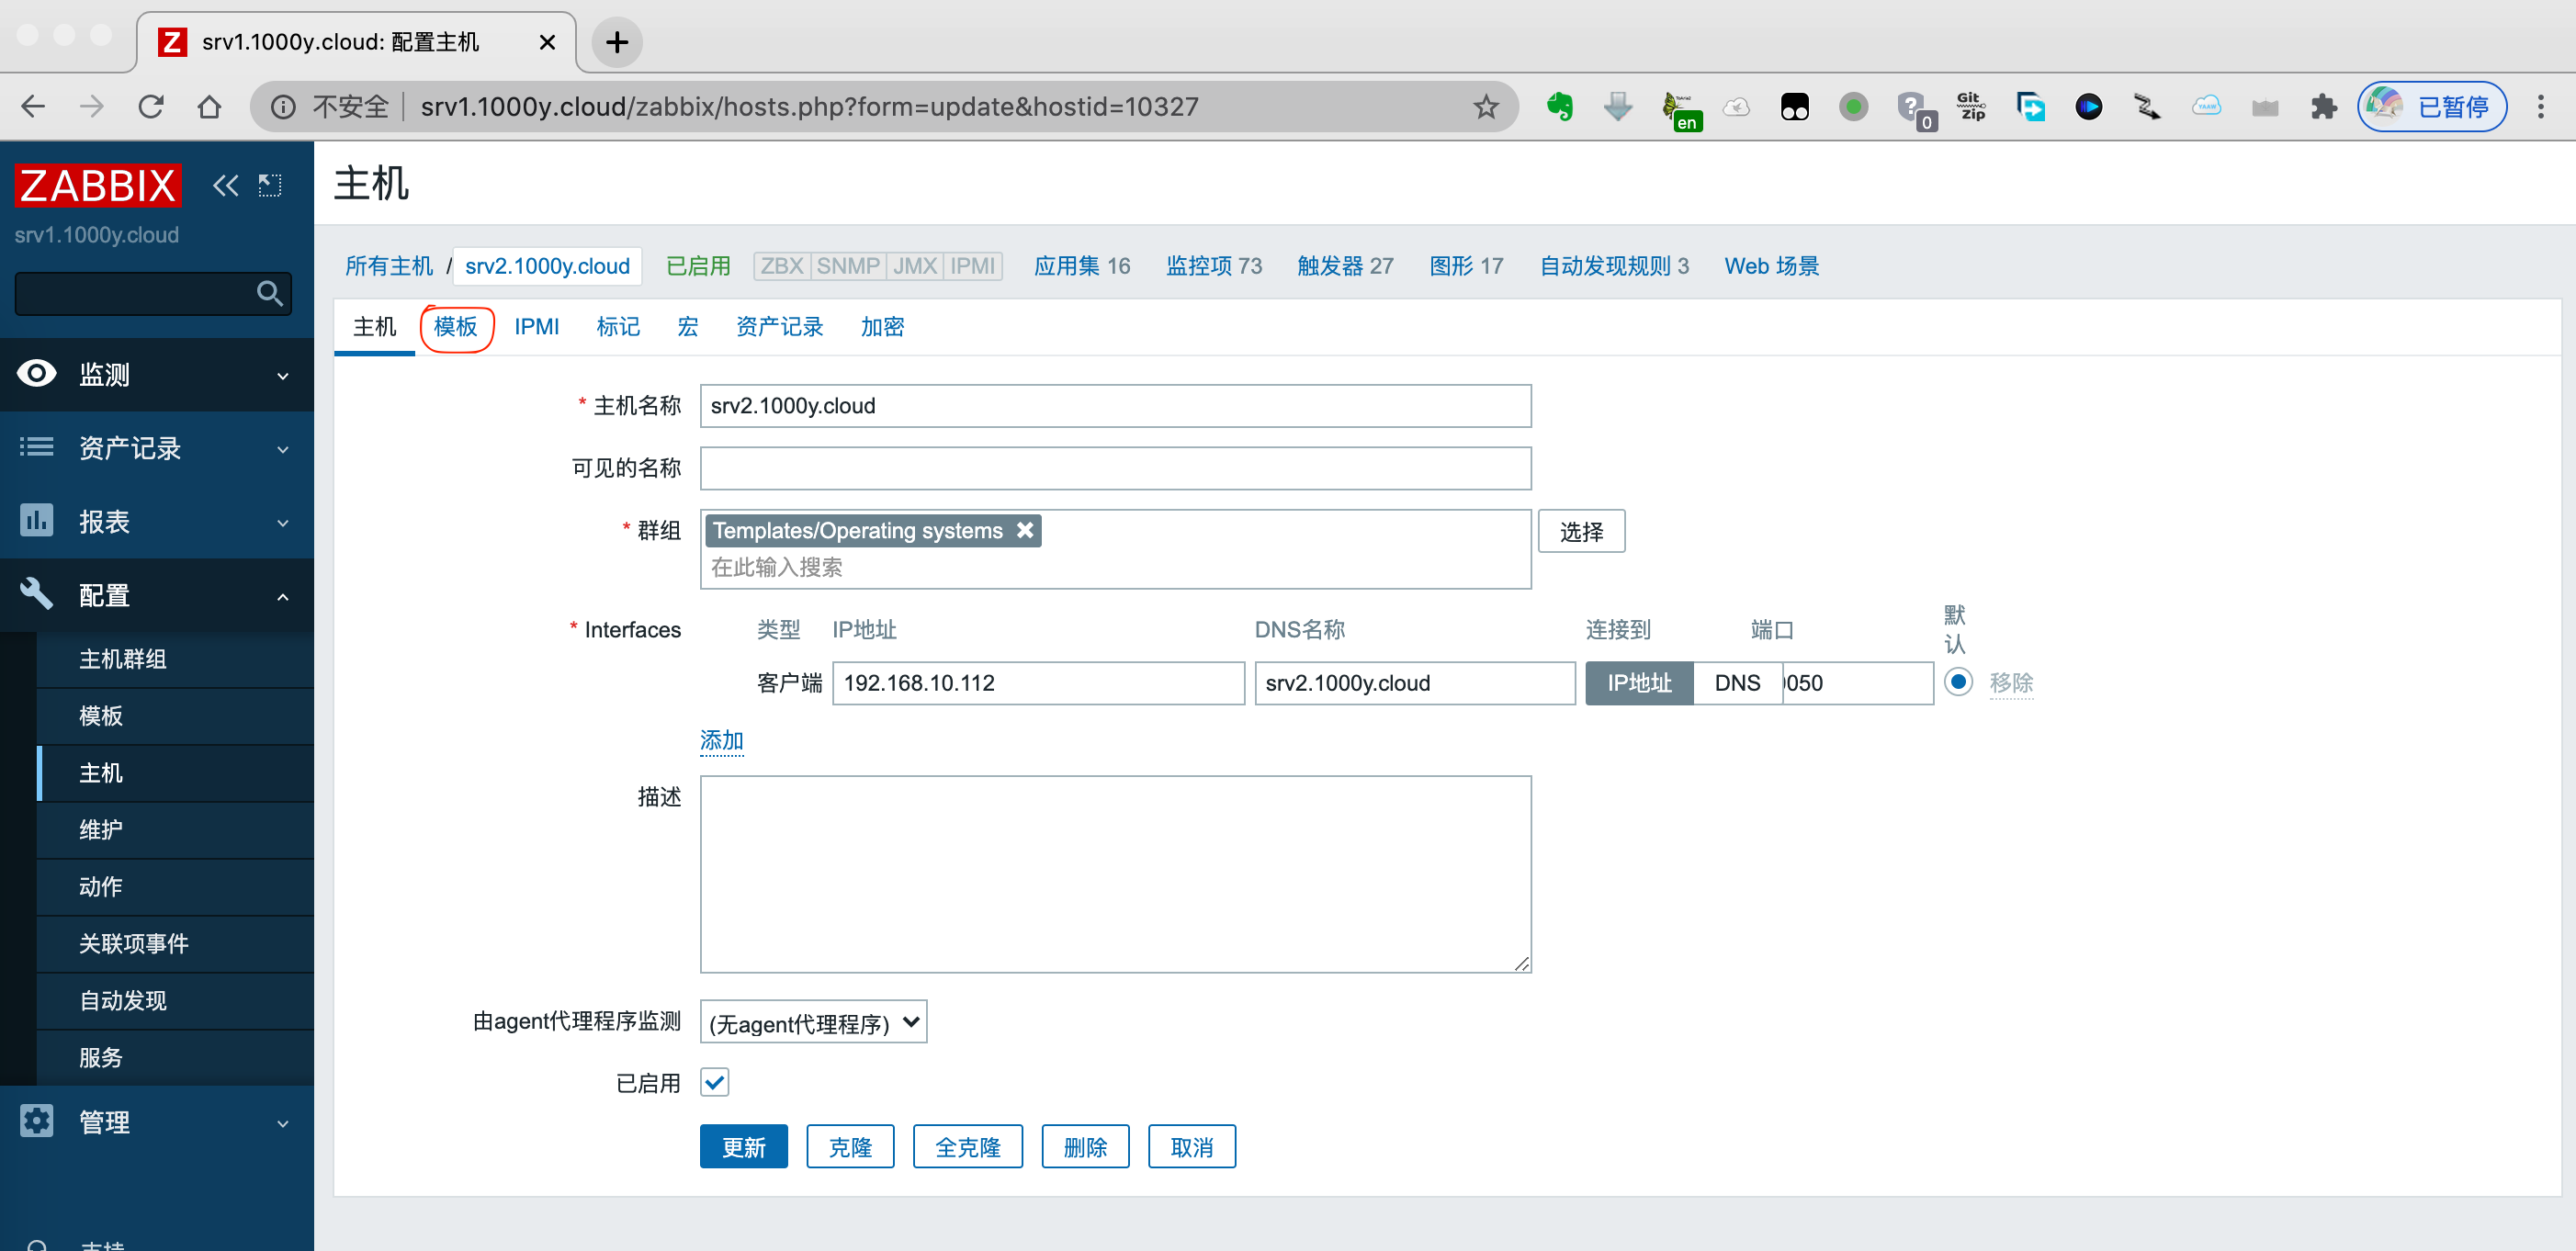
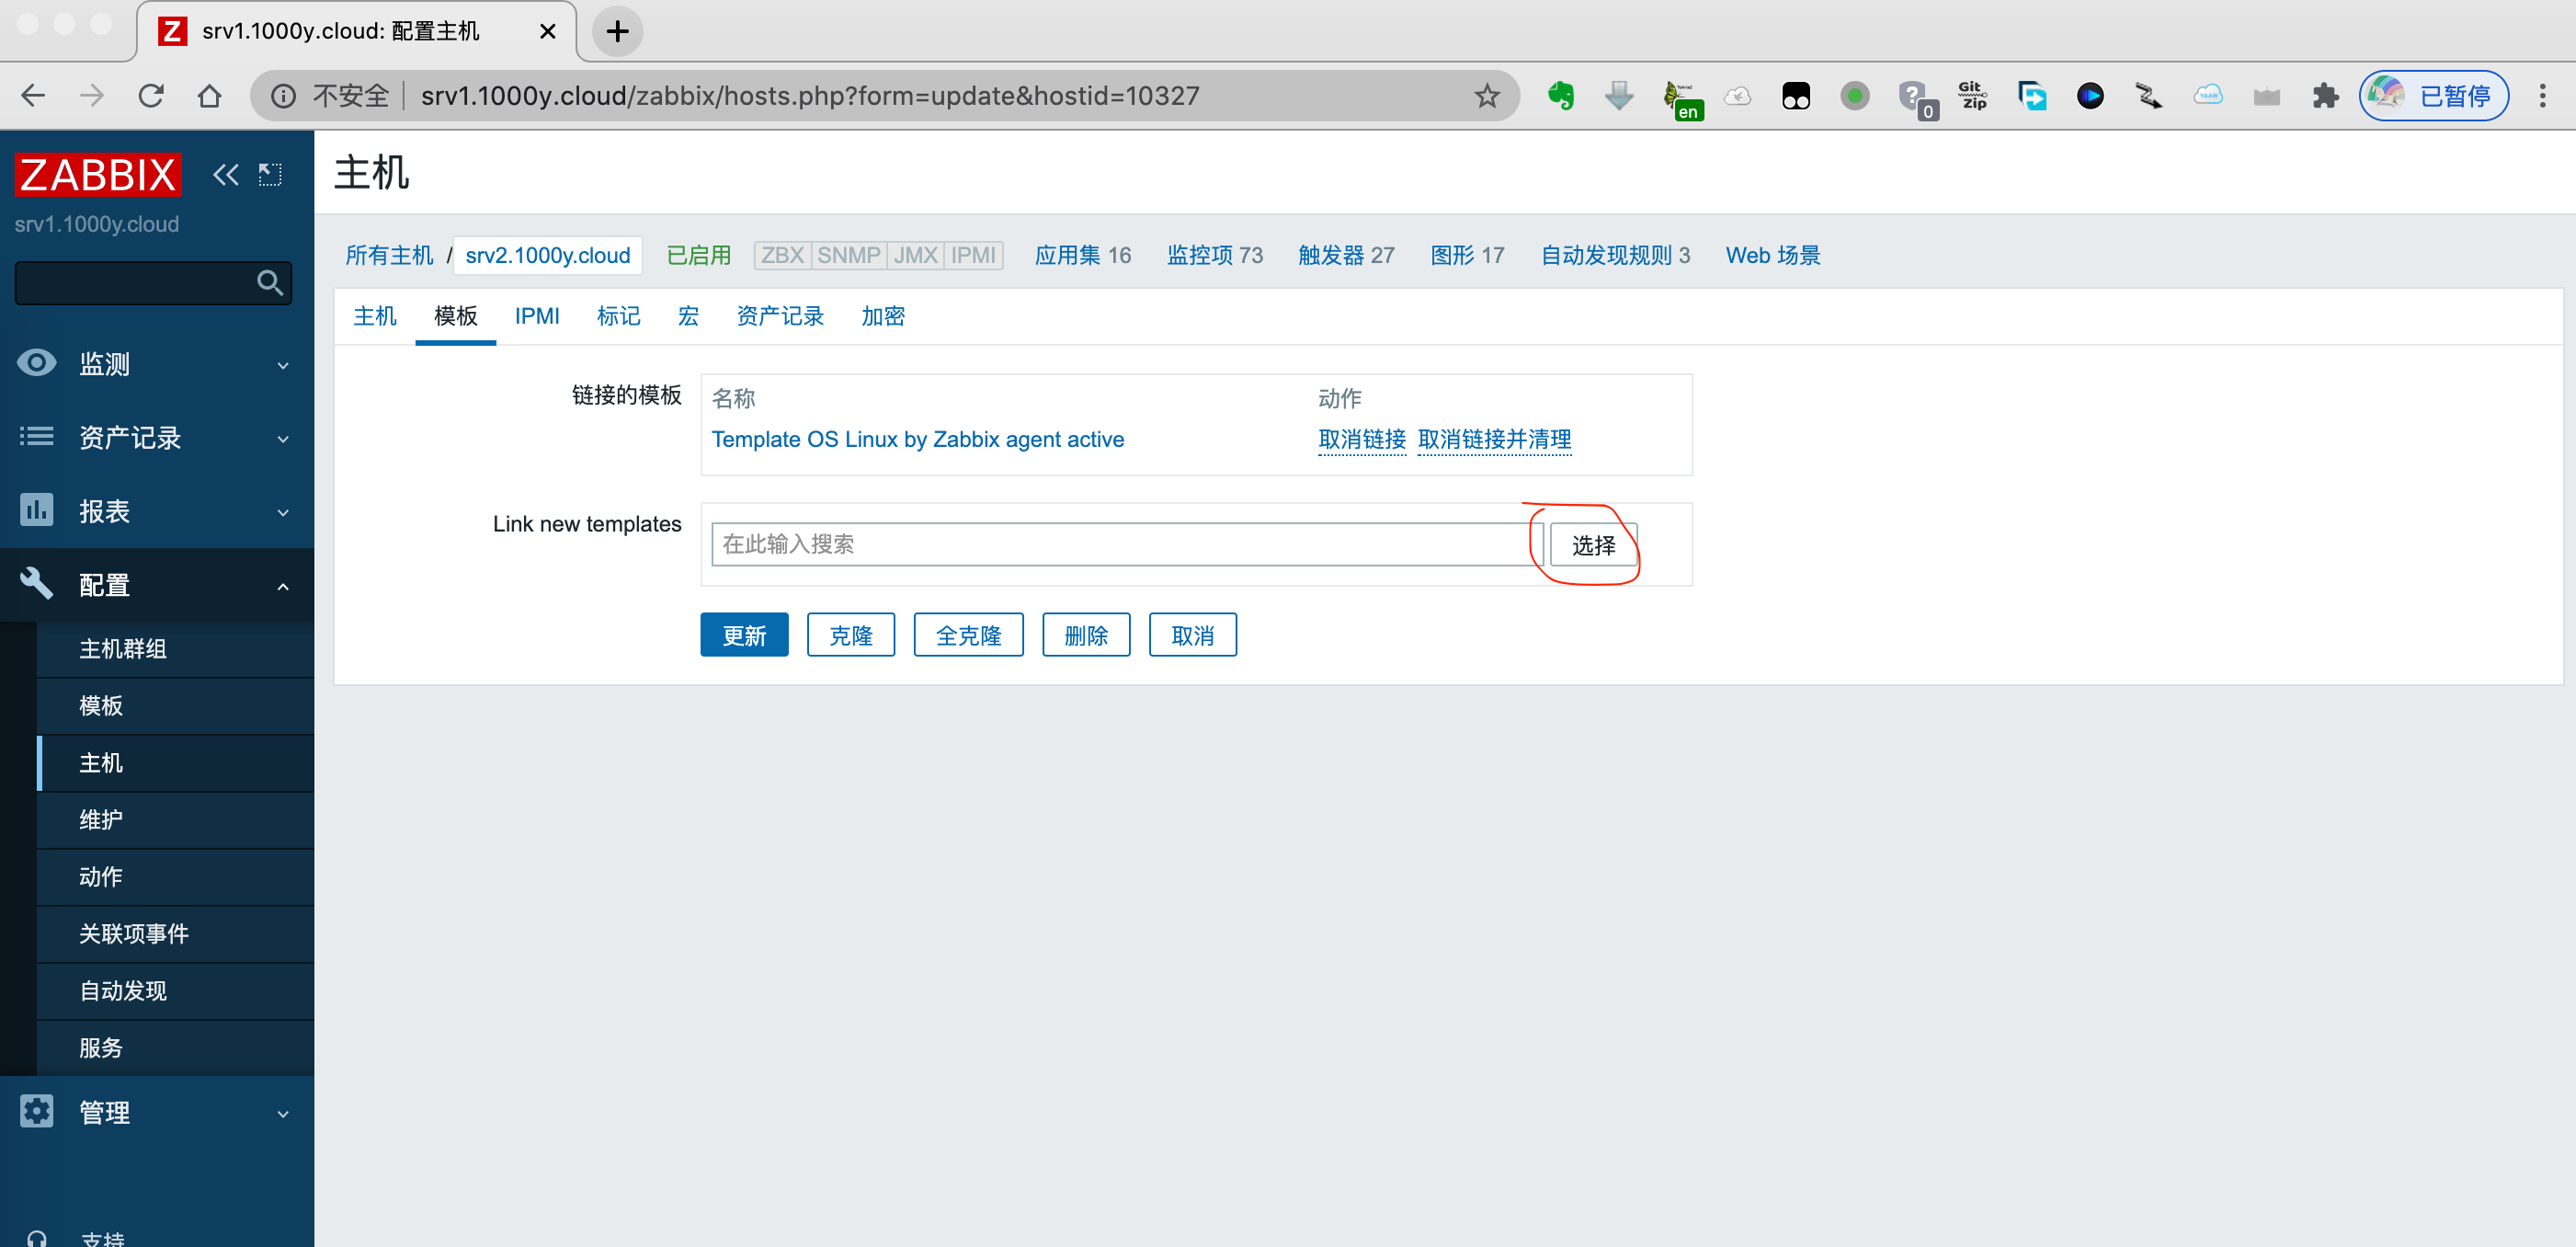
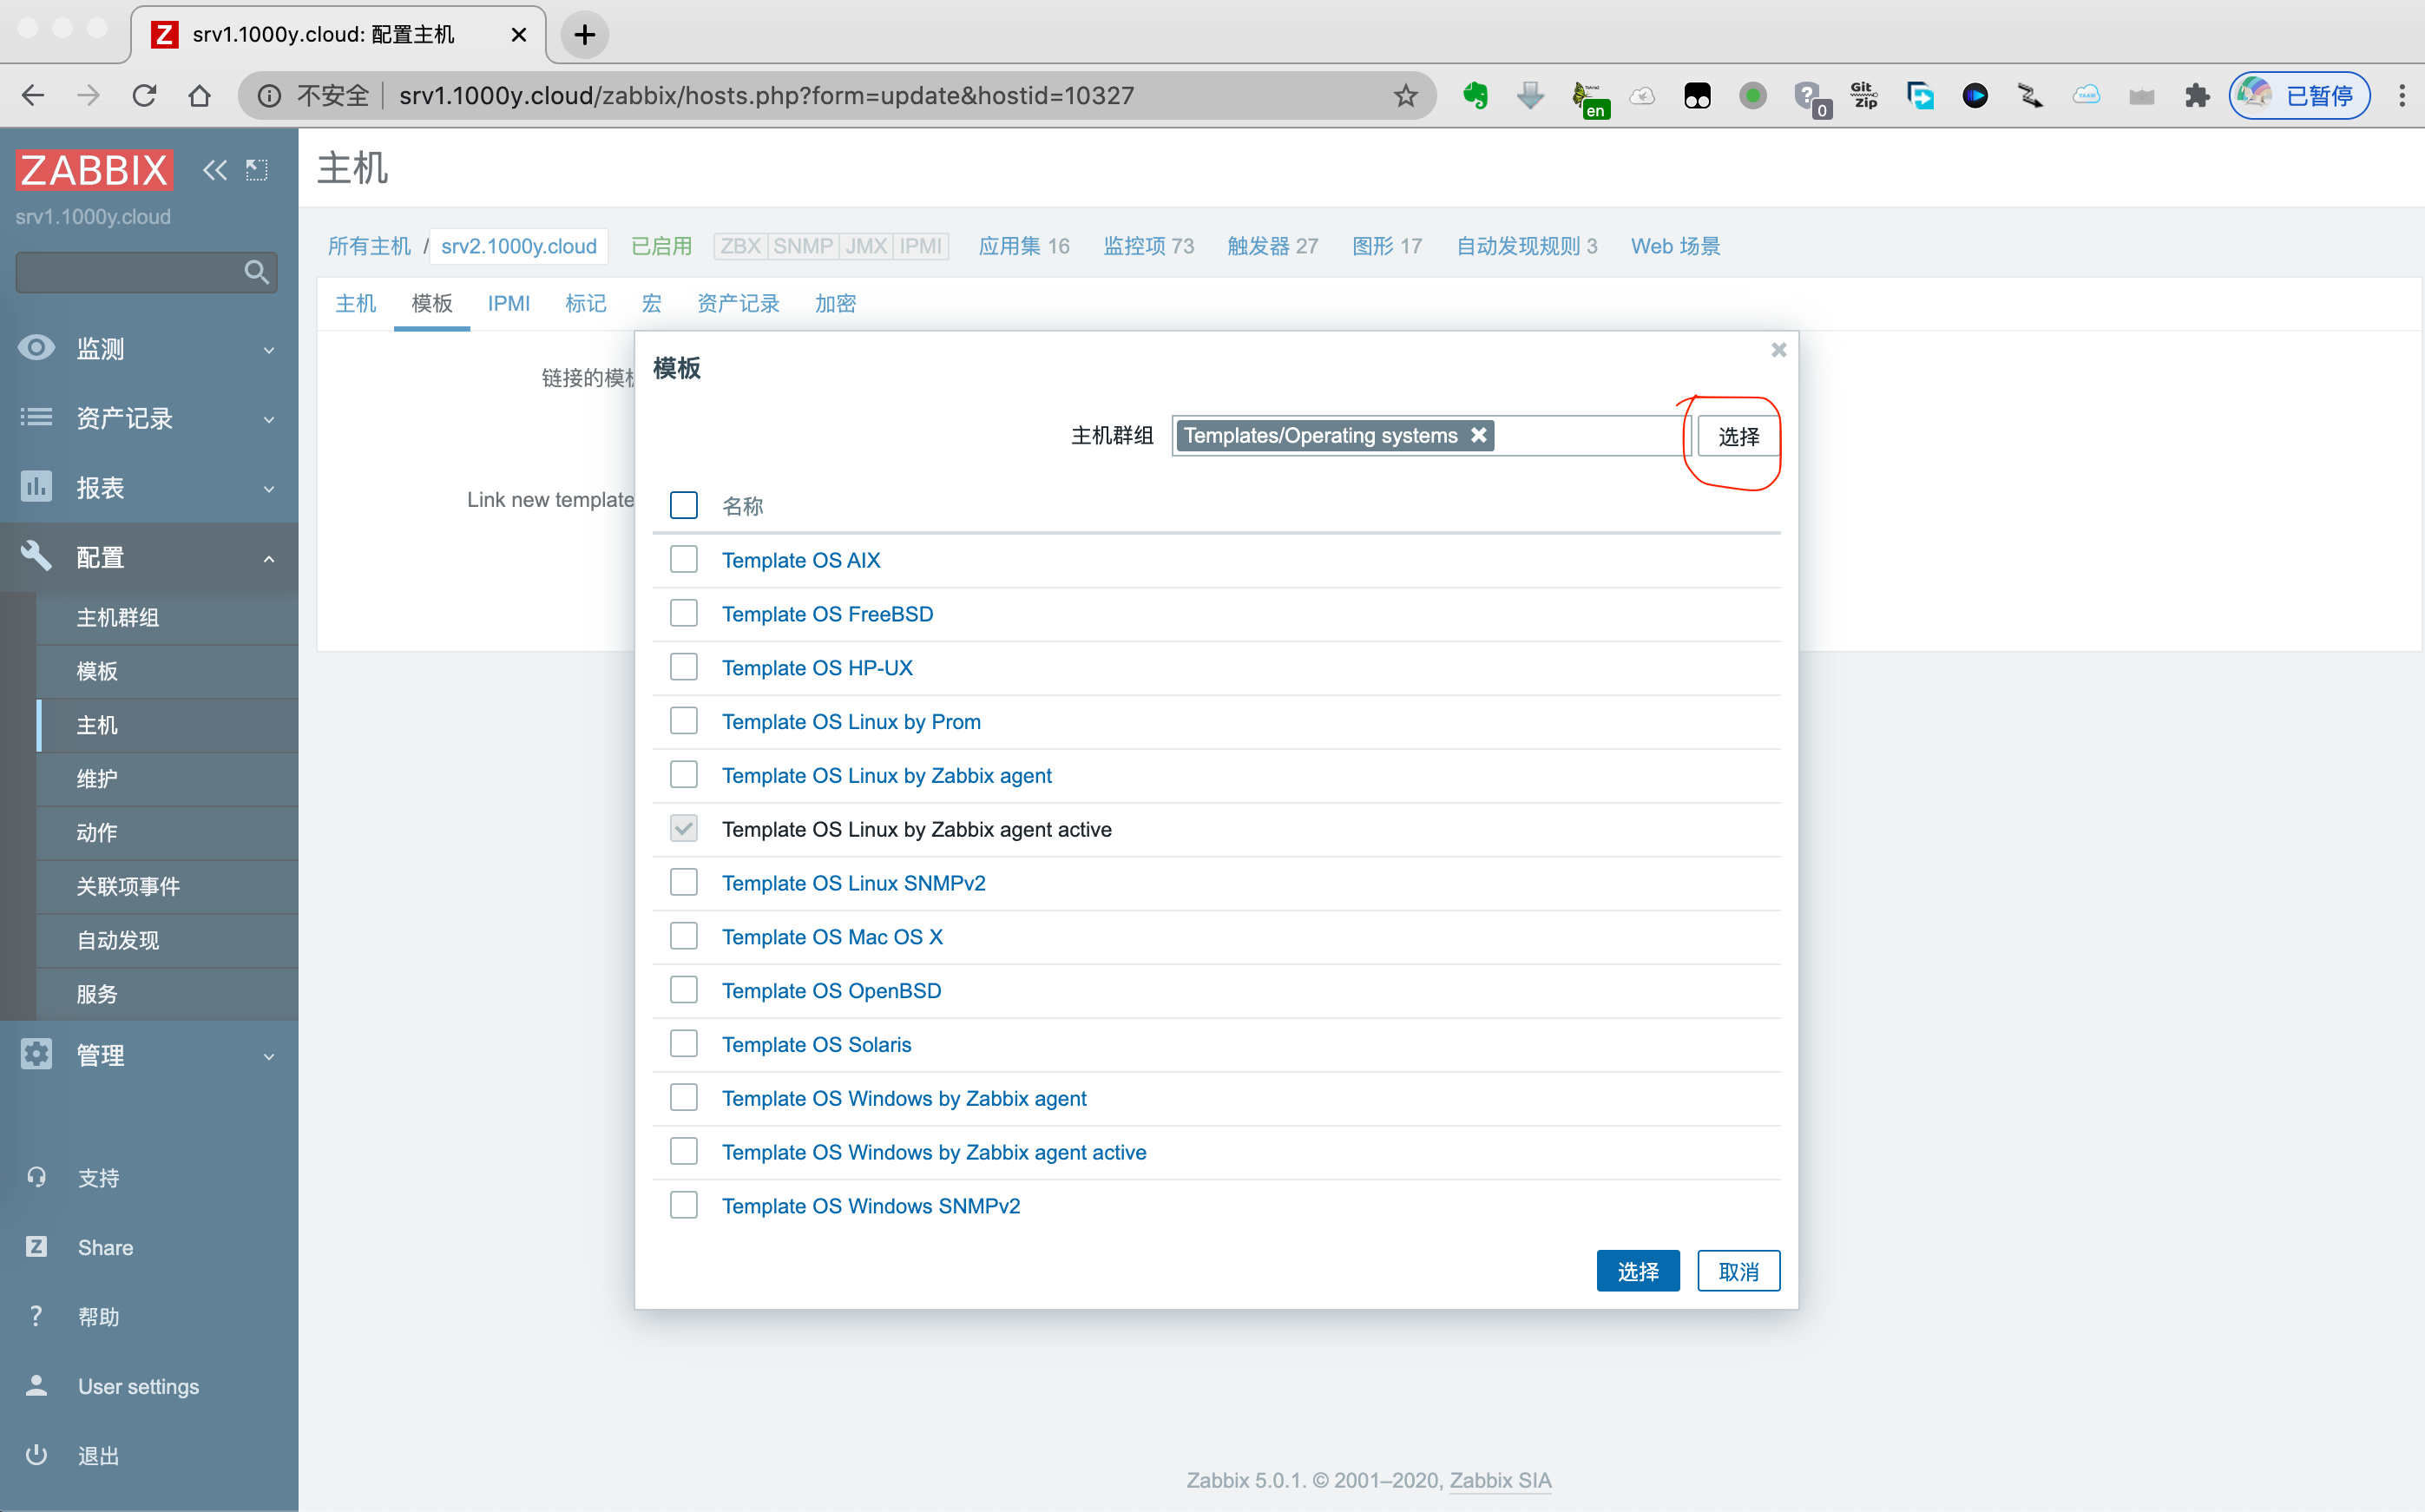
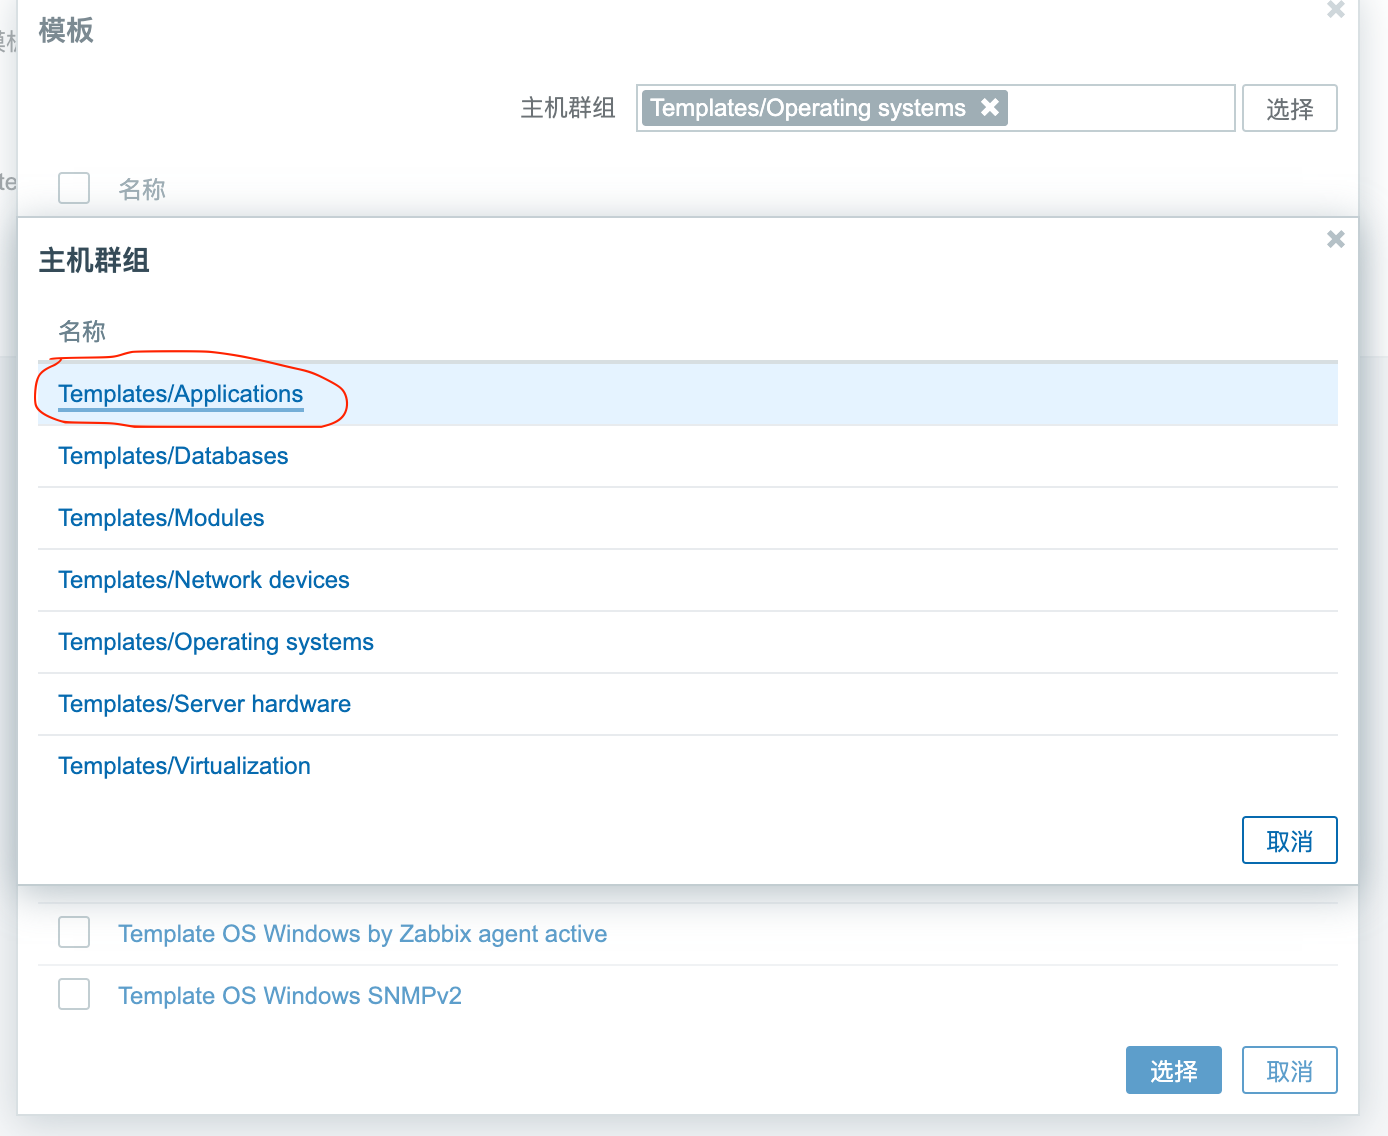
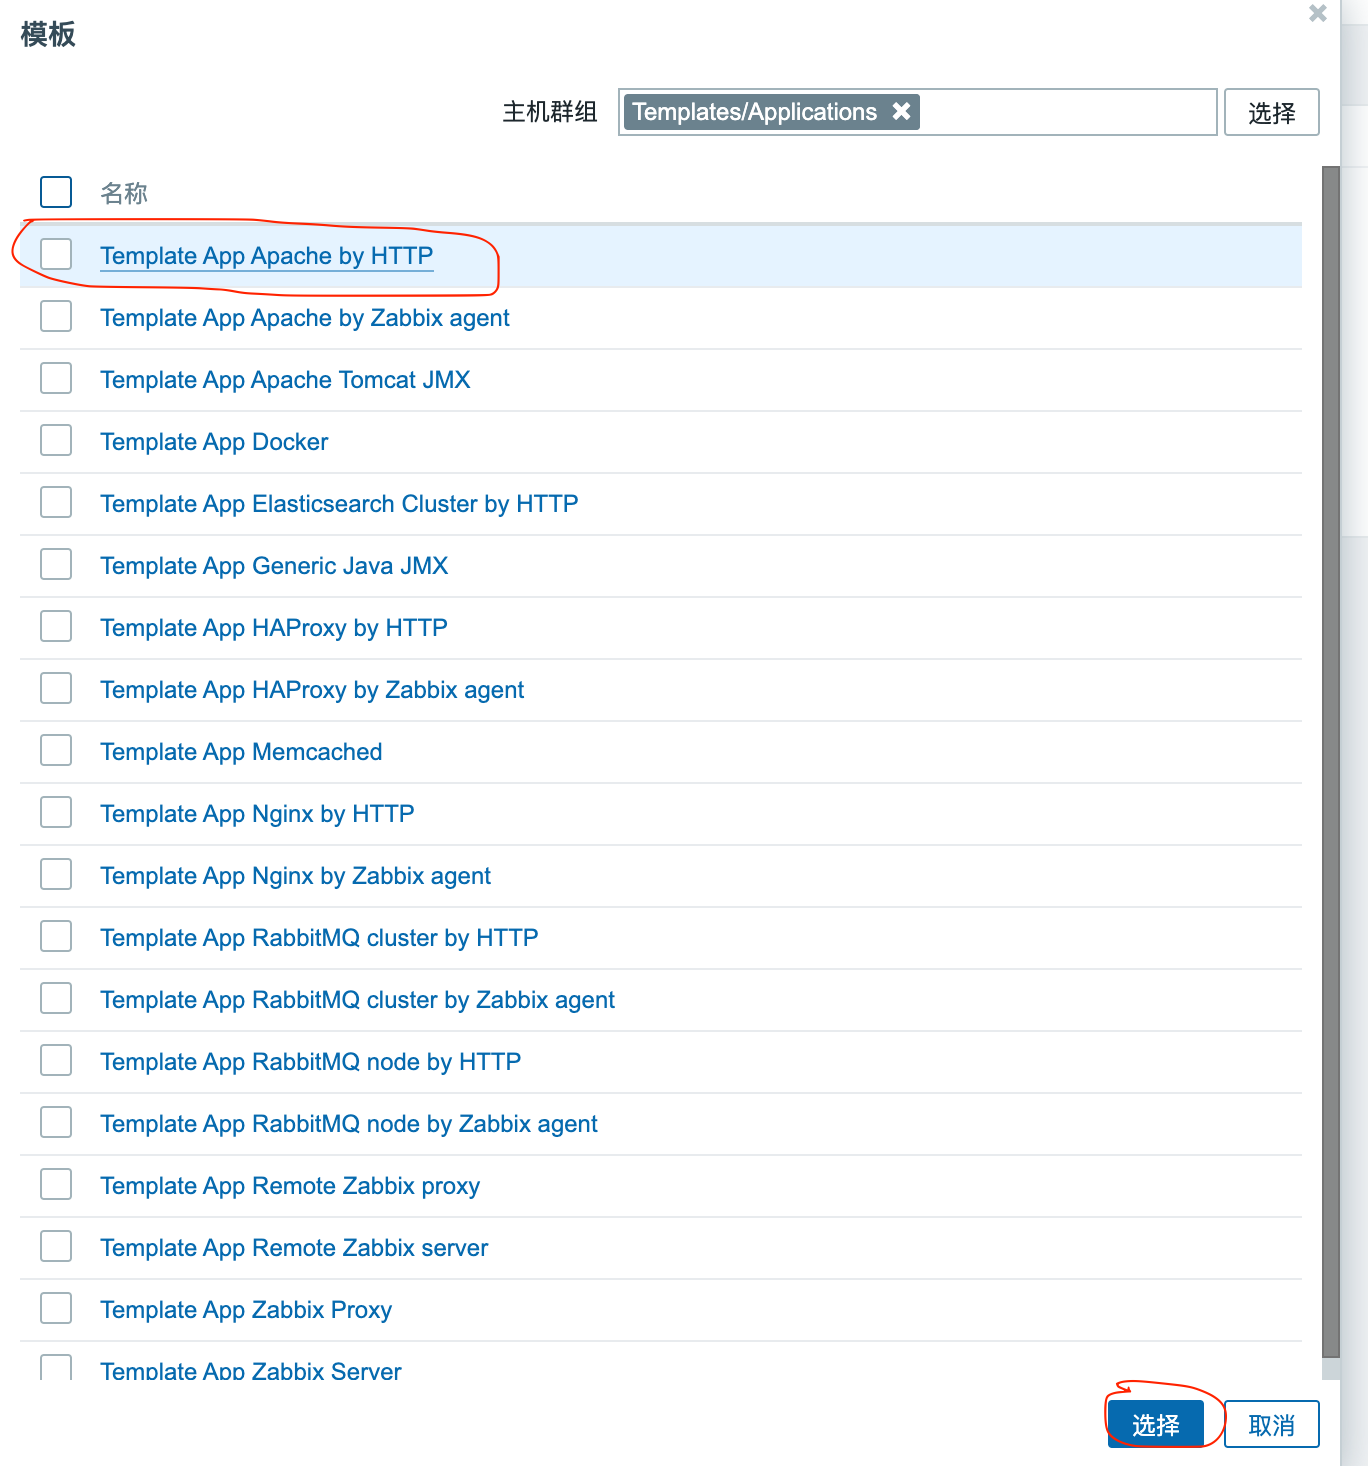
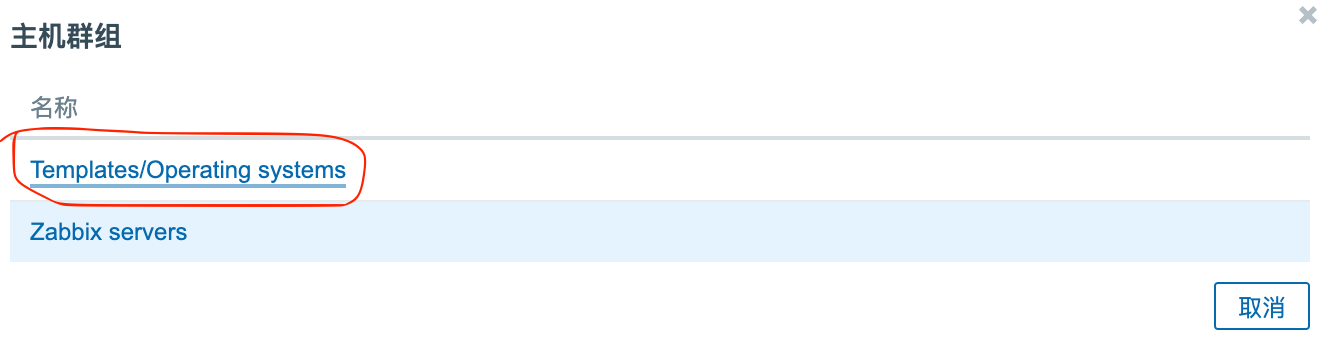
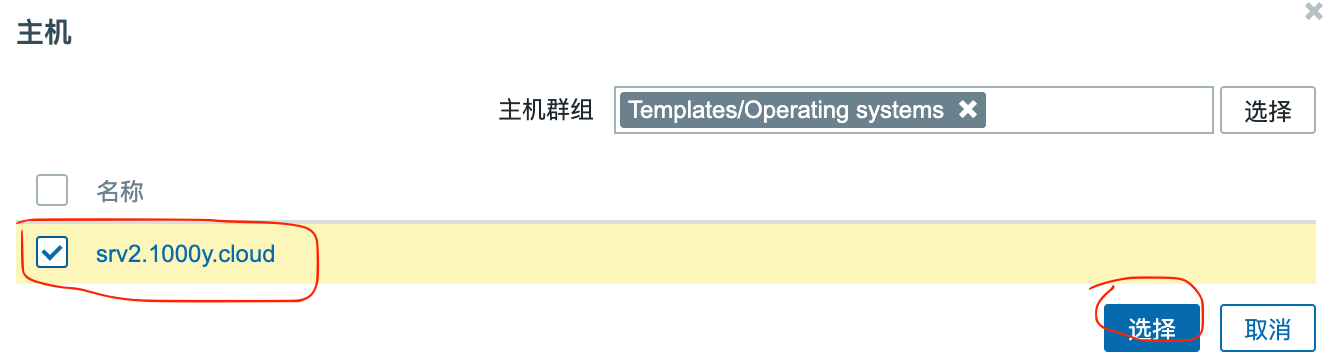
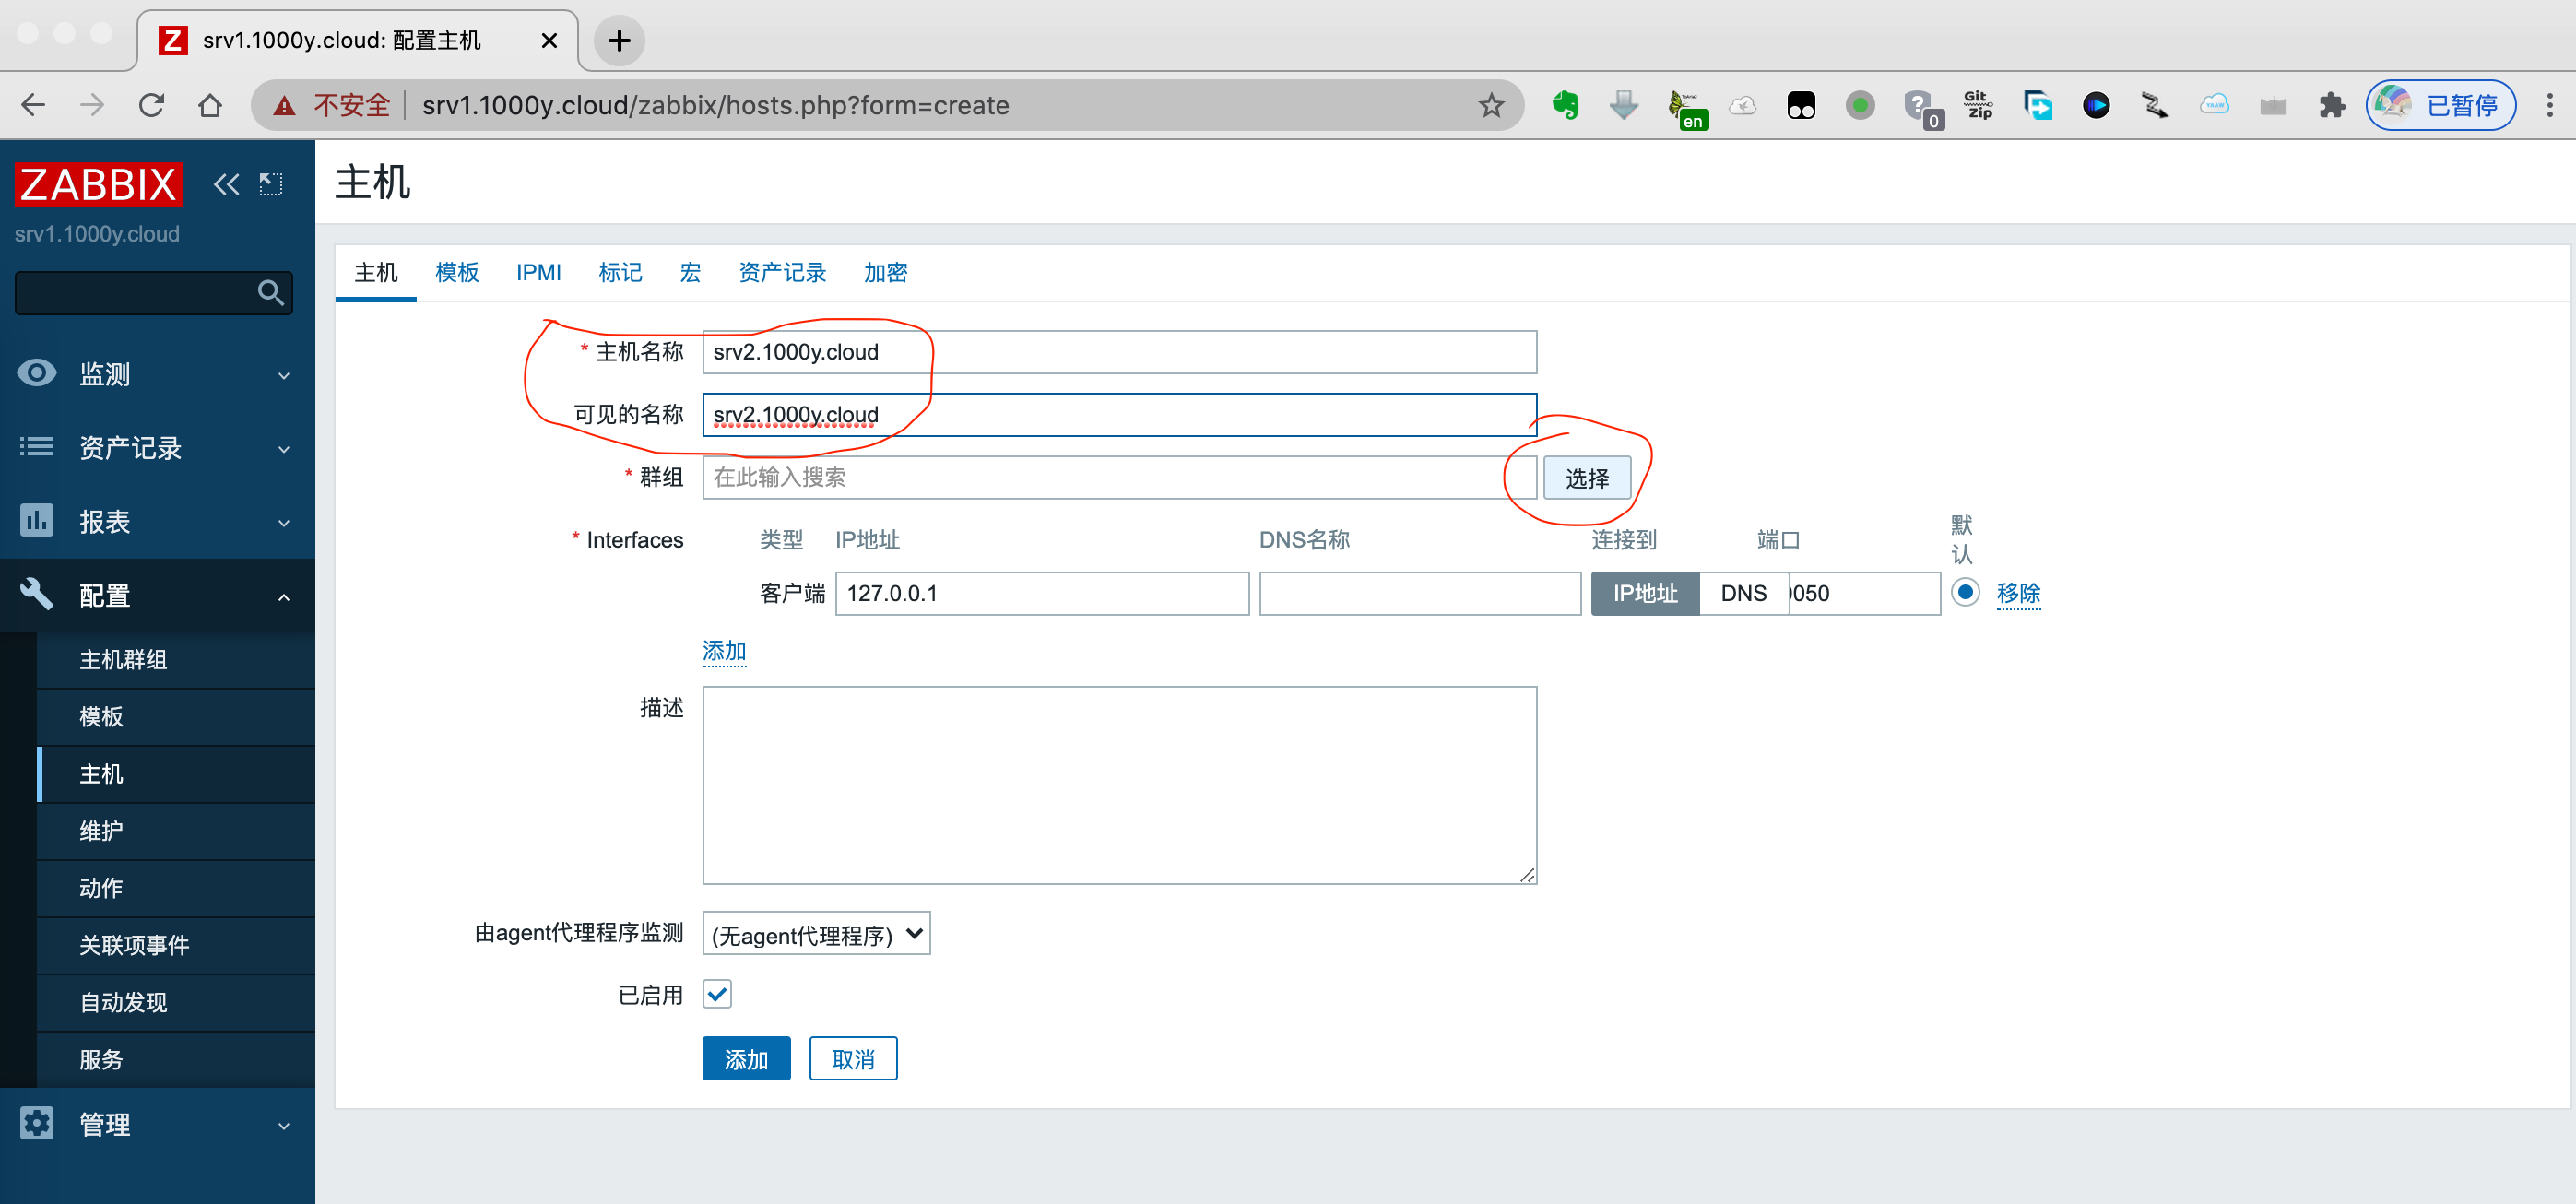
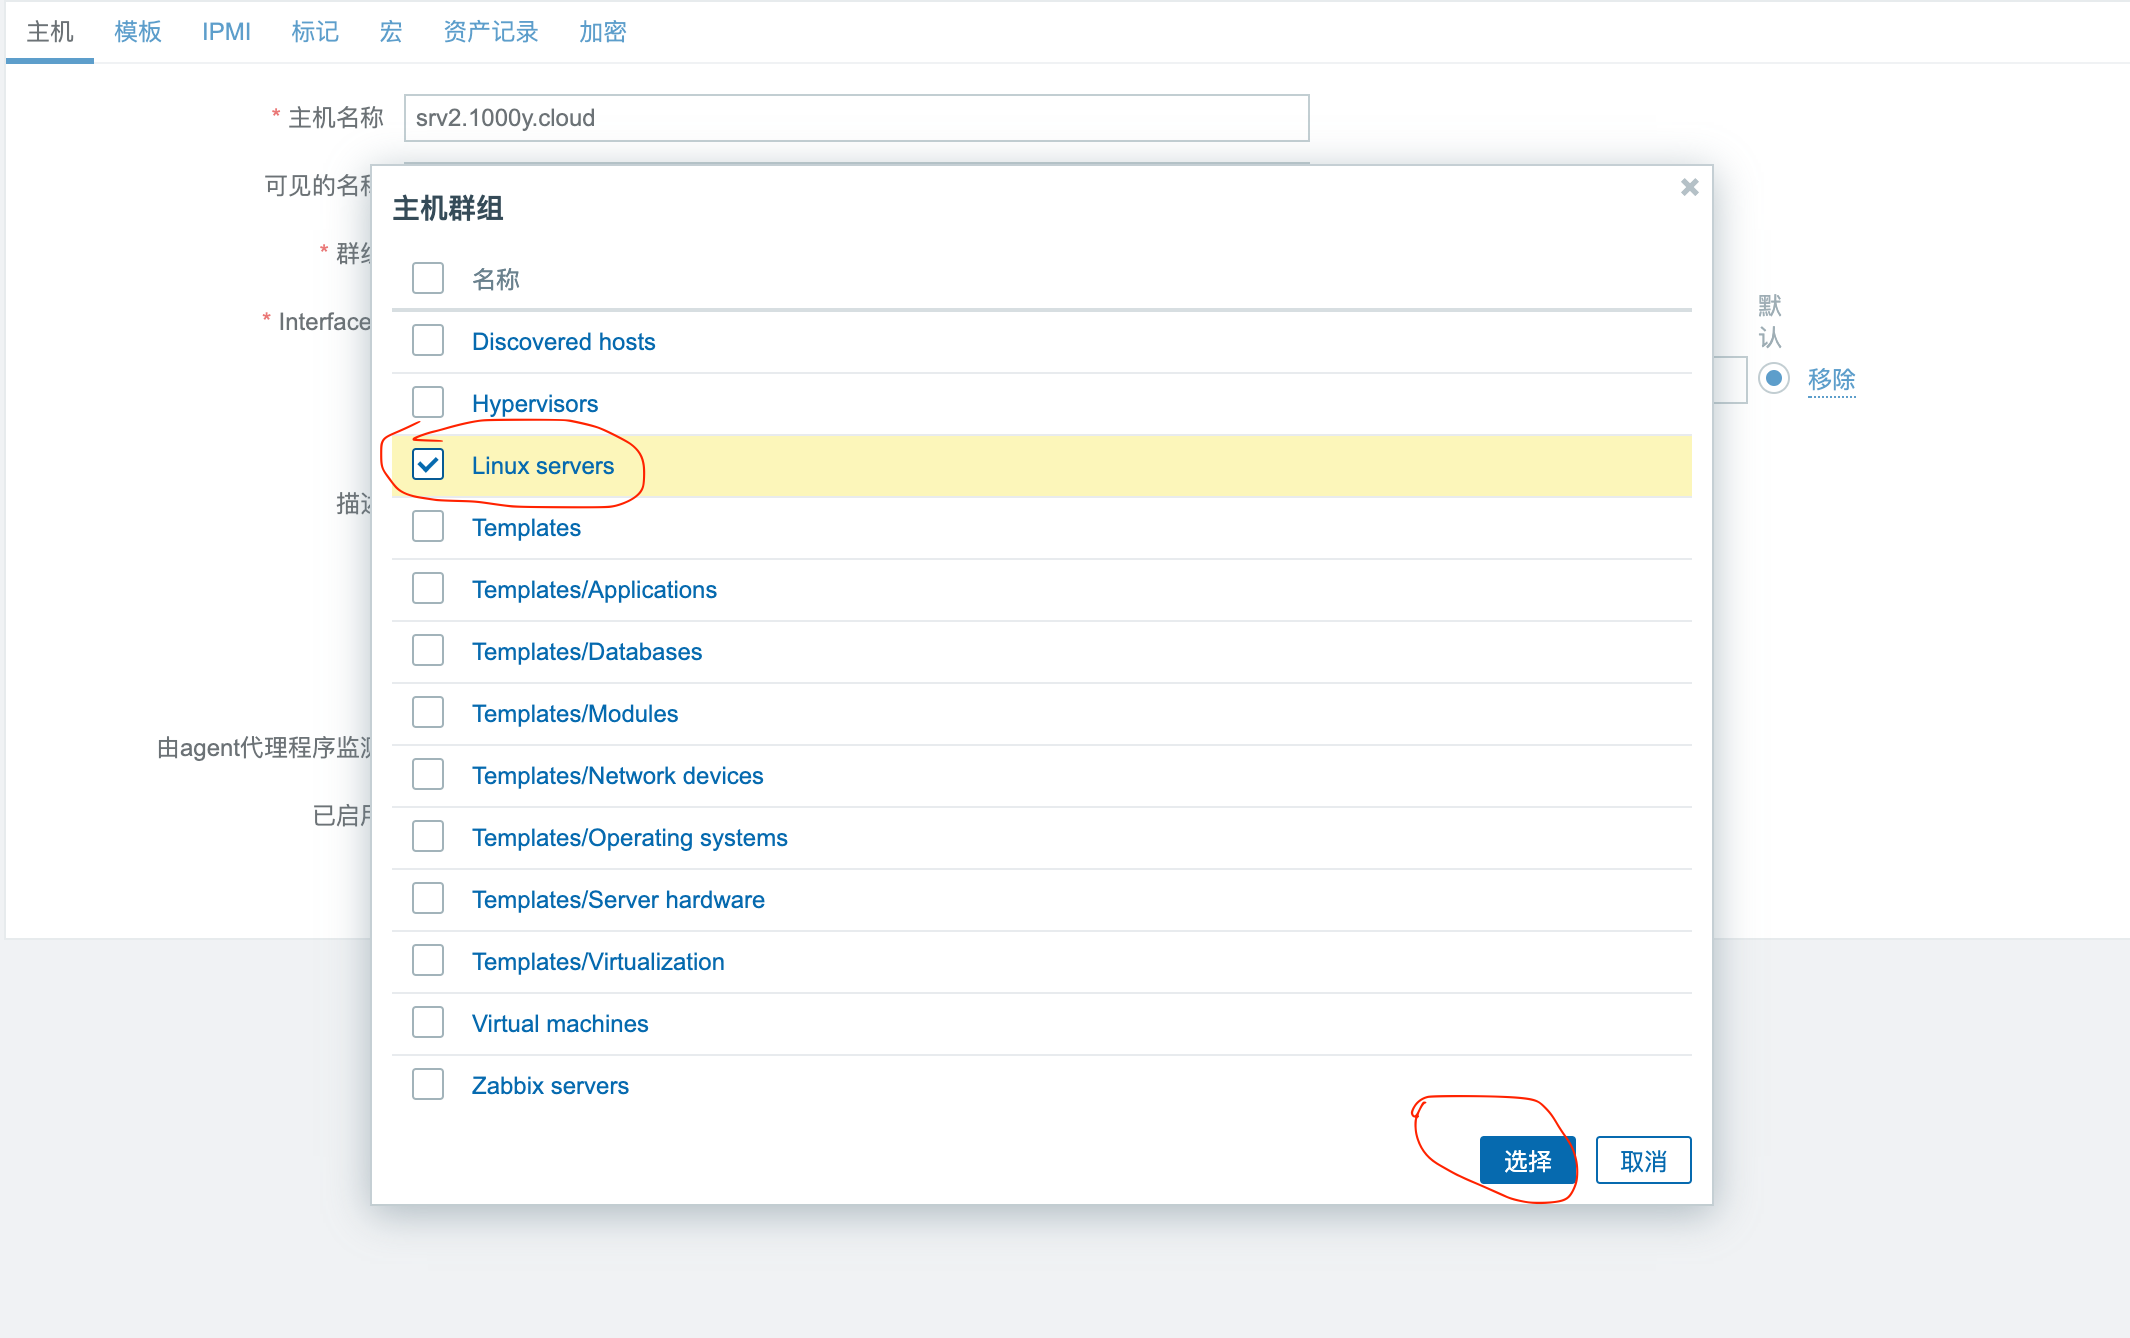
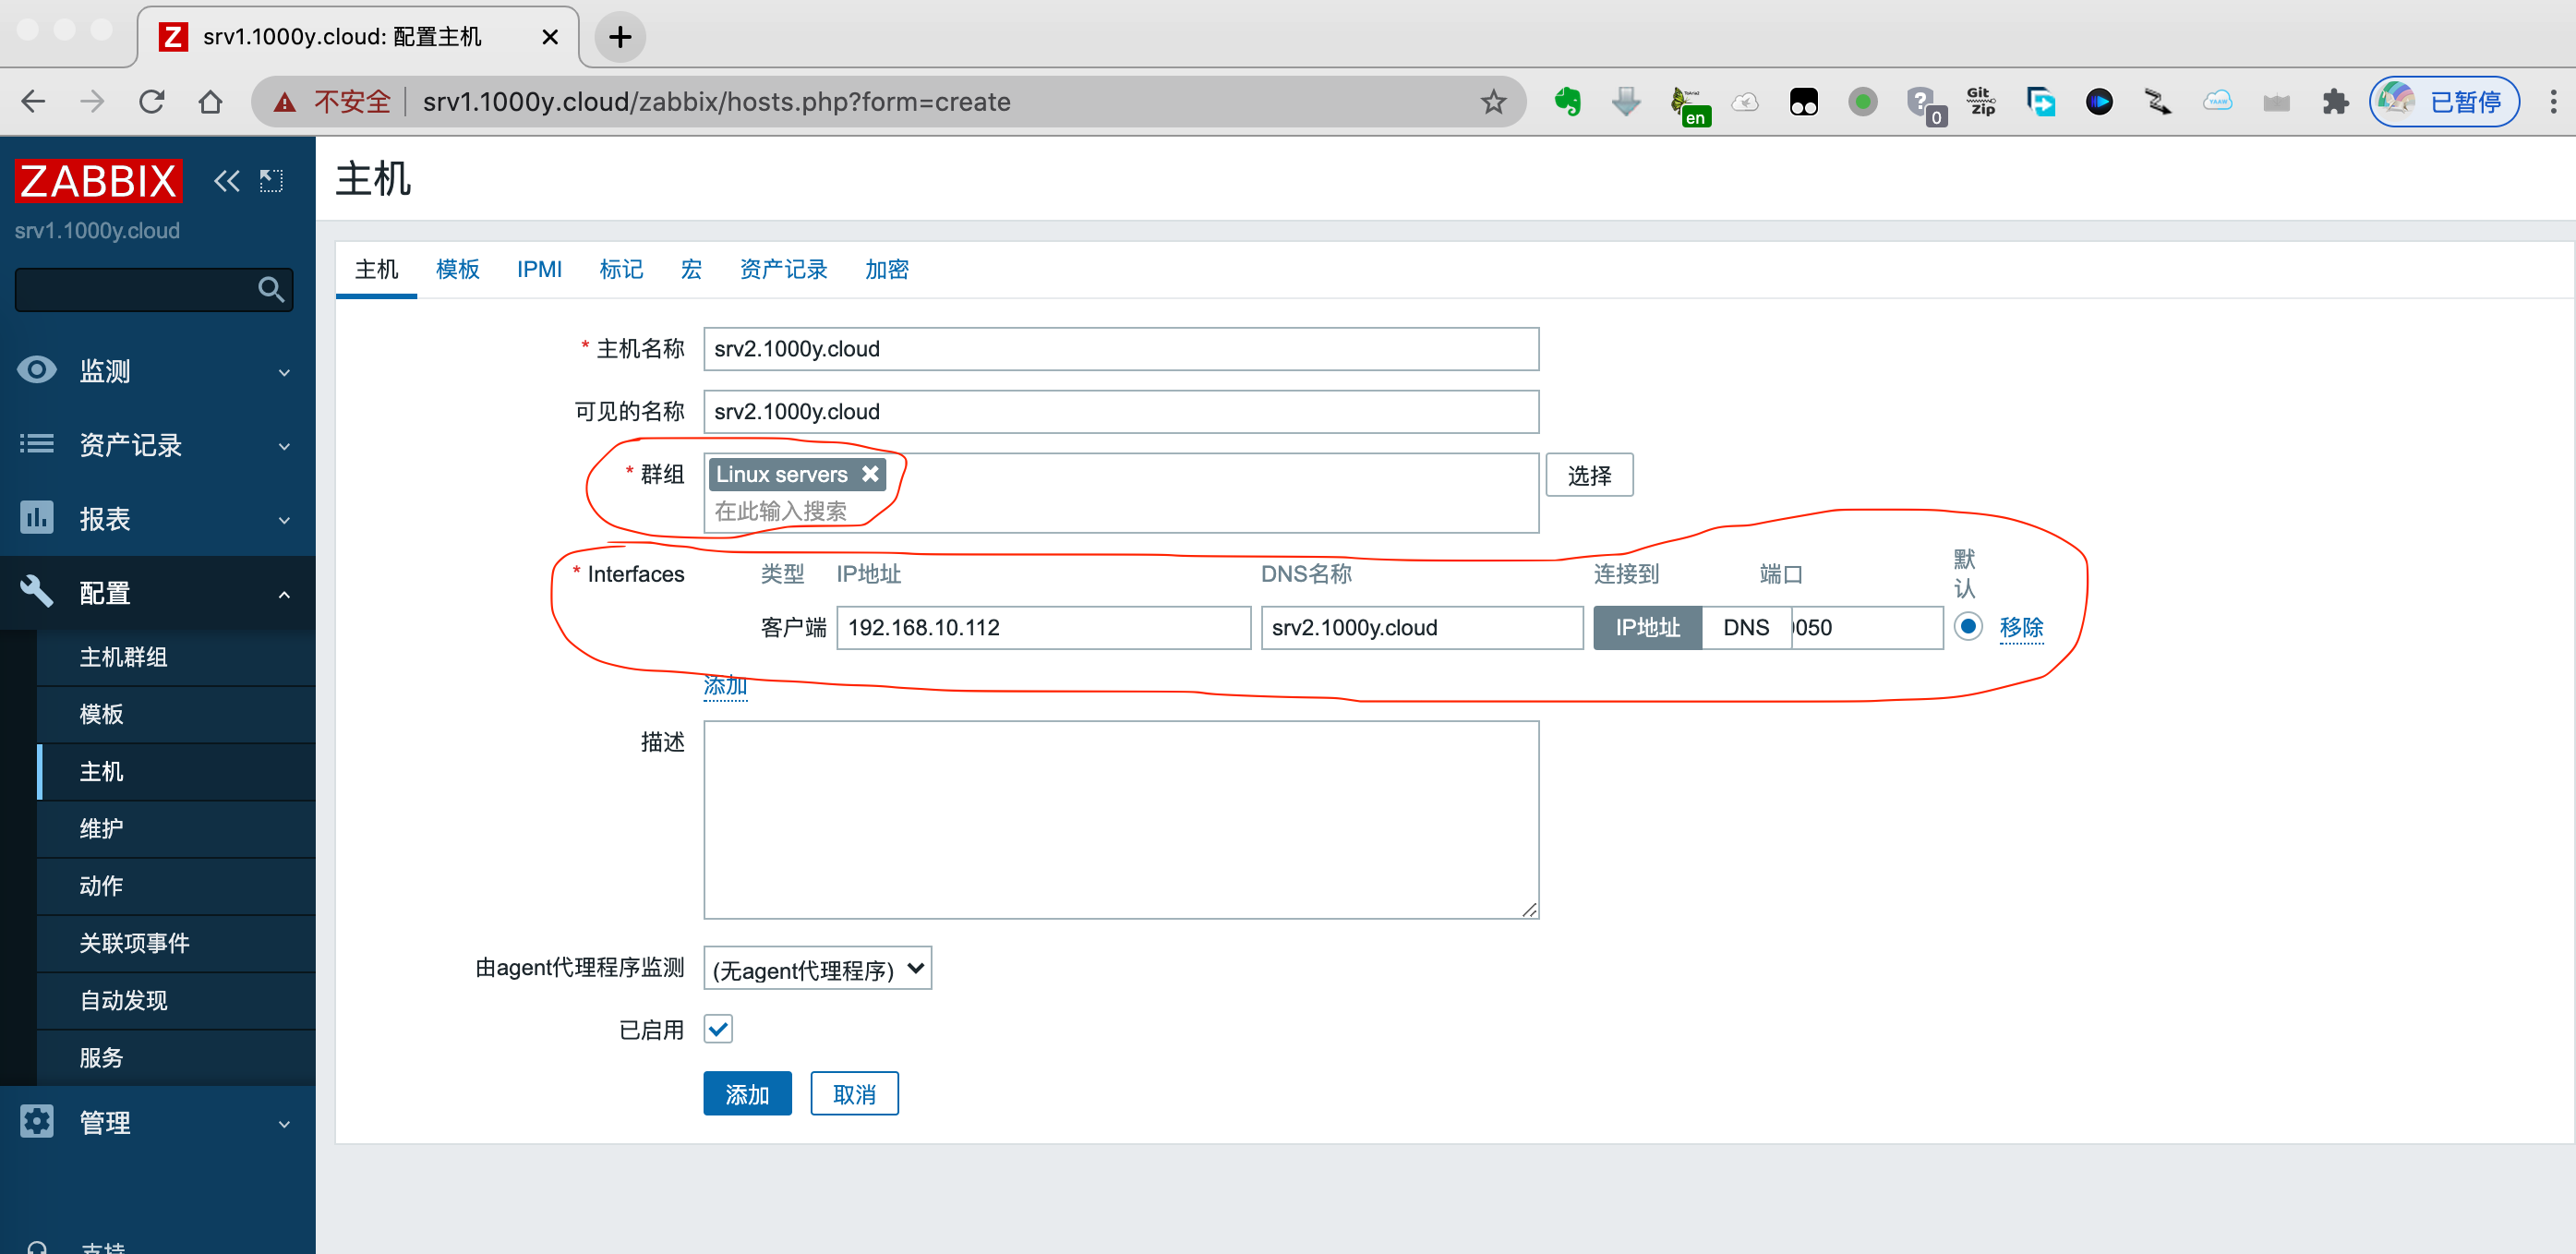
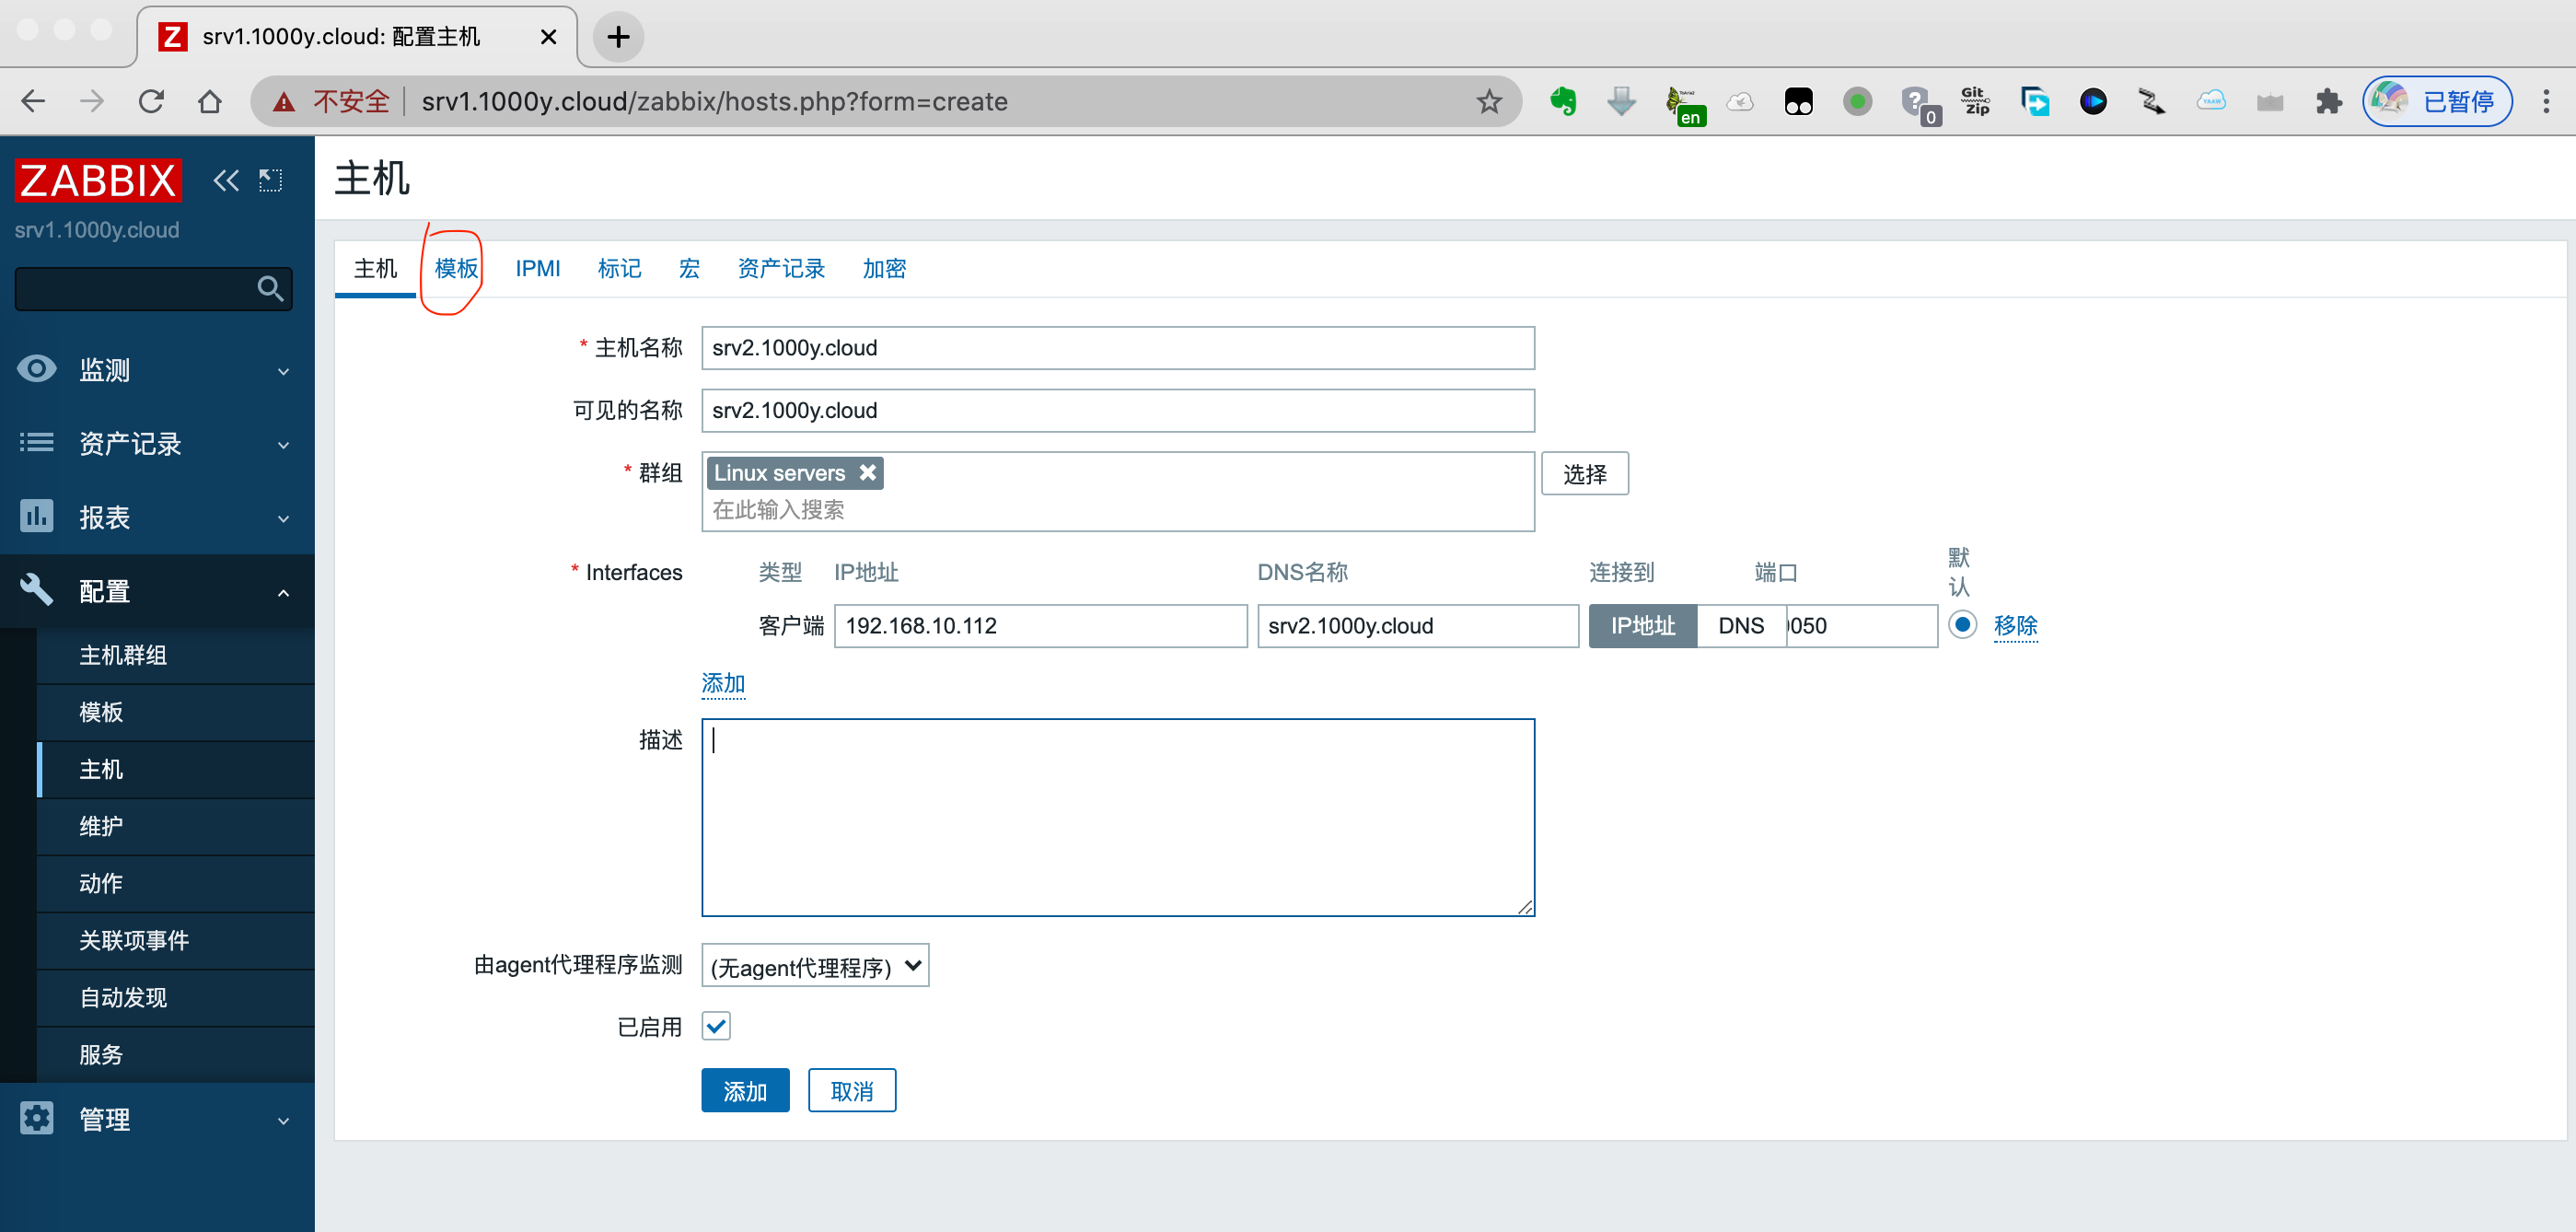
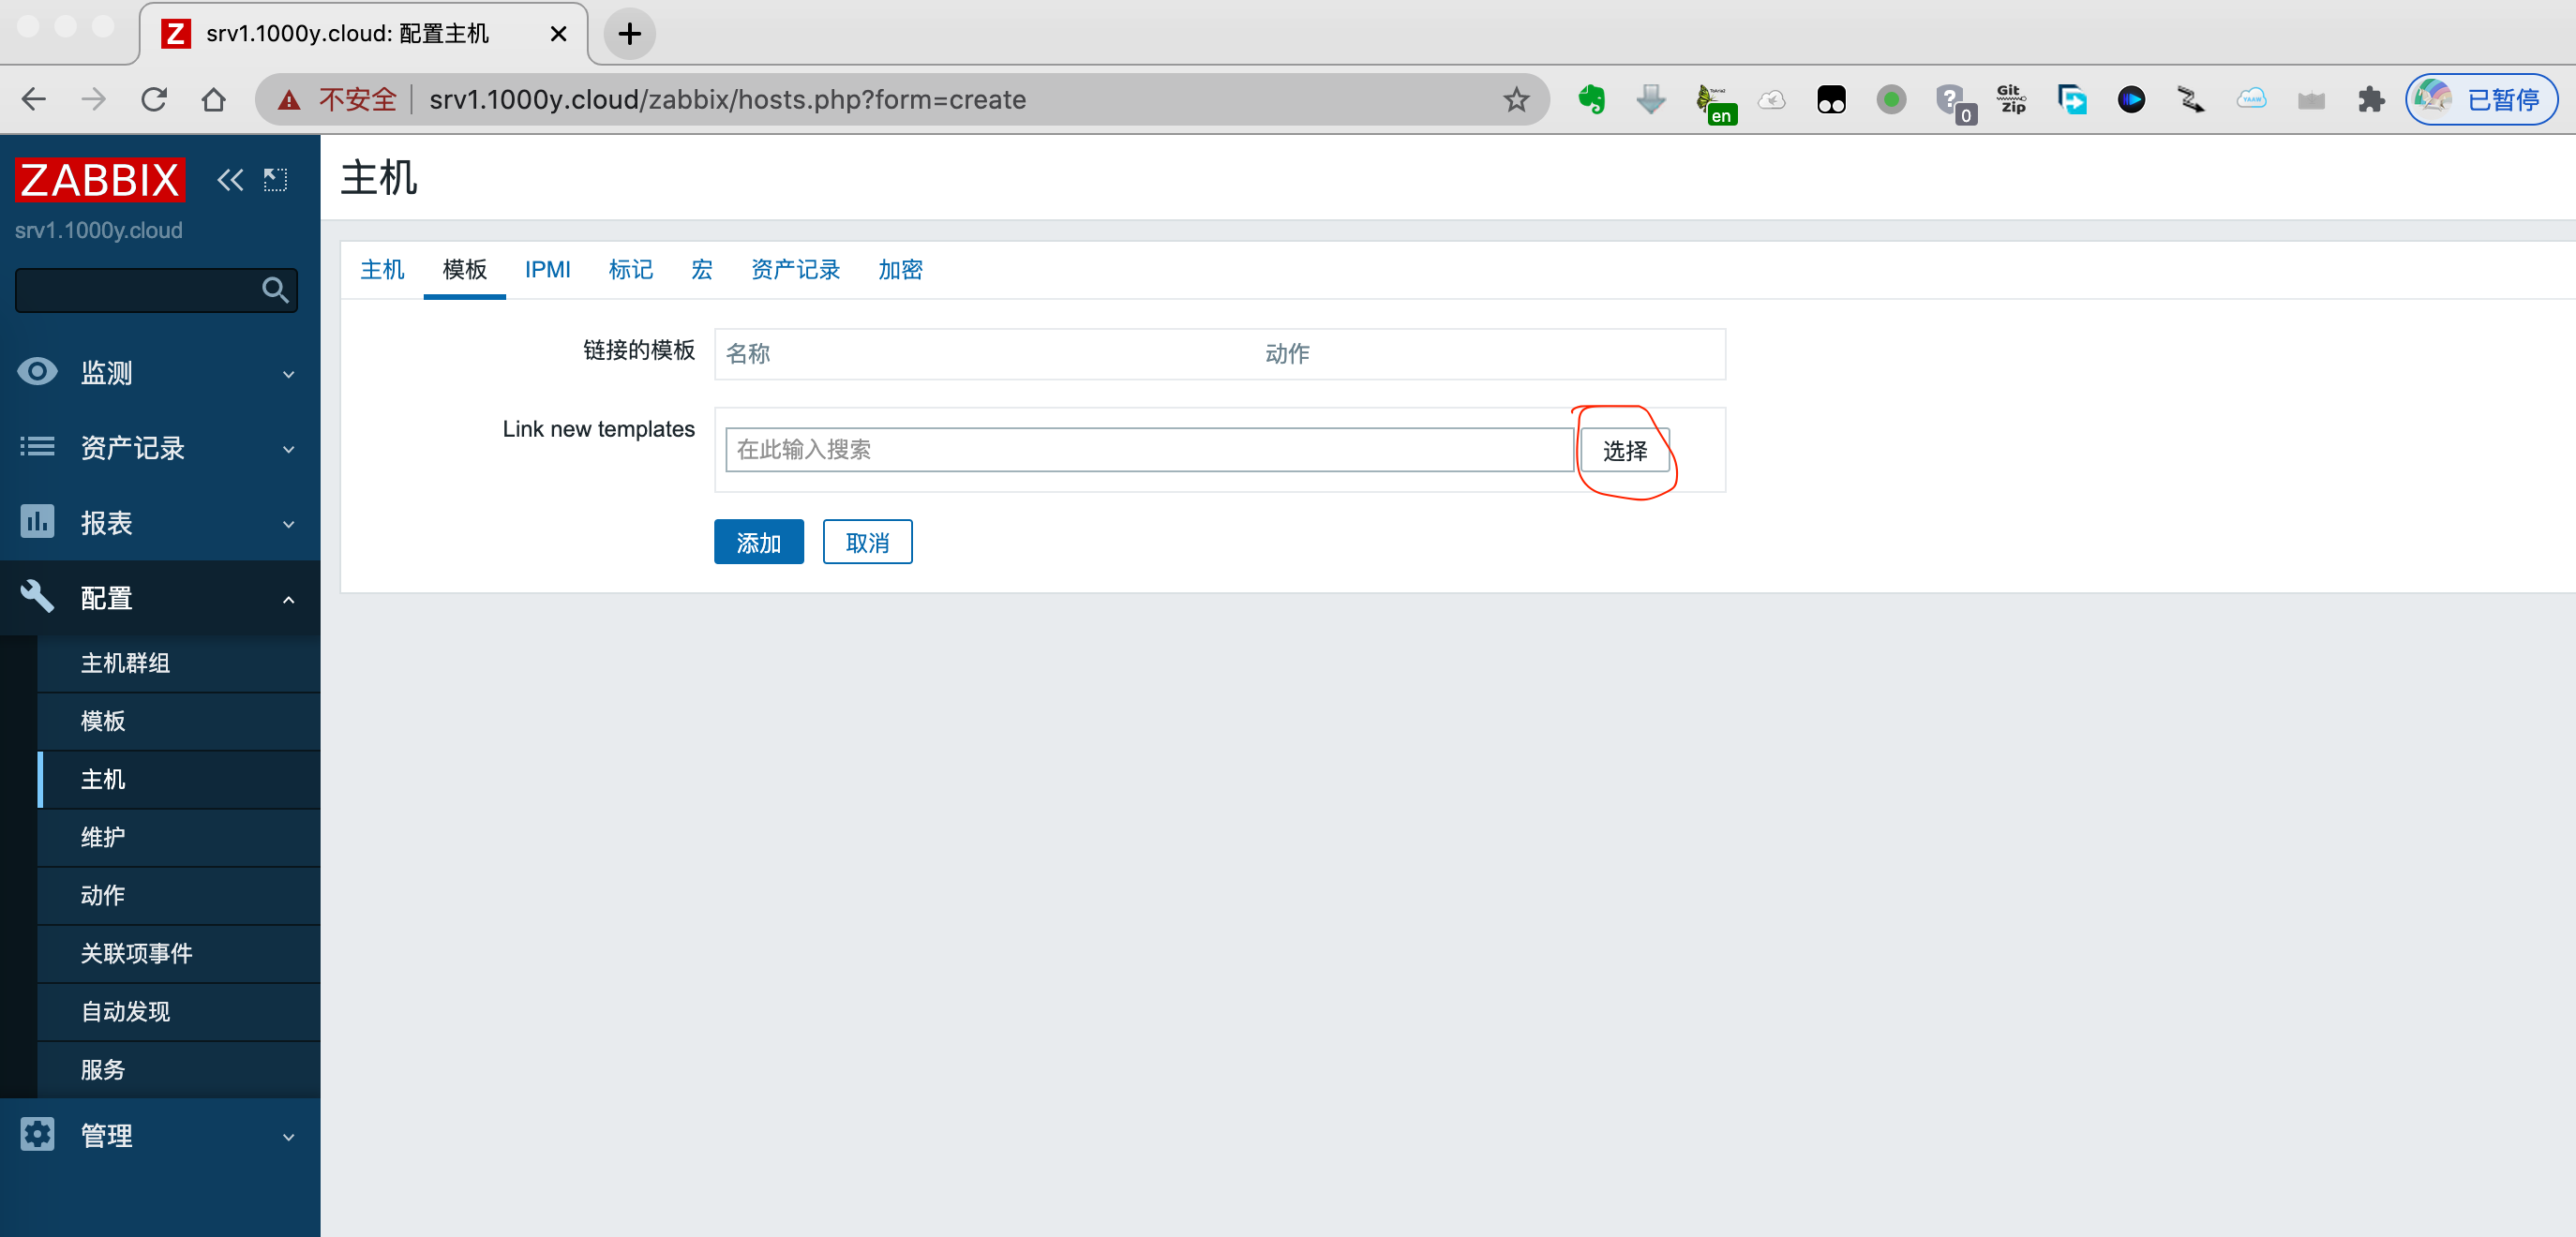
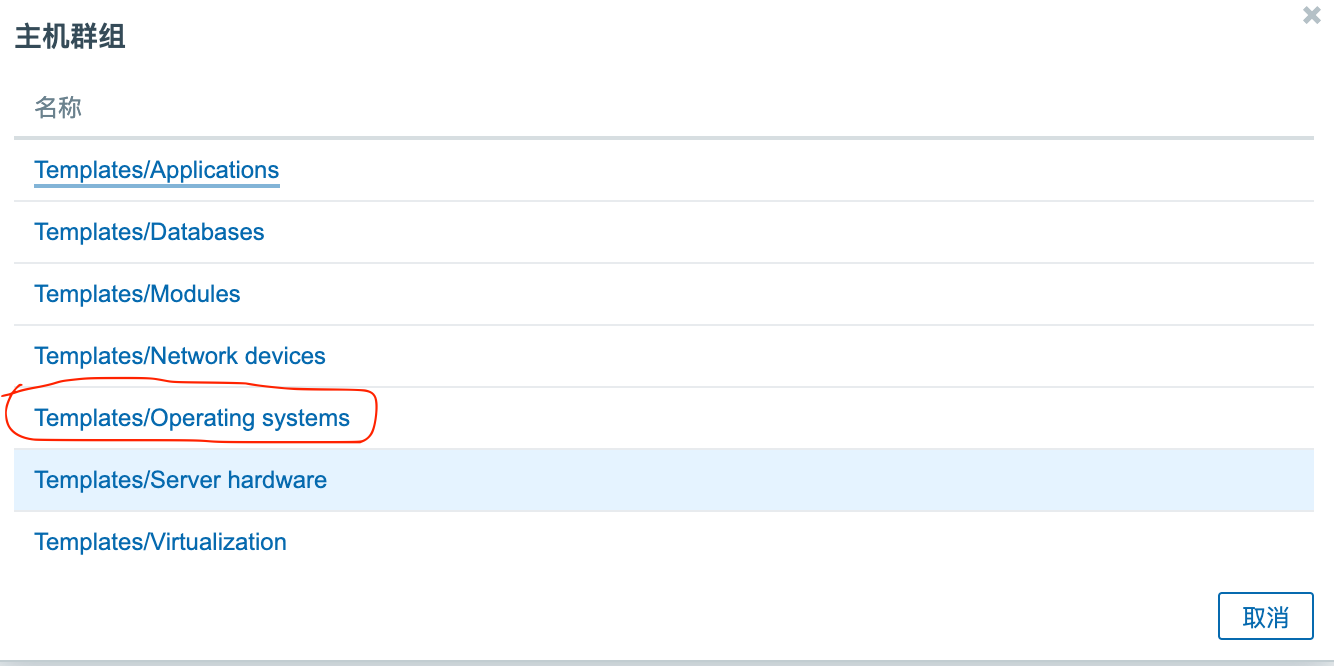
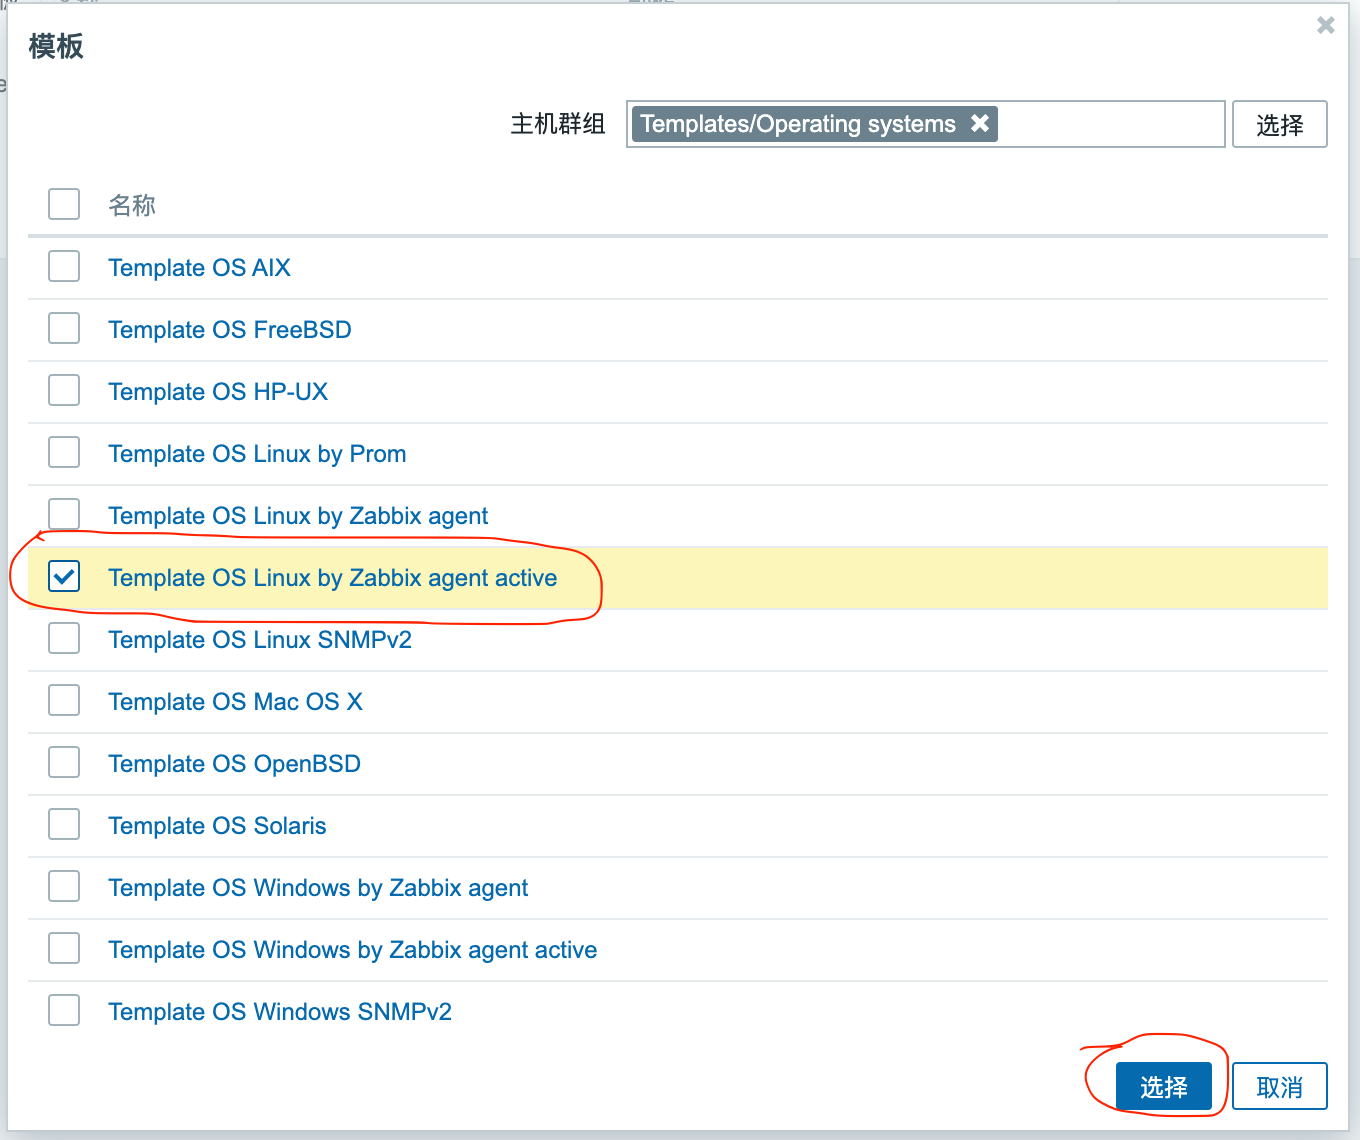
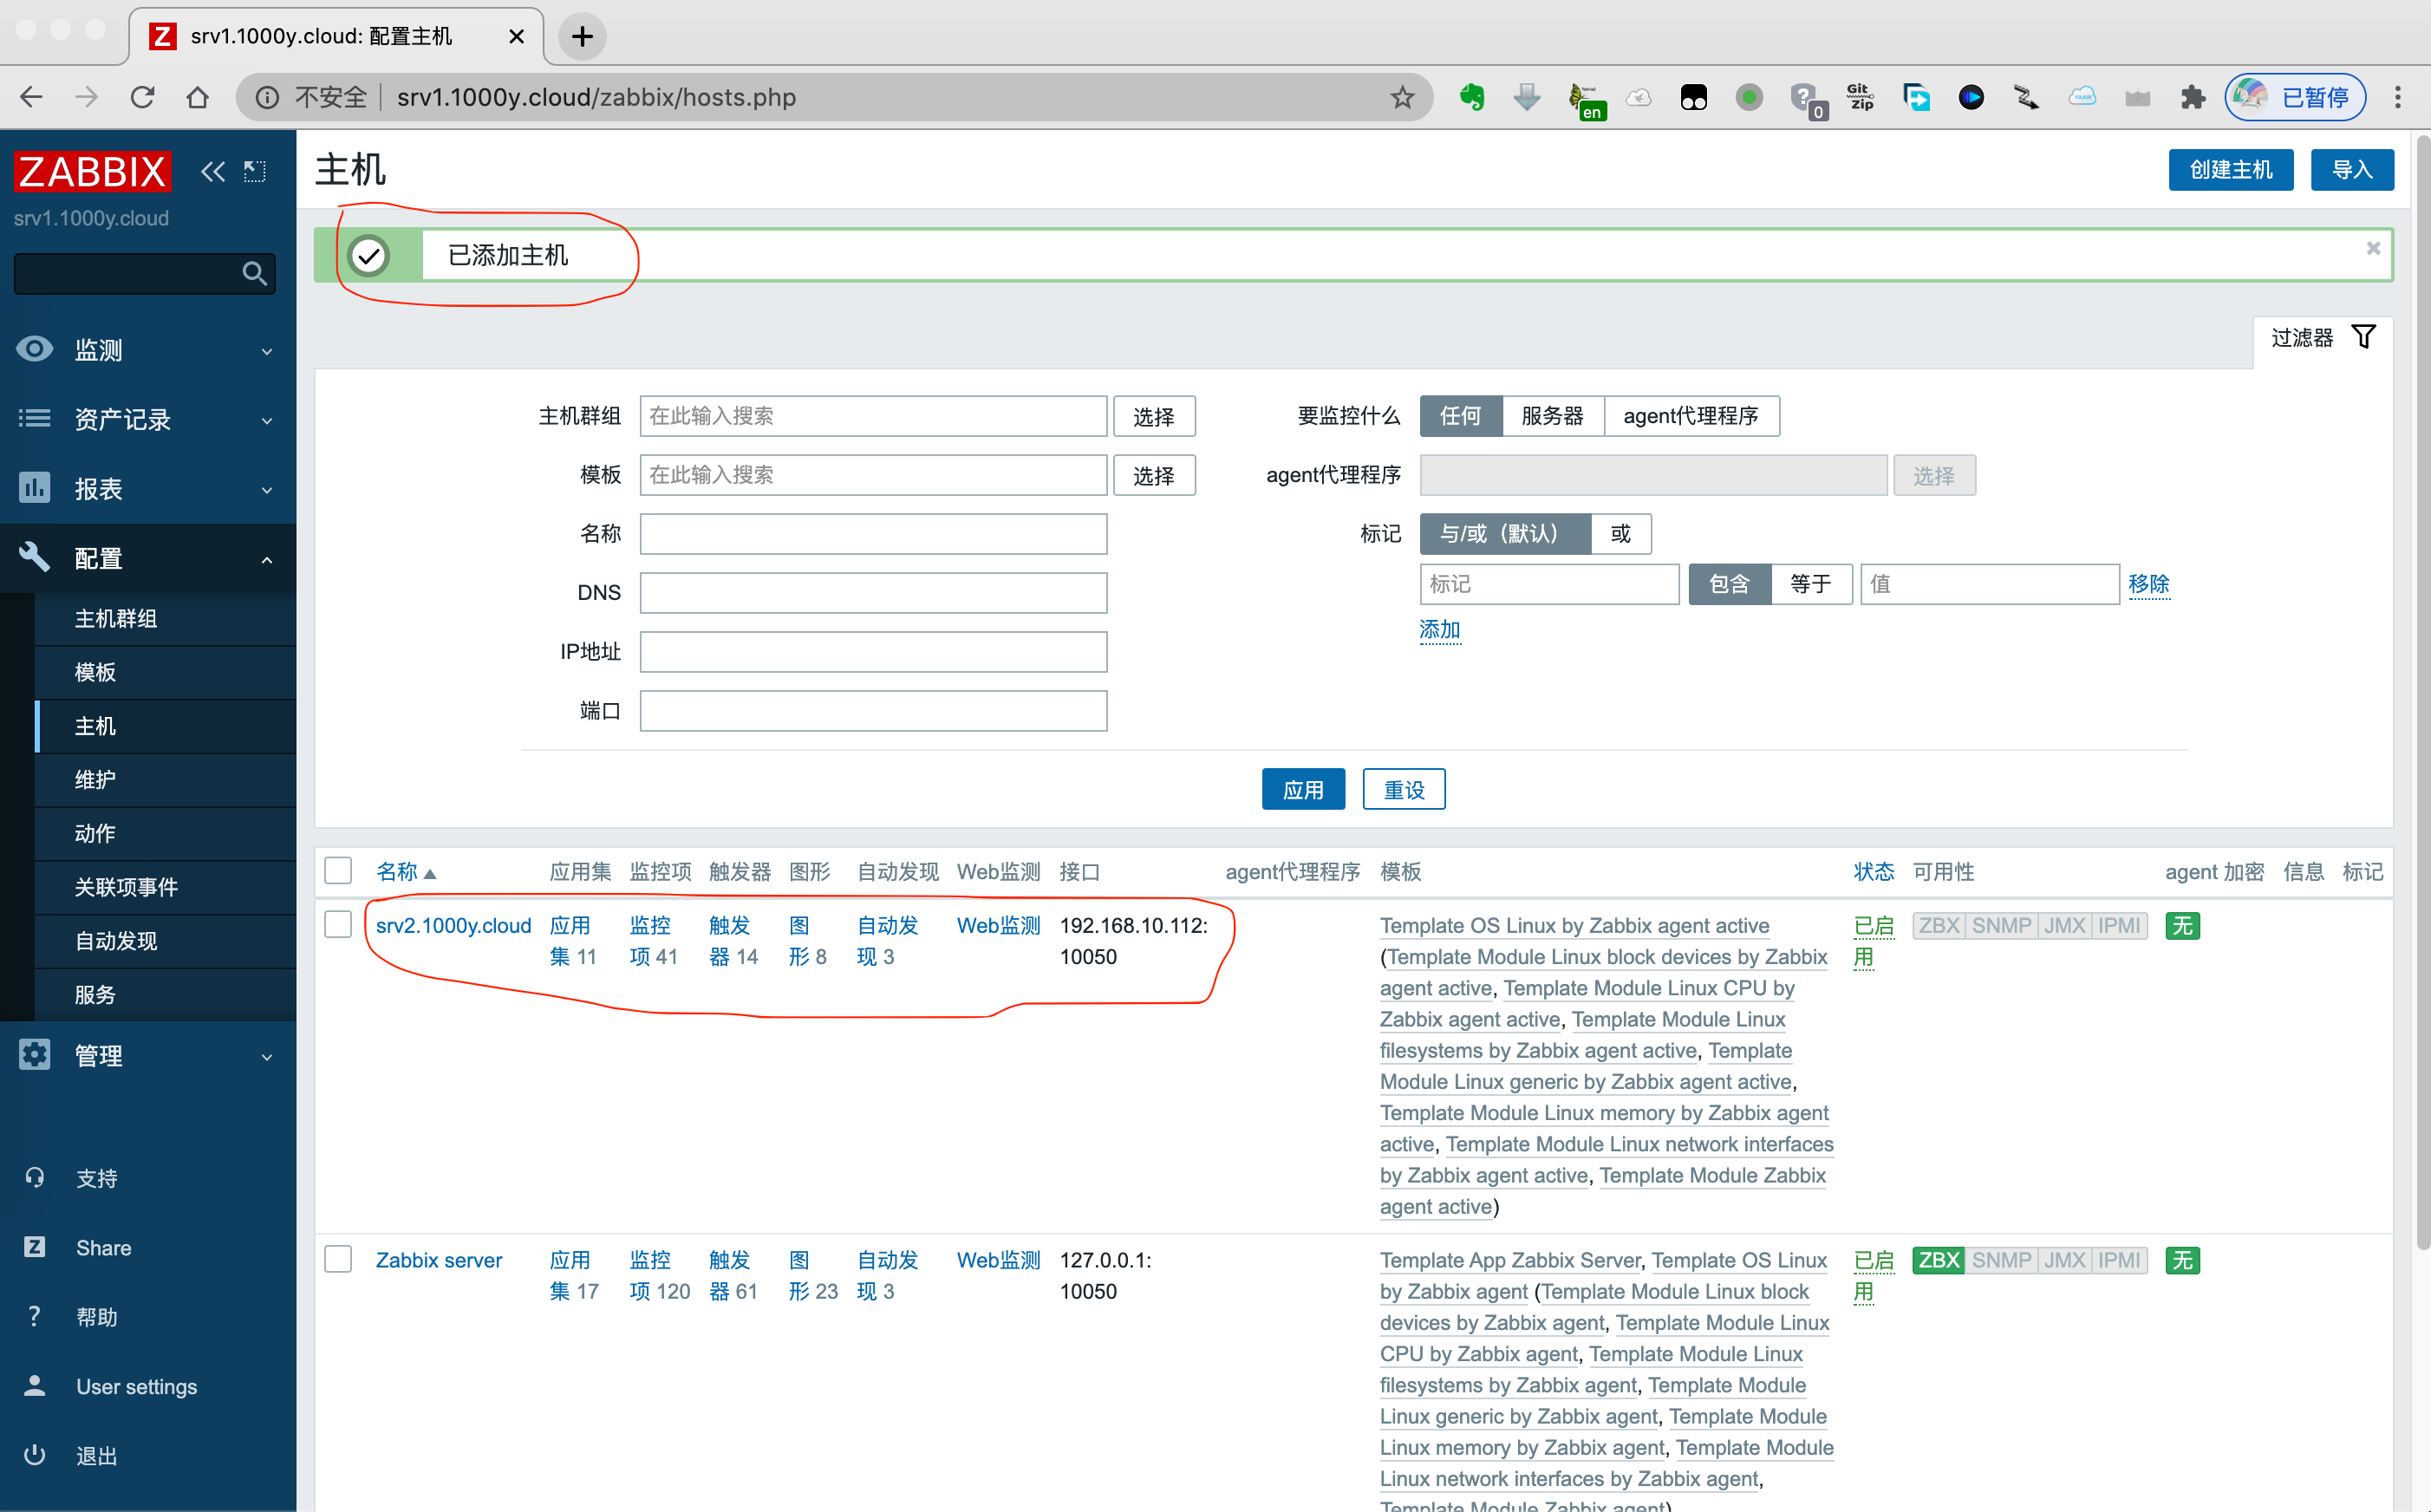
2) 点击[主机]==>[配置]==>[创建主机]
# 如果打算选择被动模式,可直接选择"Template OS Linux by Zabbix agent"模板
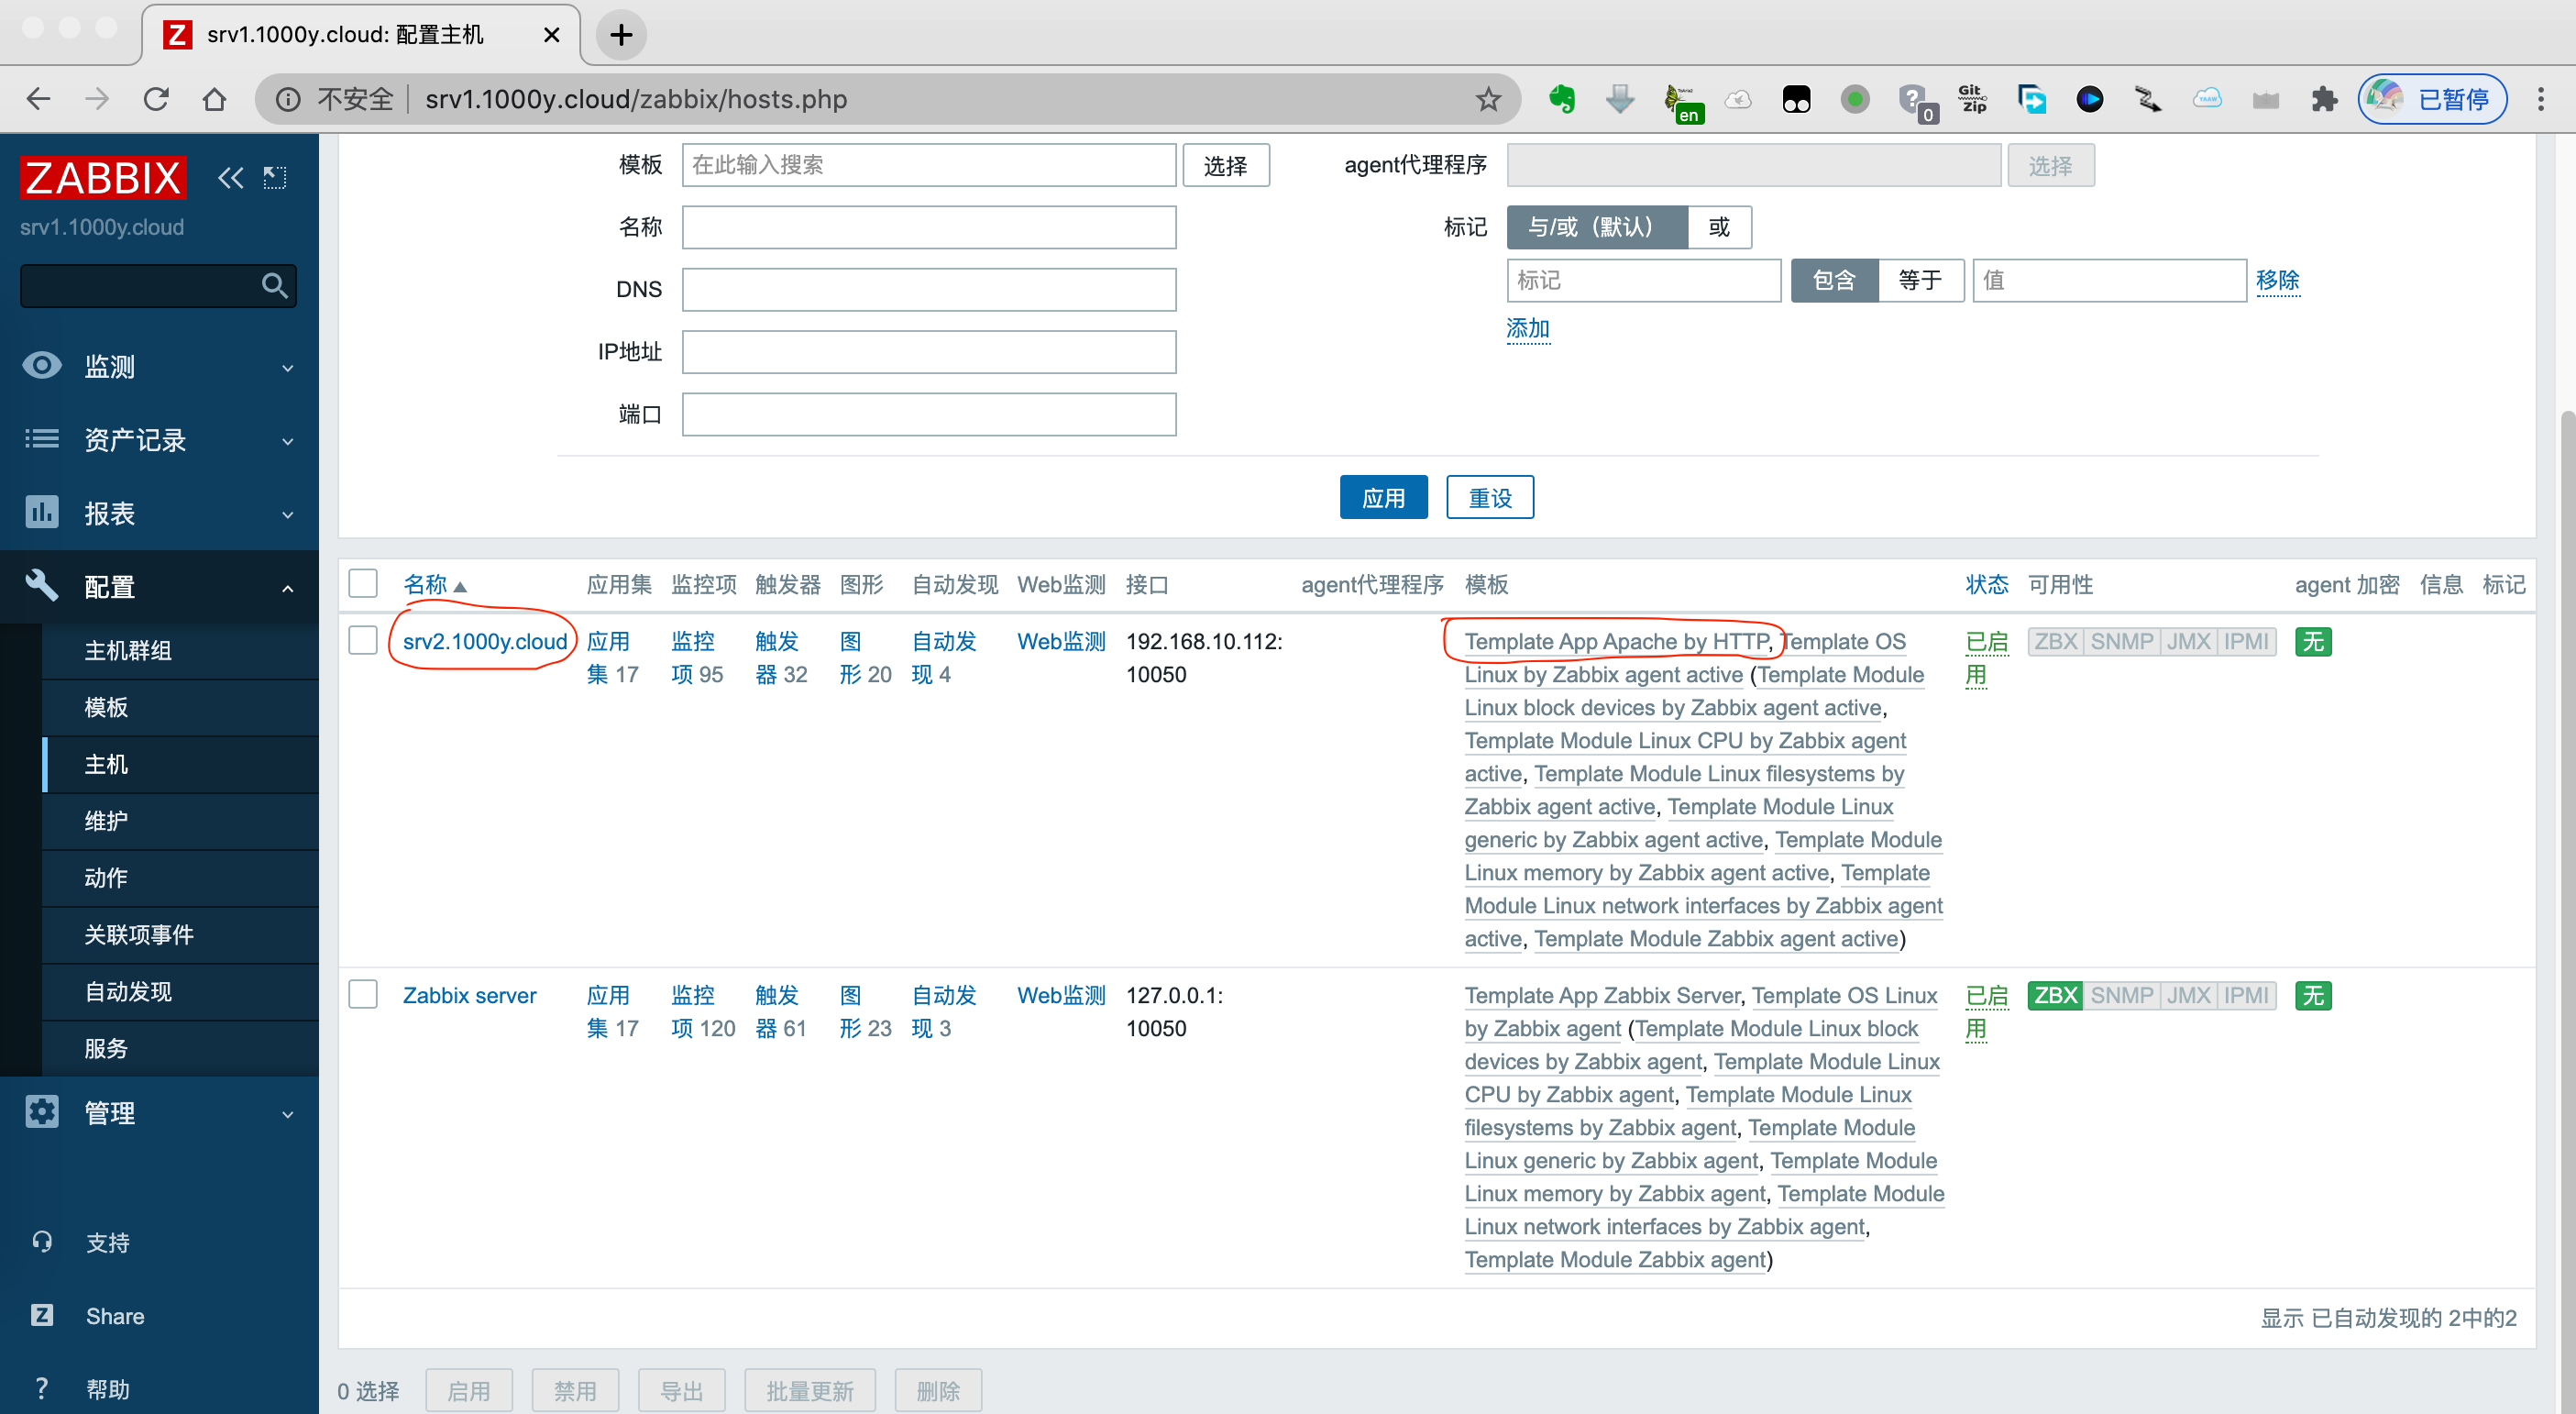
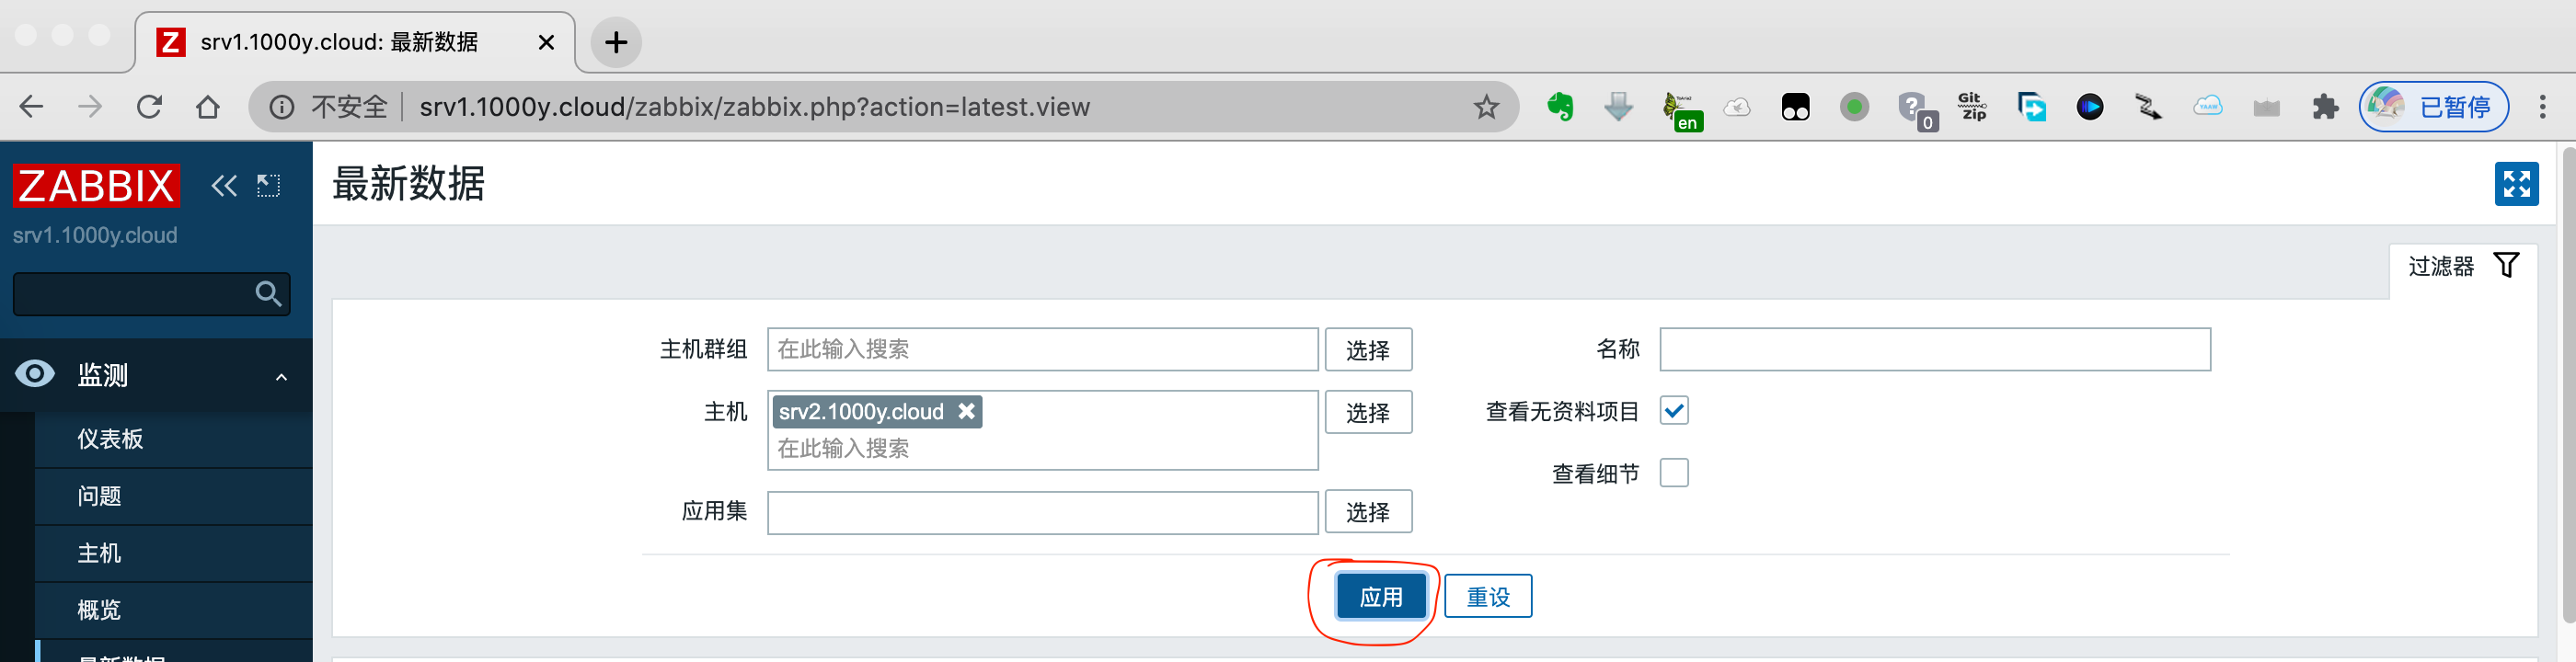
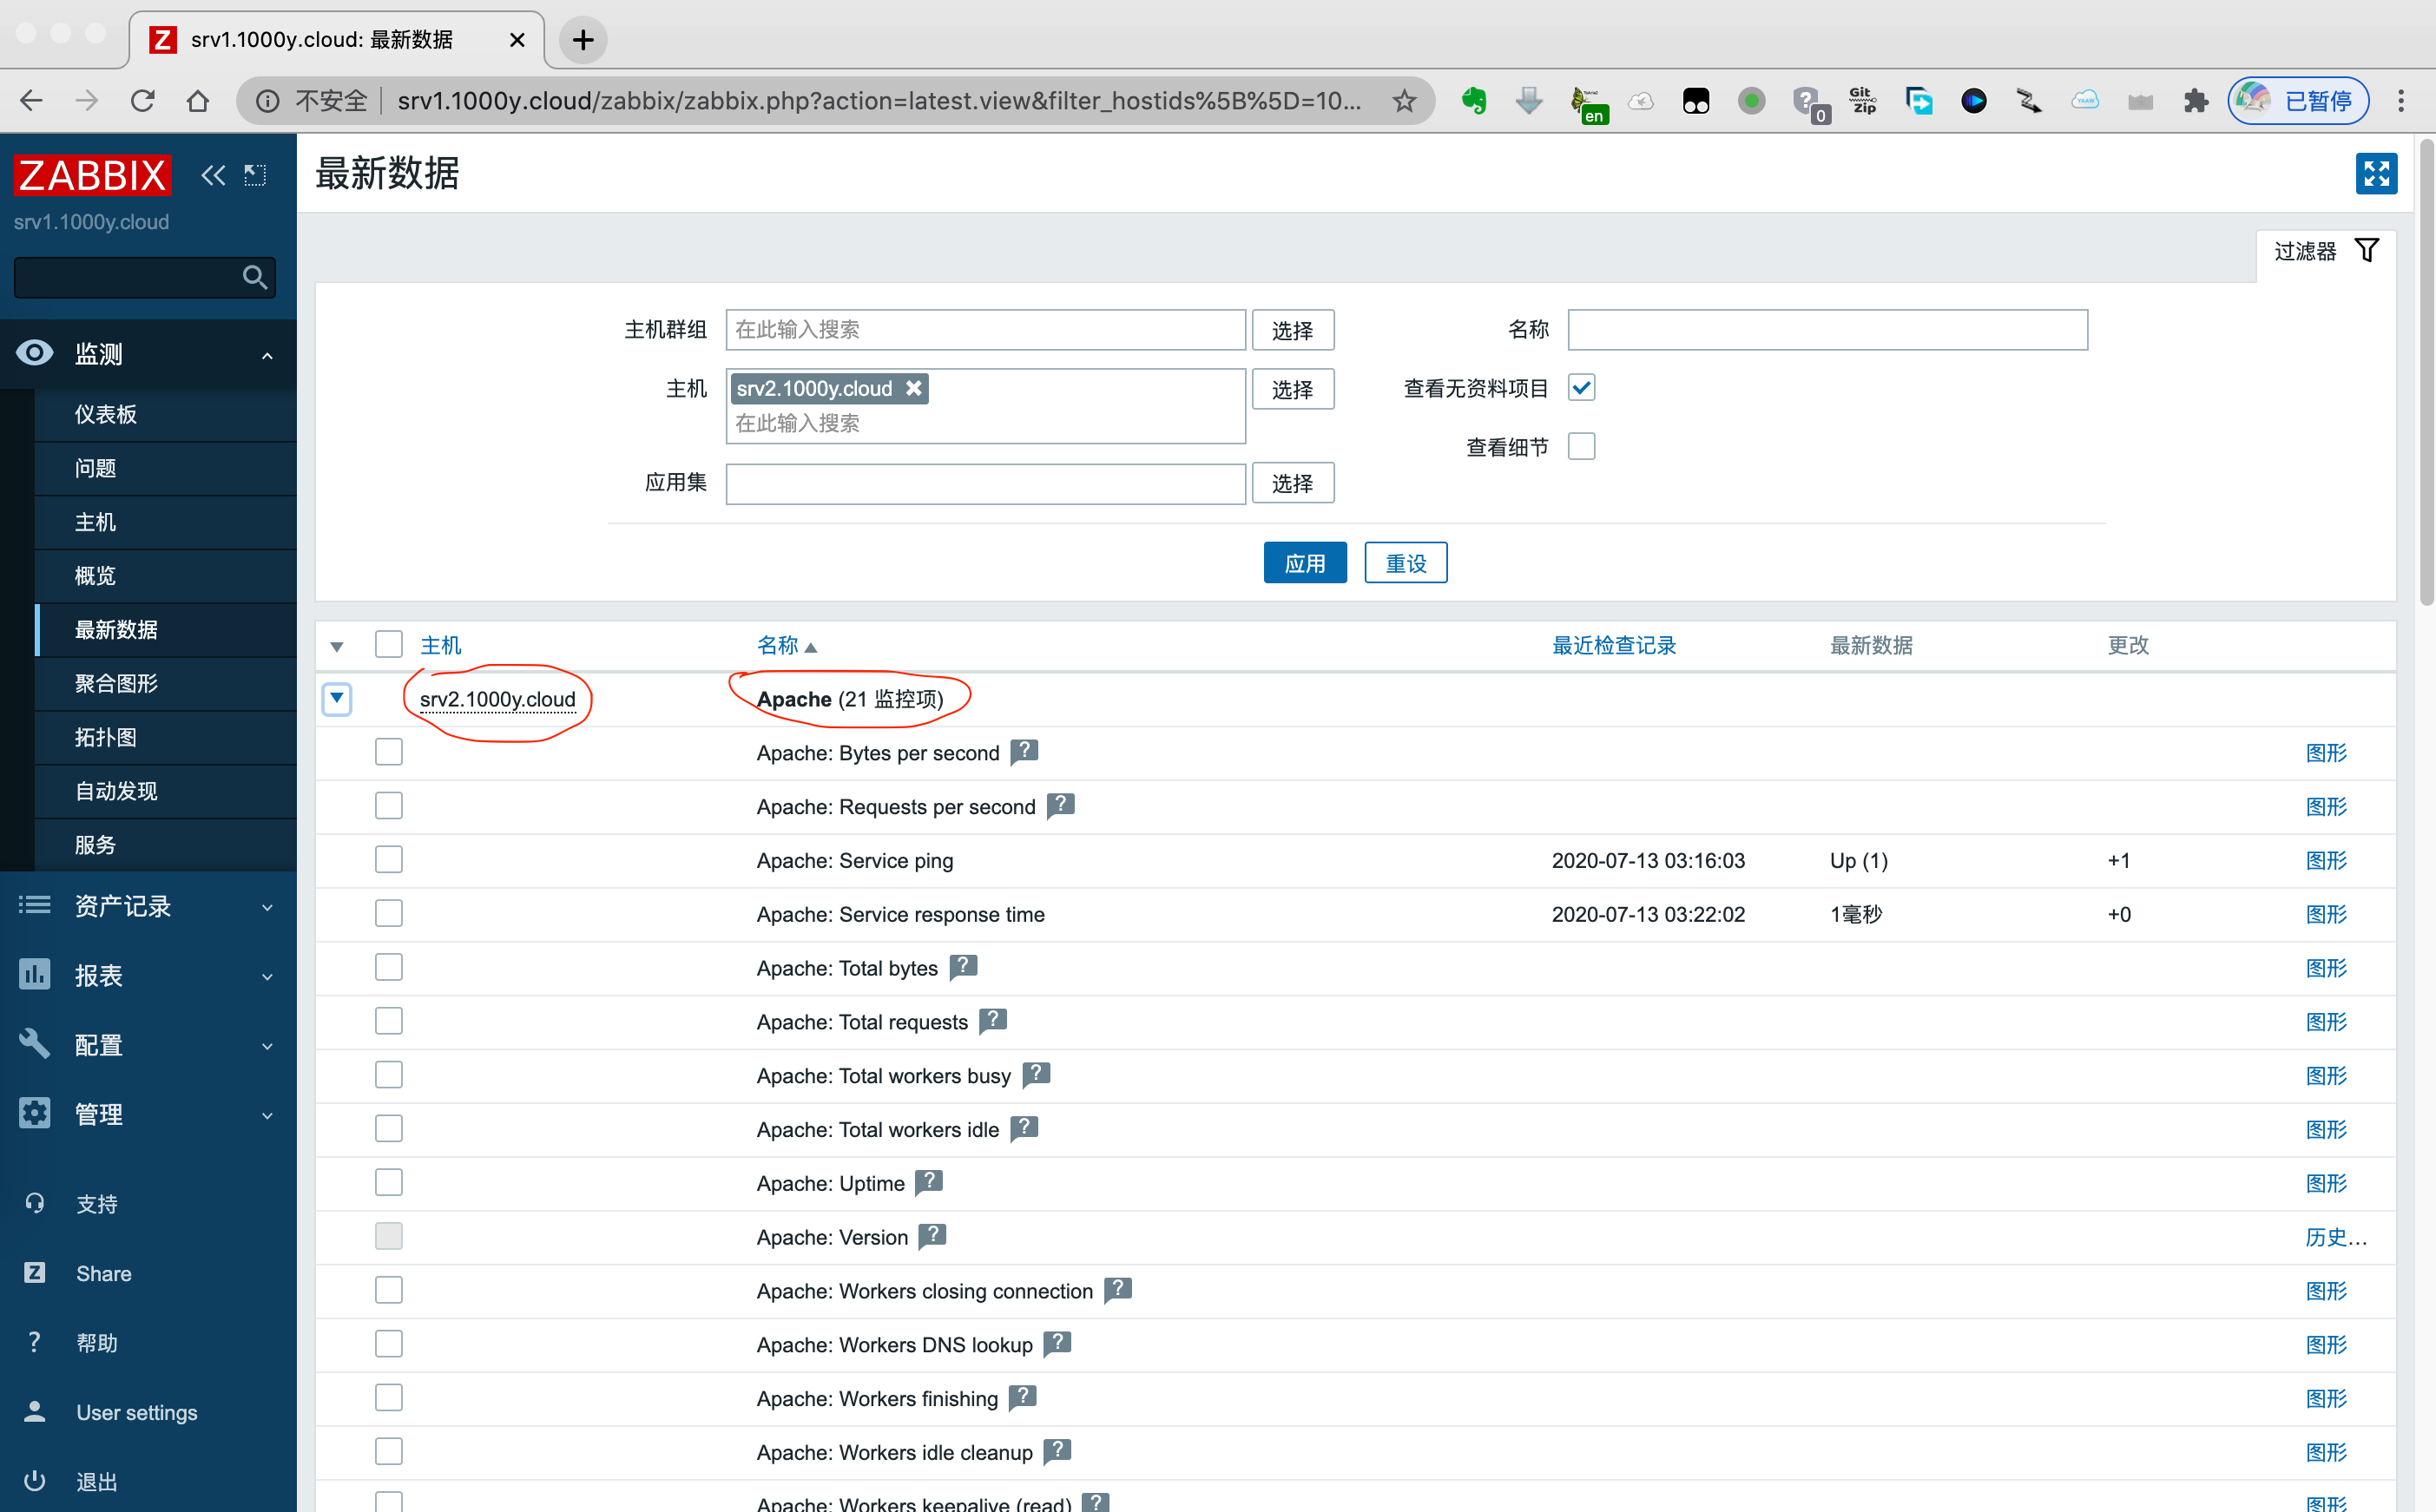
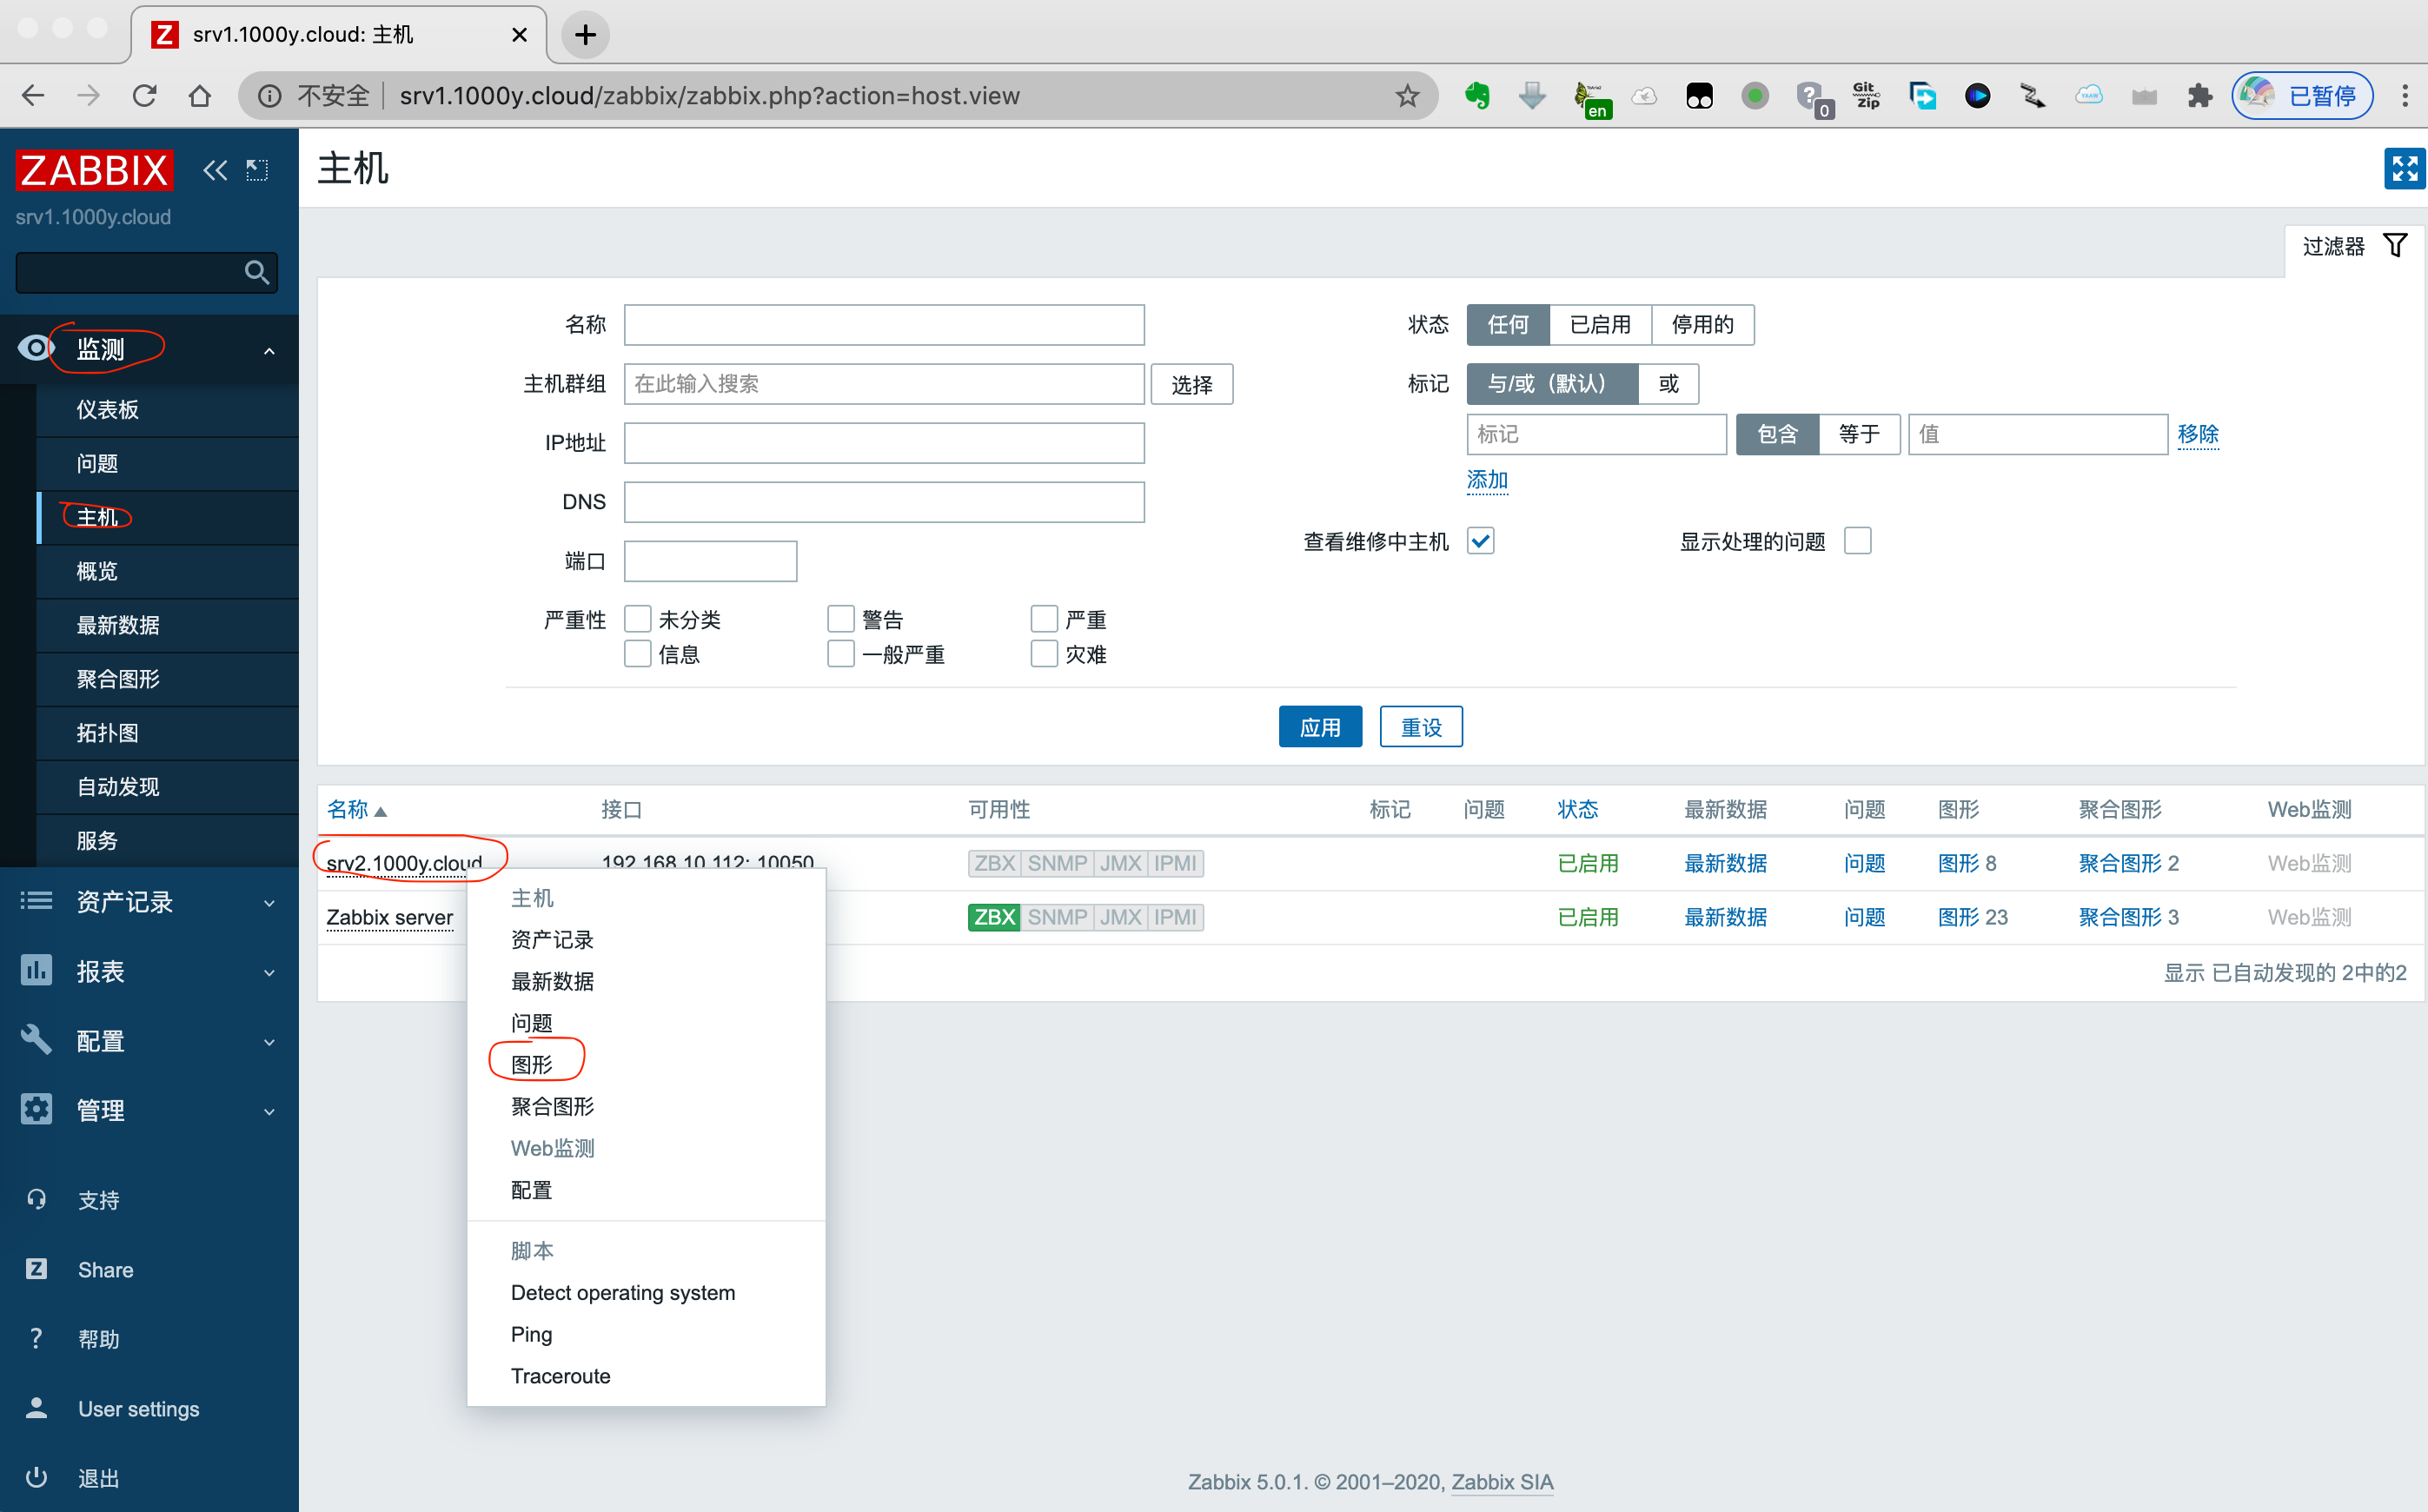
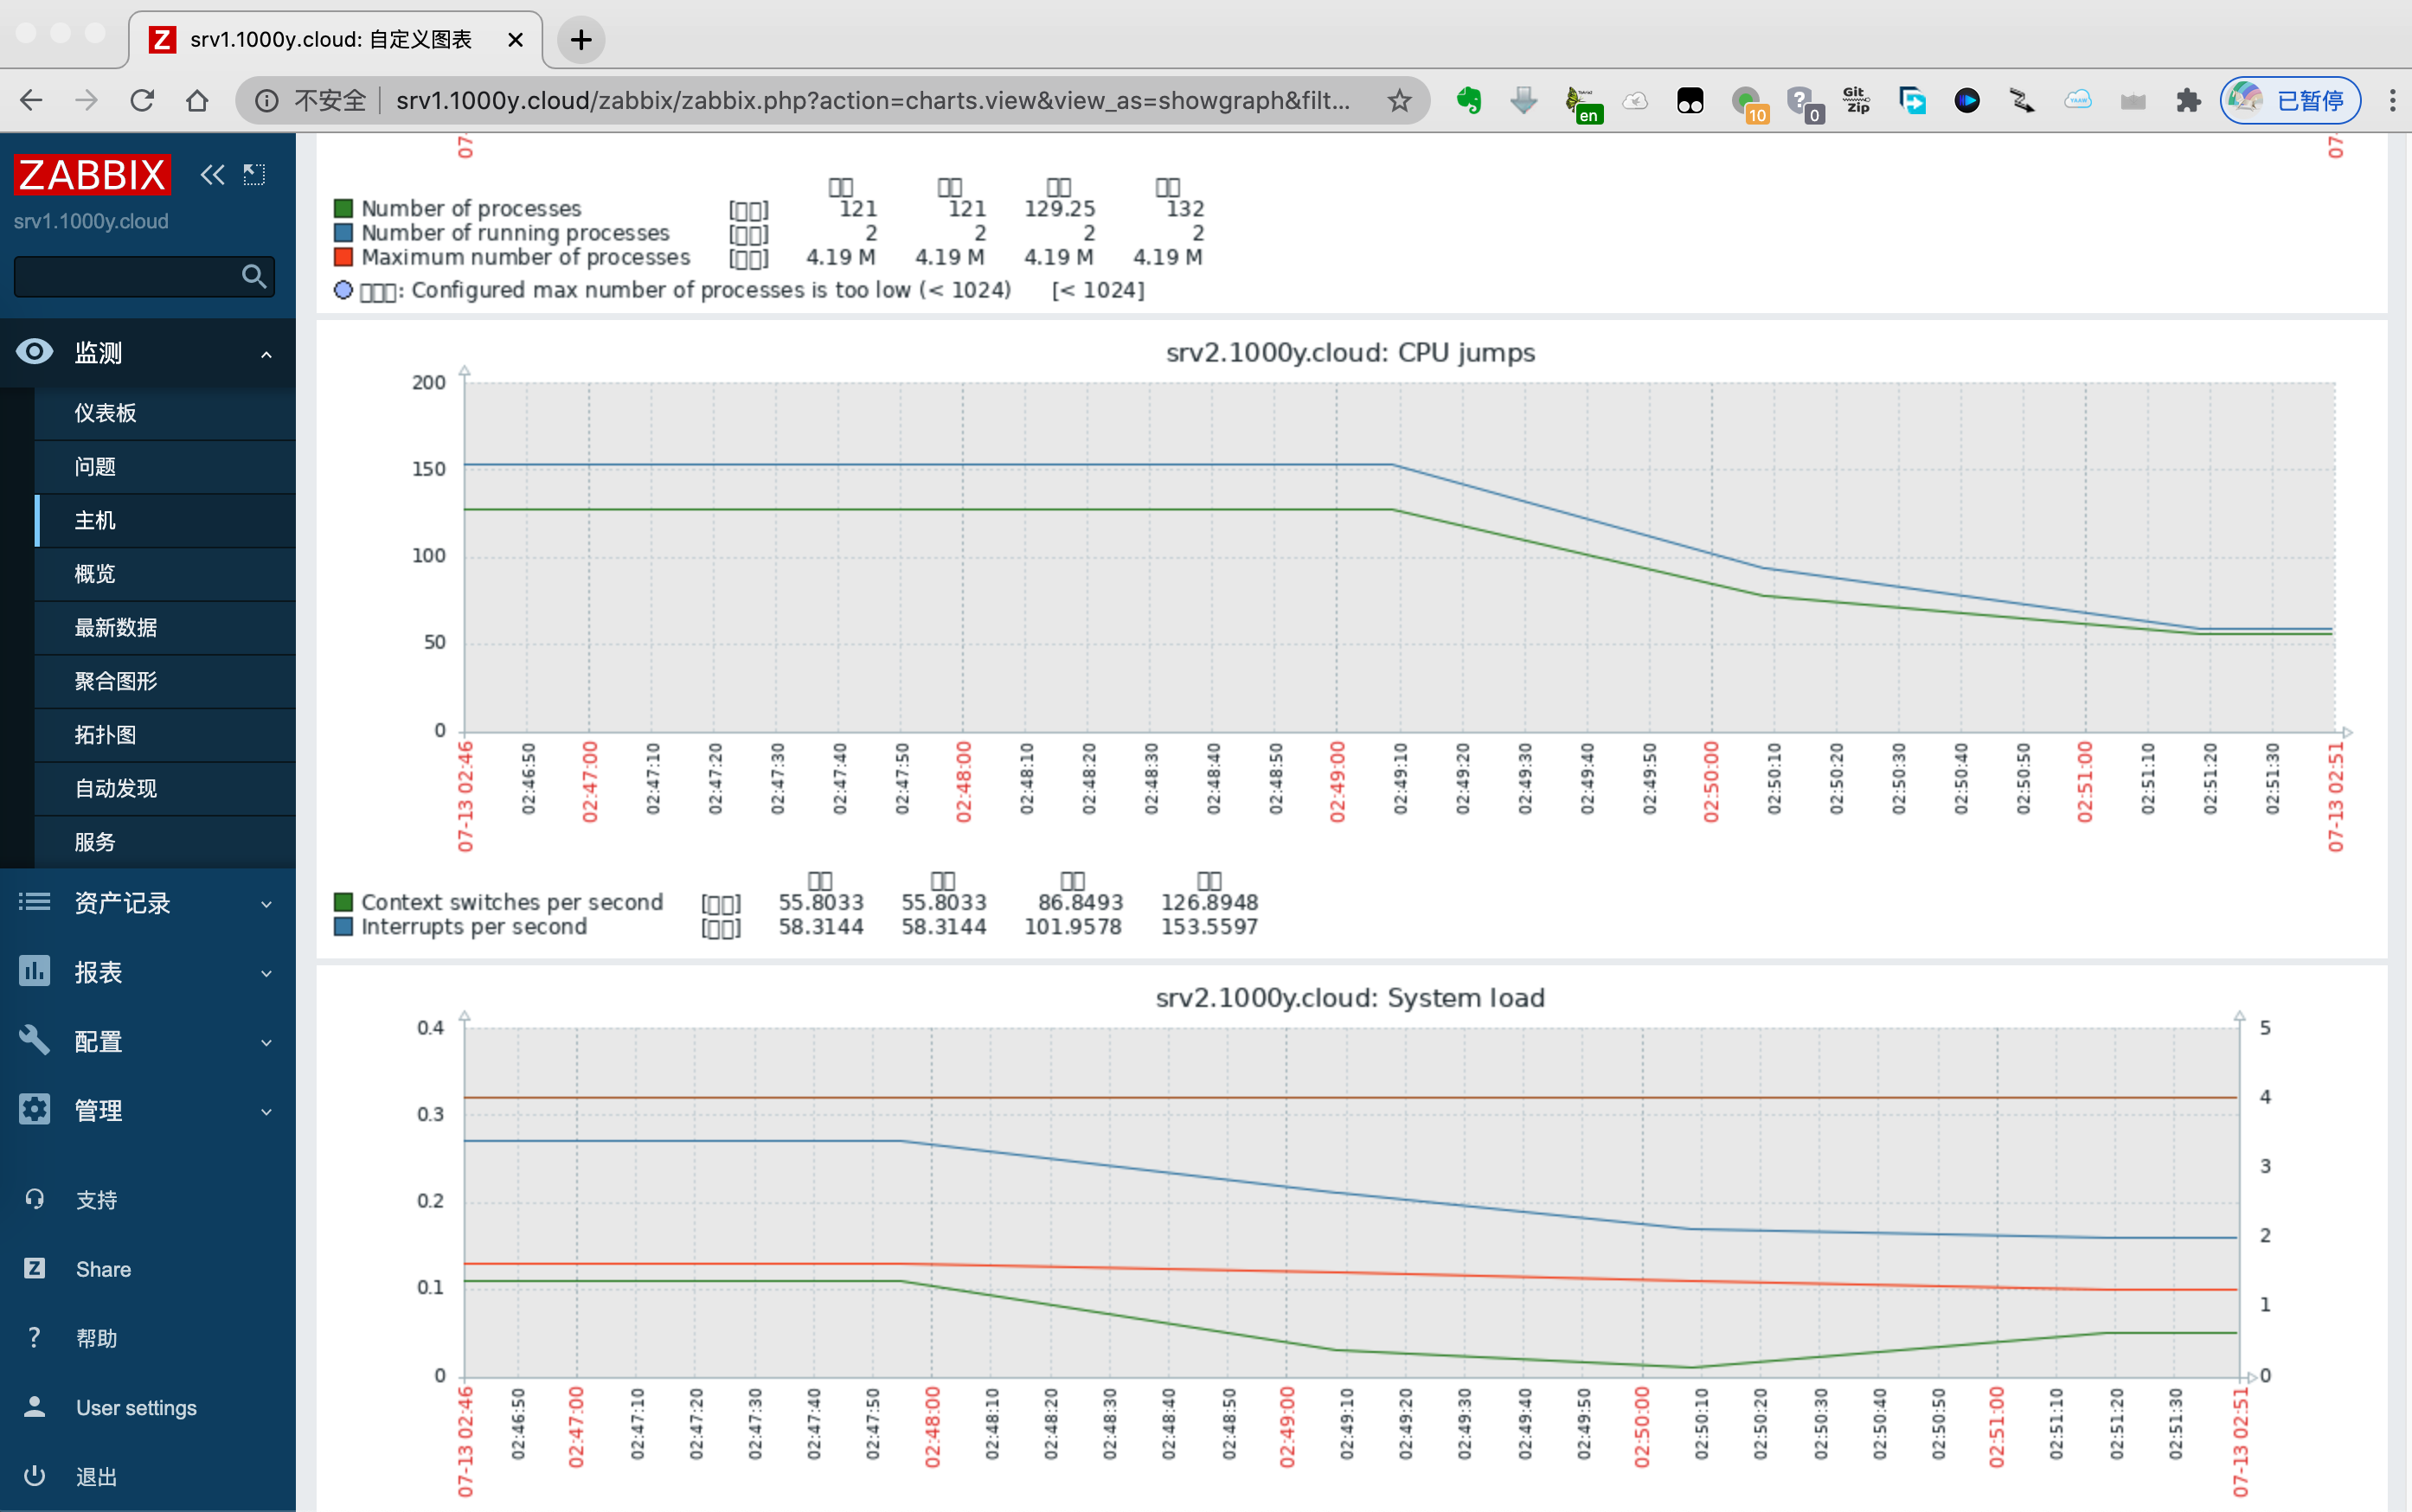
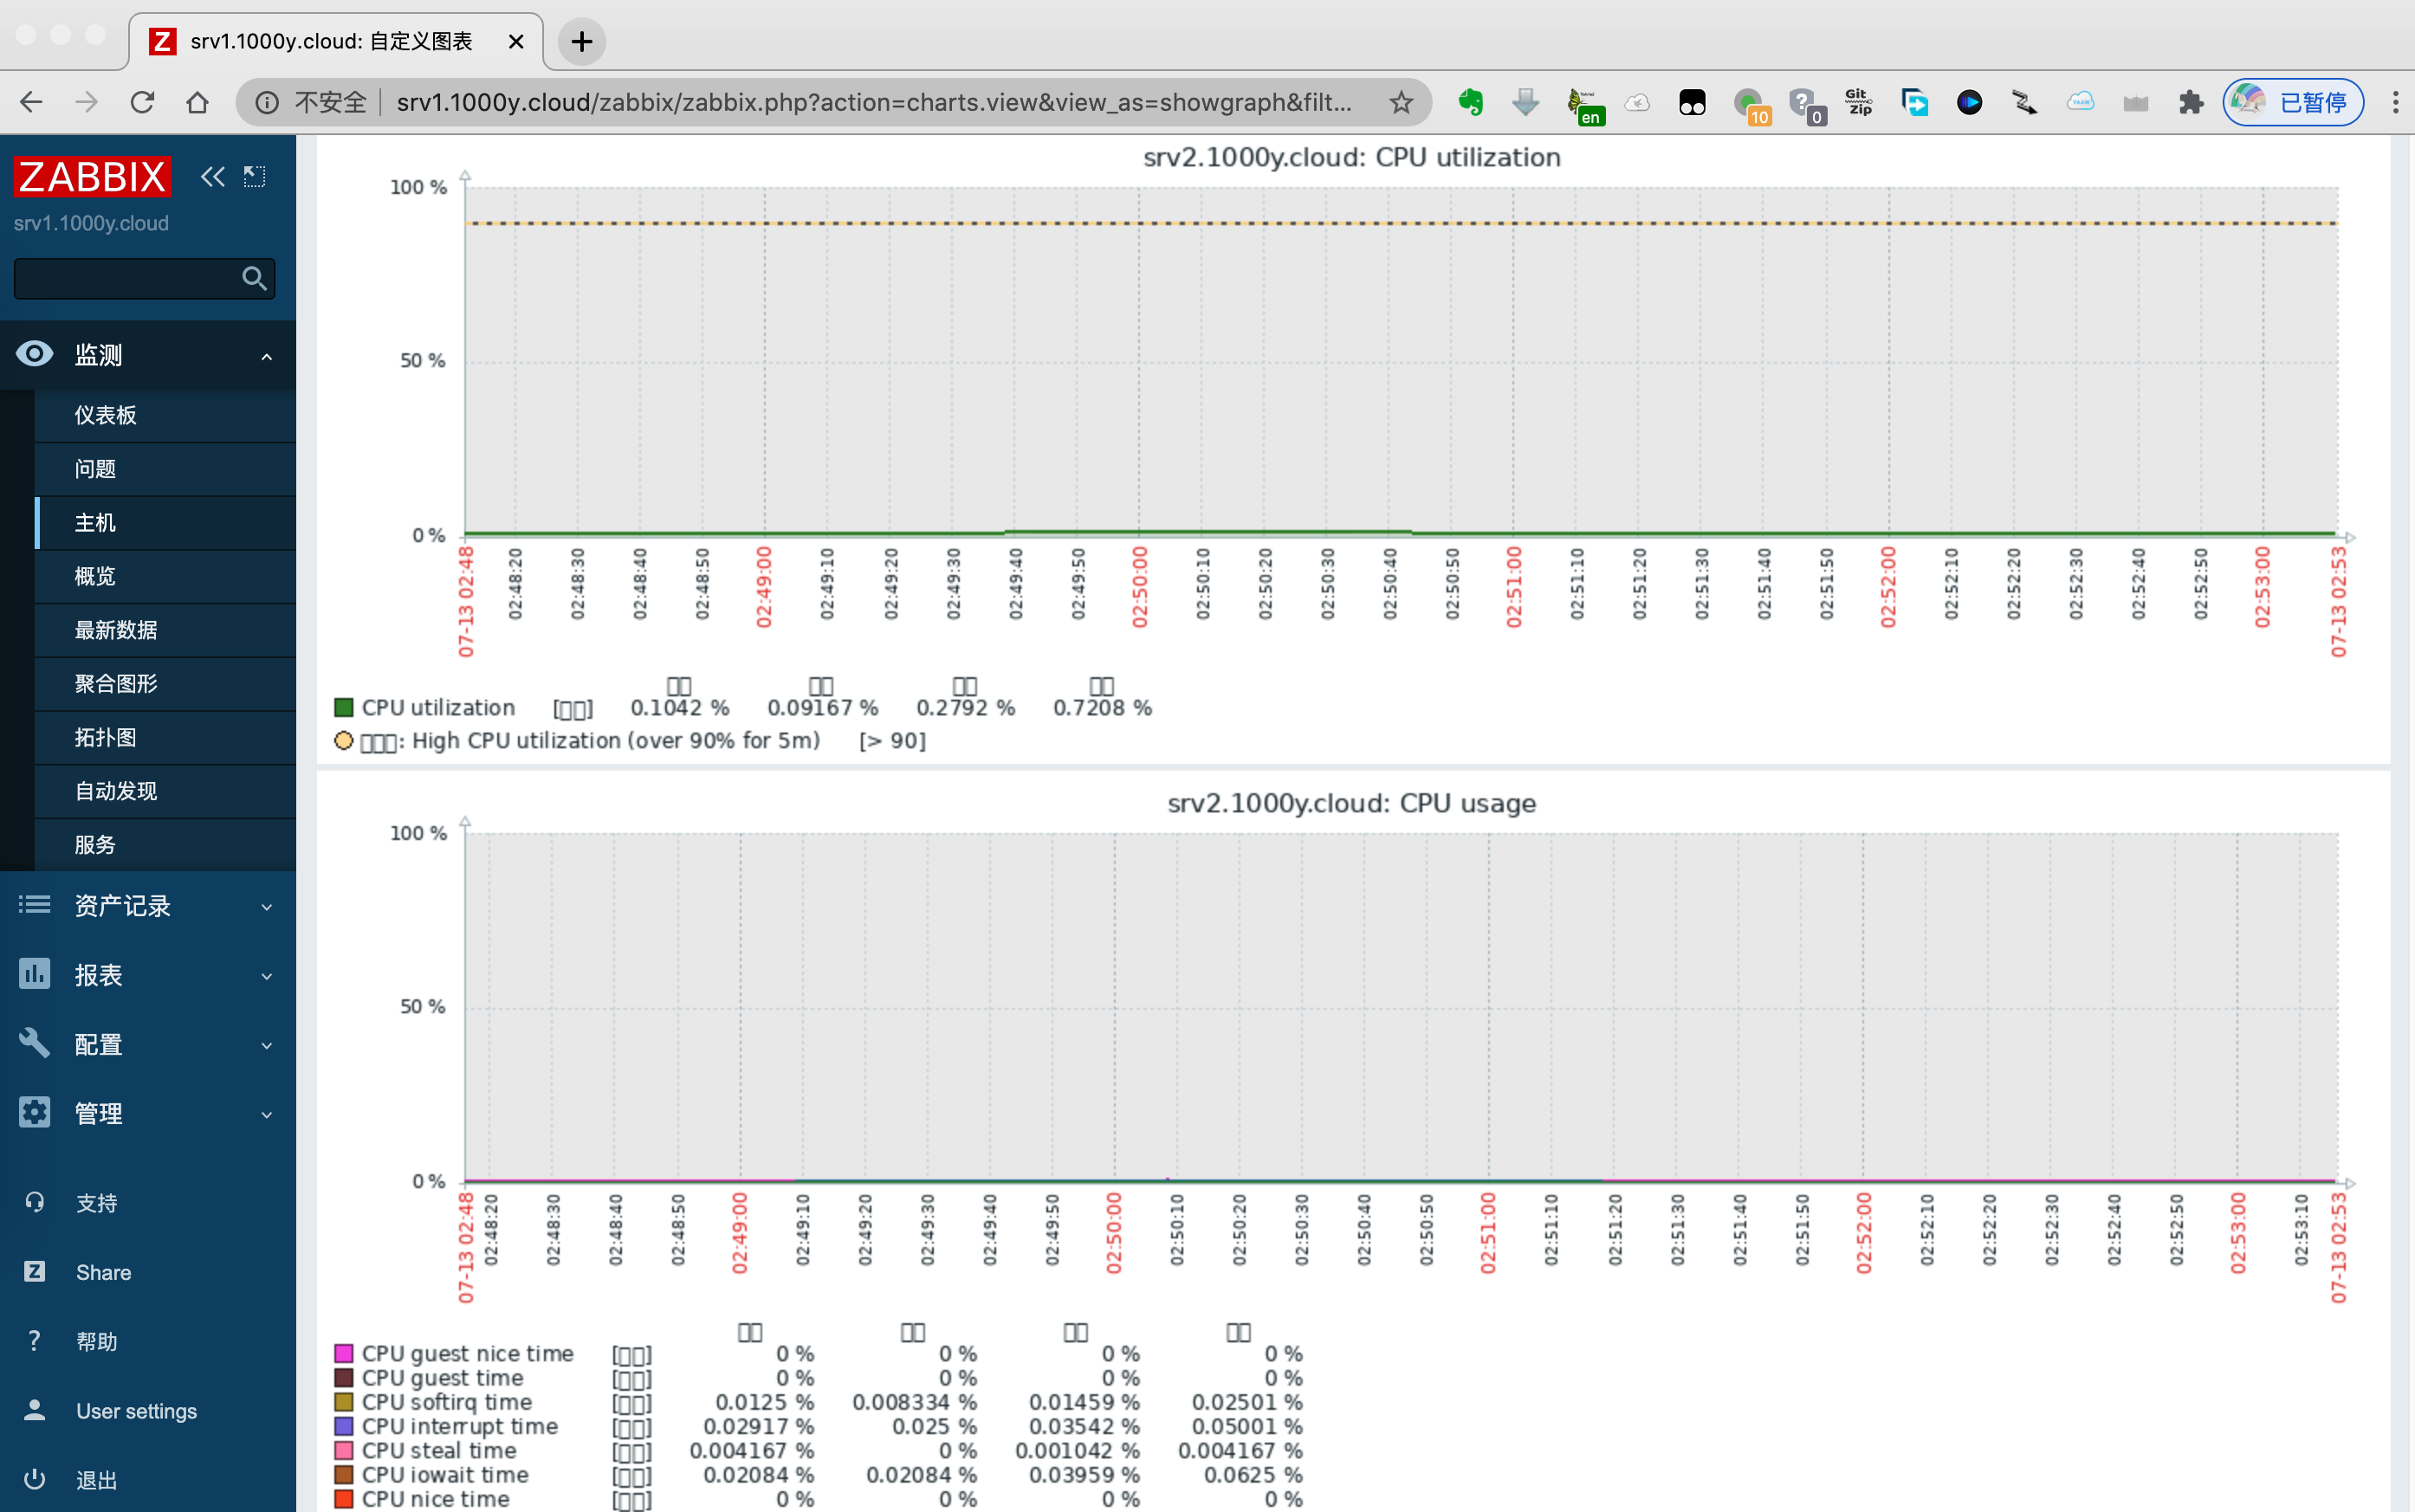
3) 验证新节点
# 如果Active模式一直没有数据,请查看srv2节点上的日志 [root@srv2 ~]# tail -f /var/log/zabbix/zabbix_agentd.log # 如果错误为 ...... ...... 89:20200713:024624.350 active check configuration update from [192.168.10.111:10051] started to fail (ZBX_TCP_READ() timed out) ...... ......
# 请修改srv2的zabbix_agentd.conf [root@srv2 ~]# vim /etc/zabbix/zabbix_agentd.conf # 于280行,加入以下内容 Timeout=30
[root@srv2 ~]# systemctl restart zabbix-agent.service
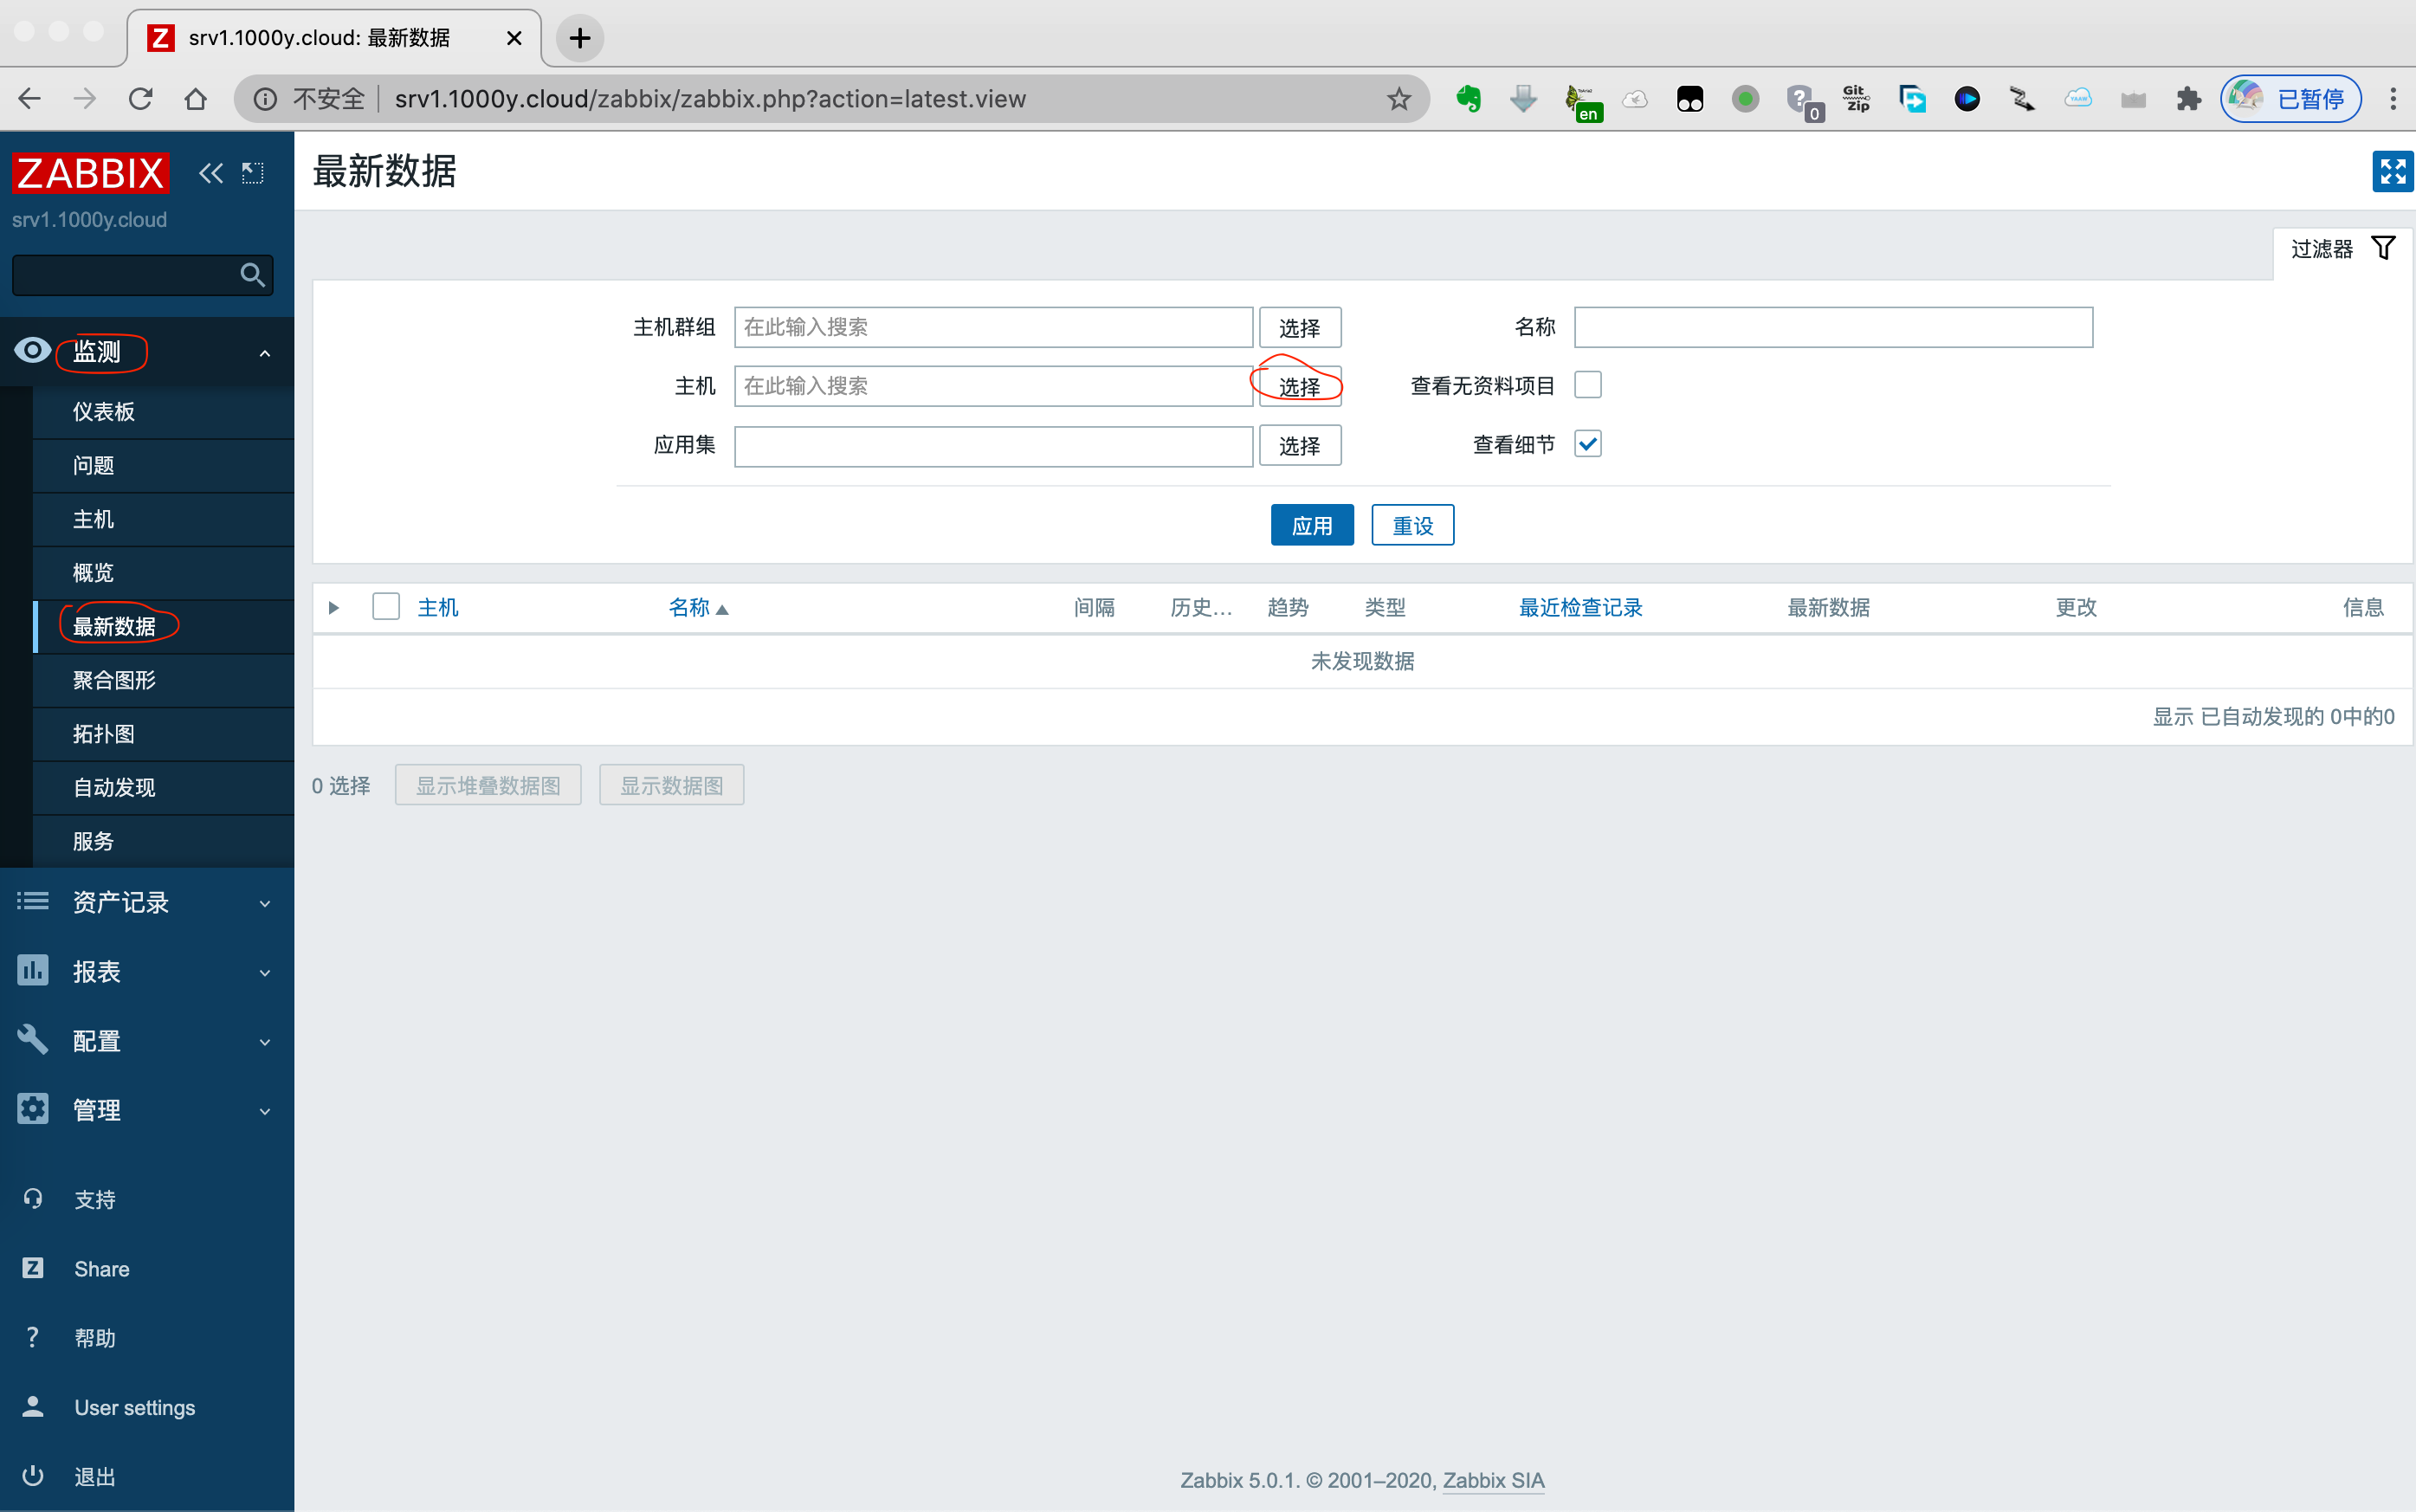
# 稍等一会,在去查看新节点的数据信息


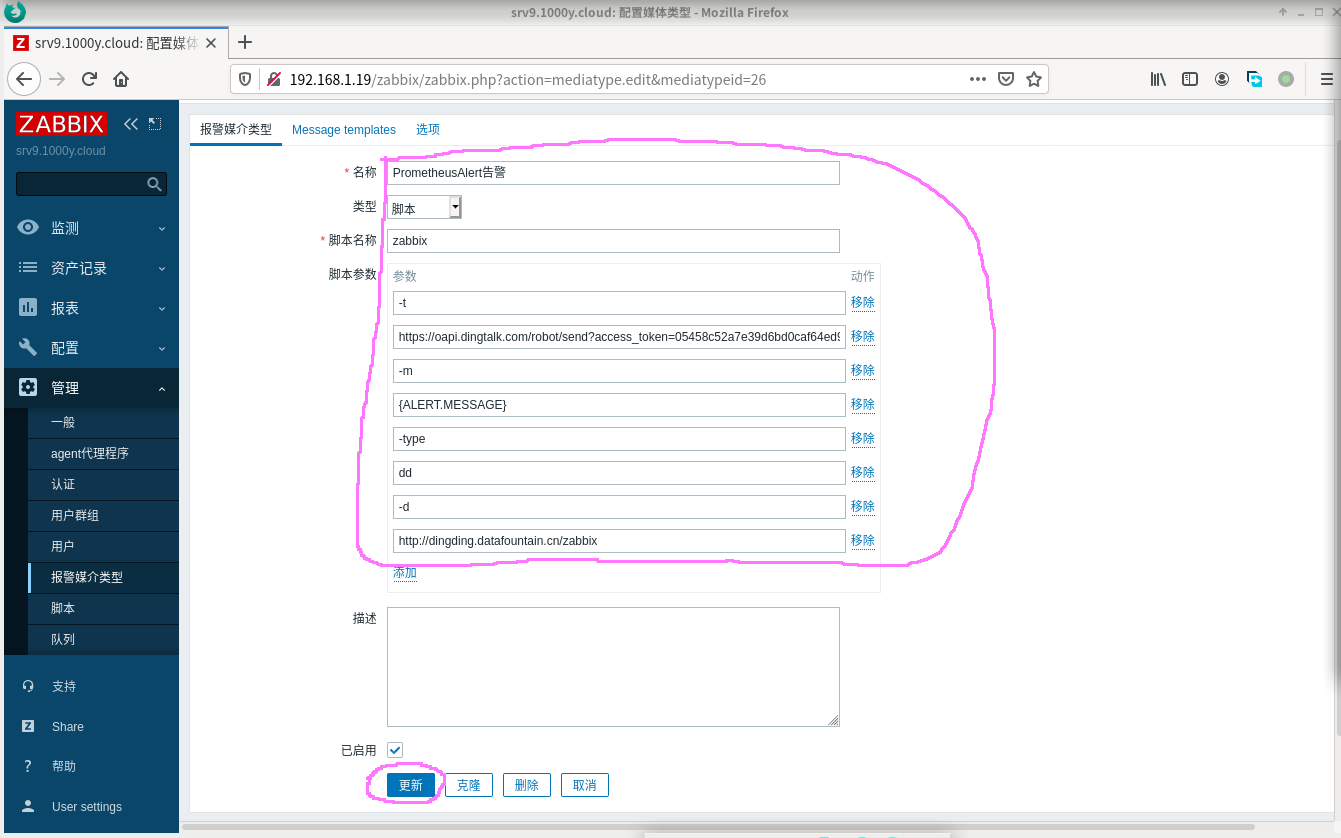
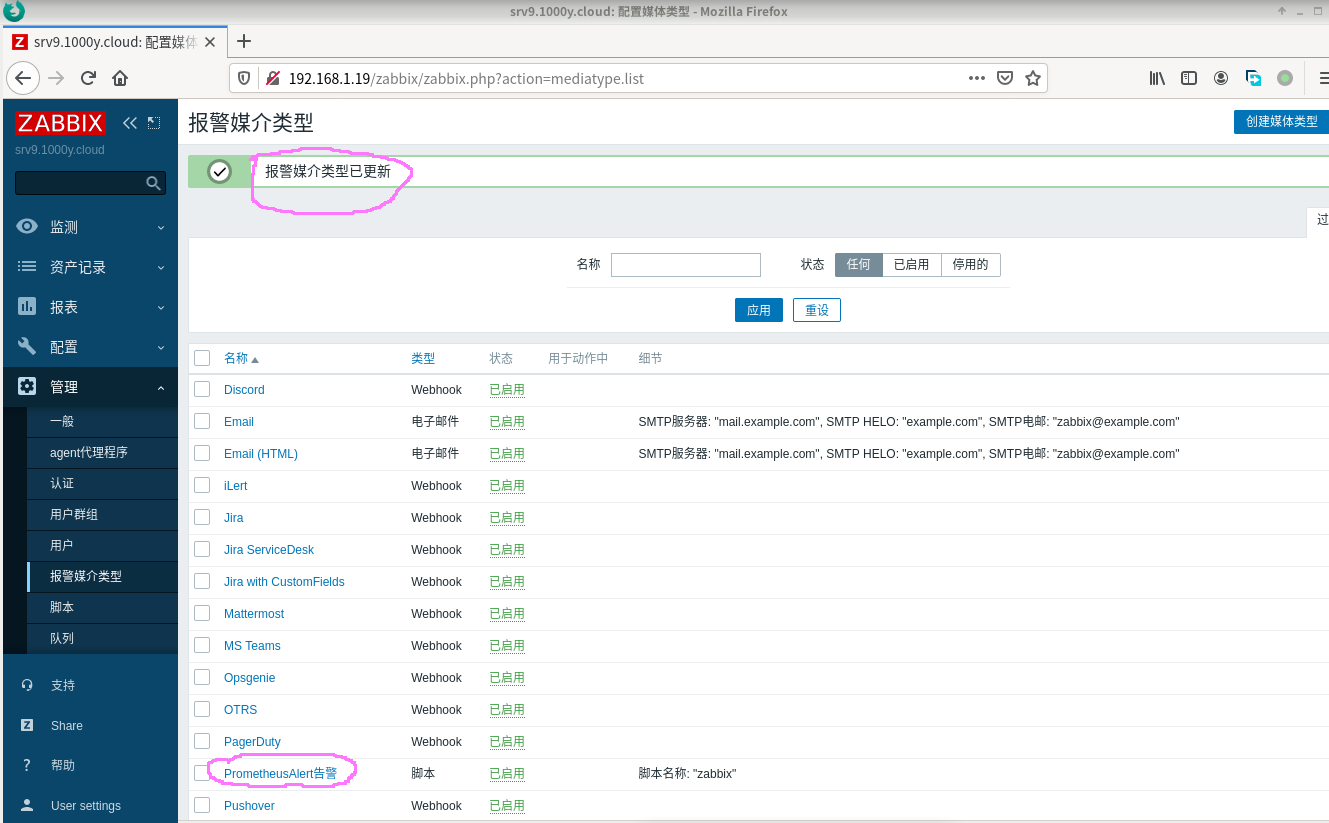
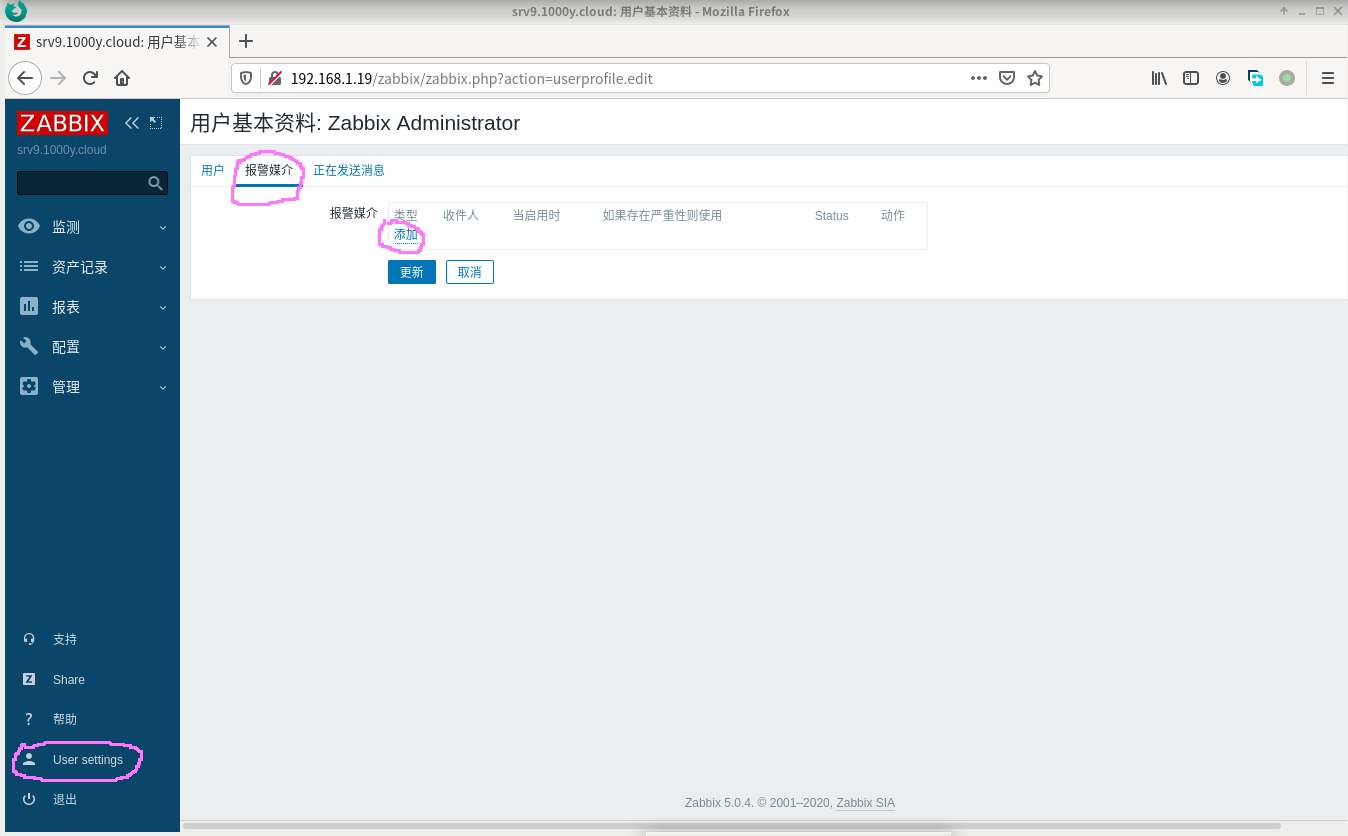
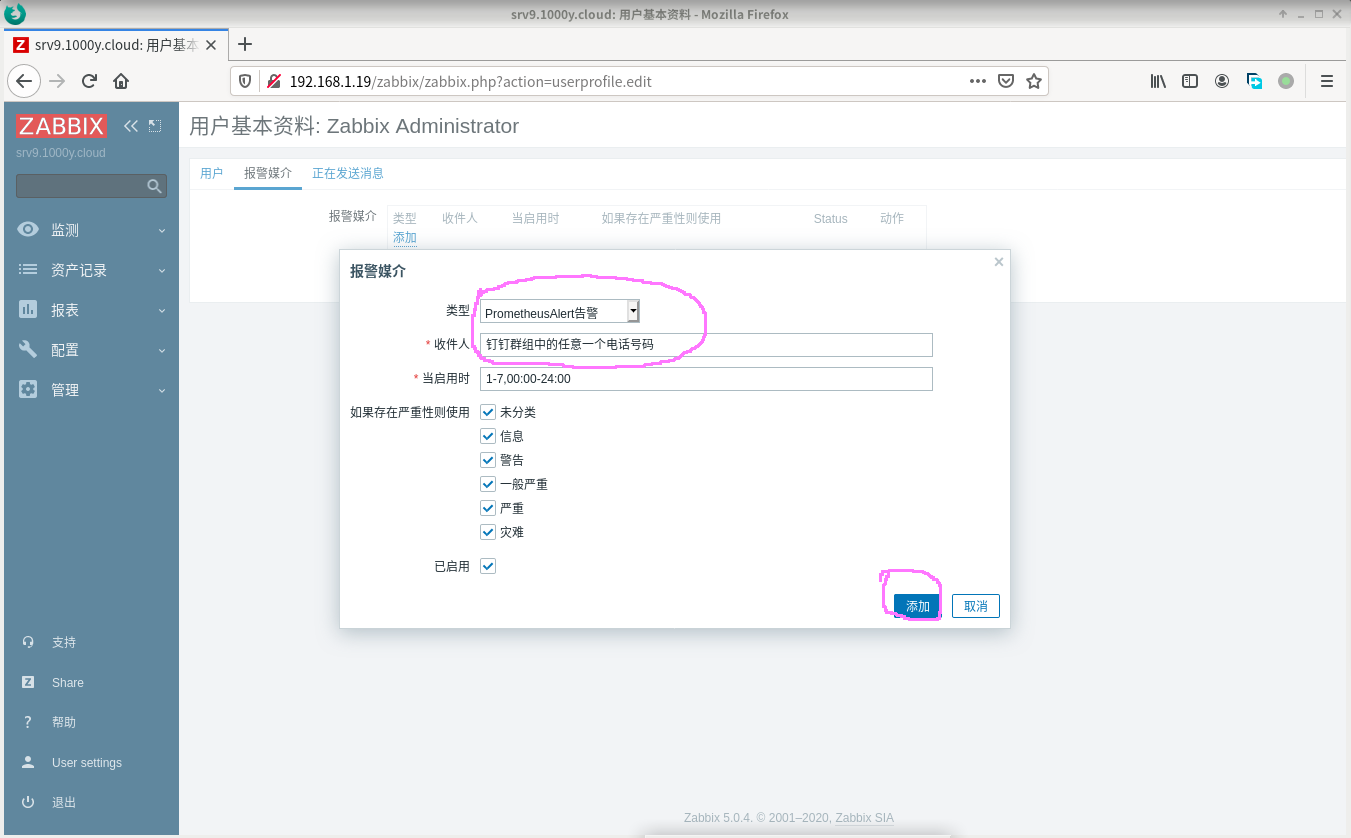
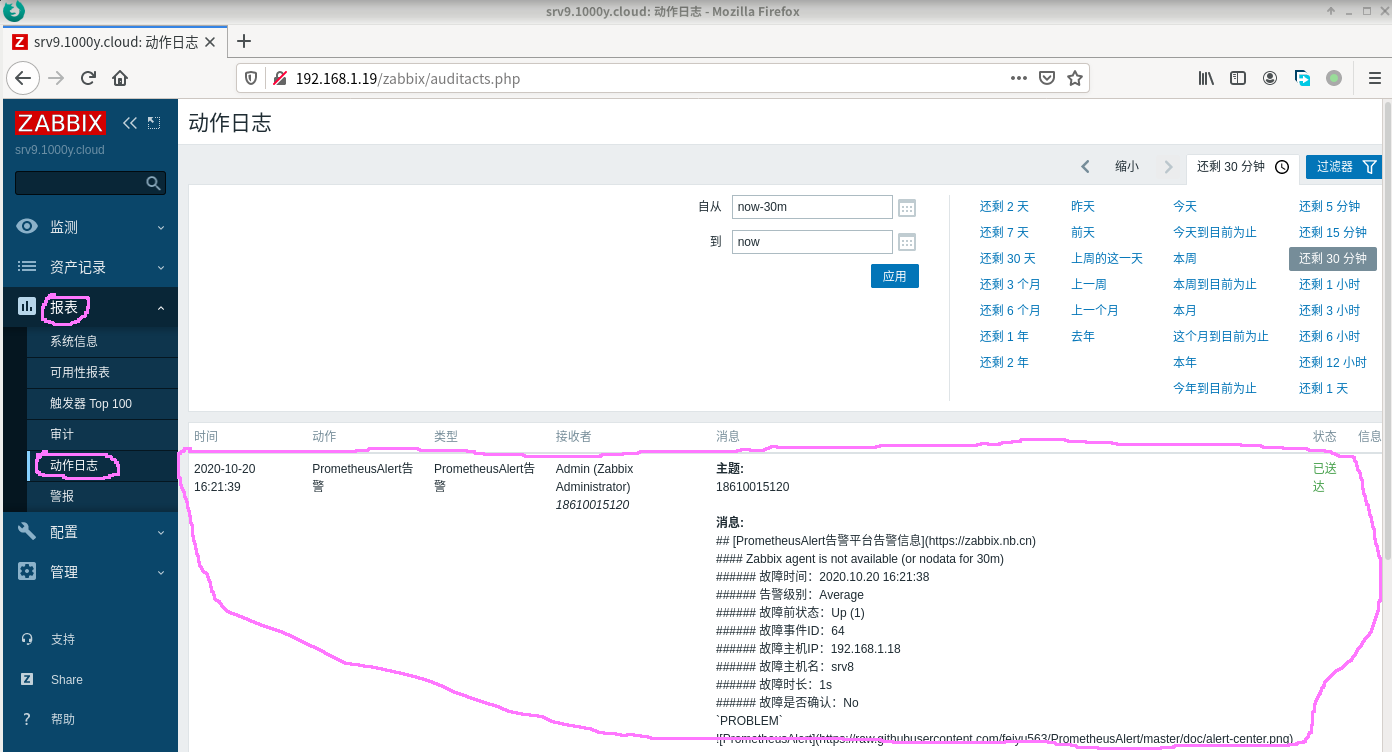
7. 实现钉钉监控报警
1) 使用钉钉电脑版,找到所需要报警的群组,创建一个机器人 |


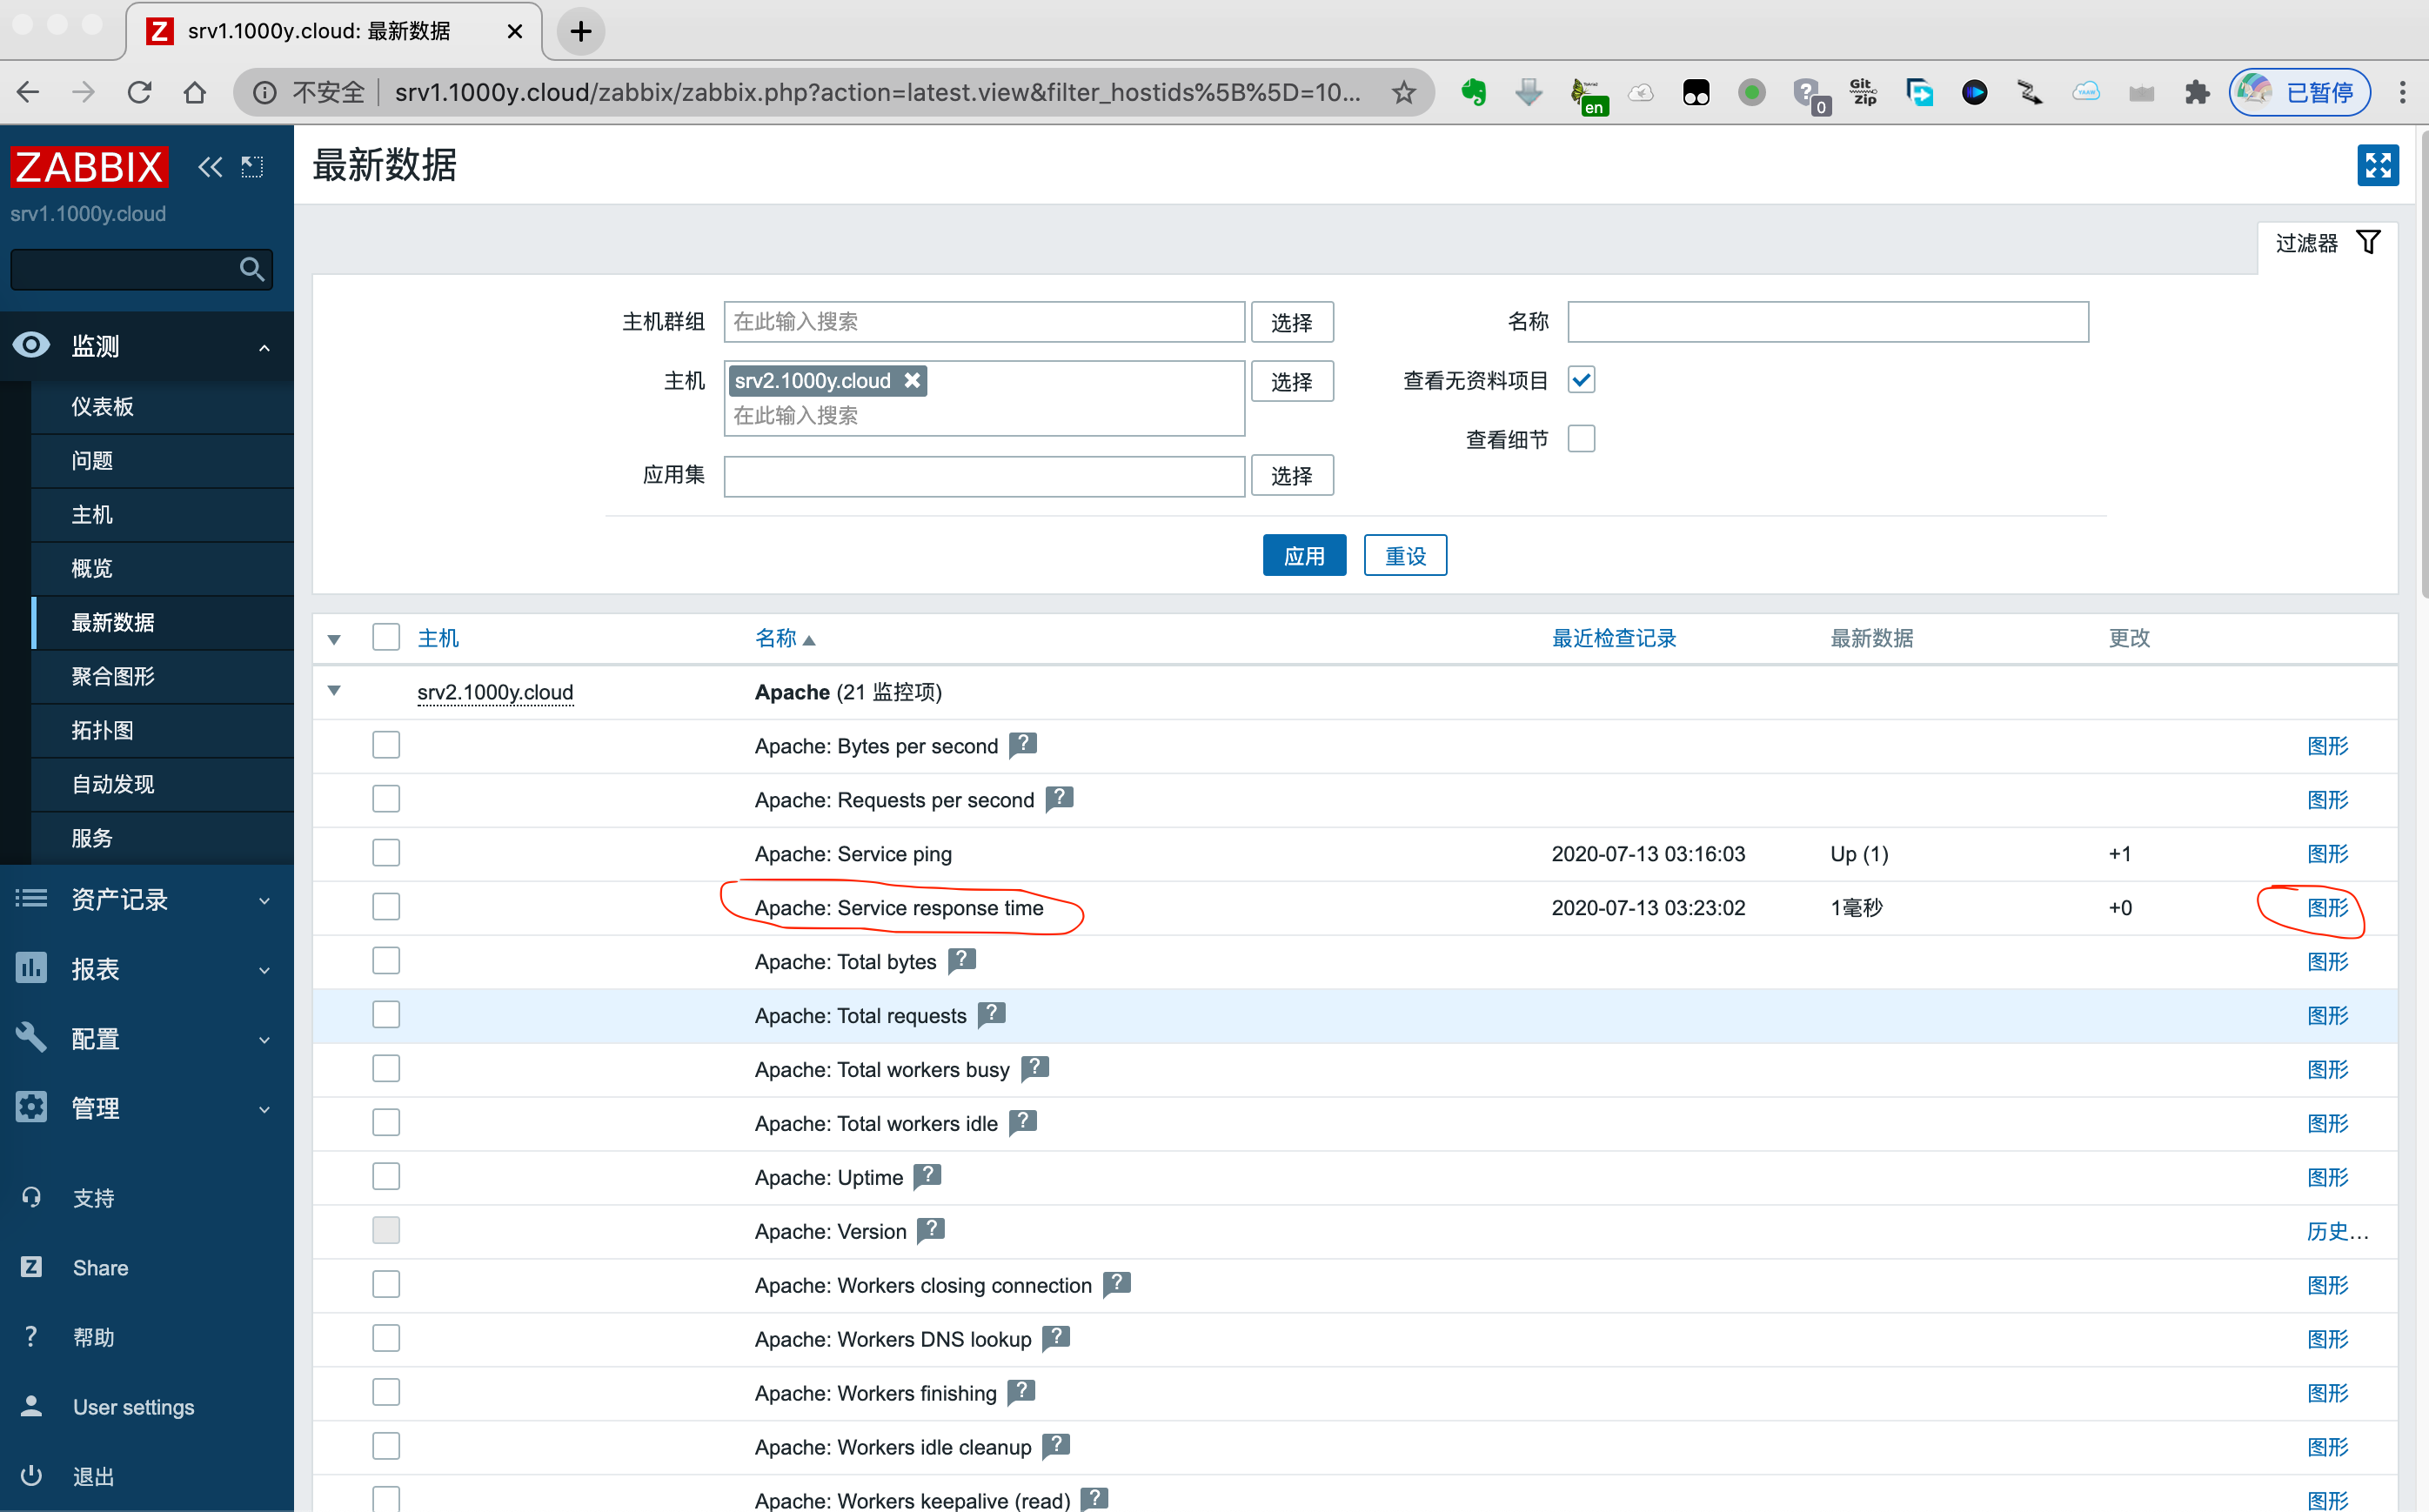
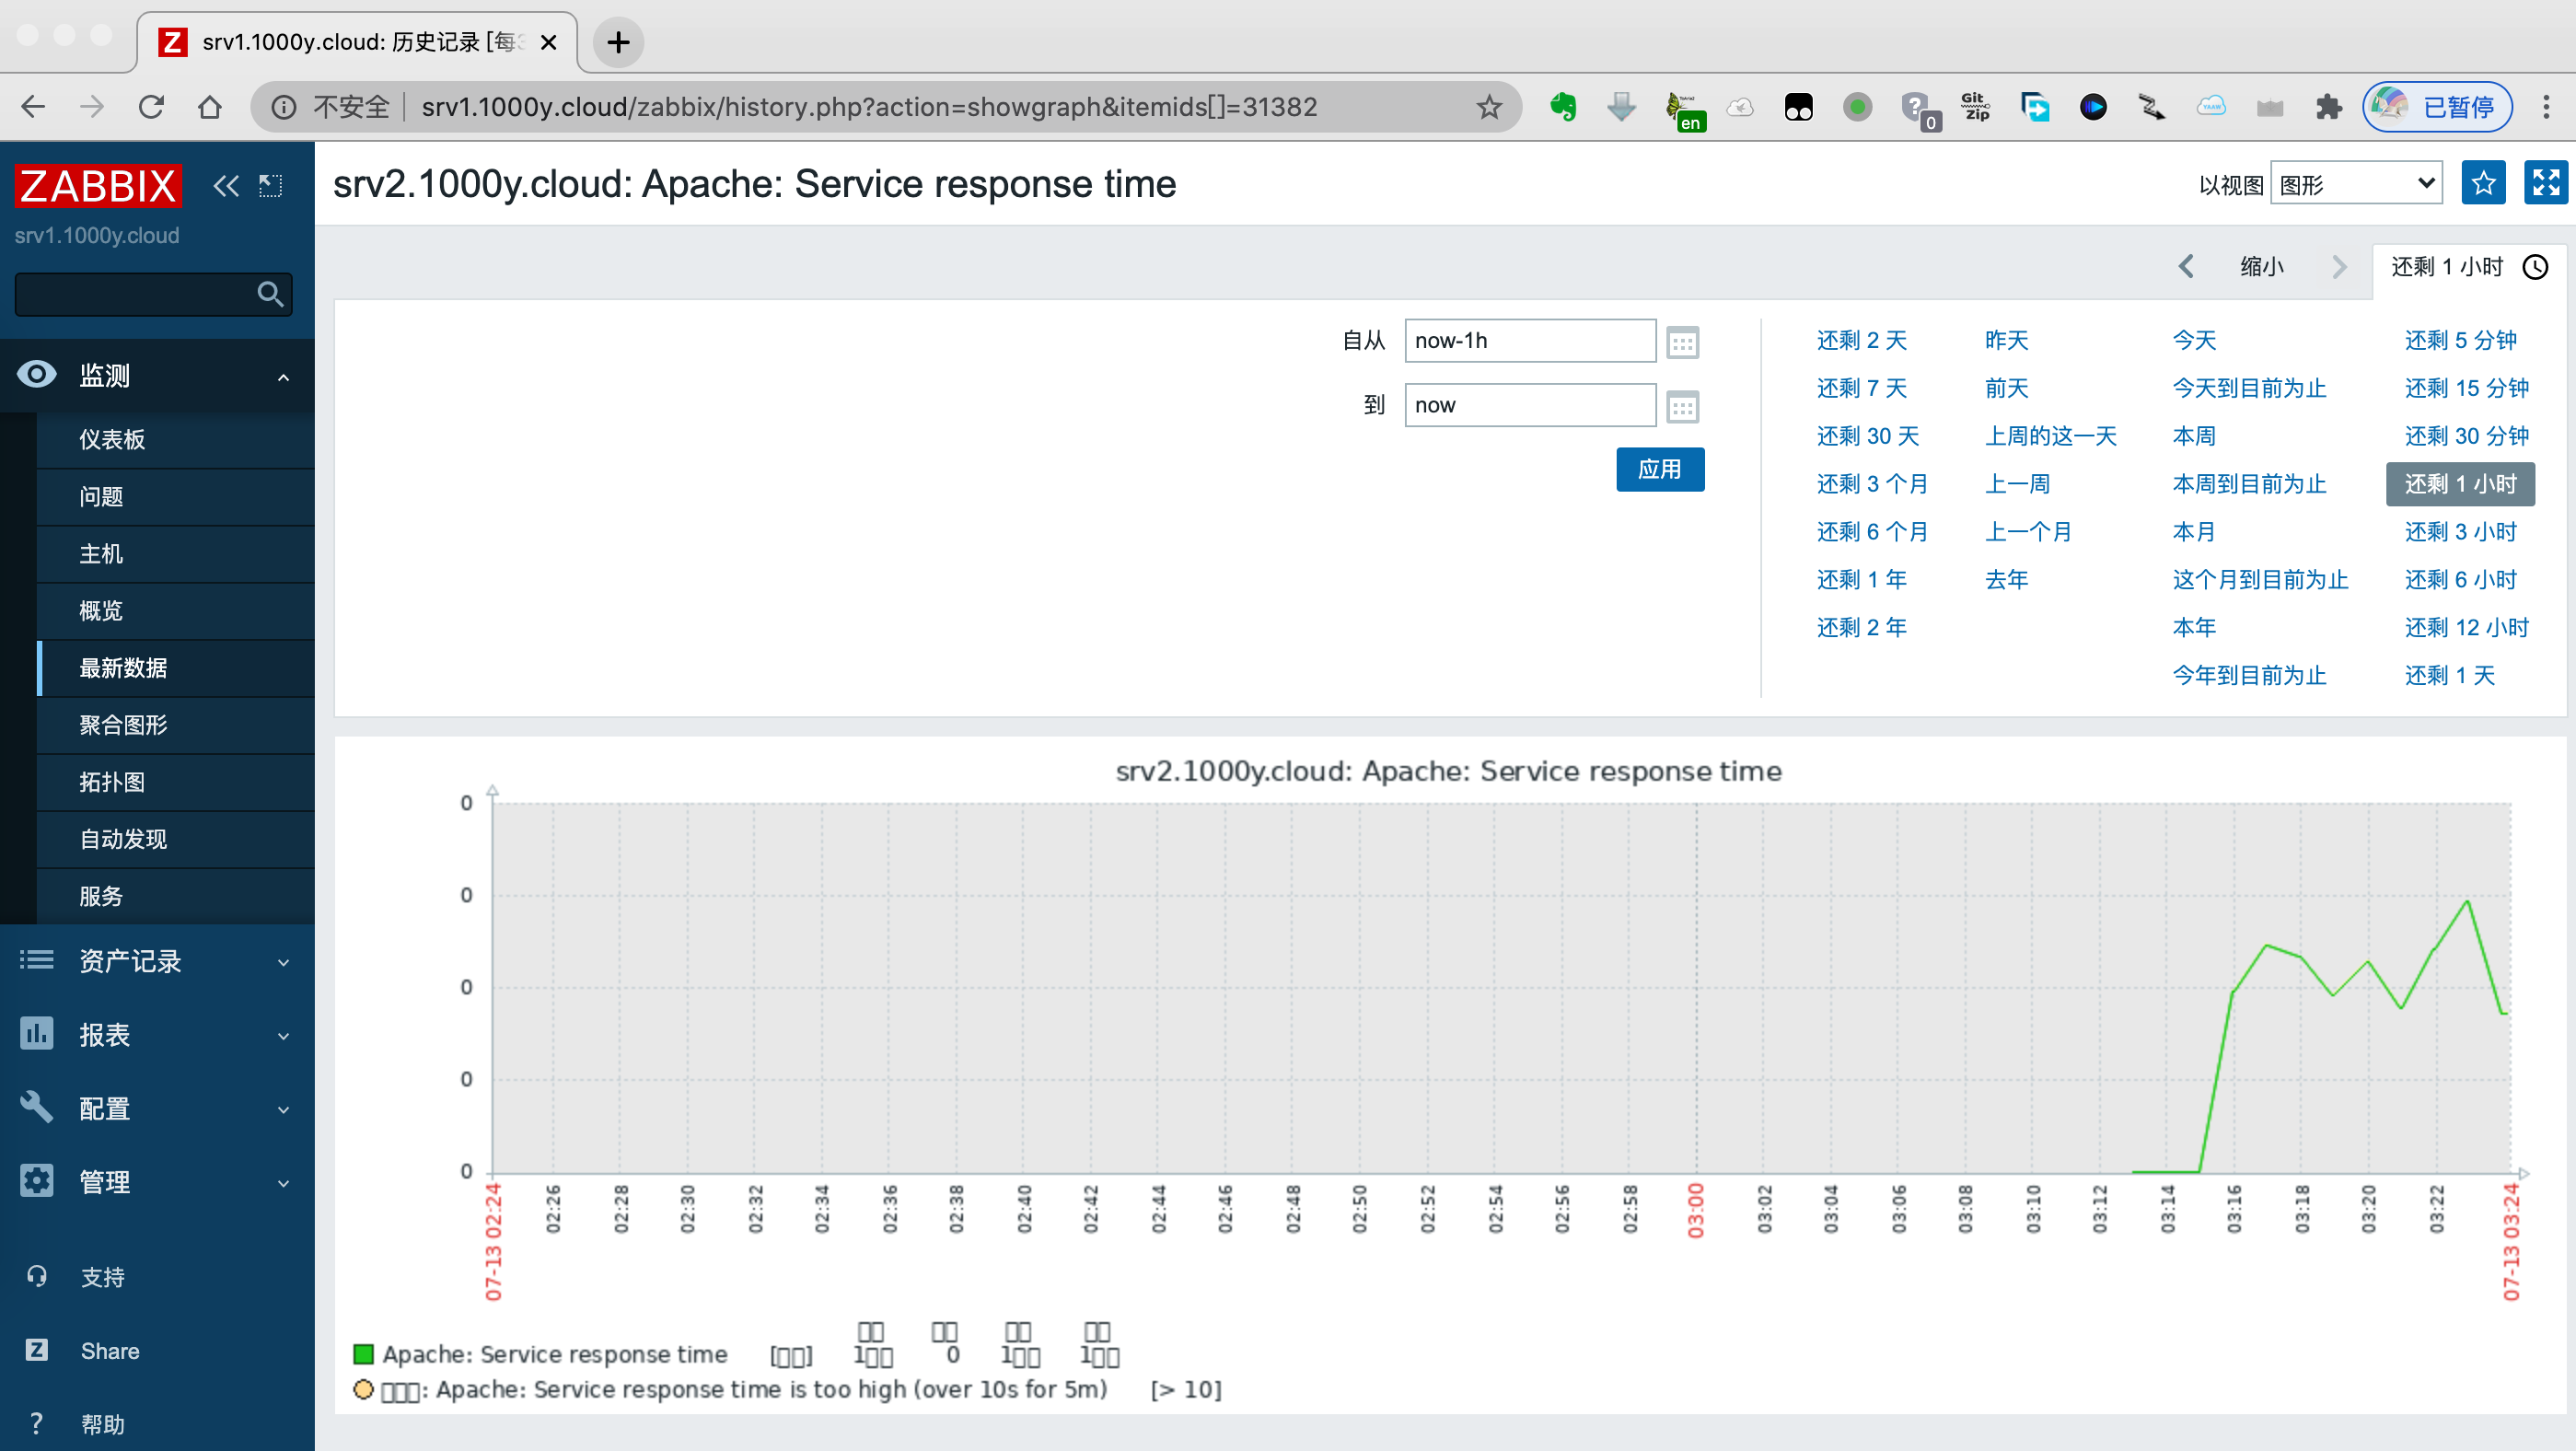
8. 添加一个监控项
1) 监控项为srv2.1000y.cloud的httpd服务 |